How Do You Remove and Prevent Creases in Leather Shoes?
Published on: April 13, 2026 | Last Updated: April 13, 2026
Written By: Harriet Nicholson
Hello Tannery Talk. You love your favorite leather boots, but those sharp creases across the toe box have you worried. I hear you, and I’m here to help you smooth things out.
This guide will walk you through what causes those creases, how to safely reduce their appearance with household items, the best practices for preventing deep folds, and how proper conditioning keeps the leather supple.
I’ve learned these methods from years of hands-on care for everything from my workhorse saddle, Mason, to daily-wear jackets and shoes.
Why Your Leather Shoes Crease (And Why It’s Okay)
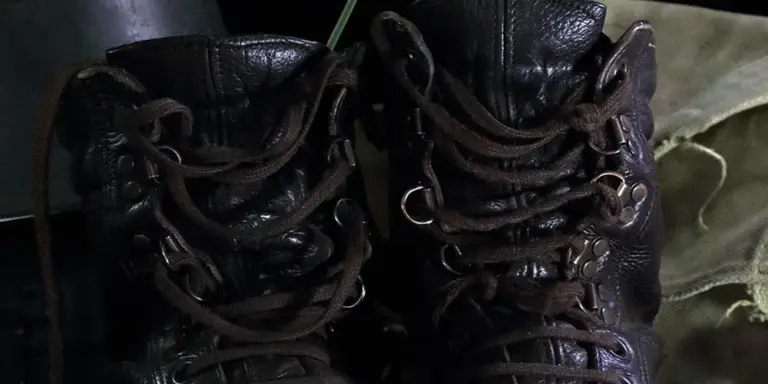
Leather is skin. Your skin folds when you bend your elbow. A leather shoe bends every time you take a step. A crease is simply the leather folding into its new, lived-in shape. It is not a flaw, it is a record of your journey.
Think of it like a favorite pair of denim. Fresh jeans are stiff. Worn-in jeans have soft wrinkles at the knees and hips that tell a story. Healthy leather creases are the same, soft and supple lines that add character.
You need to know the difference between a good crease and a bad one.
- Healthy Crease: A soft fold in the leather. The color is consistent, and the surface feels smooth, not brittle. My jacket, June, is covered in these. They feel like part of the leather itself.
- Damaging Crack: A deep, dry line where the finish has split. You might see a whitish, fibrous line underneath. It feels sharp and dry to the touch. This is leather crying out for moisture, and it means the care routine has been neglected.
Not all leather creases the same. The type of hide and tanning changes everything.
- Full-Grain Leather: This is the top layer, just like it came from the animal. It develops rich, unique creases and a patina over time. It is durable and ages beautifully, like my saddle, Mason.
- Corrected-Grain Leather: The surface has been sanded and given a heavy finish or coating. It tends to crease in broader, less defined patterns. The creases can look more like wrinkles in plastic if the coating is thick.
- Suede & Nubuck: These have a nap. They don’t develop sharp crease lines the same way. Instead, bending causes the nap to compress and change shade in that area, which usually brushes back out.
A crease is not your enemy, but dryness and neglect always are.
Should You Fix Creases? How to Assess Your Shoes
Before you try to fix anything, you need to look at what you have. Take the shoe off and hold it under good light. This two-minute checkup tells you everything.
- Look for Color Loss. Bend the shoe gently at the toe box. Do the crease lines look dramatically lighter or white? This is a sign the oils and dyes are gone from that fold. The leather there is starving.
- Feel for Dryness. Run your thumb across the crease. Does it feel brittle, rough, or sharp? Now feel an uncreased part of the shoe, like the heel. Is there a big difference in softness? If the crease is much stiffer, the leather needs conditioning.
- Listen. Gently flex the leather. A healthy, supple hide will be quiet. If you hear a faint, dry cracking sound, that is the fibers straining without lubrication.
This inspection works for any leather item. The crease on your boot, your sofa arm, or a bag strap all signal the same thing, the leather’s need for care in a high-stress spot.
If the crease is just a fold with no color loss and the leather still feels supple, that is purely cosmetic. You can leave it be, a mark of honest wear. Trying to “remove” a healthy crease is like trying to iron the life out of your favorite jeans, you might smooth it temporarily, but you will not improve the leather.
If you see white lines or feel dryness, those creases are a warning sign. They are not just a visual issue, they are the first stage of cracking. This is when you take action to nourish and protect.
Remember, the best fix happens before the problem starts. Consistent, gentle care prevents damaging creases from ever forming. It is easier to keep leather soft than it is to rescue it once it has dried out and cracked. Think of it like putting on lotion to keep your own skin from getting chapped; simple maintenance avoids a painful repair.
How to Get Creases Out of Leather Shoes: Three Tried & True Methods
Think of a shoe crease like a fold in paper. The newer and more supple the paper, the easier it is to smooth out. Over time, that fold becomes a permanent, weak line. We want to soften the leather’s fibers and gently encourage them back into shape, starting with the least invasive method. Stay tuned for a step-by-step guide that walks you through smoothing and restoring your footwear. It will connect the care steps you’re starting here to a complete practical routine.
The Gentle Steam and Stuff Method
This technique uses moisture and mild heat to relax the leather. It’s my go-to for the fine creases on my jacket, June, and works beautifully on shoe uppers.
Steam helps the leather’s fibers relax and expand, making them more receptive to reshaping.
- Hold a garment steamer or the spout of a boiling kettle at least 6 inches away from the leather. Never let it touch.
- Move the steam source slowly back and forth over the creased area for 20-30 seconds. You just want to warm the leather, not saturate it.
- Immediately, while the leather is warm and pliable, insert a shoe tree. If you don’t have one, firmly pack the toe box and upper with a clean, soft cloth or rolled-up towels to stretch the crease smooth from the inside.
- Let the shoe sit with the support in place until it cools and dries completely, usually a few hours.
This same gentle approach works for removing creases from leather jackets across the shoulders or on boot shafts, as explained in this detailed guide.
The Conditioner and Flex Technique
Leather that creases deeply is often just thirsty. Conditioner replenishes the natural oils lost to wear and weather, making the material flexible again.
This is the best first step for how to fix creased leather shoes that feel dry or stiff to the touch.
- Apply a small amount of a quality leather conditioner (like a cream or balm) to a soft cloth.
- Rub it into the creased area using small, circular motions, really working it into the fold line. Let it soak in for 10 minutes.
- With your hands, gently but firmly flex and massage the leather in the opposite direction of the crease. Imagine you’re trying to gently stretch that line flat.
- Insert a shoe tree and let it sit overnight. The conditioner continues to work as the shoe holds its new shape.
A common mistake is using too much product. Apply a thin layer. You can always add more later, but over-conditioning can darken the leather permanently.
When to Use a Damp Cloth and Weight (For Stubborn Cases)
For a deep, set-in crease that won’t respond to steam or conditioner, this method introduces a bit more moisture for a longer period. Use it carefully.
This is a last-resort method because getting the leather too wet risks water stains, discoloration, or stretching it out of shape.
- Dampen a clean, white cloth with water. Wring it out so it is barely damp, not dripping wet.
- Lay the damp cloth directly over the crease on the outside of the shoe.
- Place a flat, heavy object like a stack of books on top, applying gentle, even pressure. Do not use excessive weight.
- Leave it for 4-6 hours, then remove the weight and cloth. Let the shoe air dry naturally, away from direct heat, with a shoe tree inside to maintain form.
The slow drying is key. Rushing it with a hairdryer will bake in the crease and damage the leather.
How to Prevent Creases and Keep Leather Supple
Fixing a crease is reactive. Preventing them is the true craft. It’s about consistent, simple habits that honor the material.
Your Secret Weapon: Proper Shoe Trees
I never put a pair of leather shoes away without trees. Cedar shoe trees are ideal. They absorb the day’s moisture from the inside, and their firm shape counters the pressure of your foot.
Using a shoe tree is like hanging a suit jacket on a broad, shaped hanger instead of draping it over a chair-it preserves the form for the long term.
There’s a real sensory reward here. The light cedar scent is clean, and putting on a shoe that has kept its shape just feels better. It supports your foot from the first step.
The Golden Rule of Rotation and Rest
Leather needs to breathe and recover. Wearing the same pair day after day gives moisture and creases no time to relax.
Rotating between two or three pairs allows each one to fully dry out and for the fibers to partially rebound from the day’s creasing.
Think of it like a muscle. Constant stress causes fatigue and damage. Rest allows for recovery. This simple practice drastically slows down how deep and permanent those flex-point creases become.
Building a Simple Conditioning Habit
Conditioning isn’t just for when something looks dry. It’s preventative maintenance. I condition my boots and Scout, my wallet, on a schedule tied to the seasons-once as winter ends and again before the dry heat of summer.
A thin application of conditioner every 3 to 6 months keeps the leather fibers nourished and resistant to deep, cracking creases. For leather boots, you may wonder how often to condition and the best way to apply it. The next steps cover frequency and technique.
You’ll see the leather’s color become richer and feel the texture turn supple under your fingers. This same principle of keeping leather nourished is exactly how you go about preventing creases in leather car seats and sofas. Supple leather bends. Dry leather breaks.
Daily Habits and Storage for Lasting Smoothness
Think of everything we’ve covered as a simple three-part routine: putting them on right, taking them off carefully, and storing them well. Consistency with these habits is what keeps shoes smooth far longer than any single treatment.
Putting On and Taking Off Shoes the Right Way
This is the simplest step most people miss. When you jam your foot in, you crush the stiff leather at the back, called the heel counter. This weakens it. A weak heel counter lets your foot slide and flex more inside the shoe, which causes more creasing across the top.
Use a shoe horn, every single time. It’s not old-fashioned. It’s smart.
- Loosen the laces completely.
- Hold the shoe steady and slide the shoe horn inside, against the back.
- Guide your foot in gently, letting the horn take the pressure.
- When removing shoes, always undo the laces first. Don’t step on the back of one shoe to pull the other off.
Make it a two-second ritual. It shows respect for the craft that made them.
How to Store Shoes When Not in Use
Leather needs to breathe. Where you put your shoes away is as important as how you clean them.
- Keep them in a cool, dry place. Avoid spots near radiators, heaters, or in direct sunlight. Heat bakes out natural oils.
- Use shoe trees. Cedar is best. It absorbs moisture and helps hold the shoe’s shape, fighting creases even while stored.
- Protect them with cloth dust bags or in a wooden cabinet. Do not seal them in plastic boxes or bags. Plastic traps moisture from the air, which can lead to mold.
I treat my saddle, Mason, the same way. It lives in a dry, ventilated tack room with a breathable cover. The principle is identical for any fine leather, especially when managing humidity and temperature levels. Let it live in a stable environment.
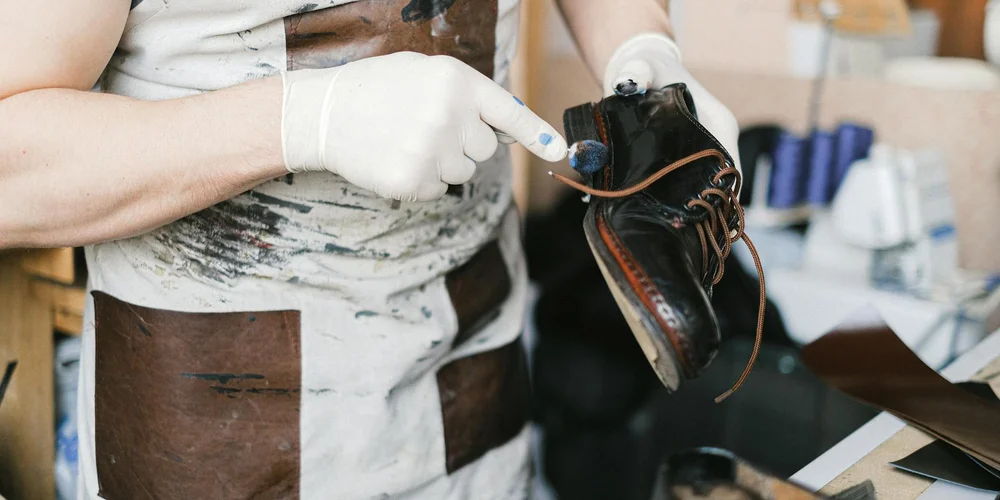
When to Call a Professional Cobbler
Sometimes, home care reaches its limit. Knowing when to ask for help is a sign you truly care for your belongings.
Call a cobbler if you see any of these signs:
- Deep cracks in the creases that show the lighter colored fibers underneath.
- Structural issues, like a separated sole, a broken shank, or a collapsed heel.
- Valuable, sentimental, or antique shoes where a mistake would be heartbreaking.
A good cobbler is like a surgeon for footwear. They have tools and skills we don’t. They can perform a “re-last” to gently stretch and reshape the shoe on its original form. They can inject specialized conditioners into deep cracks or match dyes perfectly after a repair.
There is no shame in seeking a professional’s touch; it’s often the most responsible choice for preserving a prized pair for decades more.
Common Questions
Can I use these methods on my leather jacket or boots?
Absolutely. The steam-and-stuff and conditioning techniques are universal. For a jacket, use a padded hanger to fill out the shoulders; for tall boots, roll a towel to support the shaft from the inside.
What’s the biggest mistake people make trying to remove a crease?
Using direct, high heat from a hairdryer or iron. This bakes the moisture out, making the leather brittle and setting the crease permanently. Always use gentle, indirect heat like steam when removing wrinkles and creases from leather.
How do I prevent deep creases in my leather car seats or sofa?
Keep the leather supple. Condition these high-use areas every six months to prevent the fibers from drying and cracking from repeated pressure. A supple fold is safe; a dry one will split.
My boots developed a deep horizontal crease. Is that different?
Yes. A sharp horizontal line often means the boot is too loose, allowing your foot to slide and bend the leather unnaturally. Use a thicker sock or a tongue pad for a snugger fit to prevent it from worsening.
Caring for Your Leather’s Longevity
The single most important step is to keep the leather nourished. A conditioned leather is a supple leather, one that resists deep, permanent creases and feels softer with every wear. Pair this with the simple habit of using shoe trees, and you actively avoid putting extreme stress on the material.
Proper care is the most sustainable choice you can make for any leather good. Every time you clean and condition a pair, you extend its life, honor the animal and craft behind it, and build your own skill in preserving beautiful materials. Learning the best general methods for caring and treating leather items helps you apply that care consistently across different pieces. In the next steps, we’ll outline practical tips that work for most leathers and finishes.
Research and Related Sources
- How to Remove Creases and Wrinkles From Shoes. Nike.com
- r/allenedmonds on Reddit: Any way I can get rid of the creasing on these?
- How to Remove Creases from Leather Shoes | FootFitter
- Leather Creases & How to Reduce Them – Crockett & Jones US
Harriet is a avid collector of leather goods such as purses, bags, seat covers, etc and has an extensive background in leather care, recovery, stain removal and restoration. She has worked for a number of years perfecting her leather care techniques and knows the ins and outs of restoring all kinds and types of leather products. With her first hand knowledge in leather care, you can not go wrong listening to her advice.
Boot and Shoe Care