How to Remove Pen, Marker, or Ballpoint Ink from Leather Bags and Purses
Published on: May 5, 2026 | Last Updated: May 5, 2026
Written By: Harriet Nicholson
Hello Tannery Talk. Finding a fresh ink line on your favorite leather bag can feel like a minor heartbreak.
This guide will walk you through how to identify the type of stain, choose the right gentle cleaners, follow a safe step-by-step process, and condition the leather after cleaning.
I share this advice from my bench, where I’ve cared for pieces like June’s jacket and Scout’s wallet for years.
Why Ink Sticks to Leather and Makes Such a Mess
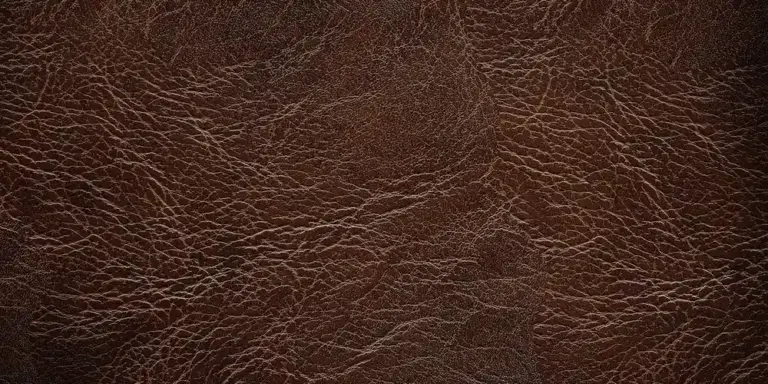
Leather is not like glass or plastic. It is a natural, porous material, much like your own skin. When you get a cut, it doesn’t seal up. It absorbs. Leather does the same thing with liquids.
Think of spilling ink on a plastic table. It pools on top. You can wipe it right off. Now, imagine spilling that same ink on a paper towel. It soaks in immediately and spreads. Leather acts like that paper towel, pulling ink deep into its fibers where it bonds with the oils and dyes.
Not all inks are the same. Ballpoint pen ink is oily. It sits on the surface at first but slowly sinks in. Permanent marker ink is alcohol-based and can dye the leather’s top layer almost instantly. Water-based inks from some pens might sit more on the surface but can still stain. This is why a one-size-fits-all approach fails. You need a plan based on what made the mark.
Gathering Your Tools: What to Have Ready Before You Start
Rushing to the stain with the first thing you grab usually makes it worse. Set up your workspace first. You will need a few simple items.
- Clean, White Cotton Cloths: Old t-shirts are perfect. White ensures no dye transfers to your leather.
- Cotton Swabs: For precision work on small marks or stitching.
- A Mild, pH-Balanced Leather Cleaner: This is for general cleaning around the stain first.
- Isopropyl Alcohol (70% or 91%): Your main weapon against many ink stains. Higher concentration can be more drying.
- A Quality Leather Conditioner: Any cleaning, especially with alcohol, strips natural oils. Conditioning afterward is mandatory.
The single most important step happens before you touch the stain: test every single product on a hidden area. I always test on the inside of a cuff, like on my jacket June, or under a flap. Apply a small amount, wait ten minutes, and check for color loss or texture change. If it’s safe there, it’s likely safe for the stain.
Some things will ruin leather. Never use acetone, nail polish remover, bleach, or abrasive household cleaners. They strip color and destroy the leather’s finish, leaving a permanent, crusty scar.
You can buy dedicated leather ink removers. They often work well. But for many everyday ink stains, plain isopropyl alcohol from the pharmacy is just as effective and far less expensive. It’s the first thing I reach for in my shop. Sometimes, it’s the only method you need for ink stains on leather.
The Gentle Process: How to Get Ink Off a Leather Purse Safely

When ink meets leather, panic is a common first reaction. I have felt it myself. The key is to pause, then follow this calm, methodical approach. Think of this as your universal first aid for fresh stains. It works whether you are dealing with my old saddle, Mason, or a brand-new handbag.
This three-step framework focuses on control and minimizes damage.
Step 1: Blot and See What You’re Dealing With
Your first move is the most important. If the ink is still wet, take a clean, white, lint-free cloth. Gently press it onto the stain. Do not rub. Rubbing grinds the ink deeper into the leather’s pores. Removing pen marks and ink stains from leather requires careful handling to avoid damage.
Blotting lifts the excess ink without spreading it, giving you a clearer picture of the task.
Now, look closely. Is it a light surface smear you can see sitting on top of the grain? Or has it already soaked in, leaving a darker, saturated spot? A surface stain is a hopeful sign. A deep soak means you will need more patience, and the result might be a lightened shadow instead of complete removal.
Step 2: Apply Your Chosen Cleaner with Care
Never pour cleaner directly onto the leather. This risks saturating and damaging a much larger area than necessary. Instead, put a small amount of your chosen cleaner (like a pH-balanced leather cleaner) onto a corner of a fresh cloth.
Start your work at the outer edge of the stain. Use light, circular buffs to gently pull the ink toward the center. This contains the mess. Working from the outside in creates a barrier that keeps the stain from growing.
Apply gentle pressure and let the cleaner do the work, not your elbow grease.
You will see ink transfer to your cloth. Switch to a clean section of the cloth frequently to avoid reapplying the ink you just lifted.
Step 3: Rinse the Area and Let It Breathe
Once the stain is gone or noticeably faded, you must remove any leftover cleaner. Take another clean cloth, dampen it with just water, and wring it out completely. It should feel barely damp.
Wipe the entire cleaned area with this cloth to rinse away residue. Follow this with a dry cloth to absorb the moisture.
Now, let the leather rest. Place the bag in a room with good airflow, away from radiators, hairdryers, or direct sunlight. Leather must air dry slowly and completely; rushing with heat will dry it out and can set any remaining stain. Keeping the leather supple is key to preventing cracking and drying out later. Plan a light conditioning step after it’s fully dry.
This might take a few hours. Do not use the bag until it is fully dry to the touch.
Ink-Specific Tactics: From Ballpoints to Permanent Markers
The gentle process is your foundation. But different inks need different tactics. Here is how to adjust your approach based on what made the mark.
Ballpoint Pen Ink: Tackling the Oily Stain
Ballpoint ink is oil-based. To break it down, you need a solvent. A high-percentage isopropyl alcohol (90% or higher) is often effective.
The method is precise. Dip a cotton swab into the alcohol, then blot the swab on a paper towel so it is moist, not dripping. Test this on a hidden seam first, like inside a pocket. Alcohol can strip the leather’s dye.
If the test spot is okay, lightly dab the stained area with the swab. You will see the ink start to dissolve and transfer to the swab. Immediately blot it away with a clean, dry cloth. Use a feather-light touch and work in tiny sections, as alcohol can lighten the leather’s color permanently. It’s especially important when removing common stains from leather like ink, wine, and oil.
On my jacket June, I’ve faded small ballpoint marks this way, but I always accept a slight lightening of the area as part of the fix.
Marker and Rollerball Ink: Handling Water-Based Spills
Many markers and rollerballs use water-based inks. These can be simpler to manage if you act fast. Your first tool is a damp cloth. Often, gentle dabbing with water alone can lift a fresh, water-based stain.
If water is not enough, add a drop of mild leather soap to your damp cloth and work it into a light lather. Use the same gentle, circular motion from the outer edge. The soap helps suspend the ink so your cloth can pick it up.
Because these inks are less oily, they sometimes come up cleanly without harsh chemicals, preserving the leather’s original color.
When a Permanent Marker Strikes
This is the toughest challenge. Permanent marker ink is designed to bond. Be honest with yourself about the likely outcome.
You can try the careful alcohol method used for ballpoint ink. It might fade the mark, especially on smooth finishes. On porous leathers, the pigment sinks in deep, and complete removal is rare. Even with patience and care, it can be challenging to get them fully out.
For a cherished or expensive bag, consulting a professional leather restorer is the safest choice to avoid making the damage worse. For vintage bags, a specialist can identify age-related wear and determine proper repair techniques to preserve its character. This approach helps safeguard the bag’s history and value.
They have specialized tools and techniques. Sometimes, the most skilled fix is a careful color match and touch-up, which is a job for an expert eye and steady hand.
Solving the Pink Stain Puzzle and Other Tough Spots
You might be looking at a strange pink or reddish mark on your bag, wondering where it came from. This is a common question. These pink stains are almost always a reaction to moisture or the start of a mold bloom. It happens when the leather gets wet and certain tannins or salts rise to the surface.
Whether it’s on a bag, a couch, or a chair, the cleaning principle is the same: start gentle. A harsh chemical right away can set the stain or damage the leather’s finish, especially when cleaning natural leather on furniture like chairs. Start gentle and test a small area first.
Your first move is always a pH-balanced leather cleaner. Dampen a soft, white cloth with the cleaner and gently blot the stain. Never scrub in circles. Think of it like dabbing a spill on a nice tablecloth. Work from the outside of the stain inward to prevent it from spreading. This same technique helps remove stubborn stains from leather boots and other surfaces. The next steps will show how to apply it across different materials.
If the pink mark is old or set-in, a mild vinegar solution can help. It addresses mild mold and can break down the residue. Mix equal parts white vinegar and distilled water. Always test this mix on a hidden seam or patch first, as vinegar can alter some leather dyes. Apply it with a cotton swab, let it sit for no more than a minute, then blot it away with a damp water cloth. For broader mold concerns on leather items, you may want to learn how to remove mold from leather items. The next steps will cover how to remove or treat mold from leather items in more detail.
Patience is your best tool here. You may need to repeat a gentle cleaning process over a few days, letting the leather dry completely between attempts. Some marks, especially deep ones, will only fade. I think of it like a scar on a well-loved piece. My jacket, June, has a light scar near the cuff from a scrape. The mark is still there if you look closely, but conditioning has made it soft and part of her story. The goal is often to minimize and blend, not to magically erase.
Bringing Your Leather Back to Life After Cleaning
Cleaning, even with gentle products, strips away natural oils. Your leather will feel dry and thirsty afterward. Conditioning is not a suggestion; it’s the final, required step to prevent cracking and restore flexibility.
Wait until the cleaned area is completely dry to the touch. This usually takes a full day at room temperature. Then, use a clean hand to apply a thin, even coat of leather conditioner. Your fingers are the best tool because they sense warmth and help you feel where the leather has absorbed it.
Apply conditioner in small circular motions, letting the leather soak it in, then buff off any excess with a soft, dry cloth after 15-20 minutes. This is the exact routine I use on Scout, my wallet, after any cleaning. It keeps the veg-tan leather supple and ready for another three years in my pocket.
A good conditioner does more than just add moisture. It nourishes the leather fibers from within, which can help even out the look of the surface. Minor residual discoloration often becomes less noticeable as the conditioner darkens and enriches the leather uniformly. The piece regains its healthy glow and its protective barrier.
If the leather still feels stiff after the first coat has fully dried (wait another day), a second light application can help. Remember, multiple thin coats are always better than one thick, greasy coat that can clog the leather’s pores.
Smart Habits to Keep Ink Stains Away for Good
Once you have dealt with a stain, your thinking changes. You start to see every pen as a tiny, ticking bomb. The best approach is to stop the problem before it starts. Here are some simple, effective habits to build.
Your First Line of Defense: A Dedicated Pen Case
The most reliable fix is also the simplest. Keep your writing tools separated from your leather.
I keep my own pens in a small, lined pouch inside my briefcase. It’s a habit born from a close call with a leaking rollerball on my own bag years ago. For bags you use every day, like a work tote or briefcase, this one step removes almost all the risk.
- Use a small zippered pouch, a hard-sided glasses case, or even a dedicated pocket in a bag organizer.
- This also protects the pens from getting scratched and keeps other items from getting marked.
A separate pen case is a foolproof barrier between a potential leak and your bag’s interior.
Add an Invisible Shield with Protector Spray
For bags that face daily use and exposure, a leather protector spray is a wise investment. Think of it as a light, water-resistant raincoat for your leather. It won’t make it bulletproof, but it gives you crucial extra seconds to wipe a spill away before it soaks in.
My friend’s briefcase, used for client meetings daily, gets a fresh coat every six months. It has saved it from coffee splashes and more than one hurriedly uncapped marker.
- Start with a clean, dry bag. Condition it first if needed, then let it dry fully.
- In a well-ventilated area, hold the can 6-8 inches from the leather.
- Apply a light, even mist over the entire surface, not forgetting the seams and edges.
- Let it dry completely for the time stated on the product label, usually a few hours, before using the bag.
A protector spray creates a sacrificial layer that repels liquids, making cleanup from minor accidents much faster and more complete.
The Foundation of All Protection: Consistent Conditioning
Leather is skin. Just like skin, when it’s dry and thirsty, it absorbs everything quickly, including ink. When it’s nourished and supple, it has a tighter, more resilient surface.
A well-conditioned bag has a better chance of resisting a quick swipe of ink. The oils and waxes in a good conditioner fill the leather’s pores slightly, making it less absorbent on contact. My saddle, Mason, has survived countless dirty environments partly because his regular conditioning creates a naturally tougher hide.
- Use a pH-balanced leather conditioner every few months, or whenever the leather feels dry.
- Apply it sparingly with a soft cloth, let it absorb, and buff off any excess.
- This maintenance doesn’t just prevent stains. It prevents the cracks and dryness that make stains permanent.
Embrace the Story, Including the Stains
Perfection is not the goal. A life well-lived leaves marks. A small, faded ink spot on the inside flap, a faint scuff near the bottom-these are chapters in your bag’s story.
My jacket, June, has a light oil stain near the pocket from a rainy day years ago. I cleaned what I could, conditioned the leather, and let it be. Now, it’s just part of her character, a memory in the grain. Focus on keeping the leather healthy overall, and don’t fret over every tiny blemish.
A bag’s true beauty is in its patina, the gentle aging that comes from love and use. A minor stain, treated with care, simply becomes part of that honest history.
Common Questions
My bag has a pink stain, but I never spilled ink. What is it?
That’s a moisture mark, not ink. It’s often a salt or tannin bloom from humidity or a previous spill, and it requires a different gentle cleaning approach.
Can I use a leather ink stain remover made for furniture on my bag?
You can, but always test it on a hidden seam first. Furniture cleaners may be formulated for different leather types or finishes than your delicate bag.
How can I prevent ink stains from happening in the first place?
Use a dedicated pen case inside your bag as a primary barrier. For added protection, apply a leather protector spray to create a water-resistant shield.
When should I just call a professional for a stain?
If the ink is from a permanent marker or has soaked deeply, stop. A professional conservator can assess damage and perform color touch-ups you cannot do at home safely.
Your Leather’s Care After the Clean
Test every cleaner on a hidden spot first-this is your most important step. A careful, patient approach preserves the leather’s character and keeps pieces like my jacket June looking her best.
I choose conditioners from tanneries that respect their materials, because good care honors the craft. Learning these skills helps you build a lasting, responsible relationship with every leather good you own.
Related Guides and Information
- r/AutoDetailing on Reddit: Pen ink on leather. What’s the best way to remove safely?
- Ink on Leather? Don’t Panic – Here’s How to Fix It – Vintage Leather Sydney
- What product can I use to remove ink from real leather?
Harriet is a avid collector of leather goods such as purses, bags, seat covers, etc and has an extensive background in leather care, recovery, stain removal and restoration. She has worked for a number of years perfecting her leather care techniques and knows the ins and outs of restoring all kinds and types of leather products. With her first hand knowledge in leather care, you can not go wrong listening to her advice.
Removing Ink and Marker