How to Remove Permanent Marker or Sharpie Stains from Leather Furniture
Published on: February 28, 2026 | Last Updated: February 28, 2026
Written By: Harriet Nicholson
Hello Tannery Talk. Spotting a Sharpie stain on your leather couch can send a wave of panic, but I assure you, many marks are removable with calm, careful steps.
This article walks you through identifying your leather type, testing safe cleaning agents, applying a gentle removal process, and conditioning the leather after treatment.
With years of hands-on experience caring for leather, I’ve successfully tackled ink on pieces like June, my trusted calfskin jacket.
First, Understand Your Leather
Not all leather is finished the same way. The type you have decides how you should clean it. Getting this wrong is the fastest way to make a small stain a big problem.
Think of leather finishes like wood finishes. Aniline leather is like a beautifully stained wood table. The color soaks deep into the grain, and you can feel every pore. It has no protective topcoat. A protected leather, which most furniture is, is like a painted cabinet. It has a rich color layer, then a clear protective film on top. Faux leather is a different material altogether, usually a plastic-coated fabric.
You need to know what you’re working with before you touch a stain. Find a hidden spot, like under a cushion or behind a skirt. Dampen a white cloth with distilled water and rub gently. If color comes off onto the cloth, you likely have aniline or semi-aniline leather. If no color transfers and the surface feels slightly plastic-like, you have a protected finish. This knowledge guides everything. Gentle methods for aniline, slightly more robust ones for protected finishes.
The Golden Rule: Test, Don’t Guess
I never skip this. Not on my own gear, and I won’t let you skip it on yours. A spot test is your safety net. It takes five minutes and can save your couch.
Here is the exact process. Gather a white cotton cloth, distilled water, and the cleaning product you plan to use first (like a mild, pH-neutral leather cleaner).
- Find your hidden test spot again.
- Dampen a corner of the cloth with your cleaner.
- Gently rub a small circle, no larger than a dime.
- Blot it dry with a clean part of the cloth.
- Wait. Let it air dry completely, which can take an hour.
Now, inspect. Look for three things: a change in color (bleeding or darkening), a change in texture (the coating getting gummy or peeling), or a change in shine (a dull spot). If you see any of these, stop. That method is too harsh for your leather.
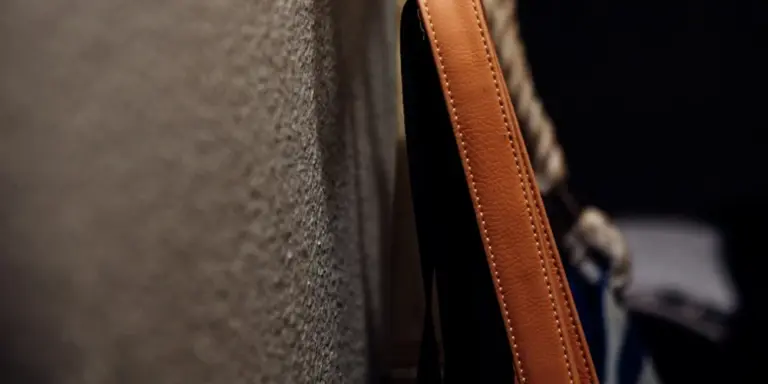
This test tells you what your leather can handle without risking the visible surface. I learned this lesson early on with a bag strap. I used a strong cleaner without testing and stripped a patch of its dye. The repair was more work than the original stain. Testing avoids that heartache every time.
Your Immediate Action Kit
Take a breath. Seeing a Sharpie mark on your couch is stressful, but you can often fix it with items you already own. The goal is to be gentle, patient, and methodical.
Before you start, always test your chosen method on a hidden spot, like the back or underside of a cushion. Wait for it to dry completely to check for color changes or texture damage.
Start with These Common Items
Your first line of defense is likely in your bathroom or cleaning closet. These are generally safe for most finished leathers.
- Rubbing Alcohol (Isopropyl Alcohol, 70% or 90%): This is your most effective and common tool. The higher the percentage, the faster it works, but 70% is plenty strong.
- Hand Sanitizer (Alcohol-based): A great alternative. The gel form gives you more control and prevents drips.
- Non-Acetone Nail Polish Remover: Look for one labeled “non-acetone.” It is a bit stronger than pure alcohol.
- White Vinegar or Lemon Juice: For very faint marks or as a follow-up. Their mild acidity can help lift residual dye.
- Pencil Eraser: For dry, superficial scuffs from a marker tip. Use a clean, white eraser and gentle pressure.
Why Alcohol Works (The Simple Science)
Permanent marker ink isn’t just color. It’s a dye suspended in a carrier solvent. When you write, that solvent evaporates and the dye bonds to the surface.
Alcohol works by dissolving that carrier solvent again, releasing the dye so you can blot it away. Quality leather has oils and a protective topcoat. A quick, controlled application of alcohol affects the marker more than your leather’s natural oils. The key is to not soak the leather. You are spot-cleaning, not bathing it.
Comparing Your Removal Options
Think of stain removal like smoothing wood. You have different tools for different jobs.
Using a cream leather cleaner or mild soap is like hand sanding. It’s safe, controlled, and perfect for general dirt. It might not touch a deep stain.
Alcohol is your orbital sander. It has more power and gets the job done quickly with careful guidance. You need to keep it moving to avoid creating a low spot.
A strong solvent like pure acetone is your belt sander. It removes material fast and is risky. On leather, acetone can strip the color and finish instantly, leaving a permanent bleached spot. I only use it on raw, unfinished edges, never on a couch or bag like my jacket, June.
Step-by-Step: Using Rubbing Alcohol
This is the process I use on my own pieces when accidents happen.
- Gather your kit: Rubbing alcohol, many white cotton cloths or swabs, and a dry, soft cloth.
- Dampen a corner of a cloth with a small amount of alcohol. Do not pour it on. You want it barely wet.
- Gently dab the stain from the outside edge toward the center. You will see the dye start to transfer to your cloth.
- Use a clean part of the cloth with each pass. This prevents you from rubbing the dye back into the leather.
- Blot frequently with a dry cloth to absorb the lifted ink and any excess moisture.
- Let the area air dry completely. Then, assess. If a faint shadow remains, you can repeat the process once more.
If the stain is gone but the spot looks dull or feels dry, that is your signal to condition. A light application of a neutral leather conditioner will restore the oils and even out the finish. This is a critical last step I never skip, even on my tough saddle, Mason.
A Step-by-Step Guide to Removing the Stain
Take a deep breath. I’ve fixed similar marks on pieces like my friend June, the leather jacket. The key is acting calmly and methodically. Rushing can grind the ink deeper into the leather’s pores. This process is your best first move for how to get permanent marker out of a leather couch.
Gather your tools first. You will need:
- A clean, white, lint-free cloth (microfiber is perfect)
- Another cloth, damp with cool water
- A gentle, pH-neutral leather cleaner
- Cotton swabs
- Leather conditioner
Step 1: Blot the Fresh Stain
If the ink is still wet, your first job is to soak it up. Fold your clean cloth and press it firmly onto the mark. Hold for a few seconds.
Blot, do not rub. Rubbing is the enemy here; it will spread the ink and push it deeper into the grain, making the stain larger and more permanent.
Lift the cloth straight up. You might see ink transfer. Move to a clean section of the cloth and repeat until no more wet ink comes off.
Step 2: Dampen and Lift
Dampen a corner of your second cloth with cool water. Wring it out so it’s barely damp, not wet. Gently dab the stained area. You are trying to lift the surface ink without saturating the leather. It’s particularly tricky when dealing with pen, marker, or ballpoint ink stains on leather.
For seams or detailed stitching, use a cotton swab dipped in water and squeezed nearly dry. Roll the swab along the stitch line to wick ink out of the crevices.
Step 3: Clean with a Neutral Cleaner
Apply a small amount of pH-neutral leather cleaner to a clean, dry cloth. Work it into a lather in your hand first. Gently wipe the stained area using small, circular motions. This method helps tackle common stains like ink, oil, and watermarks on leather bags. For more stain-specific tips, see our guide on cleaning leather bags.
Let the cleaner sit on the stain for about two minutes. This gives it time to break down the ink’s bond with the leather’s oils. Removing ink stains from leather can be tricky, so be sure to test the cleaner on a small, inconspicuous area first.
Step 4: Wipe and Dry
Take your damp cloth and wipe away all the cleaner residue. Use a dry section of your clean cloth to blot the area until it feels dry to the touch.
Now, walk away. Let the leather air dry completely for at least two hours. This pause lets you see the true, final result of your cleaning before you do anything else.
Step 5: Condition the Leather
Leather cleaning removes oils along with stains. Conditioning afterwards is non-negotiable. It restores flexibility and prevents dryness and cracking.
Apply a quality leather conditioner with a fresh cloth, using broad, even strokes over the entire panel, not just the cleaned spot. This ensures even color and moisture. Buff off any excess after ten minutes.
If the First Pass Doesn’t Work
Sometimes, a stubborn mark needs a second attempt. Wait for the leather to dry fully from your first try. Then, repeat the cleaning process from Step 3.
You can be slightly more aggressive on the second pass. Use a soft-bristled brush (like a horsehair detailing brush) with the leather cleaner to work the formula gently into the grain. The goal is agitation, not abrasion.
If the homemade method still leaves a shadow, a commercial leather ink remover is your next option. These are formulated solvents, so caution is key.
Always test any remover on a hidden area first, like the back of a cushion or under an armrest. Follow the product’s instructions to the letter-they are all different.
Apply the remover with a cotton swab for maximum control, working from the outside of the stain inward. Have a damp cloth ready to immediately neutralize and wipe the area clean as directed.
Set realistic expectations. Some dyes, especially on aniline or semi-aniline leather, can bond permanently. The stain may lighten from a dark blotch to a faint shadow but not vanish completely. This isn’t failure.
Think of it like a scar on well-loved skin. It tells a story. Your careful work preserved the leather’s health, preventing a crack or dry patch. A lightened stain is often a successful rescue.
Special Cases: Jackets, Car Seats, and Boots

The core principles of stain removal always apply, but different leather items have their own personalities and needs. Let’s look at a few common scenarios.
Removing Sharpie from a Leather Jacket
Treating a jacket like my calfskin piece, ‘June’, feels personal. You’re not just cleaning a stain, you’re preserving a companion. The thinner leather and frequent movement require a gentle touch.
First, identify the finish. Most fashion jackets have a painted or corrected grain surface. This topcoat can sometimes act as a barrier, making removal easier if you act fast.
- Blot any wet ink immediately with a clean, dry cloth. Do not rub.
- Test your chosen cleaner (a pH-balanced leather cleaner or a dab of isopropyl alcohol on a cotton swab) on an inside seam.
- Apply the cleaner to a clean cloth, not directly on the stain. Dab gently from the outside of the stain inward.
- Wipe the area with a cloth dampened with clean water to remove any cleaner residue.
- Let it air dry completely, away from direct heat.
If the stain lifts but leaves a faint shadow or disrupts the dye, a specialized leather recoloring balm applied with care can often blend the area seamlessly. The goal is to clean without stripping the finish, which would create a bigger problem than the original mark.
Dealing with Marks on Car Leather Seats
Auto leather is almost always coated with a protective polymer layer. Think of it as a durable plastic shield over the leather. This changes the game. Harsh solvents can permanently damage this coating, leaving a cloudy, sticky patch.
Your safest first line of defense is always a dedicated automotive leather cleaner. These are formulated for these specific coatings.
- Vacuum the area first to remove grit that could scratch.
- Spray the cleaner onto a soft microfiber cloth.
- Gently wipe the stained area. The stain might be sitting only on the coating.
- For a persistent mark, you can try a tiny amount of isopropyl alcohol (70% or less) on a hidden area as a test. Dab, don’t scrub.
Aggressive rubbing with alcohol or acetone can dissolve the coating, resulting in a repair that requires a full seat re-dye, so patience is your best tool here. After cleaning, use a conditioner made for automotive interiors to keep the underlying leather supple, especially before repairing and restoring damaged leather car seats.
Handling Stains on Leather Boots & Work Gear
Boots like rugged work or hiking styles are often made from oil-rich, full-grain or waxed leathers. They are built to take a beating. A permanent marker stain is more of a superficial insult than a deep wound.
On these tough finishes, you often have more leeway. The oils and waxes in the leather can sometimes resist ink penetration.
- Start with saddle soap. It cleans and conditions in one step. Work it into a lather with a damp brush and clean the entire panel or the whole boot for even results.
- If the stain remains, use a cotton ball with a small amount of rubbing alcohol. Blot firmly. On this leather type, it’s less likely to harm the surface.
- Let the area dry. You will likely see a lightened, clean spot.
- Condition the entire boot heavily with a leather oil or wax-based conditioner. This will re-darken the leather and blend the cleaned area as it nourishes the hide.
The conditioner is the final, crucial step. On functional boots, the priority is maintaining the leather’s weather resistance and flexibility, where a perfect cosmetic appearance often comes second to durability.
What to Do With Faux or Bonded Leather
Real leather is a tough, porous skin. Faux or bonded leather is a plastic coating over fabric or shredded leather fibers. Your cleaning approach must be completely different.
Treating faux leather like real leather is the fastest way to cause permanent, glossy damage or peeling cracks. The plastic top layer cannot absorb conditioner, and it reacts poorly to strong solvents. To keep faux leather looking new and prevent cracking, stick with gentle cleaning and care suited to synthetic materials. Small, regular cleanups help maintain its finish.
Why Harsh Solvents Are a Disaster
Rubbing alcohol, acetone, or oil-based cleaners are common suggestions for ink. On faux leather, they act like paint stripper. They can:
- Melt the surface, creating a sticky, gummy spot.
- Strip the color and finish, leaving a permanent pale blotch.
- Make the plastic brittle, causing it to crack with the next bend.
I’ve seen chairs where someone tried to clean a small mark and ended up with a large, shiny scar. The damage is often worse than the original stain.
The Safer, Gentler Path
Your goal is to lift the ink from the plastic surface without attacking the surface itself. You need a milder, water-based strategy.
- Identify Your Material. Check the manufacturer’s tag or a hidden seam. If it says “bi-cast,” “PU leather,” or “vinyl,” it’s faux.
- Mix a Gentle Cleaning Solution. Use a few drops of clear, pH-balanced dish soap in a cup of cool water. For store-bought options, look for cleaners specifically labeled for vinyl or faux leather.
- Perform a Quick Spot Test. This is non-negotiable. Apply your solution to a hidden area (under a cushion, behind a skirt). Wait only 2-3 minutes, then wipe dry. Check for any color transfer, gloss change, or texture softening. If it looks good, proceed.
- Apply and Lift. Dampen a soft, white microfiber cloth with your solution. Gently dab and circle over the ink stain. Do not scrub aggressively. The goal is to gradually break the ink’s bond.
- Dry Immediately. Use a separate dry cloth to blot the area completely. Never let water pool or soak in.
Patience with gentle dabbing is your most effective tool here, not a powerful chemical. If the ink lightens after a few attempts, you are on the right track. If there is no change, the ink may have penetrated a tear in the coating, making removal unlikely without professional help.
The Essential Final Step: Conditioning

Cleaning leather, especially with the methods needed for a stubborn stain, strips away more than just ink. It removes the natural oils that keep the material flexible. Think of it like washing your hands with harsh soap many times in a row. Your skin gets dry and tight. Leather feels the same way. You must be careful when removing pen marks or ink stains from leather.
Conditioning is not a suggestion, it is a mandatory step to restore strength and prevent the leather from cracking where you treated it. Skipping it leaves the area weak and vulnerable.
The Reward of a Supple Handfeel
When you apply conditioner correctly, you can feel the difference. That dry, thirsty patch of leather drinks it in. The tightness melts away, replaced by a soft, supple flexibility. On my jacket June, after I had to treat a small ink spot on the cuff, the conditioned area regained its smooth handfeel, blending seamlessly with the rest of the sleeve. It’s the proof your care worked.
A Simple, Effective Method
You do not need special skills for this, just a little patience. Use a clean, lint-free cloth and a quality leather conditioner or cream. A neutral, pH-balanced product is a safe choice for most furnishings.
- Apply a small amount of conditioner to your cloth, not directly onto the leather.
- Gently rub the conditioner into the entire cleaned area using circular motions. Treat a slightly larger section than you cleaned to ensure an even finish.
- Let the leather absorb it. This takes 15 to 30 minutes. The leather will look darker at first, which is normal.
- Take a fresh, dry cloth and buff the area gently. This removes any excess and helps even out the finish.
If the spot still feels dry or stiff to the touch compared to the surrounding leather, apply a second, lighter coat following the same steps. It is better to use two thin applications than one heavy one that can clog the pores.
Long-Term Care Made Simple
This step connects your stain removal to the lifetime of your furniture. You have just asked the leather to endure a lot. Conditioning is how you help it recover. I think of it like giving Mason, my old saddle, a long drink of water after a dusty ride. It is a basic act of maintenance that pays off for years. Making this a habit after any deep clean keeps the entire piece nourished, resilient, and beautiful.
How to Prevent Future Marker Mishaps
Even the best stain removal is a reaction. The best strategy is prevention. A little foresight can save you a lot of scrubbing.
If you share your home with young artists or creative minds, your leather furniture is a canvas waiting to happen. A simple rule can work wonders: markers and leather do not mix. Keep all art supplies in a dedicated caddy or box that is only opened at a designated table.
For homes with kids, I recommend a “trade-up” policy: washable markers for the sofa, permanent ones only at the craft table under supervision. This simple swap removes the most dangerous tool from the equation without stifling creativity.
The Power of a Well-Maintained Shield
Think of your leather’s finish and conditioner not as a treatment, but as its first line of defense. A dry, thirsty leather surface is more porous and will absorb stains faster and deeper.
My own leather jacket, June, gets a light conditioning every few months. This isn’t just about softness. The conditioner fills the microscopic pores in the top-grain, creating a smoother, more resistant surface. When something spills or marks it, that barrier gives you precious extra time to blot it away before it sets.
A regularly conditioned leather surface has a slight, protective sheen that can help liquids and inks bead up, allowing for easier cleanup before a stain sets in. It won’t make it bulletproof, but it turns a potential disaster into a simple wipe-up.
Creating a Leather-Safe Home
Your living space should work for you. If your leather couch is the center of family life, define its purpose. Make it the place for reading, relaxing, or watching movies-not for glitter glue or model painting.
Establish a specific, well-lit zone for messy or inky projects. Cover that area with a wipeable cloth or mat. The physical separation helps build a habit. The leather zone stays clean; the creative zone is for exploration. This isn’t about restricting fun, but about respecting the materials in your home.
Keep a kit nearby your leather furniture. A soft, white cloth and a small bottle of pH-balanced leather cleaner in a cabinet can make all the difference. If an accident occurs, you’re ready to act instantly, which is always better than waiting.
Protection is a habit, built from simple steps: defined zones, the right tools for the right space, and a consistent care routine for your leather. Your couch, like my old saddle Mason, is a companion for years. These small acts of prevention help ensure it ages with character, not with stains.
When to Call a Professional

Sometimes, the bravest thing you can do for your leather is to hand it off. Knowing when to stop a DIY attempt isn’t a sign of defeat, it’s the mark of a responsible owner.
My own piece, June the jacket, has a small, neat repair from a specialist. I didn’t hesitate to send her out for that job. The result is perfect and preserved her value.
Signs Your DIY Attempt Should Stop
If you see any of these signs, put your cleaner down and step back. Pushing forward can turn a stain into permanent damage.
- The stain is very large or on a highly visible spot, like the center of a light-colored couch cushion. Home methods work best on small, contained areas.
- The leather is antique, very delicate, or has a fragile, already-cracked finish. You risk lifting the color or the top layer itself.
- You’ve tried two gentle methods (like a mild soap and a dedicated leather ink remover) with no improvement. The ink is likely a stubborn, pigmented type.
- The stain begins to spread or blur during cleaning, or the leather’s color starts to lift.
Why a Pro is the Right Choice
Think of a leather repair specialist like a skilled mechanic for your favorite car. They have tools and knowledge we simply don’t keep at home.
Their expertise isn’t just about removal, it’s about seamless restoration. They can match dyes perfectly, repair the finish, and treat the leather so the spot blends in completely. This protects your furniture’s look and its longevity.
Calling a pro is an act of care. It says you value the piece enough to invest in its proper healing.
How to Find a Reputable Leather Repair Specialist
Take your time finding the right person. A good specialist will be happy to answer your questions.
- Search for “leather furniture repair” or “leather restoration” in your area. Read customer reviews and look for before-and-after photos of their work.
- Call and describe your specific problem: permanent marker on your type of couch. Ask about their experience with this exact issue.
- Inquire about their process. They should explain how they’ll test a hidden area first and discuss potential outcomes honestly.
- Request a written estimate. Be wary of prices that seem too low without a clear explanation.
- Avoid anyone who pressures you for an immediate decision or guarantees a 100% invisible repair before seeing the stain. Honest pros manage expectations.
A short consultation now can save your leather from irreversible damage later. Your couch, like my old saddle Mason, deserves that thoughtful approach.
Quick Answers
Is rubbing alcohol safe to use on all types of leather?
No. It is generally safe for protected, finished leather but can strip color and oils from delicate aniline or semi-aniline leathers. Always perform a spot test in a hidden area first.
How can I stop this from happening again?
Establish clear rules: keep permanent markers away from leather furniture. A consistently well-conditioned leather surface also provides a slight protective barrier, giving you more time to clean accidents.
What if the Sharpie stain has already dried?
The process is the same. A dried stain requires the same gentle, patient method of dabbing with a suitable cleaner like alcohol. Do not scrub, as this can grind the dried pigment deeper.
Why is conditioning the leather after cleaning so important?
Cleaning agents remove the leather’s natural oils along with the stain, leaving the area dry and prone to cracking. Conditioning restores essential moisture and flexibility to preserve the material. Understanding the best cleaning methods for leather boots and shoes helps preserve their finish. This simple step keeps the leather looking its best longer.
The stain is gone, but the color looks lighter there now. What did I do wrong?
You may have inadvertently removed some of the leather’s dye or topcoat, often by being too aggressive or using an inappropriate cleaner. On aniline leather, some permanent dye transfer is possible; a professional may need to blend the area.
Caring for Marked-Up Leather
The single best move is to act fast with the gentlest method. A dab of rubbing alcohol on a cotton swab, applied with patience, solves most Sharpie mishaps before they set in for good.
Every successful clean is a vote for a longer life for your furniture, keeping it out of a landfill for years to come. Building your care skills turns accidents into simple maintenance, honoring the material and the craft behind it.
Related Guides and Information
- ILC – How To Get Sharpie Permanent Marker off Leather
- r/CleaningTips on Reddit: How can I remove what looks like sharpie from leather?
- How To Get Sharpie Off Leather (Properly) – Von Baer
Harriet is a avid collector of leather goods such as purses, bags, seat covers, etc and has an extensive background in leather care, recovery, stain removal and restoration. She has worked for a number of years perfecting her leather care techniques and knows the ins and outs of restoring all kinds and types of leather products. With her first hand knowledge in leather care, you can not go wrong listening to her advice.
Removing Ink and Marker