How to Repair Torn Leather Car Seats at Home
Published on: February 24, 2026 | Last Updated: February 24, 2026
Written By: Harriet Nicholson
Hello Tannery Talk. Seeing cracks or tears in your car’s leather can make you worry it’s ruined for good. I know that feeling, but from restoring pieces like Mason’s saddle, I can tell you most damage is fixable.
This article walks you through the process, from start to finish. We will cover identifying the type of damage, cleaning and prepping the leather, applying a strong filler for tears, expertly matching the color, and sealing the repair for lasting protection.
I’ve spent years in my workshop bringing life back to worn leather goods, so you can trust these methods.
The First Step: What Kind of Leather Do You Have?
Before you touch a single cleaner, you need to know what you’re working on. This step decides everything. Car seats are not all made from the same material. Using the wrong method on the wrong material can make the damage worse.
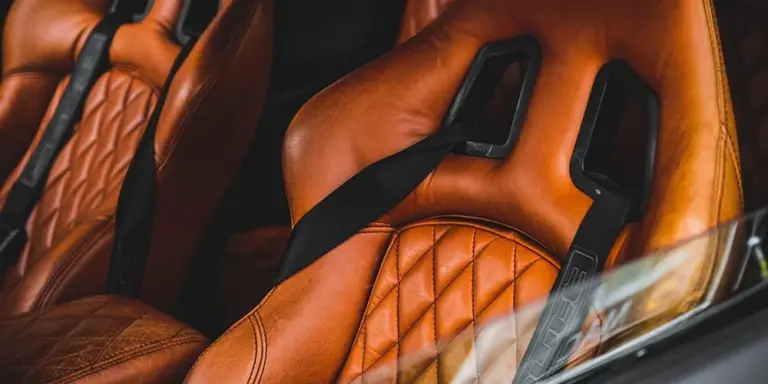
Genuine, high-quality leather like top-grain or aniline feels like my old saddle, Mason. It has a natural, slightly porous feel. You can see the unique grain pattern, like a fingerprint. A drop of clean water will soak into it slowly, darkening the spot.
Most modern car seats use a coated or protected leather. This has a thin, uniform plastic or pigment layer on top. It feels smoother and more consistent. That water drop will bead up and sit on the surface. Some seats are even made from synthetic leatherette, which has no natural grain at all.
The repair method you choose is completely dependent on this simple identification. A scratch on coated leather is often a scratch in the color coating itself. A scratch on aniline leather goes into the hide. They are fixed differently, as discussed in Aniline vs Pigmented Leather.
Knowing this gives you the real answer to “can you repair leather seats in a car?” For real leather and good quality coated leather, yes, you absolutely can. For cheap vinyl or badly damaged leatherette, replacement might be the only lasting option. Distinguishing genuine leather from bonded leather changes the repair outlook. Bonded leather repairs are often unreliable and not durable, so replacement is typically the practical option.
Gathering Your Tools: What’s In a Leather Seat Repair Kit?
Think of this like gathering ingredients before you cook. Having everything within reach makes the job calm and controlled. A good DIY repair kit addresses each stage of the process.
The core components break down into six categories:
- Cleaner: A pH-balanced leather cleaner. It removes dirt and body oils without drying out the hide.
- Conditioner: This moisturizes the leather fibers after cleaning. For car seats, a non-greasy formula is best.
- Filler/Patch Compound: This is for physical damage. A flexible leather filler fills cracks and small holes. For tears, you need a patching compound and a backing cloth.
- Adhesive: A strong, flexible leather glue for bonding patches or reattaching seams.
- Colorant: This matches the finish. It comes as liquid dye, pigment, or a blend. You must match your leather type (aniline dye vs. coated leather pigment).
- Tools: Soft brushes, foam applicators, fine-grit sandpaper, plastic scrapers, and a hairdryer for speeding up drying times.
Basic Kit vs. Advanced Kit
What you need depends on the damage.
A basic scuff-repair kit is for surface marks. It includes a cleaner, a conditioner, a colored leather cream or mild abrasive, and applicators. This is like giving June, my jacket, a quick refresh. It’s for maintenance, not reconstruction.
An advanced tear-repair kit includes everything above plus filler, adhesive, a patching fabric, and liquid colorant. This is for fixing a split seam or a puncture. It’s a more involved process, like the surgery my wallet Scout once needed.
Sourcing Your Supplies and Setting Up
You can find a pre-made leather seat repair kit at many auto parts stores. These are convenient for small, standard jobs. For a perfect color match on a larger repair, you may need to order a custom-mixed colorant from a leather supply company.
Always work in a well-ventilated space, like a garage with the door open. Protect your car’s interior with cloths or masking tape. The most important step everyone skips? Test every product-cleaner, filler, color-on a hidden area first, like under the seat or on the rear of a seatback. Wait for it to dry completely. This tells you if the color matches and if the product reacts badly with your leather.
Give yourself time. Rushing leads to mistakes. A good repair can have several steps with drying time in between. Patience here saves you from having to start all over again.
How to Fix Surface Scratches and Fading Color

When you ask how do you fix leather car seats, you’re usually talking about the daily wear we all see. Light scuffs from bags, faint color transfer from new jeans, and that gradual sun fading on the bolster. This isn’t deep damage. It’s the leather’s topcoat and color layer asking for a touch-up. Think of it like refreshing a well-worn pair of boots—especially after you’ve cleaned and protected them from sun damage.
The goal is a clean, unified surface so any new color you apply bonds evenly and looks natural. Rushing this step is the most common mistake. A dirty or oily surface will cause the new dye to bead up or absorb unevenly, leaving you with a blotchy, obvious repair.
The Essential Cleaning and Prep
This process is non-negotiable. I treat my jacket, June, the same way before any conditioning. You need two things: a pH-balanced leather cleaner and a separate, high-quality leather conditioner.
- Vacuum the seat thoroughly. Loose grit is sandpaper.
- Dampen a soft microfiber cloth with clean water and wring it out completely. Wipe the entire seat section to lift initial dust.
- Apply a small amount of cleaner to a new, dry microfiber cloth. Work in gentle, overlapping circles over the damaged area and the surrounding leather. You’re not scrubbing. You’re lifting oils and grime from the grain.
- Use a second damp cloth to wipe away all cleaner residue. Let the leather dry fully for 30 to 60 minutes. It should feel cool and matte to the touch.
Conditioning after cleaning restores suppleness and prepares the leather to accept color evenly. Apply a thin coat of conditioner with your fingers or a cloth, let it absorb for 15 minutes, then buff off any excess with a clean cloth. Now you have a perfect, receptive canvas.
Matching and Applying Color
This is where patience pays off. You’ll need a leather dye or cream made for automotive interiors and several soft, lint-free applicator cloths or sponges.
First, find a hidden test spot. Look under the seat cushion or behind the headrest. Apply a tiny dot of your color product.
- Does it match when wet?
- Does it match when dry?
- Does it change the leather’s texture?
If the color is slightly off, many brands offer mixing kits. Testing in an unseen spot is the only way to avoid a patchy, two-toned seat that looks worse than the original scratch. My wallet, Scout, is a uniform dark brown because I tested my conditioning balm on the inside fold first.
When you’re ready to apply:
- Shake the product well. Put a small amount on your applicator.
- Apply to the scratch or faded area with a light, feathering motion. Start in the center of the damage and blend outwards into the good leather.
- Use multiple whisper-thin layers. Let each layer dry for 5-10 minutes before adding the next. Three thin layers look infinitely better than one thick, gloopy one.
- After the final layer dries (about an hour), buff the entire panel gently with a clean cloth. This blends the repair and restores a slight sheen.
The repaired spot might feel different at first. Give it 24 hours to cure fully. The color will settle, and with a final light conditioning in a week, the repair will become part of the seat’s own story, just like the gentle creases on Mason’s saddle.
Repairing Cracks and Deep Scratches in the Leather
This is different from cleaning a scuff. A deep scratch or crack means the leather’s surface layer is torn or worn through. You are not just cleaning the finish, you are rebuilding a small section of the material. Think of it like fixing a dent in a wooden table. You need to fill the gap, shape it, and then refinish the area to match. For a leather bag, this is about doing a repair for deep scratches, not just cleaning. When done right, it can restore the bag’s look and longevity.
My old wallet, Scout, developed a small crack in a corner from being overstuffed. I used this process, and with patience, the repair became almost invisible to the touch.
Step 1: Clean and Prepare the Damage
You must start with a perfectly clean and dry surface. Any dirt or conditioner left in the crack will prevent the filler from sticking.
- Use a soft brush to remove any loose debris from the crack.
- Dampen a clean, lint-free cloth with a neutral, pH-balanced leather cleaner and gently wipe the entire area, going over the crack several times.
- Let the area dry completely. This usually takes 30 to 60 minutes. Do not use heat to speed this up.
A clean, dry base is the non-negotiable foundation for a lasting leather repair.
Step 2: Gently Sand the Edges
Feel the edges of the crack with your finger. You will likely feel rough, raised bits of leather. These need to be smoothed so the filler can lay flush.
- Use a fine-grit sanding sponge or very fine sandpaper (like 400 grit).
- Lightly sand only the torn edges of the leather. Your goal is to feather them smooth, not to sand away good leather.
- Wipe away all the dust with a slightly damp cloth and let it dry again.
Step 3: Apply the Leather Filler Compound
Leather filler is a paste that hardens to fill gaps. It comes in tubes or jars.
- Using a small, flexible spatula or a plastic spreader, press the filler firmly into the crack or scratch. Overfill it slightly, as the compound will shrink a bit as it dries.
- Smooth it as best you can, feathering the edges out onto the surrounding good leather.
- Follow the product’s drying time. This can take several hours. Resist the urge to touch it.
Step 4: Blend and Smooth the Filler
Once the filler is fully dry and hard to the touch, it’s time to blend it seamlessly into the seat.
- Use your fine-grit sanding sponge again. Sand the hardened filler with very light, circular motions until it is perfectly level with the surrounding leather.
- Stop frequently to run your fingers over the area. You should not feel a ridge or dip.
- Clean all the dust away thoroughly.
This step requires a gentle touch. Sanding too hard will create a new low spot. The comparison to woodwork is perfect here, you are essentially sanding a patch smooth before applying a new stain.
Ready for Color
After sanding and cleaning, you will have a smooth, matte patch. The repair area now has no color or finish. It is a blank canvas. The next step is to apply a leather dye or refinisher to match the original color of your seat. Always test your color match in a hidden area first, like under the seat cushion.
Taking your time on these preparation steps means your final color coat will look even and professional, not like a obvious patch.
How to Fix a Ripped or Torn Leather Seat
Finding a rip in your car seat can feel like a punch to the gut. I get it. My old saddle, Mason, has seen a few scrapes. The good news is, many tears can be mended. The approach depends entirely on the size and nature of the damage. Think of it like first aid for leather.
We’ll look at two scenarios: small, clean punctures and larger, gaping tears. The line between them is often the width of your thumb.
Repairing Small Punctures and Cuts
A small tear from a key, pet claw, or sharp object is a common fix. The goal is to stabilize the leather from behind to prevent the tear from growing. This method works best on clean, straight cuts, not jagged holes.
The most reliable DIY method for a small tear is to reinforce it from behind with a repair patch and flexible adhesive. This creates a strong, invisible backing that supports the leather.
- Clean the area. Use a neutral leather cleaner on both sides of the tear. The underside must be free of foam, dirt, or old adhesive. Let it dry completely.
- Apply adhesive. Use a flexible, leather-safe contact adhesive. Apply a thin layer to the underside of the leather around the tear and to your repair patch (a thin, flexible leather or vinyl piece).
- Let the adhesive become tacky. This usually takes 3-5 minutes. It should feel sticky, not wet.
- Position the patch. Carefully press the patch onto the underside of the leather, covering the tear completely. Apply firm, even pressure for a full minute.
- Close the tear. From the top side, gently press the edges of the tear together. You can use a specialized leather repair tape on the surface to hold it flush while the underside adhesive cures fully (usually 24 hours).
- Final touch. After curing, you can use a leather filler compound on the surface line, then dye and condition to blend the repair.
A common mistake is rushing the adhesive’s tacky time or using too much glue, which can seep through and create a hard spot. Patience here makes the repair last.
Addressing Large, Gaping Tears
For a tear longer than an inch, or where the leather is shredded or missing a piece, the game changes. I learned this with an old jacket that had a massive seam blowout.
Honestly, a large structural tear is often beyond the scope of a durable DIY repair and is best assessed by a professional upholsterer. They have the tools, heavy-duty sewing machines, and matching material to rebuild the panel correctly.
A temporary tape fix might hide the problem, but it will not withstand the daily stress of sitting. The constant flexing will loosen any household adhesive or tape. A pro can often replace just that damaged section, saving the rest of the seat and maintaining its value and safety. Consulting a professional is the responsible choice for major damage.
Your Questions on Patches and Tape
Let’s clear up two common items you’ll see: leather repair patches and repair tape.
A leather seat repair patch is a backing material, typically used underneath the tear as a support scaffold for the adhesive, as described in the small tear repair steps. It is not a cosmetic surface fix. For do fix tears cuts holes in leather car seats, you’ll see how patching sits with filler and color matching in the next steps.
Leather seat repair tape is a temporary surface product designed to hold edges together during a repair or as a very short-term cover. It is not a permanent solution. Think of it like a bandage that allows the real medicine (the adhesive and patch underneath) to work. Relying on tape alone will lead to the tear reopening.
Bringing It All Back: Conditioning and Protecting Repaired Leather
You have a fresh repair. The crack is filled, the scratch is colored in. That is a fantastic step, but the job is not finished yet. The repair work is only half the journey. True restoration comes from nourishment. Think of your repair like a bandage on skin; the skin underneath still needs care to stay healthy and flexible.
Choosing Your Leather’s Nourishment
Not all conditioners are the same, and your car seats face unique challenges. They endure intense sun, fluctuating temperatures, and constant friction. You need a product that feeds the leather without leaving a slippery, shiny film. I think about my saddle, Mason, which sees similar heat and wear. Are the best leather conditioners for car seats able to protect and restore them, not just shine? The right formula should feed the leather and guard against sun, heat, and wear.
- For General Care: A pH-balanced leather conditioner or milk is your safest bet. It penetrates well to moisturize from within.
- For Heavy Sun Exposure: Look for a conditioner with added UV blockers. This reduces fading and protects the dye in your repair.
- For a Matte, Original Finish: Use a light, non-greasy conditioner. Avoid heavy oils or waxes if you do not want to alter the sheen.
- For Maximum Protection: After conditioning, a dedicated leather protectant spray adds a thin, invisible shield against spills and stains.
How to Apply Conditioner Like a Pro
This part is simple, but patience is key. Rushing leads to a sticky, uneven finish. Gather a few clean, soft microfiber cloths.
- Clean First, Always. Gently wipe the entire seat with a neutral leather cleaner and a dry cloth. Remove any dust or oils so the conditioner can absorb properly.
- Apply Sparingly. Put a small amount of conditioner on a cloth. Start with the repaired area, working it in with small circular motions. You can always add more product, but you cannot take it away once it is soaked in.
- Expand Your Work. Move outward from the repair to treat the entire seat panel. This ensures an even look and protects all the leather equally.
- Let It Breathe. Allow the conditioner to absorb fully. This usually takes a few hours. Do not sit on the seat during this time.
- Buff Gently. Once dry to the touch, use a fresh, dry cloth to lightly buff the surface. This removes any excess and brings up a gentle, natural luster.
How Conditioning Shields Your Work
This step does more than just make the leather feel nice. It is your repair’s long-term insurance policy. Conditioning replenishes the natural oils that wear, sun, and time steal away.
For the repair itself, conditioner keeps the filler or colorant flexible, preventing it from drying out, cracking, and peeling away. For the surrounding leather, it prevents new stress lines from forming next to the old damage. It keeps the entire piece supple, so it moves and bends without creating new weak points. My jacket, June, has several repaired spots that have lasted years because the leather around them is kept nourished and strong.
The Reward: Feel and Scent
When you do this right, you will know. Run your hand over the seat. The repaired spot should not feel stiff or waxy. It should blend with the surrounding leather, feeling supple and cool to the touch. The harsh, dry scent of a repair compound will be gone, replaced by the deep, reassuring aroma of cared-for leather. It is the smell of durability restored. That restored handfeel and rich scent are the true signs you have not just patched a problem, but given your leather a new lease on life.
When to Call a Professional: Repair Cost vs. DIY
Every leather craftsman knows their limits. I learned mine years ago trying to salvage a torn antique bag. I poured hours into it, but the result was never right. Knowing when to handle a repair yourself and when to seek a professional saves your time, money, and the leather itself.
For small, cosmetic issues-minor scuffs, surface scratches, or light dye transfer-a careful DIY approach with a quality kit is often perfectly effective and deeply satisfying. Think of it like giving my jacket, June, a good clean and condition. The damage is skin-deep. For anything beyond that, you need an expert’s eye.
Signs Your Car Seat Needs a Pro
If you see any of the following, put down the repair kit and pick up the phone. These problems go beyond simple patching.
- Large Sections of Missing Leather: A rip longer than three or four inches, or a worn-through area bigger than a credit card, is a major undertaking. Matching the grain and color across a large panel is incredibly difficult.
- Structural Damage: Can you feel broken or collapsed foam underneath? Does the seat frame feel compromised? This isn’t a leather issue; it’s an upholstery and safety issue.
- Multiple, Connected Tears: Several small rips along a stress point, like a seat bolster, indicate the leather is fatigued. Patching one tear will just put pressure on the next.
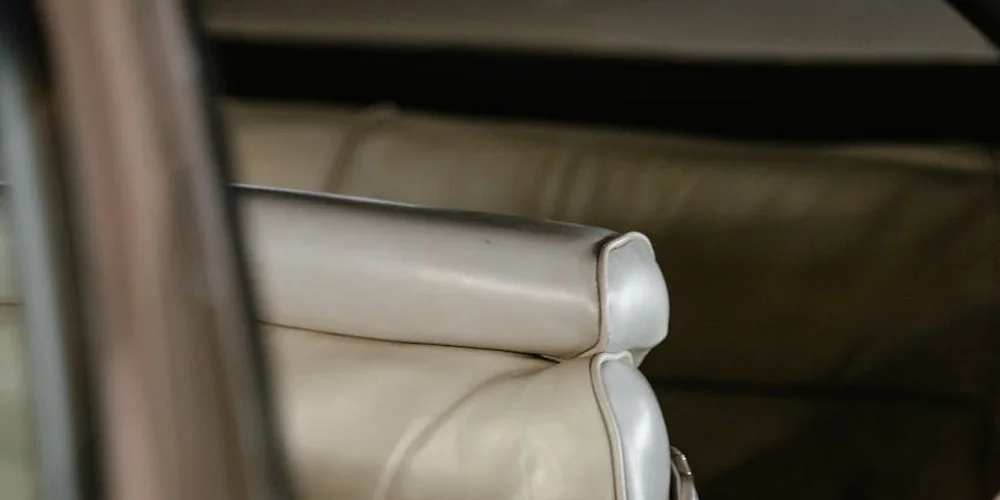
- Severe, All-Over Drying & Cracking: When the leather feels like old parchment and the cracks are deep and widespread, the material has lost its integrity. No conditioner can re-weave split fibers.
What Affects Leather Seat Repair Cost
If you do need a pro, the price isn’t a mystery. It’s based on clear factors. A simple patch job on a single tear in a common black leather will cost much less than restoring a worn-out, two-tone vintage sports seat.
| Factor | Why It Matters |
| Size & Number of Repairs | A one-inch cut is a quick fill and color match. A shredded bolster may require a whole new panel sewn in. |
| Leather Type & Color | Matching a unique aniline dye or a complex perforated pattern is more labor-intensive than matching a standard coated leather. |
| Seat Design | A flat, simple center section is easy. A complex, sculpted seat with stitching, piping, or perforated inserts takes more skill and time. |
| Labor Rates in Your Area | Shop rates vary by city and the specialist’s expertise. An auto upholsterer may have a different rate than a dedicated leather repair mobile technician. |
Always ask for a detailed, written estimate that breaks down parts and labor before any work begins. A trustworthy pro will be happy to provide one.
DIY Investment vs. Professional Results
Let’s compare what you’re really committing to. For a DIY kit, you’re investing your own time and a modest amount of money. For a professional, you’re paying for their guaranteed time, specialized tools, and expertise.
- DIY (Time & Kit): Plan for 2-4 hours of focused work for a small repair, not including drying time between steps. A good quality repair kit with compounds, dyes, and graining papers might cost as much as a nice dinner out. The risk is your own skill; the result might be “good enough” but not invisible.
- Professional (Fee & Finish): You invest money, not your weekend. A pro has industrial-grade adhesives, pigment libraries, and graining tools you can’t buy. They’ve seen hundreds of seats. The result should be a repair you have to search for to find. It’s the difference between a home stitch on a tear and the seamless repair I had done on June’s sleeve.
Ask yourself: Is this a functional fix for a daily driver, or a restoration for a car you love? Your answer guides the choice.
Finding “Leather Seat Repair Near Me”
Finding the right person is the most important step. A generic web search can be hit or miss. Instead, try these paths to find a true specialist.
- Ask a Detailer: High-end auto detailers see the work of every local repair pro. They know who does clean, durable work and who to avoid. They are your best source for a referral.
- Check with Upholstery Shops: Not just auto shops-furniture and marine upholsterers work with leather daily and often have the skills for car seats. Call and ask if they handle automotive leather repair.
- Look for Mobile Specialists: Many skilled technicians operate mobile services. They come to you. Ask to see photos of their previous seat repairs, specifically looking for color and grain matching.
- Visit in Person: If possible, take your car to them for the estimate. A good craftsperson will want to feel the leather, assess the damage in person, and give you a confident plan. If they only want texted photos, be cautious.
Trust your instincts-if a repair quote seems too cheap, or the technician can’t clearly explain their process, look for someone else. Your car’s interior deserves the same care you’d give a trusted leather good.
Can Car Seats and Daily Use Ruin Your Leather?
Yes, car seats and daily use can damage leather seats. But they don’t have to ruin them. The difference is in the care. Think of it like my English saddle, Mason. Years of riding create wear, but consistent conditioning and cleaning prevent that wear from turning into permanent, ugly damage.
Without protection, the constant pressure, friction, and trapped debris from a car seat will absolutely break down the leather’s surface and finish over time.
How Child Seats, Belts, and Friction Create Wear
The damage happens in specific, predictable ways. Your leather is tougher than you think, but these forces add up.
- Child Seats Dig In: The hard plastic bases and legs concentrate immense pressure on small areas. This compresses the leather’s fibers, creating deep, permanent creases and crushing the natural grain. It can also trap heat and moisture against the leather, which weakens it.
- Belts Cause Abrasion: Every time you buckle and unbuckle, the belt buckle scrapes across the same spot. This acts like fine sandpaper, slowly scuffing away the protective topcoat and dye. You’ll see a faded, rough patch appear.
- Daily Sliding In and Out: This is constant, low-grade friction. Your clothing, especially rough jeans or zippers, grinds against the seat bolster. This gradually polishes and wears down the surface, leading to shiny, discolored areas that feel different from the rest of the seat.
Practical Tips to Minimize Damage
You can’t stop using your car. But you can create a protective buffer. This isn’t about coddling the leather, it’s about smart maintenance, just like I treat Mason before a long trail ride.
The single most effective thing you can do is use a quality protective mat or towel under any child seat. Look for a soft, thick fabric that absorbs shock and allows the leather to breathe. Place a clean, smooth towel under seat belts to prevent buckle rub.
A good barrier distributes pressure and stops abrasion, giving your leather’s natural durability a fighting chance.
Beyond that, a simple routine makes all the difference.
- Clean Immediately After Removal: When you take the car seat out, clean that spot. Use a soft, damp cloth and a tiny amount of pH-balanced leather cleaner. Gently wipe away any grit, salt, or moisture that was trapped. Let it air dry completely.
- Condition That Area More Often: The compressed leather under a car seat is thirsty. Every other time you condition your whole interior, give that spot an extra, light application of a nourishing leather conditioner. Work it in with your fingers in a circular motion to help the leather plump back up.
- Inspect for Early Signs: Feel the area. Does it feel drier or stiffer than the surrounding leather? That’s your cue to condition. Catching it early stops a crease from becoming a crack.
The goal is to manage the damage, not fear it. With these steps, the wear your leather gets becomes part of its honest history, like the creases on my jacket June, not a reason for regret.
Keeping Your Seats Pristine: Simple Habits for Longevity
Caring for leather car seats is not complicated. It is about consistent, gentle attention. Think of it like caring for Mason the English saddle or June the jacket. The goal is to prevent problems before they start by performing regular maintenance. With a few simple habits, you can keep your seats looking and feeling great for years.
Habit 1: Clean Gently and Often
Dirt and grit are leather’s worst enemies. They work into the grain and act like sandpaper, wearing down the finish and drying out the hide. You do not need fancy tools for this.
Here is a simple routine. Aim for it every 3-4 months.
- Vacuum the seats first. Use a soft brush attachment to lift loose dust and debris from the seams and creases.
- Use a clean, damp microfiber cloth with a few drops of a pH-neutral leather cleaner. Work in small, gentle circles. Do not soak the leather.
- Wipe the area with a second, clean, damp cloth to remove any cleaner residue.
- Let the seats air dry completely, away from direct heat or sun.
A gentle cleaning removes the grit that slowly grinds the leather down, protecting the soft finish you love. The most common mistake is using harsh cleaners or household soaps. They strip away the leather’s natural oils, leaving it dry and brittle, unlike the right products and methods that help maintain its suppleness.
Habit 2: Shield from the Sun
Sunlight is the fastest way to fade and age leather. The UV rays break down the dyes and dry out the fibers, leading to stiff, cracked seats. This reflects the role UV light plays in leather aging, through oxidation and gradual degradation of the material. Prevention is straightforward.
- Use a windshield sun shade every time you park, even on cloudy days.
- Try to park in the shade or a garage when possible.
- Consider applying a leather protectant with UV inhibitors during your annual conditioning. This adds a light, invisible shield.
This habit is no different from keeping your favorite leather jacket out of a sunny window. You are just giving your seats the same consideration.
Habit 3: Condition Once a Year
Leather is skin. Over time, it loses the oils that keep it supple. Conditioning replenishes those oils. For most cars, once a year is perfect. If you live in a very dry or hot climate, you might do it every eight months.
Choose a quality, water-based leather conditioner. I look for products from tanneries that advocate for responsible sourcing. After a thorough cleaning, apply a small amount to a soft cloth.
Massage the conditioner into the leather in circular motions, covering the entire seat. Let it soak in for the time recommended on the bottle, usually 15-20 minutes. Then, gently buff off any excess with a clean, dry cloth.
Think of a conditioner as a thirsty drink for your seats, restoring flexibility and preventing the tiny cracks that lead to major splits. Like my wallet Scout, a little nourishment keeps it looking its best.
The Easiway to Avoid Big Repairs
These three habits work together. Cleaning prevents abrasive damage, sun shielding stops UV breakdown, and conditioning fights dryness. Skipping them is how a small scuff becomes a deep scratch, or a dry patch becomes a full tear.
This proactive care is the core philosophy for any leather good. You would not let dirt cake on your favorite bag or let your boots dry out completely. Your car seats deserve the same thoughtful routine. It is the simplest, most effective maintenance you can do.
Leather is a resilient, living material. It responds beautifully to consistent care. A well-maintained seat can handle daily use and still develop a beautiful, even patina, much like Mason’s deep chestnut saddle. When you give it just a little attention, it will support you reliably for the long journey ahead.
Common Questions
Is a leather seat repair kit from a store like Autozone any good?
For a small, straightforward scuff or crack, a store-bought kit is a practical starting point. Just manage your expectations on color matching; the included dye may not be a perfect blend for your specific seat’s fade and wear.
How do I find a reliable professional for “leather seat repair near me”?
Skip the generic search and ask a high-end auto detailer or a furniture upholsterer for a referral. A true specialist will gladly show you photos of their previous seat repairs so you can judge their color and grain matching.
Is leather repair tape a permanent fix for a tear?
No, it is a temporary stabilizer. Use it to hold torn edges together while the adhesive on your underlying patch cures, but never rely on tape alone as the final repair.
I see people discussing repairs on forums like Reddit. Should I trust those methods?
Forums are useful for understanding common problems, but always cross-reference any advice with established leather conservation principles. What worked on one person’s vinyl seat could ruin your aniline leather.
Preserving Your Car’s Leather
When your leather seats show wear, act quickly and choose your materials with care. A small repair now with a quality conditioner or colorant prevents a minor scuff from becoming a costly problem later. This simple habit is the most effective way to maintain your investment.
Looking after leather is an ongoing practice that builds your skill and deepens your connection to the material. I encourage using products from sources that respect animal welfare and the environment, as caring for a leather good is also about honoring its origin and ensuring it serves you well for years.
Further Reading & Sources
- Leather Car Seat Repair In Los Angeles, CA 90232 – Best Way
- Amazon.com: Leather Repair Kit
- How to Fix A Hole in a Leather Car Seat | UK Tutorials
Harriet is a avid collector of leather goods such as purses, bags, seat covers, etc and has an extensive background in leather care, recovery, stain removal and restoration. She has worked for a number of years perfecting her leather care techniques and knows the ins and outs of restoring all kinds and types of leather products. With her first hand knowledge in leather care, you can not go wrong listening to her advice.
Car Interior and Auto Leather Care