How Do You Get Nail Polish Out of Leather Furniture?
Published on: May 4, 2026 | Last Updated: May 4, 2026
Written By: Harriet Nicholson
Hello Tannery Talk. That sudden splash of nail polish on your leather sofa is a heart sinking moment, but I promise you can handle it.
This guide will walk you through understanding your leather type, selecting safe cleaning agents, using a gentle blotting technique, and replenishing the leather’s moisture after cleaning.
I have spent years caring for leather, from conditioning Scout my wallet to repairing June my jacket, so I know how to approach stains without causing harm.
Stay Calm and Act Immediately
That sinking feeling is familiar. You find a bright smear on your sofa, and your heart drops. I’ve been there, like the time I discovered a fresh scuff on June the jacket. The first rule is to breathe. Panic leads to rushed mistakes. You have a short window to fix this cleanly.
Wet nail polish acts fast. Its solvents are designed to evaporate quickly, setting the color into whatever they touch. On leather, those same solvents can start to break down the protective topcoat and dye if they sit too long. Acting within the first few minutes gives you the best chance of a full recovery without damaging the leather’s finish.
Your first move is simple. Grab a clean, dry, absorbent cloth-a microfiber or soft cotton works best. Gently place it over the spill and press down. Do not rub. Rubbing will grind the polish particles deeper into the leather’s grain and spread the stain. You are just soaking up the excess liquid. Blot until the cloth comes away clean. These basics also apply to common stains like ink, wine, and oil. The next steps will cover targeted removal tips and safe solutions.
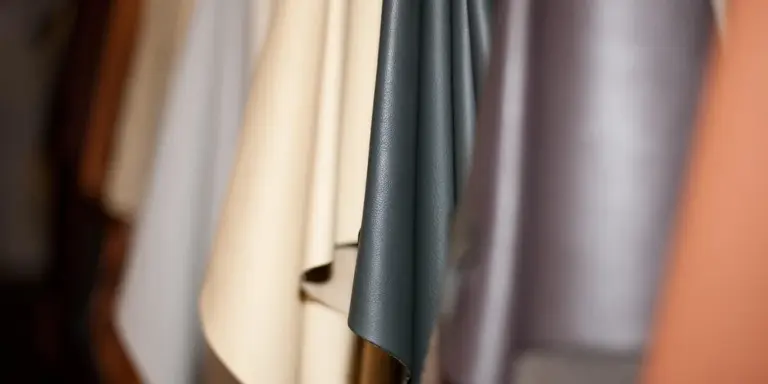
Assemble Your Leather Care Toolkit
Before you tackle the stain itself, get your supplies ready. You don’t need anything fancy, just a few careful choices. Having everything at hand means you can work methodically without scrambling.
- Clean Cloths: Several white or light-colored microfiber cloths. You need one for applying cleaner and a fresh, dry one for buffing.
- Cotton Swabs: These are perfect for precise control when applying solvent to a small stain.
- Mild Leather Cleaner: A pH-balanced cleaner for general leather upkeep. You’ll use this after the polish is gone.
- Leather Conditioner: A neutral conditioner to restore moisture. The cleaning process will dry the leather out.
- The Key Solvent: This is your stain fighter. You have two safe options:
- A non-acetone nail polish remover.
- Isopropyl alcohol (rubbing alcohol) at 70% or 90% concentration.
Every leather is different, so testing your solvent in a hidden spot is an absolute must. Think of the back of a cushion, under an armrest, or the bottom of a seat. Apply a tiny drop with a swab, wait a minute, and check for color transfer to the swab or any change in the leather’s texture or finish. If there’s no adverse reaction, you’re clear to proceed. When dealing with dye transfer stains on light-colored leather, this cautious approach helps you avoid setting the stain or causing additional color bleed. By testing first, you can choose a solvent and method that lifts the dye without damaging the finish.
The Gentle Removal Method: Step-by-Step
I’ve dealt with this on a few pieces, most memorably a client’s light-colored chair. Panic is your first enemy. Take a breath. Nail polish is frustrating, but it’s often a surface-level problem you can manage. The key is a gentle touch, good timing, and the right tools. Here’s how to get nail polish off a leather couch without making the situation worse.
- Blot any remaining wet polish. If the spill just happened, grab a paper towel or a dry, clean cloth. Gently press it onto the polish to soak up as much of the wet formula as you can. Do not wipe or smear. You’re lifting the excess, not spreading it. Think of it like dabbing up a spilled drink before it soaks in.
- Dampen a cloth with your chosen remover and dab-never scrub-the stain. Take a white cotton cloth (an old t-shirt works perfectly) and slightly dampen a corner with your chosen solvent. I’ll cover what to use next. Fold the cloth so you have a clean, soft pad. Start at the very edge of the stain and gently press the cloth onto the polish, then lift. You’ll feel the tackiness of the polish give way. Rotate to a clean part of the cloth often. Work inward. Scrubbing is the quickest way to damage the leather’s topcoat and grind the polish deeper into the grain.
- Wipe the area clean with a cloth dampened with water to remove any residue. Once the polish is gone, you’ll likely see a faint, greasy-looking halo. That’s residue from the remover and any polish oils. Dampen a fresh section of your cloth with plain, cool water. Wipe the entire treated area lightly to neutralize it. You might catch the light, clean scent of the alcohol evaporating.
- Pat the area dry with a clean towel. Use a fluffy, absorbent towel to blot the spot until it’s dry to the touch. Let the piece air dry completely away from direct heat for a few hours before you use it again. This prevents any trapped moisture from causing problems later.
A common mistake is using too much liquid. You want your cloth damp, not dripping. Too much solvent can seep past the finish and affect the leather underneath, potentially causing a dark spot or stiffening the fibers.
Acetone vs. Non-Acetone: What’s Safe for Leather?
So, what should you dampen that cloth with? The bottle of polish remover in your bathroom is likely acetone-based. My advice is to leave it there.
I do not recommend using pure acetone on finished leather furniture or upholstery. Acetone is a powerful, aggressive solvent. For leather, it acts like a harsh stripper. It can dissolve the protective dyes and topcoat finishes that give your sofa its color and sheen, leaving a faded, blotchy patch that’s often a permanent repair. It can also suck the natural oils right out of the leather, leaving it dry and brittle. It’s not safe for cleaning leather for these reasons.
You need a gentler approach. A non-acetone nail polish remover is a better starting point, as its solvents are less intense. But for a method I trust more, I turn to a simple bottle of rubbing alcohol (isopropyl alcohol, 70% or 90%).
Rubbing alcohol is strong enough to break down most polish formulas but evaporates quickly without soaking in deeply. It’s my go-to for precise spot cleaning on finished leathers. I’ve used it on my own gear, like when a pen leaked in the same pocket as Scout, my wallet. A quick, careful dab with an alcohol-dampened cloth lifted the ink without harming the veg-tan’s developing patina.
To use it for nail polish, follow the steps above. Always test your remover on a hidden area first, like behind a cushion or on an underside seam. Apply a small dab, wait a minute, and check for any color transfer to your cloth or change in the leather’s texture. If it passes this test, you can proceed with confidence.
What If the Polish Has Already Dried?

Dried polish is a tougher opponent. It’s a hard, glossy shell stuck to the surface. The goal here is to soften it from the outside in, without letting liquid seep into the leather’s pores. Rushing will cause damage.
You will need your same supplies: a non-acetone nail polish remover, two clean cotton cloths (like old t-shirts), and your leather cleaner. Find a spot where you can work patiently.
- Fold one cloth into a small pad and dampen it lightly with the remover. It should be moist, not dripping.
- Gently lay this damp pad directly on top of the dried polish spot. Do not rub. Let it sit there for 2 to 3 minutes. This allows the solvents to gently soften the polish from the top down.
- Lift the pad. Take your second, dry cloth and start dabbing at the spot. The polish should begin to transfer onto the dry cloth as a softened gunk. Use a clean section of the dry cloth as it gets dirty.
- Repeat the damp-cloth-rest and dry-dab process until all the polish residue is gone. This might take several cycles. Patience is your best tool here.
Never pick or scrape at the dried polish with your fingernail, a knife, or any hard object. You will almost certainly scratch the leather’s top-grain, creating a permanent mark that’s worse than the original stain. If the polish is being stubborn, repeating the gentle softening process is always safer than forcing it.
Nourishing the Leather Back to Health
Cleaning, especially with a solvent, strips away the leather’s natural oils. The spot you just worked on is now vulnerable and dry. If you skip this next step, that area can become stiff and prone to cracking over time. To prevent drying out and cracking, follow up with a conditioner designed for leather. This quick step helps restore moisture and keep your items supple.
Conditioning is how you give that leather its strength and flexibility back. Think of it like a drink of water for your skin after washing your hands.
First, clean and disinfect the leather before letting it air dry fully for about an hour. Then, take a quality leather conditioner. A little goes a very long way.
- Put a drop of conditioner, about the size of a pea, on your fingertip.
- Gently massage it into the cleaned leather using small, soft circles with your finger. Your body heat helps the conditioner soak in. Cover an area slightly larger than the cleaned spot to blend it in.
- Let it absorb for 15-20 minutes. Then, take a clean, dry cloth and lightly buff the area to remove any excess. This leaves a protected, nourished finish.
This isn’t just a fix, it’s standard care. I condition my English saddle, Mason, with this same method after every few rides or a deep clean. That routine is what keeps an 8-year-old saddle supple and prevents the leather from drying out and cracking at the stress points. Your furniture deserves the same thoughtful upkeep.
When to Call in a Professional

There comes a point where the kindest thing you can do for your leather is to stop. You’ve been gentle, you’ve used the right products, but the stain isn’t budging. That’s not a failure. It’s a signal. It might be time to consider professional stain removal.
I think of Mason, my old English saddle. Years of oil and wear gave it a deep, resilient character. But if a large splash of nail polish had hit its antique surface, I wouldn’t gamble with it. Some leather tells you it needs an expert’s hand.
Scenarios Where DIY Reaches Its Limit
Knowing when to step back protects your furniture from irreversible harm. Here are the clear signs.
Large or old, set-in stains are a different beast than a fresh drop. The polish has had time to fully cure and penetrate deeper into the leather’s pores. Aggressive scrubbing, even with the right cleaner, can damage the topcoat and finish far more than the original stain.
Delicate, antique, or aniline-dyed upholstery requires a specialist’s diagnosis. This leather has little to no protective topcoat. It’s like comparing a sturdy work jacket to a delicate silk blouse. The methods that work on a protected sofa could strip color and alter the texture of an heirloom piece.
If you see any discoloration, darkening, or texture change after your careful cleaning attempt, stop immediately. This is the leather communicating that the interaction is wrong. Continuing could set the discoloration permanently. Even if you’re confident in your cleaning skills, it’s crucial to be cautious.
Expert Help is a Smart Preservation Choice
Calling a professional isn’t a last resort. It’s a first-rate decision for preserving value and sentiment. I once had a client bring me a jacket like June, but with a huge, old ink stain. They’d tried everything. My job wasn’t just to remove the stain, but to save the jacket’s character and integrity.
A good leather care specialist sees the whole piece, not just the blemish. Their goal is a repair that looks natural and maintains the leather’s strength for years of future use.
Finding the Right Specialist for the Job
Not all cleaners understand leather. Look for someone who talks about preservation, not just cleaning.
- Ask specific questions: “What is your process for nail polish on an unprotected leather?” or “Do you use pH-balanced products?”
- Avoid anyone who suggests harsh, all-purpose solvents or promises guaranteed results without seeing the piece. Leather is not uniform.
- Seek out professionals who mention using gentle, appropriate methods like careful spot cleaning, targeted degreasing, and post-cleaning conditioning to restore moisture balance.
The right expert will treat your furniture with the same respect you do. They’ll help your leather, whether it’s a family heirloom or a daily companion like Scout, live its best, longest life.
Common Questions
Can I use hairspray or hand sanitizer instead of rubbing alcohol?
No. These contain other chemicals, fragrances, and emollients that can leave a sticky residue or damage the leather’s finish. Stick to 70-90% isopropyl alcohol or a dedicated non-acetone remover for a clean, controlled result. DIY cleaners from household items like vinegar, soap, or general alcohol can strip color, dry out the leather, or leave residues that harm the leather finish over time. That’s why relying on products formulated for leather care helps maintain its durability and appearance.
How can I protect my leather from future spills?
Regular conditioning is your best defense, as it maintains a supple, sealed surface. For high-risk areas, consider using a leather-protector spray designed for your leather type, and always apply it to a clean, conditioned surface first.
Will this method work on all types of leather?
It is safest for finished, protected leathers like those on most modern furniture. Always test your solvent in a hidden spot first. For suede, nubuck, or antique/unfinished leather, do not proceed-consult a professional immediately.
Should I condition the leather right after cleaning?
No. You must let the cleaned area air dry completely first, usually for about an hour. Applying conditioner to damp leather can trap moisture and lead to mildew or finish clouding.
Final Thoughts on Nail Polish and Leather Care
The most vital advice is to act fast and test first. A small drop of solvent on a hidden spot tells you everything you need to know before you treat the visible stain.
Caring for your leather well means it cares for you longer, becoming a part of your daily life for years. Every repair you make or stain you remove thoughtfully is a step toward more sustainable, skilled ownership.
Expert Resources and Citations
- r/CleaningTips on Reddit: Nail polish on leather couch. Uh oh 🙁
- Nail Polish Remover on Leather | Fibrenew International
- How to Remove Nail Polish from Leather and Fabric Sofas – Expert Tips
Harriet is a avid collector of leather goods such as purses, bags, seat covers, etc and has an extensive background in leather care, recovery, stain removal and restoration. She has worked for a number of years perfecting her leather care techniques and knows the ins and outs of restoring all kinds and types of leather products. With her first hand knowledge in leather care, you can not go wrong listening to her advice.
Furniture and Upholstery Care