How Do You Properly Maintain and Condition Leather Couches to Extend Their Lifespan?
Published on: April 28, 2026 | Last Updated: April 28, 2026
Written By: Harriet Nicholson
Hello Tannery Talk. That beautiful leather sofa is a big investment, and it’s natural to fret over keeping it soft and supple for years.
I will guide you through a practical care routine. We will cover identifying your leather type, safe cleaning steps, effective conditioning techniques, and simple habits to prevent wear.
My advice comes from hands-on experience conditioning and repairing leather goods, from daily companions like my saddle Mason to my jacket June.
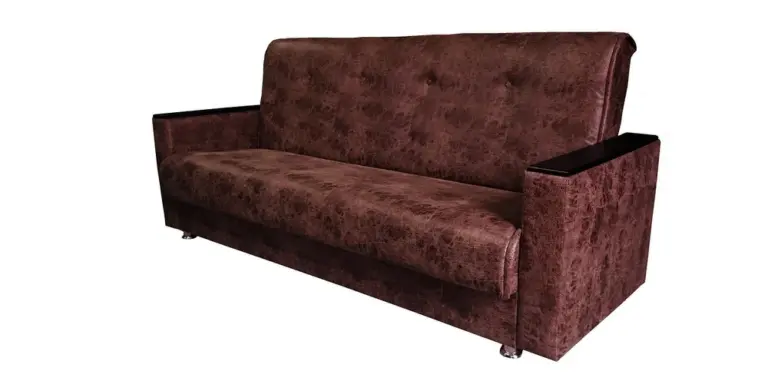
Know Your Leather Couch Before You Start
Think of your couch like a person. You wouldn’t use the same heavy lotion on a baby’s skin that you’d use on a farmer’s work-calloused hands. The type of leather your couch is made from dictates everything you do next, from cleaning to conditioning.
Getting this right means your care adds years of life. Getting it wrong can lead to stains, cracks, or a sticky, damaged surface.
You can often find the leather type on a tag tucked under a cushion or on the frame. If that’s gone, try the water drop test. Place a single drop of distilled water on an inconspicuous spot, like the back or under a cushion. Watch it for 60 seconds.
- If it darkens the spot and soaks in, you likely have aniline or semi-aniline leather.
- If the bead of water just sits on top, you have a pigmented or protected finish.
Part of caring for leather well is knowing where it came from; I always advocate for choosing and maintaining pieces made from responsibly sourced, high-quality hides, as they age with more grace and character.
Quick Guide to Leather Types and Finishes
Here’s a simple breakdown of the leathers you’ll commonly find on sofas.
- Aniline Leather: This is the most natural. It’s dyed with soluble color but has no protective topcoat, so you see the hide’s true grain and markings. It feels incredibly soft, like my jacket June, but it absorbs spills easily and fades faster in sunlight.
- Semi-Aniline Leather: A practical middle ground. It has a light layer of protective pigment or wax, which gives it more stain and fade resistance than pure aniline, but it still retains much of the natural look and soft handfeel.
- Pigmented (or Protected) Leather: This is the durable workhorse. A layer of colored polymer or wax creates a uniform, protective surface. Think of it like comparing a sturdy work boot to a soft leather glove. It resists stains, scratches, and fading very well, making it great for busy homes.
- Bonded Leather: This is not full-grain leather. It’s made from shredded leather fibers bonded with polyurethane or latex onto a backing. It has a very uniform look and plastic-like feel. It’s often less durable and can peel or crack over time.
How to Care for Your Specific Leather
This is where identification pays off. The main question I see is, “How often should I condition my leather couch?” The honest answer is: it depends on the type.
- Aniline & Semi-Aniline: These thirstier leathers need conditioning more often, about every 6-12 months. Use only products meant for unfinished leathers. Clean gently with a pH-neutral cleaner. Your goal is to nourish the hide without smothering its natural breathability.
- Pigmented Leather: Focus more on cleaning the protective topcoat. Conditioning is still needed, but less frequently-once a year is often plenty. Use a cleaner and conditioner designed for finished leathers. This keeps the topcoat supple and prevents it from cracking.
- Bonded Leather: Care is mostly surface cleaning. Use a barely damp cloth and a mild, non-abrasive detergent. Avoid oils and heavy conditioners, as they won’t penetrate and can create a greasy film. Its lifespan is more limited by its construction than your care routine.
Your Easy Routine for Daily and Weekly Leather Couch Care
Great leather care is mostly about prevention. A few simple habits dramatically cut down on the need for deep, stressful cleans later. In high-humidity environments, moisture-aware care helps prevent mold and stiffness. We’ll share practical prevention solutions for humid conditions.
This routine answers the common worry, “Is this too much work?” It’s not. It’s about small, consistent actions that become second nature, like brushing your teeth.
What to Do Every Day
These actions take less than a minute but make a huge difference over years.
- Address Spills Immediately. Blot-never rub-with a soft, dry, absorbent cloth. For sticky spills, follow with a cloth dampened with distilled water and blot dry. Rubbing pushes liquid in and can damage the finish.
- Manage Sun and Heat. Keep your couch out of direct, sustained sunlight. Use blinds or rotate cushions if you can. Also, keep it a good distance from radiators, fireplaces, or heating vents. Heat dries leather out from the inside, leading to brittle cracks.
- Fluff and Smooth. Give your cushions a good plump and pat back into shape. Gently smooth out any deep, bunched-up creases in the seating area. This prevents the leather from forming permanent, deep-set wrinkles, just like you wouldn’t leave a nice jacket crumpled in a ball.
What to Do Every Week
Set aside 10-15 minutes once a week. I do this while listening to music-it’s a peaceful ritual.
- Vacuum Thoroughly. Use your vacuum’s soft brush attachment. Gently go over all surfaces, paying close attention to crevices, seams, and under the cushions. Dust and grit act like sandpaper, wearing down the finish over time.
- Lightly Wipe Down. Dampen a clean, white microfiber cloth with distilled water. Wring it out until it’s just barely damp-it should feel cool, not wet. Wipe the entire couch in gentle, sweeping motions. This lifts body oils and everyday grime before they build up.
- Inspect for Wear. Run your hand over high-wear areas: armrests, seat edges, headrests. Look for any changes in color, feel, or texture. Catching a small, dry spot early means a simple conditioning fix later. I do this with my wallet Scout every few weeks to keep it in top shape.
How to Deep Clean Your Leather Couch the Right Way
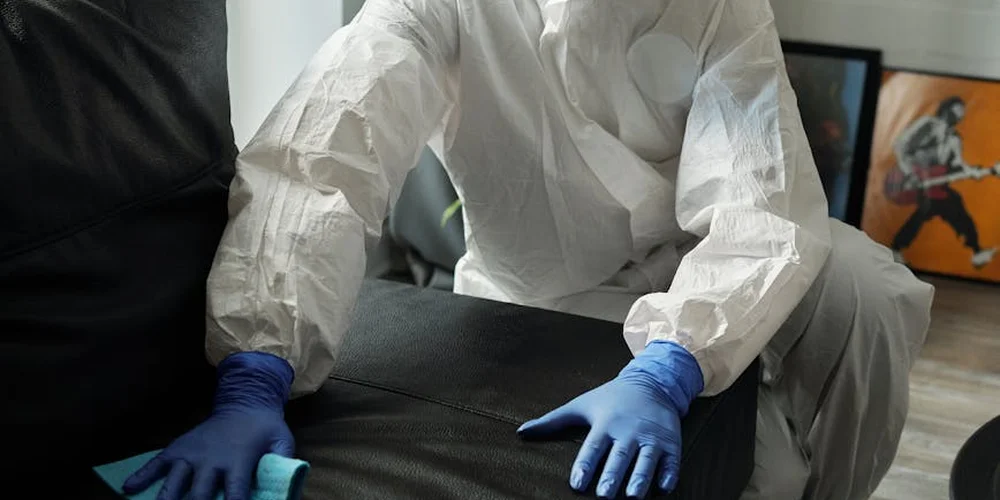
Think of a deep clean as a reset for your couch. It removes the daily grime so your conditioner can work effectively. You want to be gentle. A harsh scrub can permanently scar the surface. My approach with June, my leather jacket, is the same I use for furniture. Slow, careful, and thorough.
Gathering Your Cleaning Supplies
You only need a few simple things. Using the wrong product is like trying to fix a watch with a hammer. It will cause more damage.
- Two or three soft, lint-free cloths (microfiber or old cotton t-shirts work perfectly).
- A mild, pH-balanced leather cleaner. A few drops of saddle soap diluted in a bowl of lukewarm water is a great alternative.
- A separate bowl of clean, lukewarm water for rinsing.
- A soft-bristled brush, like a horsehair detailing brush, for textured leather or seams.
Household cleaners, dish soap, or harsh chemicals strip away the leather’s natural oils, leaving it dry, stiff, and prone to cracking. Your goal is to clean, not to dissolve the material. DIY mixtures like vinegar, rubbing alcohol, or plain soap can remove more protection than dirt, speeding up damage over time. These common household items often harm leather by drying, staining, or weakening the finish, which is why safer, purpose-made leather cleaners are recommended.
The Step-by-Step Cleaning Process
Do not rush this. Working section by section prevents the cleaner from drying on the surface and ensures you don’t miss a spot.
- Always do a spot test. Apply a small amount of your cleaner to a hidden area, like behind a cushion or on the back. Check after it dries for any color change or damage.
- Dampen one cloth with your cleaner. Wring it out well. You want it damp, not soaking wet. Start on one cushion or armrest. Wipe in gentle, overlapping circles. This lifts dirt from the grain without grinding it in.
- Take your second cloth, dampen it with plain water, wring it out, and wipe the same section to remove any soapy residue.
- Let the area air dry completely before moving to the next section. A fan can help, but never use a hair dryer or direct heat.
For ink, a dab of isopropyl alcohol on a cotton swab can sometimes lift it. For oil, sprinkle a little cornstarch, let it sit overnight to absorb the oil, then brush it off and clean gently. For any stubborn stain, gentle patience is better than aggressive chemicals, especially when dealing with delicate leather surfaces.
Conditioning Your Leather Couch to Restore and Protect
Cleaning takes things away. Conditioning puts good things back. Leather loses its natural oils from use, sunlight, and air. This is how you care for leather furniture long-term. Conditioning is like giving thirsty skin a drink. It restores flexibility and forms a protective barrier, absorbing oils and waxes that penetrate and protect the hide.
Choosing the Best Conditioner for Your Couch
Not all conditioners are the same. The right one depends on your couch’s finish and your goals.
- Oils (like neatsfoot or mink oil): These penetrate deeply and are excellent for thirsty, full-grain, or unfinished leathers. They offer strong waterproofing but will darken the leather noticeably.
- Balms and Waxes (like beeswax-based products): These sit more on the surface, providing a protective, water-resistant layer and a soft sheen. Great for items that need a shield.
- Creams and Milks: These are often lighter, absorb quickly, and are ideal for finished, aniline, or pigmented leathers where you want to moisturize without a heavy change in color or feel.
My general rule is simple. For a family sofa, a light leather cream or milk is often the safest, most effective choice to maintain the original look while providing nourishment. I avoid conditioners with silicones or petroleum; they can create a sticky film that blocks the leather’s pores over time.
How to Apply Conditioner for Maximum Benefit
This is where your couch truly gets its life extended. The process for how to condition a leather couch is about even, thoughtful application.
- Ensure your couch is completely clean and dry from the previous deep clean.
- Apply a small amount of conditioner to a soft cloth. Rub your cloths together to spread it evenly into the fabric.
- Working on one small section at a time, massage the conditioner into the leather using gentle, circular motions. You are aiming for a thin, even layer you can barely see. Too much can oversaturate and weaken the fibers.
- Let the conditioner absorb. This can take a few hours or even overnight. The leather will drink it in.
- Take a clean, dry cloth and gently buff the entire surface. This removes any excess product and brings up a soft, natural glow.
You might notice the leather looks slightly darker after conditioning. This is completely normal, especially with oils. The color will even out as it fully dries, adding depth and character to your couch’s patina, just like the warm glow on my old saddle, Mason. If an area still feels dry after a day, you can apply a second, very light coat.
When to Handle Repairs Yourself and When to Call a Professional

Your leather couch gets used daily. Scratches, scuffs, and dryness are normal. The key is knowing which marks are a story and which are a cry for help.
Run your fingertips over the area. A minor scuff feels like a slight change in texture on the surface. A scratch might catch your nail. A deep crack will feel dry, rigid, and look like a break in the leather’s top layer.
I learned this difference working on June, my leather jacket. A light scrape from a bike rack buffed out with some conditioner and patience. But a small tear on the seam needed a professional’s needle and thread to stop it from growing. Your couch deserves the same careful diagnosis.
For surface-level issues that haven’t broken the leather’s grain, you can often provide the care it needs right at home. Major structural damage needs an expert’s hand to truly restore it and add years of life.
Simple DIY Fixes for Minor Wear
Most common wear is superficial. With the right approach, you can make it nearly vanish.
For light scuffs or dull spots, your first tool is already in your kit: a soft, lint-free cloth and your regular leather conditioner. Apply a small amount of conditioner to the cloth and rub it gently over the scuffed area in a circular motion. The oils and waxes can often redistribute the pigments and moisturize the surface, making the scuff blend in. Buff it lightly with a dry part of the cloth. This is how I keep Mason, my saddle, looking polished after a muddy ride. These same techniques can also help repair scratches and remove scuff marks from leather shoes or boots. If the scuff or scratch is deeper, you may want to explore more targeted repair steps designed for footwear.
For a defined scratch that’s not a deep cut, you can use a leather filler and dye. This requires more care.
- Clean the scratch thoroughly with a neutral, pH-balanced leather cleaner. Let it dry completely.
- Using a small spatula or palette knife, press a quality leather filler paste into the scratch. Overfill it slightly, as it will shrink as it dries.
- Let it cure for the full time listed on the product, usually 24 hours.
- Once rock hard, sand it flush with the surrounding leather using very fine-grit sandpaper (800 grit or higher). Sand gently.
- Apply a matching leather dye with a fine brush or sponge, feathering the edges. Let it dry.
- Finish with a light coat of conditioner to seal and blend.
The biggest mistake here is rushing the dry times or using a dye that doesn’t match, creating a more obvious spot than the original scratch. Always test your products on a hidden area first, like behind a cushion.
Signs You Need a Leather Care Expert
Leather tells you when it’s in trouble. Listen to it. These are the red flags that mean it’s time to call a professional.
- The leather feels stiff and papery, and after two thorough conditioning sessions a week apart, it still drinks up the product without softening.
- Cracks are longer than an inch or form a web-like pattern. These are structural failures.
- You see a tear where the leather is fully separated, or a seam is splitting open.
- There is a musty smell or visible mold spots (often white or green). This needs specialized treatment.
- A large area of color is faded or discolored from prolonged sun exposure.
A professional restorer has tools and materials we don’t. They can perform a complete leather rehydration from the inside out, replace damaged sections with precision, and use industrial-grade dyes and finishes for a seamless repair. They save pieces that seem lost. Whether it’s for vintage jackets, furniture, or accessories, they understand what it takes to make leather look its best again.
In community talks, the consensus is clear: we try the gentle fixes first. But when the problem is deep, repeated, or widespread, a professional repair is the true investment in your couch’s lifespan. Trying to fix a large tear yourself can often make it worse and more expensive to fix later. A pro’s work on a major crack can add a decade of comfortable use, making the cost a wise, long-term choice for a piece you love.
Common Questions
Can I use household products like vinegar or saddle soap?
For most modern furniture leathers, avoid vinegar and use saddle soap sparingly. Saddle soap is a mild cleaner for unfinished leather but can leave a residue on pigmented finishes; always test in a hidden area first. It’s important to follow the recommended methods for cleaning leather furniture to ensure their longevity.
How do I deal with that ‘sticky’ feeling some old leather gets?
A sticky feel often means a broken-down polyurethane topcoat or built-up product. Gently clean the area with a damp microfiber cloth and a pH-neutral leather cleaner to remove residue, then let it dry fully before applying a tiny amount of appropriate conditioner.
My couch is near a window. How do I *really* protect it from sun damage?
Use UV-blocking window film or shades as your first defense. For aniline leathers, consider a conditioner with added UV inhibitors to help slow the inevitable fading caused by direct sunlight.
Is it true that some conditioners can actually *damage* my couch?
Yes. Using heavy oils or waxes on pigmented leather can create a greasy film, and silicone-based products can seal in moisture and cause the finish to peel. Always match the product to your leather’s finish type.
Final Thoughts on Leather Sofa Care
The best care is simple and consistent. Clean dust and spills promptly, then condition with a quality product once or twice a year to keep the leather supple and protected. These core steps reflect the best general methods for caring and treating leather items. They work across different leather types and uses.
Looking after a leather sofa well honors the material and the animal it came from. Building this care skill lets you enjoy its character for decades, far beyond any fast-fashion alternative.
Industry References
- How To Keep Real Leather Upholstery From Cracking – Furniture Fair | Cincinnati | Dayton | Louisville | Indianapolis
- Leather couch maintenance tips needed
- RH.COM • 800.762.1005 CARE SHEET | (08-04-23) LEATHER CARE INSTRUCTIONS
- r/CleaningTips on Reddit: It’s my first leather couch from Article Furnitures and I don’t know how to clean the middle pillow. No spill, just normal everyday usage 🙏
Harriet is a avid collector of leather goods such as purses, bags, seat covers, etc and has an extensive background in leather care, recovery, stain removal and restoration. She has worked for a number of years perfecting her leather care techniques and knows the ins and outs of restoring all kinds and types of leather products. With her first hand knowledge in leather care, you can not go wrong listening to her advice.
Furniture and Upholstery Care