How to Paint and Repaint Leather Bags and Shoes: Your Practical Guide
Published on: April 2, 2026 | Last Updated: April 2, 2026
Written By: Harriet Nicholson
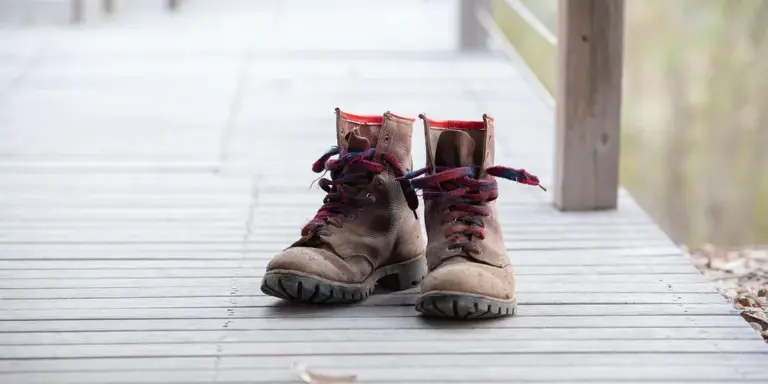
Hello Tannery Talk. That scuff on your favorite loafers or the faded corner of your trusted leather tote does not mean the end. I get it, the idea of painting leather can feel intimidating, but it is a skill you can learn.
This guide will walk you through the key steps, including preparing the surface correctly, selecting paints made for leather or faux leather, applying color evenly, and finishing with a protective seal.
I have revived many pieces in my care, from touching up June’s jacket to fully repainting worn bags, and I am here to share that hands on knowledge with you.
Can You Really Paint Leather and Faux Leather?
Yes, you can paint leather. You can also paint many types of faux leather and vinyl. It’s a fantastic way to revive a faded color or completely change the look of a piece. You can even use it to restore color to faded leather furniture.
Think of paint and dye differently. Paint sits on top of the material like makeup, while dye soaks in deep like a wood stain. This changes how the piece feels afterward. A painted surface will have a new, consistent layer of color you can feel. A dyed piece lets the natural grain and texture show through because the color is part of the material.
My jacket, June, has areas touched up with paint. On the cuff, you can feel a slight difference in texture compared to the original dyed leather. It’s not bad, just different. Paint is less flexible. If you bend a painted area sharply, it might crackle. Dye moves with the leather because it’s inside it.
Preparing the surface is the most important step. It’s like painting a wall. If you don’t clean and sand it first, the new paint won’t stick well and will peel off. The same is true for leather.
Choosing the Right Paint for Your Project
Picking a paint is like choosing the right tool. You wouldn’t use a sledgehammer to hang a picture. Match the paint to your project for the best results.
The main things to compare are flexibility, final finish, and how easy the paint is to control. Here are the most common types for bags and shoes.
Acrylic Leather Paints and Finishes
For most projects on shoes and bags, acrylic leather paint is your best, most reliable choice. It is designed for this job, especially when working with faux leather or genuine leather materials.
These paints dry to a flexible finish that bends with the leather, which is critical for items you wear and use. They come in every color imaginable and in a range of sheens. You can get a flat matte, a satin, or a high-gloss finish. Often, you buy the paint and a separate top-coat sealer in the sheen you want.
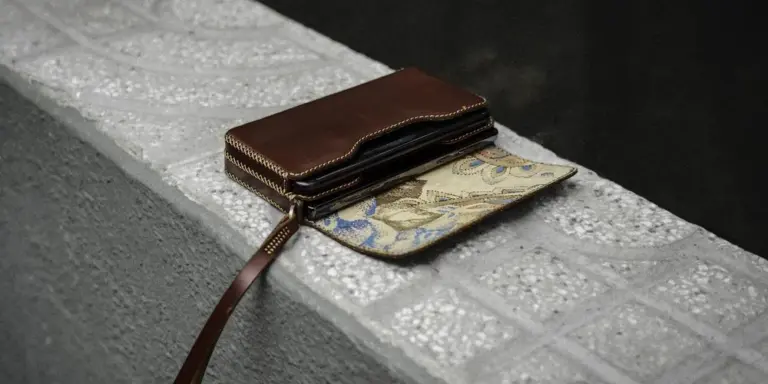
You apply them with a brush, sponge, or airbrush. They give you a lot of control for clean lines and details. For touching up scuffs on a dark bag or adding new color to Scout my wallet, this is what I would use.
Spray Paints for Leather and Faux Leather
Can you spray paint leather shoes? You can, but you must be very careful about the product you use.
Do not use standard hardware store spray paint. It will dry into a hard, plastic-like shell that will immediately crack when flexed. You must use spray paint formulated for flexible surfaces, like fabrics, vinyl, or leather.
The big advantage of spray paint is a perfectly smooth, even base coat, especially on larger items or faux leather. It’s great for covering a whole bag in one solid color. The downsides are significant. You have little control, making detailed work messy. Overspray gets everywhere, so you need a dedicated, ventilated spray booth (like a large cardboard box). You must apply very light, multiple coats to avoid drips.
Specialty Paints and Inks
Other options exist for specific effects. Artist’s acrylic inks or leather paint pens are excellent for fine line work, illustrations, or writing on leather. They flow easily for detail but aren’t meant for covering large areas.
No matter what paint you choose, this rule is absolute. Always, always test your paint on a hidden spot first, like an inside seam or the back of a strap. Check for adhesion and see how the color looks when dry. A test takes five minutes and can save your entire project.
How to Prepare Leather for Painting: The Clean Slate

I need to stress this first. Skipping preparation is the number one reason paint cracks, peels, or looks patchy. Think of it like trying to stick a poster to a dusty wall. It just won’t hold. A perfect paint job starts with a perfectly prepared surface.
Give the paint a clean, grippy surface to cling to, and you’ve already won half the battle.
Step 1: A Deep Clean
You must remove every trace of dirt, skin oils, and old conditioners. These create a barrier. For my jacket June, I use a gentle leather cleaner or a dab of saddle soap on a damp, soft cloth. Work in small circles to lift the grime.
Rinse the cloth and wipe away any soap residue. Let the piece dry fully. The leather should look matte and feel clean to the touch, not slick or waxy. When considering how to clean a leather coat at home without damaging it, focus on safe cleaners, moisture control, and drying tips for best results.
Deep cleaning removes the invisible films that cause paint to fail.
Step 2: Light Sanding and Deglazing
If your leather or faux leather has a shiny finish, you need to gently rough it up. This is exactly like sanding a piece of wood before you stain it. You’re creating microscopic grooves for the paint to lock into.
Use a fine-grit sandpaper, around 400 grit. Lightly scuff the entire area you plan to paint. You are not sanding it down, just dulling the shine. Wipe all the dust away with a slightly damp cloth or a tack cloth.
A lightly scuffed surface gives the paint the mechanical grip it needs to stay put.
Step 3: Applying a Primer or Base Coat
Primer is your insurance policy. Some flexible acrylic leather paints are self-priming, which is fine for refreshing a similar color. But for a major change-like painting a black bag white-or for painting faux leather, a dedicated leather primer is a must.
Apply one thin, even coat with a soft brush or sponge. Cover the entire sanded area. Let it dry completely, which usually takes about an hour. The primer creates a uniform, absorbent base so your top color looks true and adheres strongly.
Use a primer for dramatic color transformations or on synthetic materials to prevent the paint from simply sitting on top and rubbing off.
The Painting Process: Techniques for Bags, Shoes, and Art
Now for the satisfying part. With your canvas ready, you can apply color. Here are the methods I use for different goals.
Painting Leather Bags and Shoes: The Solid Color Method
This is for a full color change or touching up worn spots on functional items. You will need a quality acrylic leather paint.
- Stir your paint thoroughly. Pour a small amount into a dish.
- Using a soft brush or sponge, apply the first coat in thin, even strokes. Follow the leather’s natural grain if you can see it.
- Let this coat dry to the touch. This takes 15 to 30 minutes. Do not rush. Applying a second coat too soon will lift the first and create clumps.
- Apply a second coat. Most projects need two to three thin coats for solid, consistent color.
If you are painting over existing leather paint, check its condition first. If it’s not cracking, clean and lightly sand it just as you would raw leather. Then your new paint can bond properly. This is especially important when painting leather furniture to restore its color and finish.
Patience between thin coats is what builds a smooth, professional-looking finish that flexes with the leather.
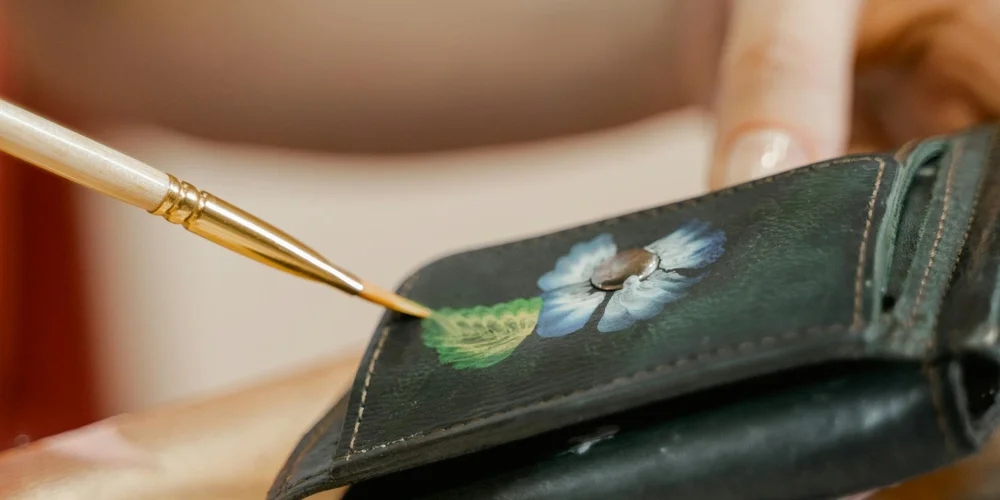
Creative Leather Painting Techniques
Once you’re comfortable with solid colors, try these artistic methods. They’re perfect for personalizing a bag or creating unique art pieces.
Feather painting gives you soft, blended transitions. Load a sponge with two different paint colors, dab them side by side, then lightly pat and blend them onto the leather. It creates a beautiful, watercolor-like effect.
Simple leather printing is easy with stencils. Secure your stencil firmly with painter’s tape. Then, use a stippling motion with a sponge or a small brush to apply the paint. Lift the stencil straight up for a crisp design. Be sure to use methods that won’t damage the material.
For a gradient or ombre effect, mix your paints to create intermediate shades. Apply the darkest color at one end, blending into the lighter shades while the paint is still wet using a dry, clean brush.
These techniques let you move beyond repair into the realm of creative restoration and personal expression.
Adding the Protective Topcoat
Do not skip this. A topcoat seals your work. It protects the paint from scuffs, water, and daily wear. For my saddle Mason, a good topcoat means the refreshed areas can withstand weather and use.
Wait at least 24 hours after your final paint coat. Then, apply an acrylic finisher or a flexible leather sealant with a clean brush. Use light, even strokes. One or two thin coats are enough. Let it cure fully according to the product instructions. These steps help lock in color and protect the finish. For durability and color protection, consider the best methods to seal leather dye paint.
The topcoat is the final, essential layer that locks in your color and makes the piece durable enough for real life.
Caring for Painted Leather Goods
Your work isn’t done when the paint dries. Long-term care is about protecting your effort. Think of the paint and finish as a new skin that needs different care than the leather beneath it.
For cleaning, always be gentle. Use only a soft cloth, slightly dampened with water, to wipe away surface dirt. Avoid any harsh chemical cleaners, solvents, or saddle soap, as they can break down the paint or leave a filmy residue.
This next point is key. You cannot condition painted leather in the traditional way. The oils and waxes in a regular leather conditioner cannot penetrate the painted seal. They will just sit on top, often creating a sticky, uneven mess.
Instead, your main maintenance task is to watch the protective topcoat. On high-wear areas like bag straps, shoe creases, or wallet edges, this clear coat will thin over time. Every year or so, apply a single, thin new layer of the same compatible acrylic finisher or topcoat to those spots. This refreshes the shield without needing a full repaint.
Fixing Common Painting Problems
Don’t worry if you run into issues. Most painting problems have a straightforward fix. I’ve corrected these on my own gear, like when the edge paint on Scout started to chip from being stuffed in a tight pocket.
How to Fix Peeling or Cracking Paint
Peeling usually points back to the start. The main causes are poor surface preparation, using a paint not meant for flexible materials, or constant heavy bending.
Here is how to make it right.
- Use a small, dull tool (like a toothpick or plastic spudger) to gently lift and remove all the loose, flaking paint. Do not scratch the good leather.
- Lightly sand the exposed area and a small border around it with very fine grit sandpaper (400+ grit). This roughs it up so new paint can grip.
- Apply a fresh layer of leather primer to this spot and let it dry completely.
- Spot-repaint the area, feathering the new color into the old. Finish with your topcoat.
This spot-repair method is often better than stripping and repainting the entire piece.
How to Remove Paint from Leather
Consider paint removal a last resort, for a major mistake or a botched job. It is risky. Strong removers can permanently dry out or stain the leather underneath. If you’re removing paint from leather furniture, upholstery, shoes, or other surfaces, choose methods that remove paint without causing damage. We’ll outline safe, damage-free approaches in the next steps.
For common acrylic leather paints, you can try a gentle method first. Dampen a cotton swab with isopropyl alcohol (rubbing alcohol) and test it on a hidden seam. If the paint softens and wipes away without damaging the leather’s color, you can proceed carefully on the main area. Work in tiny sections, and stop immediately if the leather itself seems affected. For stubborn or unknown paints, consulting a professional is the safest path, especially when you’re unsure about the paint’s quality and permanence.
Dealing with Stiffness
A freshly painted item will feel stiffer. That’s normal. You’ve added multiple new layers of acrylic, which are flexible but not as soft as bare leather. It’s like breaking in a new pair of stiff jeans.
The best solution is gentle, manual flexing. For a bag, open and close it repeatedly. For shoes, wear them around the house. Bend the leather by hand. The heat and movement from use will gradually soften the paint layers, restoring a more natural feel without causing cracks. Avoid using conditioners or oils to soften it, as they will not help and may cause problems.
Common Questions

Is there a difference between acrylic leather paint and standard artist’s acrylic?
Yes, acrylic leather paint contains flex agents to bend with the material, while standard artist’s acrylic dries rigid and will crack on flexible items. Always use paints formulated for leather to ensure durability and avoid finish failure.
How do I prevent a tacky or sticky feel after sealing painted leather?
A tacky finish usually results from applying the topcoat too thickly or not allowing full cure time. Apply thin, even coats and let the piece dry completely in a well-ventilated area before use.
What’s the safest way to paint detailed designs or logos on a bag?
Use a fine brush or leather paint pen for precision, and mask surrounding areas with painter’s tape for crisp lines. Test your technique on a hidden spot or scrap leather first to ensure control and color payoff.
Does faux leather require special preparation compared to genuine leather?
Faux leather often has a slick, non-porous surface that needs thorough deglazing with light sanding. A dedicated leather primer is essential here to create a grippy base for the paint to adhere properly, especially when painting leather furniture and sofas.
Caring for Your Painted Leather Creations
For any paint job, whether on shoes or a bag, a thorough clean and prime is your non-negotiable first step. That careful preparation creates a foundation that allows the color to adhere properly and last through years of use.
Choosing to restore leather is a direct vote for sustainable care and against waste. With each project you complete, from refreshing my jacket to rescuing a scuffed shoe, your practical skills and respect for the material will naturally grow.
Research and Related Sources
- Flexible Leather Paint for Shoes, Bags & Custom Projects · Angelus Direct
- Amazon.com: Kaps Dye Paint For Leather Shoes And Bags With Sponge And Brush, Super Color, 70 Colors (101 – White) : Clothing, Shoes & Jewelry
- Amazon.com: Angelus Acrylic Leather Paint, Best Sellers Kit, Flexible Paint For Shoes, Sneakers, Leather, Canvas, Furniture, and More – 12 Colors (1 oz Each)
Harriet is a avid collector of leather goods such as purses, bags, seat covers, etc and has an extensive background in leather care, recovery, stain removal and restoration. She has worked for a number of years perfecting her leather care techniques and knows the ins and outs of restoring all kinds and types of leather products. With her first hand knowledge in leather care, you can not go wrong listening to her advice.
Restoring Color and Re-Dyeing