How to Decorate Leather Without Harming It
Published on: March 29, 2026 | Last Updated: March 29, 2026
Written By: Harriet Nicholson
Hello Tannery Talk. You have a beautiful leather piece you want to personalize, but you’re worried about ruining it. That careful instinct is exactly where we should start.
This guide walks you through the entire process, from preparing the surface to sealing your finished art. We will cover the right tools, gentle methods like hand-tooling and stamping, and the crucial aftercare to protect your work.
I base this advice on years of hands-on work, conditioning pieces like my old saddle Mason and repairing the creases in my jacket June.
What Makes Leather So Easy to Hurt When You Decorate It?
Leather is not a uniform sheet of plastic. It’s a network of skin fibers holding natural oils and waxes, often with a protective topcoat. Think of it like a sponge wrapped in a thin, painted shell. Harsh chemicals, intense heat, or abrasive pressure don’t just sit on the surface. They can soak in or strip away the very things that keep leather flexible and strong.
Strong solvents can dissolve the finishes and oils, leaving the fibers dry and brittle. High heat from a tool can literally cook those fibers, making them shrink and harden permanently. Your goal with any decoration is to work with the leather’s nature, not fight against it.
Delicate Skin vs. Tough Hide
Not all leathers are created equal. Sensitive types, like aniline-dyed or suede, are like bare skin. Aniline leather has minimal pigment topcoat, so its beautiful color is vulnerable. Suede’s fuzzy nap is easily matted or stained. One wrong move can leave a permanent mark.
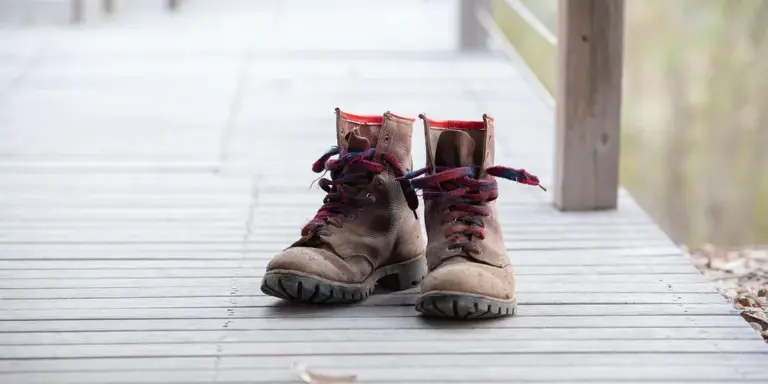
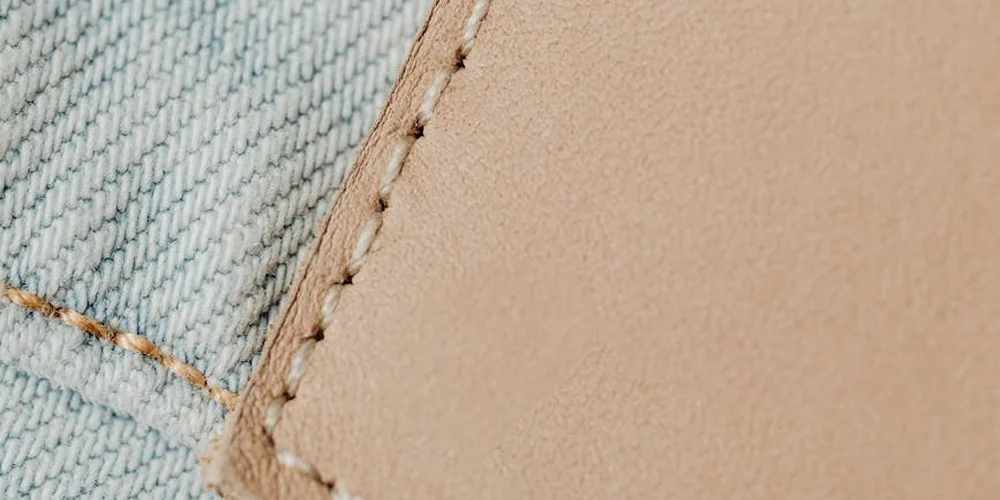
Sturdier leathers, like robust full-grain or pull-up leathers, are more like a well-worn work jacket. They have a dense grain and often a heavier finish. You can think of pull-up leather like your favorite pair of broken-in jeans-it changes character with stress and oil, which can be part of the design. Full-grain is like new, stiff denim; it’s tough but still needs care.
Leather from responsible tanneries that use quality hides and thoughtful tanning methods often has a more consistent structure. This integrity means it can better handle the stress of tooling, dyeing, or stamping without falling apart. It’s a reminder that supporting ethical sourcing isn’t just good for animals; it results in a more durable, workable material.
The First, Best Rule: Test Everything on a Scrap Piece
I never apply a new dye, stamp, or finish to a beloved piece like my jacket June or my saddle Mason without testing it first. Skipping this step is how heartbreak happens. It is the single most important habit you can build.
Here is how to test properly:
- Find the Right Scrap: Don’t use a scrap of stiff veg-tan to test something for a soft lambskin jacket. The scrap should be as similar as possible in type, thickness, and finish to your project piece. Old belt ends or sample swatches are perfect.
- Clean the Scrap: Prepare it exactly as you would the real item. Use a pH-balanced leather cleaner and let it dry completely. This removes any unseen residues that could affect your test.
- Apply Your Method: Do the exact decoration you plan to do. Use the same tool, medium, pressure, and dry time. If you’re painting, apply the paint. If you’re foil stamping, use the foil and heat.
- The Real Check – Wait and Feel: Let the scrap dry fully, preferably for 24 hours. Then, inspect it. Look for unwanted color changes or cracks. Most importantly, bend it, roll it, and feel it. Does it feel stiffer or gummy? If the leather lost its suppleness on the scrap, it will happen on your project.
Common Testing Mistakes to Avoid
- Using a Mismatched Scrap: Testing on chrome-tan when your project is veg-tan tells you nothing useful. The results will be completely different.
- Not Waiting Long Enough: Some effects, like stiffness from certain acrylics or sealers, only show up after the product has fully cured. Patience is key.
- Ignoring the Handfeel: A test can look perfect but feel like cardboard. If it doesn’t feel right in your hand, it won’t feel right as a bag, wallet, or jacket.
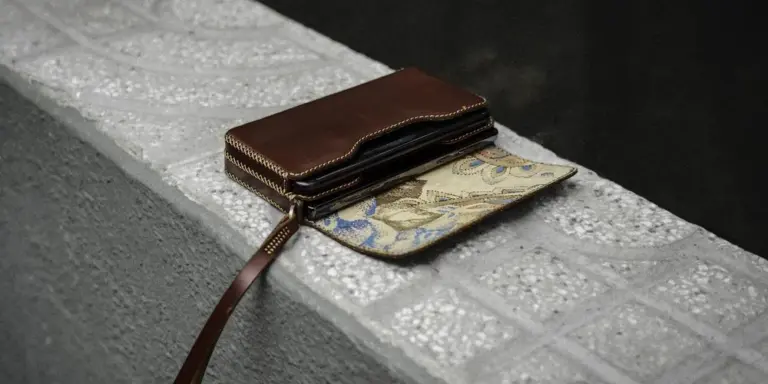
Consider this scrap piece your most valuable tool. It costs you nothing but a little time and can save a treasured item. Scout, my wallet, has a small, perfect brand on it because I practiced that hot-stamp technique on five different scraps first.
How Do You Print on Leather Without Causing Harm?
You can print on leather safely, but you must treat the material with respect. The goal is to add your design without drying out the fibers or creating a stiff, plastic-like layer on the surface.
The safest paths involve transfer methods or adapted digital printers, both of which keep harsh chemicals and extreme heat away from your leather’s surface. I think of it like applying a temporary tattoo versus using a permanent marker; one sits on top carefully, the other soaks in.
Always test your method on a scrap piece of the same leather first. This simple step saves pieces like my old saddle, Mason, from a botched experiment. If your test scrap feels stiff, cracks, or changes color badly, adjust your approach.
Using Heat and Transfer Papers
Heat transfer is a popular way to print complex images. You print your design onto special transfer paper with an inkjet printer, then use heat to move the ink onto the leather.
The key is controlled, gentle heat, as too much will cook the natural oils right out of the leather, making it brittle and weak. It’s like overcooking a good steak; what was supple becomes tough and dry.
Here is the basic process:
- Choose a transfer paper made for dark or light fabrics; it often works on leather.
- Print your mirror-image design onto the paper using a standard inkjet printer.
- Place the paper face-down on your clean, dry, flat leather piece.
- Set a household iron to a low-medium, synthetic fabric setting (no steam).
- Press firmly with even, circular motions for about 30-45 seconds.
- Let it cool completely before peeling the paper back slowly.
If the design is patchy, you didn’t use enough heat or pressure. If the leather underneath feels hot and stiff, you used too much. Always support the leather with a hard, flat surface like a table, not an ironing board.
Digital and Laser Methods
For a more direct print, some craft printers can be adapted. You attach a thin, rigid sheet of leather to a carrier paper that feeds through the printer. The biggest challenge is ink adhesion; you must use water-based inks and may need a pre-coat so the ink doesn’t bead up or smudge. Run several test prints on paper first to perfect your alignment and color settings.
Laser engraving is excellent for permanent, precise marks. Yes, you can laser engrave leather, but it is a delicate operation. The laser burns away a tiny top layer. Use the absolute lowest power setting that still marks the surface to avoid deep burns or charring that looks black and ashy. A light etch will give a clean, tan color, while high power will cut through and create a burnt smell.
Always, always do a test run on scrap to find the perfect speed and power combination. Engrave a small grid at different settings and see which one gives you a clear mark without damaging the back of the leather.
Painting and Drawing on Leather: A Guide to Lasting Color
Painting lets you add bold, personal art. The wrong paint will crack and flake the first time you bend the leather. I learned this the hard way on an old bag before I knew better. It especially matters when you’re dealing with delicate materials like suede.
You must use paints and dyes made specifically for leather, as they remain flexible as the material moves. Choosing the right paint depends on your leather type—faux vs genuine—and I’ll cover which paints work best for each in the next section. Regular acrylic craft paint is too rigid. Leather paint binds to the fibers, while dye soaks into them. Paint is for opaque coverage, dye is for translucent color that shows the grain. This helps ensure durability and flexibility for either material.
People ask if you can “tattoo” leather with permanent ink. The answer is yes, using special leather pens or diluted acrylic ink applied with a fine needle tool. It soaks in like a tattoo on skin, creating a permanent line that won’t rub off.
Your success depends entirely on preparation and sealing. Follow these steps:
- Clean: Wipe the area with a damp cloth and let it dry.
- Deglaze (for smooth leather): Lightly rub the area with a deglazer or pure acetone on a cotton ball to remove factory finishes. This helps the paint stick.
- Apply Color: Use your chosen tool (brush, pen, airbrush) in thin, even layers. Let each layer dry completely.
- Seal: Once fully dry, apply a clear leather topcoat or finisher. This protects your art from scratches and moisture.
Choosing Your Tools: Brushes, Pens, and More
The tool changes the feel of the finished piece. A soft brush lays down smooth, even paint but can leave subtle texture. A fine liner or detailing pen is perfect for crisp lines and lettering on a piece like my wallet, Scout.
For simple drawings, a leather-safe ballpoint pen or a fine-tip permanent marker can work, but you must seal it after or the ink will eventually fade or rub away on your hands.
Remember, anything you add sits on the leather. Thick layers of paint can make a soft jacket like June feel stiff in that one spot. For flexibility, always use thin coats and flexible sealants. The best work enhances the leather, it doesn’t fight against its natural character, especially when painting and repainting leather bags and shoes.
Adding Texture with Embossing, Stamping, and Engraving
Texture changes leather’s character completely. It adds depth and a personal touch that paint alone can’t achieve.
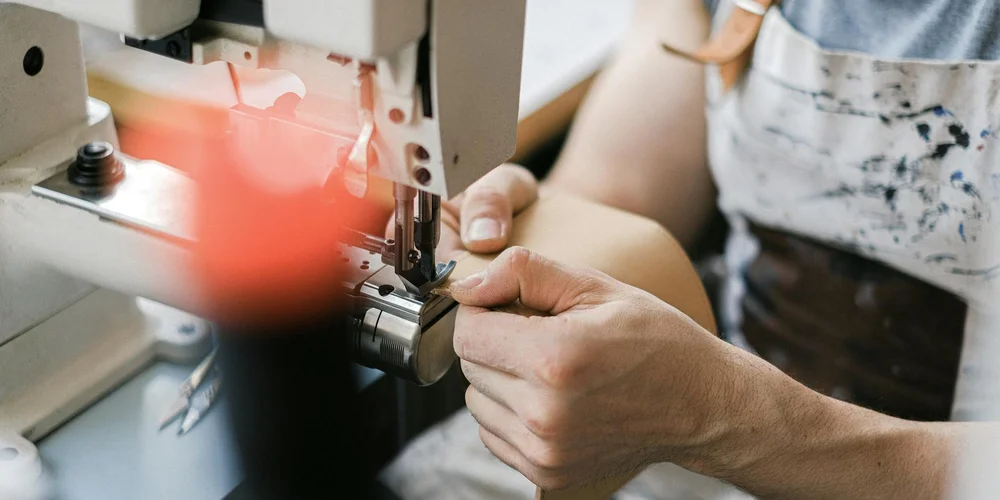
Stamping and embossing both involve pressing a design into the leather’s surface. You use metal stamps, presses, or hand-held tools. The difference is often in the technique. Stamping can be a single, definitive strike with a tool. Embossing might use a press to raise the leather around a design. Both require a mindful touch to preserve the material underneath.
The key is to work with the leather’s structure, not against it, to avoid crushing its natural grain and strength. For do treat work cowhide leather projects, apply this mindset from planning to finishing to keep the grain and durability intact.
Hot Pressing Versus Cold Work
Heat and pressure affect leather differently. Knowing which to use saves a lot of heartache.
Hot stamping uses a heated metal die. Think of it like branding cattle, but far more delicate. Preheat your tool, but don’t let it get red-hot. You want it hot enough to lightly sear the surface for a crisp impression, not burn it. Place it on the leather, apply a quick, firm press for 2-3 seconds, then lift straight up. The heat dries the area, so conditioning the spot afterward is non-negotiable to restore lost moisture.
Cold embossing uses pressure alone. For this, you often dampen the leather slightly with a sponge. This makes the fibers more pliable, like clay, so they hold the impression better. Use a mallet and a stamp, applying consistent force with each strike. Let the piece dry naturally, away from direct heat. This method is gentler and great for thicker pieces, like adding a subtle pattern to a saddle skirt.
Engraving cuts into the leather’s top layer. You can use manual swivel knives or, carefully, laser cutters. For manual engraving, keep your cuts shallow and precise; you’re sketching on the surface, not carving through it. Deep cuts weaken the leather. Always practice on a scrap piece first. If using a laser, use the lowest effective power setting in a well-ventilated area to avoid scorching and harsh fumes.
Can You Embroider on Leather and Add Other Embellishments?
You can absolutely embroider leather. My jacket, June, has a small embroidered repair that’s held for years. It just needs the right approach.
Use a sharp, thin needle designed for leather. A thick needle will leave permanent, gaping holes. A strong, waxed thread is your best friend-it moves through the holes smoothly and holds tight. For larger designs, a backing fabric on the underside is essential. It supports the stitches and prevents them from pulling through under tension.
For glued-on items like rhinestones or appliqués, your adhesive choice matters. A water-based leather glue applied in a very thin layer works best. A thick glob of glue will dry stiff and can seep through, staining the front. Apply sparingly, press firmly, and give it the full cure time listed on the bottle.
Sewing is almost always more durable than gluing for items that will see friction, like a patch on a sleeve or a bag handle. Gluing is perfect for static, decorative pieces. For June’s patch, I sewed the edges and used a tiny bit of glue to hold it flat while I worked-the best of both methods.
Sewing and Adhesive Techniques
Hand-stitching embroidery onto leather is a slow, rewarding process. Follow these steps for a clean result.
- Mark your design lightly with a white or silver pencil. Test the pencil on a hidden area first.
- If the leather is thick, pre-pierce your stitching holes with an awl or a fine drill bit. This gives you control and prevents needle deflection.
- Keep your stitches even in length and tension. Pull the thread snug, but don’t yank it, which can tear the holes wider.
Applying embellishments with adhesive is simpler but requires patience.
- First, clean the leather surface with a neutral cleaner and let it dry completely. Any oil or conditioner will prevent a good bond.
- Apply the glue in a thin, even layer to the back of the embellishment, not the leather.
- Press it firmly into place for at least 60 seconds.
- Do not move or stress the piece for the full cure time, which can be several hours. Rushing this is the most common mistake.
How to Care for Your Newly Decorated Leather Goods
The care starts the moment the final coat of sealant dries. Your decorated leather needs a gentler touch now. Think of it like caring for a detailed painting on a strong canvas. The leather itself still needs moisture and protection, but you must avoid anything that could smudge, lift, or fade the artwork, especially after sealing leather dye and paint.
For gentle cleaning, I use a barely damp, lint-free cloth. Wipe around the design, not directly over it unless absolutely necessary. Abrasive cleaners or stiff brushes are your enemy here. They can scratch delicate paints and foils right off the surface. A simple wipe with water is often all you need to remove surface dust and maintain the leather’s health without risking the design.
Take my wallet, Scout. After I had it monogrammed, my routine changed. I no longer just give it a quick rub with my palm. Instead, I use a soft, dry brush to dust out the creases and then follow with that damp cloth, carefully avoiding the stamped initials. It takes an extra minute, but it keeps both the leather and the personalization looking sharp.
Conditioning requires careful product selection. You need a conditioner that hydrates the leather without dissolving the inks or paints. Look for pH-balanced, neutral conditioners or creams. Understanding the science of how oils, waxes, and conditioners interact with leather helps you choose products that penetrate the hide and form a protective, flexible layer. This is why a balanced formula that hydrates without creating a heavy surface film works best on decorative areas. Avoid heavy oils and waxes initially, as they can cloud or penetrate decorative layers. Always apply conditioner sparingly to decorated areas, and blot away any excess immediately to prevent pooling on the design.
A protective topcoat is a smart final step for frequently handled pieces. Use a spray or cream finisher designed for decorated leather. These acrylic or resin-based products create a clear, flexible barrier against scuffs, moisture, and UV light, which is the main cause of fading. Make it a habit to check high-contact areas for early signs of wear. Catching a slight scuff early means a simple touch-up, not a full restoration.
Cleaning and Conditioning Without Damage
This routine is about prevention and precision. Rushing or using the wrong product can undo beautiful work in seconds.
Your safe cleaning routine has four key steps:
- Dry dust the entire piece with a soft bristle brush (like a horsehair brush). This removes abrasive grit first.
- Dampen a clean, white cotton cloth with distilled water or a neutral leather cleaner. Wring it out so it’s just moist.
- Spot test this cleaner on a hidden, decorated area first, like an inside seam. Wait for it to dry completely to check for any adverse reaction.
- Gently wipe the surface using light, circular motions. For the decorated zones, use the cleanest part of the cloth and barely skim the surface. Never soak the area.
Conditioning decorated leather is less about coating and more about targeted care. The goal is to keep the leather substrate supple so it doesn’t crack and distort the design on top. Apply conditioner very sparingly with your fingertips or a dedicated applicator cloth, focusing on the untreated leather surrounding the design.
If the decorated area looks dry, use the tiniest amount of conditioner. Rub it between your fingers to warm it, then gently pat it onto the design. Wait two minutes, then buff off all residue with a dry cloth. This method moisturizes the leather underneath without leaving a film on top that could attract dirt or dull the colors. For pieces like a tooled belt, I condition the plain backside thoroughly, which allows moisture to migrate through the leather fibers to the front, hydrating it indirectly without touching the artwork at all.
Quick Answers
How do I make sure a printed design won’t rub or flake off?
The key is in the final seal. Always protect your printed area with a light coat of a flexible, leather-safe acrylic sealer or topcoat.
What’s the biggest risk if I skip the test on a scrap piece?
You risk permanently altering the leather’s handfeel, making it stiff or brittle where it’s decorated. A test reveals this before you ruin your main piece.
When adding embellishments, is sewing always better than gluing?
Sewing provides superior, lasting strength for items under tension, like a handle. Use glue only for static, low-stress decorations and choose a water-based leather adhesive.
What’s the first thing I should do after adding any decoration?
Let it cure fully according to the product instructions, away from dust and direct heat. Then, gently condition any surrounding untreated leather to maintain its flexibility.
Finishing Your Leather Design Work
Always test your chosen method on a hidden area or scrap piece of the same leather first. This simple step is your best tool for protecting a valuable piece from a permanent mistake.
Good leather care means respecting the material’s origin by making pieces last. Practice new techniques on old belts or bags, building your skill to repair and embellish with confidence.
Sources and Additional Information
- Decorating Leather
- r/Leathercraft on Reddit: Outside of tooling/stamping, how do you decorate your leather (if at all)
- Decorative Leather Techniques – FavoredLeather
- How to decorate a leather bag without ruining it? : r/itabag
- 10 Simple and Stylish Ways to Decorate a Leather Bag
Harriet is a avid collector of leather goods such as purses, bags, seat covers, etc and has an extensive background in leather care, recovery, stain removal and restoration. She has worked for a number of years perfecting her leather care techniques and knows the ins and outs of restoring all kinds and types of leather products. With her first hand knowledge in leather care, you can not go wrong listening to her advice.
Restoring Color and Re-Dyeing