How Do You Remove Paint from Leather Without Damaging It?
Published on: March 9, 2026 | Last Updated: March 9, 2026
Written By: Harriet Nicholson
Hello Tannery Talk. You just spotted paint on your favorite leather couch, and that sinking feeling hits-can this be fixed without making it worse?
We’ll walk through identifying the type of paint, the crucial first step to take, a step-by-step removal method for common paints, and how to condition the leather afterward.
I’ve guided many leather pieces, from Mason my old saddle to a friend’s splattered jacket, back to looking their best.
A Quick Guide: Your First Response to Paint on Leather
When you see paint on leather, your first move decides everything. Panic is the real enemy here, not the paint. Take a slow breath and follow this plan.
Your first job is to stop the problem from getting worse, not to fix it completely.
What You Must Do Right Now
- For Wet Paint: Gently blot-do not wipe or smear-with the clean corner of a soft, dry cloth or paper towel. You are soaking up excess, not rubbing it in.
- For Dry Paint: Leave it alone. Let it cure fully for at least 24-48 hours. A fully dry, hard paint splatter is often easier to lift off than a gummy, half-dried one.
- Gather your tools: several soft, clean, lint-free cloths (microfiber or cotton), cotton swabs, and a small bowl of lukewarm water.
What You Must Never Do
- Do not scrub. Scrubbing grinds paint into the leather’s pores and can permanently scratch the surface finish.
- Do not reach for acetone, nail polish remover, or paint thinner as a first resort. These are aggressive and will strip the leather’s natural oils and dyes instantly.
- Do not run the leather under water. Soaking can cause stains, warping, and damage to the backing material.
Always start with the mildest, gentlest cleaning method and only get more specific if you need to. I think of it like cleaning my own hands: I use soap and water before I even consider a specialized solvent.
What Kind of Paint is It? (And Why It Matters)
This is the most important question. Using the wrong cleaner on oil paint is like using water to clean up cooking oil-it just won’t work, and you’ll make a bigger mess.
Water-Based Paints: Acrylic and Latex
Think of these like spilled milk. They are easier to clean if you catch them wet, and they respond well to simple, gentle cleaners.
- How to Spot It: Common in homes (wall paint, craft paints), cleans up with water when wet, has little to no chemical smell.
- Why It’s Easier: The paint’s binder dissolves in water. A damp cloth can often lift fresh, wet smears before they set.
For a dried water-based paint spot on my work apron, I start with a cloth dipped in lukewarm water and a tiny drop of pH-neutral leather cleaner, working in a small circular motion.
Oil-Based Paints: Enamel, Spray Paint, and Stains
Think of these like grease. They are tougher, designed to be waterproof and durable. They need a different approach.
- How to Spot It: Strong chemical smell, used on metal or outdoor furniture, requires mineral spirits for brush cleaning. It dries to a very hard finish.
- Why It’s Trickier: The paint’s binder is dissolved in a powerful solvent. You often need another, gentler solvent to break it down without harming the leather.
A Special Case: Nail Polish
Treat nail polish as its own category. It is a fast-drying lacquer, often acetone-based, which is a potent leather dye stripper.
With nail polish, you must proceed with extreme caution, as the remover is often as damaging as the polish itself. For a tiny drop on a shoe, I might use a cotton swab with a non-acetone polish remover, applied with pinpoint accuracy for no more than two seconds, followed immediately by blotting with a damp cloth to neutralize the area.
Your Toolkit: What to Use and What to Avoid
Your first move should always be the gentlest. I think of it like cleaning June, my old jacket. I wouldn’t start with harsh chemicals, so don’t start with them on your piece.
Here are the items to try first, in order of gentleness.
- Mild dish soap and water: A few drops of soap in a cup of warm water creates a safe, pH-balanced cleaner for most finished leathers.
- White vinegar solution: Mix one part white vinegar with one part water. It’s a mild acid that can break down fresh, water-based paint.
- Olive oil or mineral oil: These plant-based oils can sometimes soften and lift oil-based paints by breaking the bond. Use them sparingly.
- Microfiber cloths: These are essential. They are soft enough not to scratch and great for dabbing and gentle rubbing.
If the gentle approach doesn’t work, you have a few stronger options. You must use these with extreme caution.
- Rubbing alcohol (isopropyl alcohol): This is a potent degreaser. It can work on durable, heavily-finished leathers for stubborn spots.
- Acetone-based nail polish remover: Pure acetone is very aggressive. It evaporates quickly, which is its only saving grace for leather. Use it with a cotton swab for tiny, precise dots of paint.
- Commercial leather-safe paint removers: These are formulated products. They are your best bet for a stronger, specialized clean, but you must follow the label’s instructions exactly.
Now, what you should never grab from your garage or art supplies. These are for raw wood and metal, not for your leather sofa.
Paint thinner, mineral spirits, and turpentine will destroy leather finishes and strip out its natural oils, leaving the material dry, brittle, and cracked.
Avoid abrasive tools like scrub brushes, steel wool, or magic erasers on finished leather. They act like sandpaper, scuffing the topcoat and grain irrevocably. For textured leathers like suede, a clean, soft-bristled brush is the only safe tool for gentle agitation. No matter the leather type, it’s crucial to use the right products and cleaning methods to maintain its quality.
Is Rubbing Alcohol Safe for Leather?
The short answer is no, not really. It is not safe for leather in the way a proper conditioner is safe.
Think of rubbing alcohol as a last-resist defender, not your starting player. It’s a strong solvent and degreaser. This means it will attack the paint, but it will also attack the oils and finishes that keep your leather supple.
I only consider it for a tiny, targeted spot treatment on a durable, full-grain leather with a strong finish, like the leather on Mason, my old saddle. I would never use it on suede, nubuck, or aniline leather-these porous, delicate surfaces have no protective topcoat to shield them.
If you must use it, here is the safest method. Dab a tiny amount onto a clean microfiber cloth, never pour it on. Gently blot the paint spot for just a few seconds. Stop immediately and condition the area afterward with a quality leather balm to replace the lost moisture.
Does Vinegar Remove Paint from Leather?
It can help, but manage your expectations. White vinegar is not a powerful paint solvent.
What it does well is act as a mild acidic cleaner. It can soften and loosen fresh splatters, especially if they are water-based acrylic or latex paints. It works best when the paint is still somewhat damp.
Diluted white vinegar is most useful as the first step in a mild-to-strong cleaning process, helping to gently break the paint’s surface before you try anything else.
To use it, mix equal parts white vinegar and distilled water. Lightly dampen a corner of a microfiber cloth with the solution. Gently dab at the edge of the paint spot. Wait a minute to let it work, then try to wipe the paint away with a dry part of the cloth. Always follow up by wiping the area with a cloth dampened with plain water to remove any vinegar residue.
The Universal First Step: How to Test Any Cleaner
Before you touch that paint spot, you need to talk to your leather. I start every single repair or clean this way, from Mason’s saddle to a new bag. You are checking for a bad reaction, plain and simple. Think of it like testing a new skincare product on the inside of your wrist.
The rule is absolute. You must do a spot test on the specific piece you are cleaning. A method that works on my tough veg-tan wallet might cloud the delicate finish on your aniline sofa.
Finding the Perfect Test Spot
You need a hidden area that shares the same leather and finish as the damaged spot.
- For furniture, look under a cushion, on the backside of a seat, or along a bottom seam.
- For a jacket or bag, check inside a pocket seam or under a flap.
- For shoes, the inside tongue or a spot inside the shaft is ideal.
This spot is your safety zone. Any change here tells you everything.
The Step-by-Step Test Procedure
Gather a white cotton swab, your chosen leather cleaner (we’ll get to types next), and a clean, soft, white cloth. Work in good light. It’s crucial to choose the right cleaner for white leather to avoid any discoloration.
- Dampen (do not soak) the cotton swab with a small amount of your cleaner.
- Gently rub the swab on your hidden test spot in a small, dime-sized circle. Apply the same pressure you plan to use on the paint.
- Immediately blot the area dry with a clean part of your white cloth.
- Now, wait. Let the area dry completely. This can take 30 minutes to an hour.
This waiting period is non-negotiable; some reactions, like finish clouding, only appear as the leather dries.
Reading the Results: What to Look For
After the test spot is fully dry, inspect it closely with your eyes and fingers. You are a detective looking for clues of trouble.
- Color Transfer: Is there any dye on your white cloth or swab? The leather’s color should not bleed.
- Finish Clouding: Does the test spot look hazy, whitish, or dull compared to the surrounding leather? This means the cleaner is attacking the protective topcoat.
- Texture Change: Feel the spot. Is it rougher, raised, or stickier than the leather next to it? The surface should feel consistent.
If you see any of these signs, the test has failed. Your leather is telling you, “This cleaner is not for me.”
The Only Move After a Failed Test
Stop. Do not proceed to the paint stain. The goal is to remove paint without causing damage. Using a cleaner that fails the spot test guarantees damage.
A failed test isn’t a setback; it’s a successful discovery that prevented you from ruining your piece.
You simply try a different, milder cleaner on a new hidden spot. I often start with plain distilled water and a drop of pH-balanced leather soap. If that passes, I know I can move carefully. If even water causes an issue, especially when trying to treat water stains on leather, it’s time to consult a professional. This test protects your leather from you, and that’s the whole point.
How to Get Acrylic or Latex Paint Off Leather
Spills happen. Your first thought when you see paint on your leather is probably panic. I’ve felt it too. But take a breath. The most common household paints, like acrylic and latex, are water-based before they dry. This is your biggest advantage. You can learn how to get acrylic paint off leather without a trip to the specialist, if you act calmly and follow a gentle process.
The goal is to lift the paint away from the leather’s surface without driving moisture or chemicals deep into the hide. Rushing or scrubbing is what causes permanent stains or finishes to lift.
Step 1: Assess the Paint and Prep the Leather
Your approach changes completely depending on if the paint is wet or dry. Your immediate action sets the stage for everything that follows.
- For Wet Paint: Do not wipe. Immediately blot the area with a clean, absorbent cloth or paper towel. Use a light dabbing motion to soak up as much liquid paint as possible. Wiping will smear the paint and push it deeper into the leather’s grain.
- For Dry Paint: Do not apply any liquid yet. First, gently flex the leather piece back and forth over the painted spot. You want to hear or feel a slight cracking. This breaks the paint film into smaller pieces, making it much easier to lift off the surface. Think of it like cracking ice on a puddle before you can scoop it out.
Step 2: Prepare Your Gentle Cleaning Solution
You likely have what you need at home. Harsh solvents or acetone will strip your leather’s natural oils and finish. We avoid those.
- Primary Option: Mix a few drops of a mild, clear liquid soap (like castile or dish soap) into a cup of lukewarm water. You only need a weak suds.
- Alternative Option: A 50/50 mix of white vinegar and distilled water can work, especially on tougher, dried paint spots. Vinegar is mildly acidic and can help break the paint’s bond. Test this on a hidden area first, like an inside seam.
You will apply this with a cotton swab. The swab gives you pinpoint control.
Step 3: The Lifting Technique – Patience is Key
This is where most people go wrong. They scrub. We will roll.
- Dip the tip of a cotton swab into your cleaning solution and lightly dab it on a paper towel so it’s damp, not dripping.
- Apply the damp swab directly to the paint spot. Let it sit for about 60 seconds to soften the paint.
- Now, gently roll the swab across the paint. Do not scrub back and forth. Imagine you are using the swab to pick up crumbs. The rolling motion coaxes the softened paint to adhere to the cotton.
- Use a clean part of the swab or a new one as it gets dirty. You may need to re-dampen it with your solution several times.
Never scrub the leather, as the friction can damage the topcoat and permanently rough up the grain. On a piece like my old saddle Mason, I might spend 10 minutes just rolling and lifting a single dried paint splatter. It works.
Step 4: Remove Residue and Restore Moisture
Once you’ve lifted the main paint particles, you’ll have a faint residue or a damp area.
- Take a clean, soft cloth, dampen it with plain distilled water, and wring it out thoroughly. Wipe the entire cleaned area to remove any last traces of soap or vinegar solution.
- Buff the spot dry with another clean, absorbent cloth.
Leather is skin. Cleaning can dry it out. After the area is completely dry to the touch, apply a small amount of a pH-balanced leather conditioner. This replenishes the oils you might have pulled out and protects the spot. For a jacket like June, I’d condition the whole panel for an even look.
Common Pitfalls and Simple Fixes
If you see color coming off on your swab, stop. You are likely lifting the leather’s dye or finish, not just the paint. This means the paint or your cleaner is too strong for that type of finish. Your best move now is to stop the DIY process and consult a professional.
If a slight shadow of the stain remains after cleaning and conditioning, don’t despair. Often, after a few days and another light conditioning, the leather’s oils will redistribute and minimize the mark. The patina tells a story, and sometimes that includes a chapter where you saved it from a paint disaster.
Removing Oil-Based or Spray Paint from Leather
Oil-based or spray paint is a tougher opponent. It dries hard and bonds more firmly. My first move is always to soften it up, not attack it directly.
Grab some olive oil from your kitchen. Dab a little onto the paint splatter with a soft cloth. Let it sit for 10-15 minutes. The oil works to break the paint’s bond with the leather’s surface coating. You might see the paint start to look cloudy or waxy. That’s a good sign.
Patience and a gentle solvent are your best tools for hardened paint.
If the oil alone doesn’t lift it, you can move to a mild solvent. Use a cotton swab dipped in a small amount of rubbing alcohol. Work in tiny, gentle circles at the very edge of the paint spot. Test this on a hidden seam first, like inside a couch cushion flap. The goal is to dissolve just the paint, not the leather’s protective topcoat.
For car interiors, the process is similar but needs extra care. Open all the doors for ventilation. Most automotive leather has a heavy protective coating, which is good news for cleaning. Use the olive oil method first. For a follow-up, a neutral leather cleaner made for cars on a microfiber cloth is safer than alcohol. Wipe gently. The coated surface can handle a bit more than an aniline leather sofa, but you still don’t want to scrub the color off. For best results, see guides on products and techniques for cleaning, maintaining, and repairing genuine and faux leather car seats and other automotive interiors. These resources can help you choose safe cleaners and proper care steps.
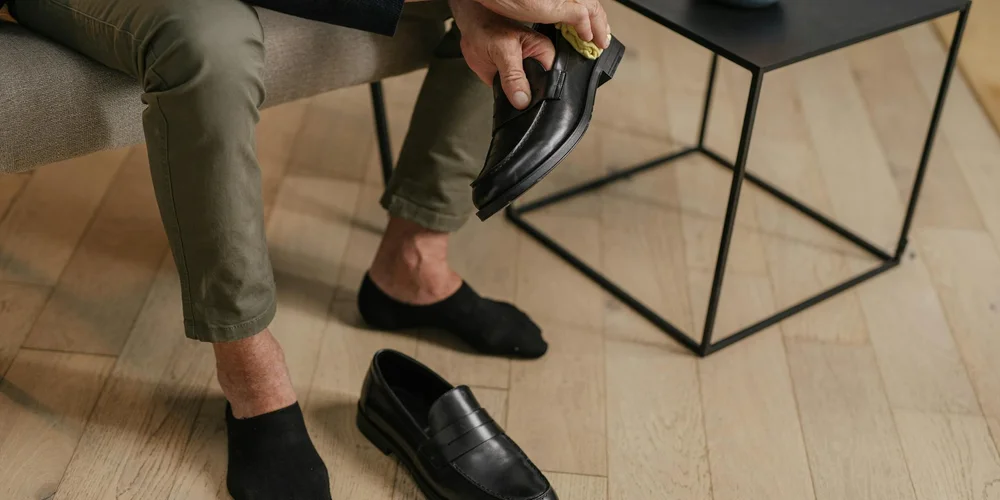
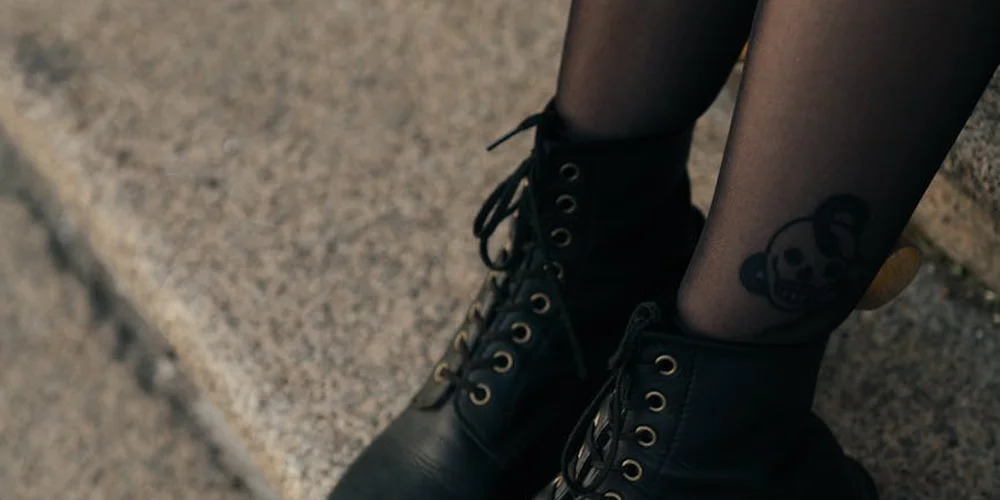
How to Get Paint Off of Leather Shoes and Boots
Footwear leather is built for punishment. Work boots and many shoes have a thick, durable finish. This lets you be a bit more firm in your approach. Think of my old work boots, they’ve seen mud, salt, and a few paint drips.
Start by softening the dried paint. Use a leather conditioner or even a dab of olive oil on the spot. Give it time to penetrate. For paint that’s already flaking, you can gently encourage it. Take a spoon, cover the back of it with a soft cloth, and use the rounded edge to lightly scrape at the flaky edges. Do not use the spoon directly. Do not dig.
Always follow a deep clean with a thorough conditioning to replace lost moisture.
After you’ve removed as much paint as possible, your leather will be thirsty. Any cleaner or solvent strips natural oils. Conditioning your shoes or boots is not an optional last step. Use a generous amount of a pH-balanced leather conditioner. Rub it in thoroughly over the entire item, not just the cleaned spot. This ensures even moisture and prevents a patchy look. Let them dry completely away from direct heat.
A common mistake is rushing. Applying too much pressure or solvent at once risks damaging the grain. If the paint isn’t budging after a few careful attempts, pausing is better than forcing it. Sometimes, a second round of conditioning and a very gentle scrape the next day does the trick.
Caring for Leather After Paint Removal
Getting the paint off is a relief. But the work isn’t done. Think of it like cleaning a deep cut on your skin. You stop the bleeding first, but then you need to moisturize and protect the area so it heals right. Your leather is the same.
The solvents and cleaners you used to lift the paint also strip away the leather’s natural oils. That area is now dry, stressed, and vulnerable. If you stop at cleaning, you leave that patch of leather brittle and more likely to crack over time.
Avoiding the “Clean Spot”
Never clean just the stained area. You will create a noticeable “clean spot” that looks different from the rest of the piece. The goal is a uniform appearance.
For a shoe or bag, clean the entire panel. For a sofa cushion, clean the whole cushion face. This evens out any slight color lift from cleaning and prepares all the leather for conditioning equally.
- Mix a small amount of a pH-neutral leather cleaner with lukewarm water, following the product’s instructions.
- Using a second, soft-bristled brush (not the one you used for paint removal), work the cleaner into a gentle lather over the entire surface.
- Wipe it away with a clean, damp cloth, rinsing the cloth often.
- Let the leather air dry completely, away from direct heat. This usually takes a few hours. Patience here prevents trapped moisture.
Restoring Life with Conditioner
Now comes the good part. This is where you bring the leather back to life. I do this for my saddle, Mason, twice a year without fail. Dry leather is hungry leather.
Choose a quality leather conditioner or balm. A product based on natural oils and waxes is often a safe bet for most leathers.
Apply conditioner to the entire piece, focusing on the dried-out area, using the same circular motion you would use to rub lotion into your skin. Be generous but don’t flood it. The leather should drink it in, not swim in it.
Here is how I condition Mason, and how you should treat your piece:
- Put a small amount of conditioner on a soft, lint-free cloth.
- Rub it into the leather using small, overlapping circles. You will feel the leather start to absorb it and become supple.
- Pay extra attention to the area where the paint was. You may need a second, lighter application there after the first soak in.
- Let the conditioner absorb for at least 30 minutes. Then, with a fresh part of your cloth, gently buff off any excess that remains on the surface. This prevents a sticky feeling.
The leather will often look darker while wet. This is normal. As it dries fully over the next day, the color will even out to a rich, nourished version of its original shade. The handfeel will be softer, more pliable, and protected. You’ve not just removed a stain, you’ve given the leather a fresh start.
Special Cases: Suede, Nubuck, and Delicate Finishes
Suede and nubuck have a soft, fuzzy surface called a nap. Think of it like the pile of a velvet cushion. This nap is beautiful but fragile. Liquids can stain it. Solvents can mat it down forever.
The golden rule for suede and nubuck is simple: never use liquid solvents or cleaners on a fresh paint stain. You will likely set the stain and crush the nap, creating a permanent, shiny dark spot.
Your first and often best tool is patience. Let the paint dry completely. Do not touch it while it’s wet. Once it’s dry, you can try to lift it mechanically.
- Take a dry, soft-bristled brush. A dedicated suede eraser block with a brush side is perfect.
- Gently brush back and forth over the dry paint flake. Use a light touch.
- You are not scrubbing. You are coaxing the flake to break apart so the bristles can lift it from the fibers.
I once saved a suede boot with a speckled drop of dried house paint this way. It took ten minutes of gentle, patient brushing, but the nap looked perfect after.
For any stain that is large, wet, or will not budge with dry brushing, my advice is firm. Take it to a professional cleaner who specializes in leather. The risk of ruining the entire piece is too high. A good professional has tools and solutions we simply don’t.
Can You Remove Nail Polish from Leather?
This question comes up often. A quick-drying splash of nail polish on a leather chair or bag feels like a disaster. Can you fix it? Yes, but you must proceed with extreme caution. Nail polish is a designed to be durable, and the removers are powerful solvents.
Removing nail polish is possible, but it is a last-resort, risky process that will almost certainly lighten the leather’s dye. You are trading a polish stain for a potential bleach spot. The goal is to minimize damage, because bleach can severely affect leather surfaces.
First, gather your supplies: a bottle of non-acetone nail polish remover, a pack of fine-tip cotton swabs, a clean white cloth, and your leather conditioner. It’s crucial to use non-acetone nail polish remover to avoid damaging the leather.
- The Hidden Spot Test is Non-Negotiable. Dab a tiny amount of the non-acetone remover on a swab. Apply it to a completely hidden area, like the underside of a cushion or an interior seam. Wait two minutes. Check for color transfer to the swab and any change to the leather’s texture or finish. If the leather discolors or gets gummy, stop. You cannot proceed.
- If the test spot is okay, work on the actual stain. Dip a fresh swab in the remover. Gently dab-do not rub-at the edge of the polish stain. You want to dissolve the polish and immediately blot it away with the clean cloth.
- Use a clean part of the swab and cloth with each dab. This prevents you from smearing dissolved polish back onto the leather.
- The moment the polish is gone, stop using the remover.
The area will look drier and lighter. This is expected. You must immediately condition that spot to replenish the oils the solvent stripped away. Apply a small amount of conditioner with a clean finger, let it absorb, and buff gently. The color may even out slightly as the leather re-hydrates, but a faint light spot may remain.
I had to do this on a small spot on an old leather desk blotter. It worked, but the area is noticeably lighter. I see it as part of its history now, a small scar from a rescued piece.
Quick Answers
I got paint on my car’s leather seats. Is the process different?
Not drastically, but be extra cautious. Automotive leather often has a durable coating, but aggressive cleaners can still strip color. Always start with the gentlest method, like a damp microfiber cloth with a drop of pH-neutral cleaner, and test first in an inconspicuous area like under the seat. Following these careful steps helps keep leather car seats clean and protected from sun damage, spills, and wear.
After cleaning, the spot looks drier and lighter. Did I ruin it?
Not necessarily; you’ve likely just stripped the area of its natural oils. This is why conditioning immediately after cleaning is non-negotiable. A quality leather conditioner will replenish moisture and often helps the color even out as the leather absorbs it.
Is white vinegar really a safe first try for all paint?
It’s a safe first step for fresh, water-based paints, but manage expectations. For cured oil-based or spray paint, vinegar will do little to nothing. Its primary role is as a mild acidic cleaner to loosen, not dissolve, and it must always be diluted and tested first.
Final Thoughts on Paint Removal
Getting paint off leather is always a test of patience. Your best approach is to start with the gentlest method, like a damp cloth and saddle soap, and only move to stronger options if you must.
Taking care of your leather this way shows respect for the material and its origin. Every piece you clean with a gentle hand lasts longer, which is the most sustainable practice you can have at your bench.
Deep Dive: Further Reading
- r/AskACobbler on Reddit: Removing Dried Paint from Leather?
- How to Remove Paint From Leather : Our Guide to Clean Paint off Leather – Vintage Leather Sydney
- 9 Working Ways to Remove Paint From Leather – Moonster Leather Products
- How to remove paint from leather?
Harriet is a avid collector of leather goods such as purses, bags, seat covers, etc and has an extensive background in leather care, recovery, stain removal and restoration. She has worked for a number of years perfecting her leather care techniques and knows the ins and outs of restoring all kinds and types of leather products. With her first hand knowledge in leather care, you can not go wrong listening to her advice.
Furniture and Upholstery Care