How Long to Break In Leather Boots? Your Realistic Timeline and Care Guide
Published on: February 19, 2026 | Last Updated: February 19, 2026
Written By: Harriet Nicholson
Hello Tannery Talk. That stiff, new-leather pinch is a common worry, and you’re right to ask how long until your boots mold comfortably to your feet.
This guide will explain how leather naturally stretches, a realistic week-by-week timeline, and the gentle care that protects your boots during the process.
My advice comes from years of hands-on experience conditioning, repairing, and patiently breaking in leather goods, from hard-worn saddles to supple jackets.
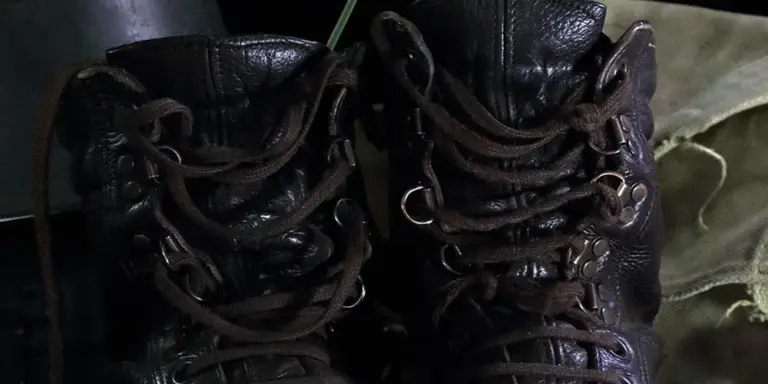
What “Breaking In” Your Leather Boots Actually Means
Breaking in your boots is not just about making them bigger. It is the leather slowly learning the unique shape of your foot. The upper leather molds to your instep and toes. The internal lining and any stiffeners soften. Think of it as the boot settling in, becoming a part of you.
You know that feeling when you slip on a favorite leather jacket? My jacket, June, felt stiff at first. Now, it moves with me, the calfskin soft and creased in just the right spots. Breaking in boots is the same journey. The goal is that perfect, personalized comfort, not simply stretching the leather out.
Stretching does happen, but it is a side effect of the molding process. If a boot is truly too small, no amount of breaking in or stretching will fix it. This process is about conformity, not enlargement. You are guiding the leather to accommodate your foot’s contours for a snug, supportive fit.
What Determines How Long Your Boots Will Take to Break In?
There is no single timeline. A soft suede boot might feel good in a week. A thick work boot could take a month of steady wear. The time depends on a few key things, much like how my saddle, Mason, took years to develop its deep patina through consistent use.
Leather Type and Finish
The tanning process and surface treatment set the stage. Vegetable-tanned leather, like on my wallet Scout, starts firm and molds slowly, forming a durable shape. Chrome-tanned leathers are often softer from the start. Special finishes change the game. When you understand the different tanning and finishing methods, you can appreciate how they affect the leather’s feel and durability.
Stiff, full-grain leather will resist at first but mold beautifully over time, while pre-oiled or nubuck leathers are more forgiving. Avoid trying to forcefully stretch certain finishes. For instance, patent leather has a plastic coating that can crack if stretched aggressively; it is better suited to gentle molding from wear, not forced stretching.
Leather Thickness
This is straightforward. Thicker leather takes longer to soften and conform. A 2mm thick boot upper will break in faster than a 3.5mm one. It is the difference between bending a thin piece of paper and a thick cardboard. Feel the leather. If it is substantial and rigid, plan for a longer break-in period with shorter wearing sessions to start.
Boot Construction
How the boot is put together matters. A Goodyear welted boot with a stiff leather midsole and shank is built for longevity, which means a firmer initial feel. Cemented construction or boots with more flexible synthetic components might soften quicker. Check the sole. A thick, rigid lug sole will flex less at first, adding to the break-in time for the entire structure.
A Simple Care Step During Break-In
As you wear them, leather loses moisture. Here is a simple step to support the process safely.
- After the first few wears, let the boots rest and air out for a day.
- Use a soft brush to remove dust.
- Apply a small amount of a neutral, pH-balanced leather conditioner to a clean cloth.
- Rub it gently into the stress points-like the vamp and ankle collar-to keep the leather supple and prevent drying cracks.
- Let it absorb fully before wearing again.
Conditioning during break-in keeps the leather healthy, allowing it to mold without becoming brittle. A common mistake is over-conditioning, which can oversoften the leather and weaken its structure. Less is more. The science of leather aging explains why it cracks and how to combat it. This knowledge guides smarter conditioning.
Your Own Foot and Habits
Your unique foot shape, arch, and how you walk are the biggest variables. A boot might break in unevenly if you have a high instep. Your wearing habits are crucial. Wearing new boots for a full eight-hour workday on day one is a recipe for blisters and discouraged progress.
Start slow. Wear them for an hour or two indoors. Gradually increase the time over a week or two. This gives the leather and your feet time to adjust together. Thicker socks can help cushion and apply gentle, consistent pressure during these short sessions.
A Practical Break-In Timeline: What to Expect Week by Week
You can expect most leather boots to require between 20 and 50 hours of total wear to feel truly broken in. This isn’t a single event but a process of the leather fibers gradually softening and molding to the unique shape of your foot. Think of it like a slow, gentle conversation between you and the boot.
The timeline depends heavily on the leather’s thickness, the boot’s construction, and how often you wear them. Wearing them for two hours a day is far more effective than one eight-hour marathon once a week.
The Three Stages of Breaking In Your Boots
All boots go through a similar journey. Knowing these stages helps you manage expectations and care for the leather properly along the way.
Stage 1: Initial Firmness (First 5-15 hours)
This stage is all about newness. The leather is stiff, the soles are rigid, and every seam feels pronounced. It’s normal to feel some pressure on your instep, heels, and the widest part of your foot. Discomfort is common, but sharp, pinching pain is a sign the boot may be the wrong size or last for your foot.
Wear the boots indoors for short periods-an hour or two at most. This lets the leather warm and begin to flex without the stress of a full day’s activity. Thicker leathers, like the kind on my saddle Mason, start out very firm but form a incredibly durable mold over time.
Stage 2: Gradual Softening (Next 15-30 hours)
You’ll notice a real shift here. The leather starts to yield and develop flex points at the ankle and ball of the foot. The initial tight spots begin to ease. This is when the boot starts to feel like it’s yours. This is the perfect time for the first application of a quality leather conditioner, as the flexing fibers are ready to absorb moisture.
Apply a light coat of conditioner to the stress points to keep the leather supple and prevent it from drying out and cracking. For ongoing care, we’ll cover how often to condition leather boots and the best application method in the next steps. You can now start wearing them for half-days or on shorter, less demanding outings.
Stage 3: Final Customized Fit (Beyond 30 hours)
The boots now move with you. The leather has softened and conformed, and the footbed has compressed to match your arch. They feel protective and secure, not restrictive. The patina-the unique creasing and color variation-begins to tell the story of your wear, much like the light creases on my jacket June. At this stage, regular cleaning and conditioning every few months will maintain this perfect fit for years.
Work Boots & Heavy Leather
Boots made for construction, logging, or ranch work use thick, rugged leathers for maximum protection. These are the slowest to break in. Expect the full 40-50 hours or more. The break-in is a commitment, but the payoff is a fit that feels like a second skin under tough conditions. Never try to speed this process up with extreme heat or harsh chemicals; you’ll only damage the leather’s fibers.
Dress Boots & Finer Leathers
Dress boots, chelseas, or boots made from calfskin or supple cowhide break in much faster. The timeline is often closer to 20-30 hours. The leather is thinner and more pliable from the start, similar to the veg-tan leather on my wallet Scout. While they soften quickly, be gentle; finer leathers can be more prone to showing scuffs and deep, permanent creases if forced. Use a delicate hand when conditioning and always use shoe trees when not worn to help them hold their shape.
How to Break In Leather Boots the Right Way: A Gentle Method
Rushing this process is the fastest way to hurt your feet and damage your boots. I treat every new pair like a conversation with the leather, not a battle. The goal is to coax the fibers to relax and mold to you.
This method works for my rugged Mason, your work boots, or a new pair of hikers. Patience here builds a foundation for years of comfortable wear.
Start Slow with Short Walks
Your first day in new boots should not be a long hike. Think of it as a brief introduction.
- Wear them indoors for 30-60 minutes on your first attempt. Just walk around your home.
- Focus on how they feel. Is there a sharp pinch on your little toe? Does the heel rub with every step? Make mental notes.
- Repeat this for a few days, gradually adding 15-30 minutes each time.
- When you can wear them indoors for two hours without major hotspots, take them outside for a short walk around the block.
Progressing slowly lets the leather’s fibers stretch gradually without causing painful stress points or cracks. A common mistake is wearing them all day on day one, which often leads to blisters and a stiff, resentful pair of boots.
Use the Right Socks
Socks are your primary tool for managing friction and fill. The wrong pair can sabotage your efforts.
- For a snug boot that needs to stretch, wear the thickest socks you plan to use with them. This applies gentle, even pressure.
- For a boot that is mostly comfortable but rubs in one spot, a thin, smooth sock made of synthetic or merino wool can reduce blister-causing friction.
- Never break in boots with no-show or dress socks. You lack padding and increase the risk of raw, painful blisters.
I learned this with my jacket, June. Wearing a thin layer underneath while it was new prevented the seams from chafing. The same principle applies to your feet.
Target Specific Pressure Points
Even with a perfect fit, one spot might rub. This is normal. The key is to address it before it becomes a blister.
For heel or ankle rubbing, apply a moleskin pad or a blister-specific adhesive bandage directly to your skin, not the boot. This creates a protective, cushioned barrier. Applying a barrier to your foot protects the leather’s interior finish and prevents damage from sweat and abrasion.
For a persistent, tight spot on the boot itself (like over the pinky toe), you can condition the leather from the outside to help it become more pliable. Use a tiny amount of a neutral leather conditioner on the area, rub it in thoroughly, and let it dry completely before wearing.
Avoid “quick fix” methods like heating the leather with a hairdryer while wearing them. Excessive, direct heat can dry out the leather’s natural oils, making it brittle over time. Proper care and maintenance is key to preserving leather’s durability.
After each short wear session, especially in the early days, take a moment to condition the boots if they feel dry. A light application of a pH-balanced leather conditioner keeps the fibers supple and ready to adapt during the next wear. My wallet, Scout, got its buttery softness from regular, light conditioning after the initial break-in.
Caring for Your Boots During the Break-In Process
Your boots are changing, and they need support. The leather is under stress, forming to your feet. Good care during this time makes the process smoother and builds a stronger foundation for years of wear.
When and How to Condition (And a Note on “Break-In Oil”)
Many people reach for a heavy oil or grease to speed up stretching. I understand the impulse, but it’s often a mistake. A heavy oil can oversaturate the leather fibers, weakening them and causing the boot to stretch unevenly or become too soft to hold its structure.
Use a light, dedicated leather conditioner instead of a heavy oil, especially for the first few treatments. Think of it like applying lotion to dry skin-you want to nourish, not drown it. My old saddle, Mason, taught me that a little consistent care prevents big problems later.
Here is a simple, safe routine:
- First Conditioning: Apply a light conditioner before the first few wears. Use a clean cloth and rub a thin, even layer over the entire boot, focusing on high-flex areas like the vamp (over your instep) and the ankle.
- Ongoing Care: Condition again after the first 15-20 hours of total wear, or whenever the leather looks dry and thirsty. You should be able to press the leather and see it slowly return, not stay creased.
- Technique: Less is more. Apply, let it soak in for an hour, then buff off any excess with a dry cloth. This keeps the leather supple without attracting excessive dirt.
Cleaning After Wear
Dirt and salt are abrasive. When ground into soft, stretching leather, they act like sandpaper, wearing down the grain and creating weak spots.
A quick, gentle clean after each wear is the best thing you can do for your boots’ long-term health. This simple habit keeps the pores of the leather open and ready for conditioning. It’s important to use proper cleaning methods to avoid damaging the leather.
Follow these steps:
- Remove the laces and insoles. Let everything air out separately.
- Use a soft, dry horsehair or bristle brush to knock off dry mud and dirt. Always brush from the heel toward the toe, following the natural grain of the leather.
- For salt stains or light grime, use a slightly damp microfiber cloth. Wipe the leather down and follow with a dry cloth.
- Only use a dedicated, pH-neutral leather cleaner for heavier soil. Harsh soaps or household cleaners will strip the leather’s natural oils when it needs them most.
Proper Drying and Storage
Never put damp or sweaty boots near direct heat. Heat from a radiator, fire, or hairdryer will bake the leather, making it brittle and prone to cracking. It forces the leather to dry too fast and shrink, fighting the stretch you’re trying to achieve.
Slow, air-drying at room temperature is the only safe method for leather boots. My jacket, June, would have been ruined years ago by rushed drying after a rainstorm. The same patient, room-temperature approach works for leather jackets and shoes too.
Do this instead:
- After cleaning, stuff the boots with crumpled paper or shaped boot trees. This absorbs moisture from the inside and maintains the boot’s shape as it dries and stretches.
- Place them in a well-ventilated area, away from sunlight and heat sources. Let them dry for a full 24 hours if they are very damp.
- For storage, keep them in a cool, dry place. Use boot trees or the paper stuffing to help hold their form between wears, which supports the new shape they are taking.
Common Break-In Problems and Simple Solutions
Even the best boots can cause a little trouble. The goal isn’t to suffer, it’s to guide the leather into a new shape. Here are the most common hiccups and how to solve them.
Blisters are the classic sign of friction. This often means the boot is stiff right where it bends with your foot. The leather needs to become more pliable. For my jacket June, softening a stiff seam meant targeted conditioning. The same trick works for boots.
- Apply a small amount of leather conditioner just to the stiff area causing the rub, like the back of the heel or the ankle bone.
- Let it soak in for an hour, then wear the boots with thick socks around the house for a short period. The conditioner softens the fibers, letting them mold to you with less friction.
- Always protect your skin. Use a specialized blister plaster or even a simple bandage over the hotspot to eliminate rubbing while the leather adapts.
A persistent squeak can be frustrating. It usually comes from two dry leather surfaces rubbing, like the tongue against the vamp. You need to introduce a bit of lubrication.
Lightly dusting some pure talcum or baby powder between the leather layers where the squeak occurs often silences it immediately by reducing dry friction.
If one spot, like the little toe, remains painfully tight, you need focused pressure. A boot stretcher is the right tool. You can find simple two-way stretchers or models with plastic “bumps” that target specific areas like a bunion.
- Spray the tight spot inside the boot with a mix of 50% water and 50% rubbing alcohol (this helps the fibers relax without over-wetting).
- Insert the stretcher and expand it just until you feel firm pressure.
- Leave it for 24-48 hours, then check the fit. Repeat if necessary, always letting the boot dry completely between sessions.
In online communities, a popular and gentle method for overall tightness is the “bag trick.” Fill two sealable plastic bags with water, place one in each boot, and put the boots in the freezer overnight. As the water freezes and expands, it gently stretches the leather. It’s a slow, low-risk method many find effective for a general snug fit.
Can All Leather Boots Be Stretched? Understanding the Limits
So, can you stretch leather boots? Usually, yes. But how much, and how safely, depends completely on what they’re made of.
Full-grain and quality corrected-grain leathers respond best. Think of my old saddle, Mason. That thick, full-grain leather is meant to flex and form over time. These leathers have natural fibers that can relax and expand with careful conditioning and wear. Pull-up leathers, which lighten when stretched, are also very malleable. They’ll stretch, but the color change is part of their character, like worn denim.
Some materials have hard limits. Patent leather has a plastic coating that can crack or peel under stretching pressure. Suede and nubuck can be stretched slightly, but you risk damaging the delicate nap. Boots with extensive synthetic lining, stiff plastic heel counters, or cemented (not stitched) construction often resist stretching and may be damaged by force.
Stretching is about the fibers, not the finish; if the boot’s structure or coating is rigid, you will hit a firm limit.
What if your boots resist stretching? First, look inward-literally. A different insole can take up volume and improve fit without touching the leather. A thinner sockliner can create immediate space. If the issue is length, however, no amount of stretching will help; boots need to be the right size from the start.
For valuable or stubborn boots, a professional cobbler is your best ally. They have powerful, controlled stretchers and the expertise to assess construction risks. They can often stretch a boot half a size in specific areas without harming it. It’s a smart investment to avoid ruining a good pair of boots with guesswork.
When to Think About a Professional Break-In Service

Doing it yourself is often the right call. You learn the feel of your boots and build that bond. But sometimes, a pro is the wiser choice. This is for very stiff leather that won’t budge, or for boots that are a significant investment. If you’ve tried gentle methods and still face pain points or you’re worried about damaging a pricey pair, a professional service can be a smart safety net.
A professional break-in service uses controlled techniques to relax and stretch the leather more aggressively than you safely can at home, saving you from the worst of the discomfort and potential for error.
What the Service Involves
A cobbler or leather specialist won’t just wear your boots. They use specific tools and processes. Typically, they will assess the leather type and construction first. Then, they might use a combination of techniques.
- Controlled Conditioning and Warming: They apply conditioners or use gentle heat to make the leather more pliable before stretching.
- Mechanical Stretching: Using adjustable boot stretchers, they can target specific pressure points like the toe box or the instep. Some services even have stretchers that simulate a walking motion.
- Spot Work: They can focus on one tight area without over-stretching the whole boot, something very hard to do by just wearing them.
Think of it like taking my jacket, June, to a specialist for a precise repair. I could try patching it myself, but a pro has the right tools and knows exactly how the calfskin will react. The goal is a custom fit without the guesswork.
Typical Cost and Timeline
Costs vary by location and boot complexity. For a standard pair of leather work boots or heritage-style boots, you might expect a range. A simple, overall stretch often costs less than a complex job targeting multiple specific spots.
- Basic Stretch: This is for general tightness. It might take 1-2 days in the shop and cost a modest fee.
- Complex/Spot Stretching: For boots with a very rigid toe or a tight heel counter, the process is more involved. It could take several days and cost more, sometimes approaching a significant percentage of the boot’s original value.
The timeline is usually a matter of days, not weeks, making it a fast track to comfort if you need the boots ready for an event or work. Always ask for an estimate upfront, as prices for stretching exotic leathers or boots with delicate finishes will be higher.
DIY vs. Professional Choice
How do you decide? It comes down to risk, value, and patience.
Choose DIY if your boots are of moderate value, the leather is supple, and you have the time for a gradual break-in. The process itself is rewarding. You get the satisfaction of molding them to your feet personally, just like breaking in my old saddle, Mason. It costs little more than your time and a bit of conditioner.
Choose a professional service in a few clear situations:
- The boots are very expensive or made from a fragile leather you don’t want to experiment on.
- The discomfort is localized and severe, like a pinching pinky toe that doesn’t improve with wear.
- You’ve tried safe DIY methods and seen no progress, indicating the leather is exceptionally tough.
- You need them wearable for a specific date and can’t afford a long, painful break-in period.
On community forums, users often share two main outcomes from professional services. Many report great success with stubborn boots, especially those with thick, waterproof leather or composite toes. The common warning is to communicate very clearly with the cobbler about exactly where the boot hurts. A few stories mention boots being over-stretched, making them too loose. This highlights the need to find a reputable professional with experience in quality footwear.
For most boots, your own patience is the best tool. But for the exceptionally stiff or valuable pairs, a skilled professional provides a controlled shortcut that protects your investment.
Common Questions
I see “break-in oil” recommended online. Is that better than conditioner?
Heavy oils can oversaturate and weaken leather fibers. For break-in, a dedicated, light leather conditioner applied sparingly to stress points is the superior preservation method.
How can I protect my heels from blisters without damaging the boot’s interior?
Apply protective bandages or moleskin directly to your skin, not the boot lining. This creates a barrier that safeguards both your foot and the leather’s interior finish from abrasion and sweat damage.
My boots are stiff as boards. Should I just send them for a professional break-in service?
For exceptionally thick or rigid boots, a professional service is a wise investment. They use controlled mechanical stretching to safely expedite the process, reducing your discomfort and risk of self-inflicted damage.
On forums, people swear by home remedies. What’s your take as a conservator?
Many DIY methods, like the frozen water bag trick, are gentle and low-risk for general snugness. However, avoid any technique involving direct, high heat, as it permanently dries and damages the leather’s structure.
Will all leather types stretch and mold the same way?
No. Full-grain leather molds beautifully with time, while patent leather or boots with rigid synthetic components have very little give. Always consider the material and construction before attempting any forced stretch.
Final Thoughts on Your Boot Journey
Breaking in leather boots is a conversation, not a command. The best results come from consistent, gentle wear and proper conditioning, never from forcing a fit. Proper methods to soften and break in leather boots.
Treating your boots as long-term companions encourages mindful consumption. Using quality conditioners and learning basic repair skills honors the material and builds your confidence in caring for all leather goods. Exploring the best leather care polishing techniques helps with maintaining and restoring the appearance of leather footwear.
Citations and Authoritative Sources
- How to Break in Boots Properly: Dos and Don’ts | Overlook Boots
- The Do’s and Dont’s of Breaking In a New Pair of Leather Boots
- Breaking In Leather Boots: Tips & Techniques for a Perfect Fit
- How to Break In Leather Boots – Drew’s Boots
- How Do I Break In Leather Work Boots?
Harriet is a avid collector of leather goods such as purses, bags, seat covers, etc and has an extensive background in leather care, recovery, stain removal and restoration. She has worked for a number of years perfecting her leather care techniques and knows the ins and outs of restoring all kinds and types of leather products. With her first hand knowledge in leather care, you can not go wrong listening to her advice.
Boot and Shoe Care