How to Care for and Polish Leather Shoes: A Step-by-Step Guide
Published on: March 17, 2026 | Last Updated: March 17, 2026
Written By: Harriet Nicholson
Hello Tannery Talk, seeing scuffs or dryness on your favorite leather boots can be disheartening. With a few trusted techniques, you can restore their beauty and keep them looking great for years.
We will cover how to clean leather safely, the right way to condition it, methods for a deep, even polish, and simple habits to prevent future damage.
As a leather care specialist, I have maintained everything from daily wear items like my wallet Scout to heavy use gear, giving me practical insight into what really works.
Understanding Your Leather: The First Step to Proper Care
You would not wash silk the same way you wash denim. Leather is the same. Knowing what type of leather you have tells you exactly how to care for it.
The Four Main Types for Shoes
Think of full-grain leather like my old jacket, June. It’s the top layer of the hide, with all its natural grain and markings intact. Full-grain is the most durable and develops a beautiful patina, a story of its use, over time. It loves conditioner and shows its history proudly.
Corrected-grain leather has been sanded or buffed to remove imperfections and is often given a uniform finish or coating. It looks very consistent but won’t develop a deep patina. Care is more about preserving that topcoat.
Suede is the fuzzy underside of the hide. Nubuck is the top grain, lightly sanded to create a velvety surface. Both are delicate. They hate water and need specific brushes and protectors, never standard polish.
How Tanning Changes the Game
How the hide was cured matters just as much. Vegetable-tanned leather, like my wallet Scout, is tanned with natural materials like tree bark. It starts light and darkens beautifully with age and oil. Veg-tan leather is thirsty; it absorbs conditioners and darkens noticeably, which is part of its charm.
Chrome-tanned leather is tanned with mineral salts. It’s more supple right away, more resistant to water, and won’t darken as much with conditioning. Most soft shoe linings and many uppers are chrome-tanned.
Trust Your Senses
Quality leather has a distinct, pleasant smell-often earthy or smoky, never chemical. It should feel substantial and warm to the touch, not like plastic. Press your thumb into it; good leather will show a slight wrinkle that slowly bounces back. That’s a sign it will mold to your foot and last for years.
Building Your Leather Shoe Care Kit
With the right few tools, you can handle 95% of shoe care at home. A proper kit saves your leather and your wallet, making searches for “leather shoe care near me” unnecessary.
The Essential Tools
- Horsehair Brushes: Get two. A soft one for dusting and polishing, and a stiffer one for cleaning suede or nubuck.
- Soft Cotton Cloths: Old t-shirts are perfect. You’ll need several for applying products and buffing.
- Applicator Daubers or Sponges: Small, reusable tools for applying conditioner and polish evenly into seams and welts.
The Core Products You Actually Need
When people ask me about “leather shoe care products,” I tell them to master these three before anything else.
- Cleaner: A pH-balanced leather cleaner or simple saddle soap. This lifts dirt and sweat without stripping natural oils.
- Conditioner: This is the lifeblood. Look for a nourishing balm or cream with lanolin, beeswax, or natural oils. It replaces lost moisture. A good conditioner prevents leather from drying out, cracking, and becoming brittle.
- Polish or Wax: Polish (usually cream-based) adds a bit of pigment to cover scuffs and gives a soft shine. Wax (paste-based) provides a harder, protective shine and water resistance, best for the toes and heels.
What to Look For and What to Skip
Seek out simple, quality ingredients. A product that lists its components clearly (like mink oil, coconut oil, beeswax) is a good sign. I see many discussions on “leather shoe care kit Reddit” threads where newcomers are overwhelmed. My advice is simple: avoid silicone-based sprays and all-in-one miracle products. Silicone can seal the leather and prevent it from breathing, while all-in-ones often clean poorly and condition weakly. Dedicated products work best.
Start with a neutral cleaner and conditioner. Once comfortable, you can explore colored polishes to match specific shoes. With this basic kit, you are fully equipped to care for your footwear for years to come.
The Core Routine: Clean, Condition, Protect
Think of this routine like giving your shoes a good meal, a drink of water, and a warm coat before heading out into the world. It’s simple, but it does everything. My boots, Mason, gets this treatment monthly, while my dress shoes might see it every other month. Your schedule depends on how hard you wear them.
This four-step process is the non-negotiable foundation of leather shoe care, preventing most problems before they ever start.
Step 1: Brush Off the Grime
Always start dry. Dirt and dust are abrasive. Rubbing them into the leather with a wet cloth is like using sandpaper. You need a soft-bristled brush, like a horsehair shoe brush or a clean, dry paintbrush for delicate leathers. Using the right products and methods is essential to keep leather looking its best. When you know which products are best for cleaning leather, maintenance becomes simpler.
Brush firmly but gently with the grain of the leather. That’s the direction the natural pores and wrinkles run. On most shoes, this is from the toe toward the heel. You’ll feel the difference. Listen for a soft, whisking sound. You’re not scrubbing, you’re lifting. Do this for a good 30 seconds per shoe until no more loose dust flies off. It’s just one of the best cleaning methods for leather boots and shoes to preserve their finish.
Step 2: The Gentle Clean
Now you can introduce moisture. For light soil, a lint-free cloth dampened with cool water is perfect. Wring it out completely. A damp cloth should never drip. Wipe the leather in smooth, overlapping strokes, again following the grain. After cleaning, consider conditioning and protecting the bag to help prevent cracking and stains. Doing so keeps the leather supple and looking its best.
For tougher dirt or salt stains, use a dedicated leather cleaner. I prefer a neutral, pH-balanced one. Apply a small amount to a separate cloth, not directly on the shoe. Work in small sections. The goal is to lift dirt, not soak the leather. Over-wetting is the most common mistake here; it can cause water spots and weaken the fibers. Let the shoes air dry fully, away from direct heat, before moving on. This takes about an hour.
Step 3: Replenish the Leather
This is the most important step. Leather is skin. It loses its natural oils and dries out. Conditioning puts those oils back. Dry leather cracks. It’s that simple.
Choose a conditioner meant for footwear. For rich, waxy leathers, a conditioning cream works well. For softer leathers like on a jacket, a lighter liquid conditioner penetrates faster. Using my fingers is my favorite method for shoes. The warmth helps the product soak in. Apply a thin, even coat over the entire shoe. You don’t need much. A little goes a very long way.
Massage it in with circular motions, then let it sit. The leather will drink it in. If it looks soaked after 15 minutes, buff off the excess with a dry cloth. If the leather still feels dry or thirsty to the touch, you can apply a second thin layer. Conditioning does not mean slathering on product; it means feeding the leather slowly and thoroughly.
Step 4: Add a Protective Layer
Conditioning moisturizes from within. Protection shields from without. This step defends against rain, spills, and daily scuffs.
You have two main choices. A wax-based polish adds a durable, water-repellent barrier and can add a shine. It’s what I use on my work boots. A silicone-free protector spray is lighter and won’t alter the color or finish, perfect for suede or delicate leathers.
Apply your protector in a well-ventilated area. For wax, use a dauber brush or cloth, applying in small circles. Let it haze, then buff to your desired shine. For spray, hold the can about six inches away and apply a light, even mist. Let it dry completely. This final shield is what gives your shoes confidence against the elements, much like the wax I use on June’s jacket before winter.
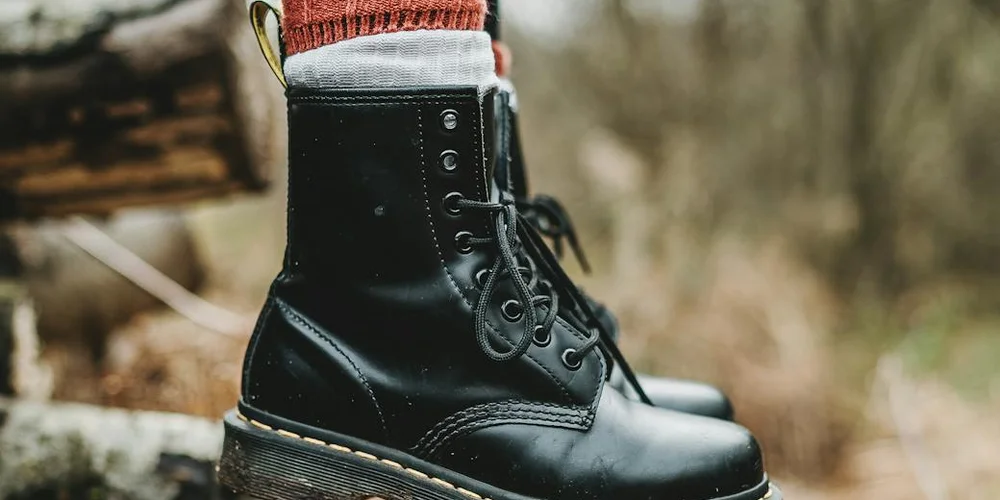
How to Polish Leather Shoes and Boots for a Perfect Shine
Think of polish as the final protective layer and cosmetic touch for your leather. It’s not a deep conditioner. That job comes first. A well-polished shoe doesn’t just look smart, it has a shield against scuffs and light moisture. For my boots like Mason, polish is the armor that keeps the patina looking rich, not worn out.
Cream Polish vs. Wax Polish: Picking Your Tool
These are two different tools for two different jobs. Using the wrong one is like trying to paint a wall with a marker.
- Cream Polish: This is your color restorer and light conditioner. It contains more oils and pigments. Use it to even out scuffs, cover small scratches, and add a subtle, soft glow. It’s like applying a tinted moisturizer to your skin. It nourishes a bit and adds color, but it won’t give you a hard, reflective shine.
- Wax Polish: This is for building a hard, protective, and shiny topcoat. It has less pigment and more wax. You use it over cream polish (or on its own for a clear shine) to create that classic mirror-like finish. It’s the clear topcoat on a manicure.
Start with cream to feed color and condition, then layer wax on top for protection and shine.
The Step-by-Step Polish Application
Here is the reliable method I use on everything from dress shoes to Scout the wallet. Patience is your best tool here.
- Prepare the Leather: The leather must be clean and dry. Any dirt under the polish will grind into the surface. Use a damp cloth with a neutral leather cleaner first. Let it dry completely.
- Apply Polish: Use a soft cloth or applicator brush. Take a small amount of polish-start with less than you think. Apply it in small, tight, circular motions over one section of the shoe. This works the product into the grain. Cover the entire shoe evenly.
- The Dry Time: This is the step everyone rushes. You must let the polish dry to a dull haze. This usually takes 5-10 minutes. Touch it. It should not feel tacky or transfer to your finger.
- Buff to Shine: Take a clean, soft horsehair brush or a flannel cloth. Buff the dried polish vigorously using straight back-and-forth strokes. This friction melts the waxes slightly and aligns them, creating the shine.
How Do You Make Leather Shine? The Mirror Finish Technique
For a high-gloss, mirror-like shine, you focus on the wax. The secret is thin layers and moisture.
After your initial buff, apply a very thin layer of wax polish only to the toe and heel (where you want the highest shine). With a clean cloth, dip your fingers in a tiny bit of water-just a few drops. Buff the wax in using rapid, very small circles. The water creates a slight emulsification, helping the wax layers fuse into a smooth, glass-like surface. Let it dry, then repeat. Two or three of these “spit shine” layers will build an incredible depth of shine. A mirror shine is built with multiple whisper-thin layers of wax, not one thick coat.
The Feeling and Sound of a Proper Buff
You can hear and feel when it’s right. A soft horsehair brush will make a gentle, rhythmic swish-swish-swish sound as it glides over the dried polish. The resistance is light but firm. With a cloth, the motion becomes almost silent, but you’ll feel the surface changing from slightly draggy to slick and smooth under the fabric. The heat from the friction is key-it’s that warmth that truly brings up the luster.
Tips for Buffing Leather Boots on Complex Areas
Boots have nooks and crannies that a big brush can’t reach. Here’s how to handle them.
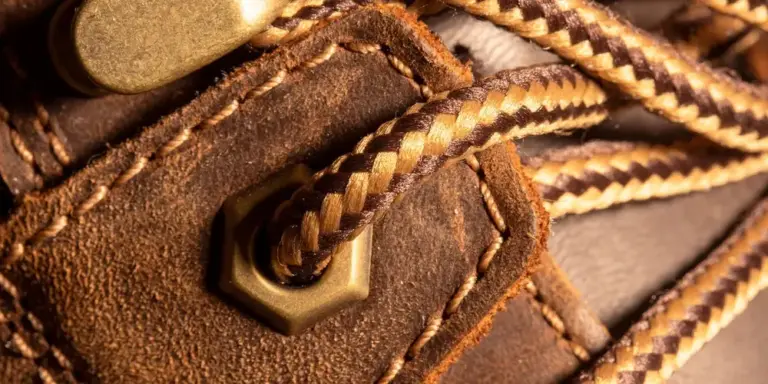
- Toe Caps & Seams: Use a smaller, narrower horsehair brush (often called a detailing brush) to get into the crease where the toe cap meets the vamp. For tight seams, a soft-bristled toothbrush reserved for leather care works perfectly.
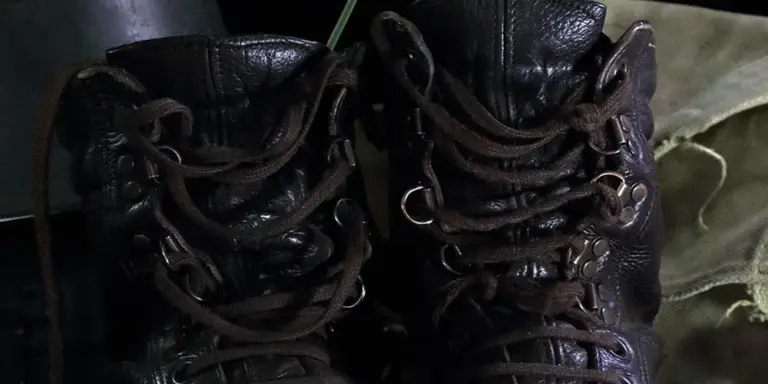
- Heels & Speed Hooks: Wrap a soft cloth tightly around your index finger. This gives you precise control to polish around the heel base and the posts of speed hooks without getting polish all over the laces.
- Textured or Rough-Out Leather: Do not use wax polish here. It will clog the nap. For these, use a dedicated conditioner or a cream polish applied very lightly, and buff gently with a soft brush to maintain the texture.
For complex boots, your tools need to get smaller: use detail brushes and cloth-wrapped fingers to reach every part. Avoid the common mistake of leaving a white wax buildup in seams. A quick pass with a dry toothbrush after buffing clears it right out.
Restoring Tired or Damaged Leather Shoes
When your favorite boots start to look worn, it can feel personal. I get it. My old saddle, Mason, has seen every kind of mark. The good news is leather is forgiving. Most damage is just superficial. With the right approach, you can bring that footwear back to life.
Fixing Scuffs and Minor Scratches
A scuff is just displaced color and wax. A deep scratch exposes the raw leather fibers underneath. Your first move is always to clean the area with a barely damp cloth. Let it dry completely before proceeding to repair the scratches and remove scuff marks from leather.
For shallow scuffs, a matching color cream polish often fills them right in. Apply a small amount with a soft cloth, rubbing in circular motions over the scuff. Let the polish dry to a haze, then buff it vigorously with a clean, dry brush or cloth-this friction melts the wax into the scuff.
For a scratch that catches your fingernail, you need to rebuild the surface. A specialized leather filler or conditioner-heavy cream works best. Apply a tiny dab directly into the scratch, overfilling it slightly. Let it cure for a full day. Once hard, gently sand it level with very fine grit sandpaper (400+ grit), then apply your colored polish over the top to blend it.
Reviving Dry, Stiff Leather
Dry leather feels stiff, looks dull, and can even start to crack at the flex points. This happens from exposure to sun, heat, and a lack of care. Restoring it is about slow, deep moisture. To prevent cracking and drying out, make conditioning a regular habit for your leather items. This keeps them supple, guards against sun and heat, and stops further damage.
- Clean the shoes thoroughly with a gentle, pH-balanced leather cleaner to remove any barrier of dirt.
- Choose a rich, absorbent leather conditioner. Oil-based conditioners (like neatsfoot oil blends) or heavy balms are great for very dry work boots or heritage leathers.
- Apply a generous, even coat over the entire shoe, paying extra attention to the vamp (the toe box) and ankle where creasing happens.
- Let the shoes absorb the conditioner in a cool, shaded place for at least 12 hours. The leather will darken as it drinks.
- Check the feel. If the leather still feels rigid or thirsty, apply a second, lighter coat after the first is fully absorbed.
The goal is not a greasy surface, but leather that feels supple and cool to the touch, like the palm of your hand. This process restored the straps on my bag Scout when they became board-stiff from neglect.
How Do I Soften and Restore Dry Leather?
This is the question I hear most. The answer is always conditioning, but patience is the secret ingredient. People often apply conditioner, buff it off after ten minutes, and wonder why nothing changed. The leather needs time to soak it in. Think of it like watering a parched plant-you pour slowly and let the soil drink. For extremely dry leather, a first coat of pure, natural oil (like pure neatsfoot oil) can work wonders to reopen the fibers before you follow with a protective conditioner balm. Always test any product on a hidden spot first, like inside the tongue.
Cleaning Salt Stains and Water Spots
Salt is leather’s enemy. It draws out moisture and leaves a white, crusty ring. Water spots from rain can leave dark rings or a cloudy finish. Act quickly.
- For fresh salt stains, wipe the area with a cloth dipped in a 50/50 mix of white vinegar and water. The mild acid neutralizes the salt. Follow immediately with a damp water cloth to rinse, then dry naturally.
- For dried salt or cloudy water spots, use a dedicated leather cleaner. Apply it, agitate gently with a soft-bristled brush, and wipe away. The cleaner lifts the mineral deposits from the pores.
After treating any stain, you must condition that area. The cleaning process strips natural oils. A light conditioning will rehydrate the spot and prevent a dry, blotchy patch.
Minimizing Wrinkles and Creases
You can’t remove creases—they’re the history of your foot inside the shoe. But you can prevent them from becoming deep, white cracks. The key is keeping the leather pliable right where it bends. Condition the high-flex areas, like the toe box, more frequently than the rest of the shoe to maintain fiber elasticity.
When applying conditioner, work it deeply into the creases with your fingers. Use a shoe tree after wearing them. It won’t erase wrinkles, but it supports the shape and slows the deepening process. My jacket June has beautiful creases in the sleeves from wear, but because the calfskin is kept conditioned, they look soft, not stressed.
Daily Habits and Smart Storage
The best polish in the world can’t fix shoes ruined by neglect. Good care starts the moment you take them off. Think of it like putting your jacket on a proper hanger instead of tossing it on a chair. It’s a small habit with a huge payoff.
Give Them a Shape to Remember
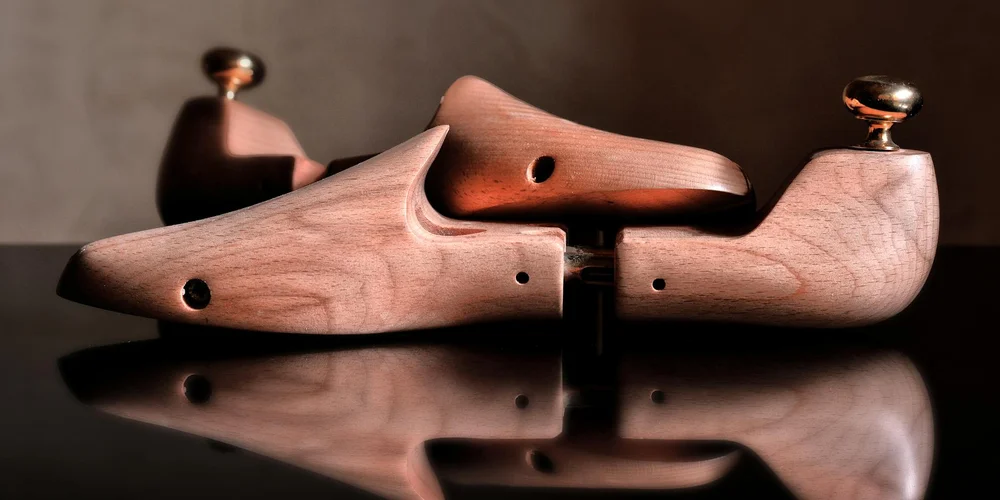
Shoe trees are not optional. When leather is warm and damp from your foot, it wants to relax and crease. A shoe tree holds the shape you bought, fighting deep, permanent wrinkles. It also pulls moisture out of the lining and leather, which prevents rot and odor. Cedar shoe trees are my go-to because the wood naturally absorbs moisture and leaves a fresh scent.
A common mistake is thinking shoe trees are only for expensive dress shoes. I use them in my rugged boots, like my old work pair. They prevent the ankle from collapsing and keep the toe box from curling. Just make sure the tree fits snugly but doesn’t stretch the leather.
Every. Single. Time.
Never force your foot in by crushing the heel. That stiff cup at the back, the heel counter, is the foundation of your shoe’s fit. Breaking it down is a quick way to make a great pair feel sloppy. A shoehorn removes this struggle completely. Using a long-handled shoehorn preserves the heel’s structure and the stitching around it, adding years to the shoe’s life.
I keep a simple, sturdy horn by the door. It’s no different than using a bookmark to save your place. That one-second action prevents a costly, often impossible, repair later. Think of Scout, my wallet. I don’t force things into it and stretch the seams. The same respect applies here.
A Place to Rest and Breathe
Leather needs to breathe. Storing shoes in a sealed plastic bag traps all the sweat and humidity you’ve just walked out of them. This creates a perfect environment for mildew. Instead, let them air out in a cool, dry spot away from direct heat like radiators or sunny windowsills.
I give my shoes at least a full day of rest between wears. This lets the interior dry completely. If they get wet from rain, I never dry them with direct heat. I stuff them with newspaper to draw out the moisture slowly and keep their shape, then let them air dry naturally. Good storage is about managing moisture and avoiding extreme temperatures, which dry out and crack leather.
A Nod to the Old Ways
Leather care has its lore. You might hear an old-timer talk about “burnishing” shell cordovan with a deer bone. Shell is a unique, dense leather that can develop a deep gloss. The technique involves rubbing the bone firmly over the leather to smooth the fibers and create heat, which brings up the shine. It’s a specialized art for a specific material.
For most leathers, this isn’t necessary. But it reminds us that caring for leather is a hands-on craft. These traditions highlight a core truth: consistent, mindful attention always beats frantic, last-minute fixes. The daily habit of using a tree and a horn is your version of that careful art.
Saving Shoes from Water, Salt, and Long Storage

Leather is tough, but water and salt are its sneaky enemies. I have seen many good shoes, like a pair I once rescued that reminded me of Mason’s saddle after a storm, come back to life with the right care. The key is to act fast and stay patient.
Immediate Steps After Your Shoes Get Wet
If your shoes get soaked from rain or splashed with salty slush, do not panic. Follow these steps right away.
- Blot, do not rub. Use a clean, absorbent cloth to gently press out excess moisture from the surface. Rubbing can grind dirt into the grain.
- Remove the laces and insoles. Take everything out so air can circulate. This prevents mildew from starting in dark, damp spots.
- Clean off salt and dirt. Mix a small amount of pH-balanced leather cleaner with water. Dampen a soft brush, gently work it over the leather, then wipe with a damp cloth. For salt stains, a 50/50 mix of water and white vinegar on a cloth works well. Wipe it off quickly with a water-dampened cloth afterward.
Acting within the first hour makes the difference between a quick recovery and permanent damage.
The Right Way to Dry: Slow and Steady Wins
This is where I see the most mistakes. Never, ever use a hairdryer, radiator, or direct sun to dry leather. Heat bakes the leather, making it brittle and prone to cracking.
Instead, use the slow air-dry method.
- Stuff the shoes firmly with crumpled paper or a dry, absorbent cloth. This helps them hold their shape as they dry.
- Place them in a room with good airflow, away from heat vents. A fan on low speed across the room can help.
- Let them dry for 24 to 48 hours. Be patient. Change the stuffing if it becomes damp.
Think of it like drying a precious wool sweater; gentle air is your only tool. I left a pair of boots to dry this way for two full days, and they softened up perfectly without a single stiff spot.
Preparing Shoes for Seasonal Storage
When you rotate your footwear for the season, a proper send-off keeps them ready for next year. This routine is your best defense against long-term decay.
- Give them a final clean. Use a neutral leather cleaner to remove any last traces of dirt or salt from the winter.
- Condition thoroughly. Apply a generous amount of a quality leather conditioner or cream. Use a soft cloth and work it into every seam and fold. Let it soak in for an hour.
- Use a protective spray. A light coat of waterproofing spray adds a barrier against unexpected moisture in storage.
- Store them correctly. Use shoe trees to maintain shape, or stuff them with acid-free tissue paper. Keep them in a cloth bag in a cool, dark place. Avoid plastic bags, as they trap moisture.
A final conditioning before storage replenishes the oils that time slowly steals, keeping the leather supple.
The Simple Secret to Prevent Cracking
You might be asking how to stop cracks before they start. The answer is not in one heroic effort, but in consistent, gentle care.
Leather cracks when it dries out and loses its natural oils. Think of it like your own skin without moisturizer. The routine for wet days and storage is part of it, but so is regular maintenance. For footwear you wear often, a light conditioning every two to three months is perfect. Use a product meant for shoes, as it won’t make them too slick—this guide explains how often to condition leather boots and the best application methods.
Consistency is your most powerful tool; a little care often is far better than a lot of care rarely. My jacket, June, has light creases but no cracks because I never let it go too long without a touch of conditioner. Your shoes deserve the same attention.
Common Questions
Is a leather care spray enough to protect my shoes?
No, a protective spray is only a shield against water and stains. It does not clean or condition the leather, which is the essential work for long-term health.
When should I seek out “leather shoe care near me” instead of doing it myself?
Seek a professional for major structural repairs, deep stains you can’t identify, or if you’re dealing with a valuable antique. For routine cleaning and conditioning, your own kit is best.
What’s the deal with all the “leather care lore” and old-fashioned techniques?
Many traditions, like using natural oils, are based on sound principles. Ignore the gimmicks and focus on the consistent, proven habits: clean, condition, and protect with quality, simple products.
How often should I really be performing the full clean-and-condition routine?
For shoes worn regularly, a full clean and condition every 1-2 months is sufficient. Always condition after any exposure to heavy rain or salt, regardless of the schedule.
What should I prioritize in “leather shoe care products” if I want to keep it simple?
Prioritize a good pH-balanced cleaner and a natural oil-based conditioner. Master these two products before you even think about polishes or specialty treatments.
Your Leather Boots, Ready for the Road
The best technique is the consistent one. A simple rhythm of cleaning, conditioning, and polishing builds a barrier against time and wear.
Caring for leather well is a quiet way to honor the material. Each time you buff a toe or treat a scuff, you build a useful skill and extend a story.
Deep Dive: Further Reading
- r/BuyItForLife on Reddit: How do I take care of my leather shoes?
- Shoe care guide for beginners
- Premium Leather Care Products – Cobbler’s Choice Co.
- Leather Shoe Care | How to Clean & Polish Shoes | Allen Edmonds
Harriet is a avid collector of leather goods such as purses, bags, seat covers, etc and has an extensive background in leather care, recovery, stain removal and restoration. She has worked for a number of years perfecting her leather care techniques and knows the ins and outs of restoring all kinds and types of leather products. With her first hand knowledge in leather care, you can not go wrong listening to her advice.
Boot and Shoe Care