How to Fix Water-Damaged Leather: A Practical Salvage Guide
Published on: October 31, 2026 | Last Updated: October 31, 2026
Written By: Harriet Nicholson
Hello Tannery Talk. If your leather piece is stiff, stained, or warped from water, I understand that worry. Let’s work through this together, step by step.
This article walks you through the salvage process, covering how to assess the damage, dry leather correctly, clean gently, condition deeply, and repair discoloration or stiffness.
I’ve revived pieces like my soaked jacket June and a waterlogged saddle, so I know these methods work with care and patience.
First, Figure Out What You’re Dealing With
Water damage on leather is not always obvious. Before you do anything, you need to assess the situation like a detective. Your first clues are how the leather looks and feels, and understanding how water, rain, and alcohol can cause leather shrinkage, damage, and staining.
Spot the Signs
Run your hands over the surface. Does it feel unusually stiff or brittle? That’s a sure sign moisture has stripped away its natural oils. Look closely. Are there dark, blotchy stains or, worse, a faint white, powdery ring along the edge of a stain? That ring is a salt bloom, a deposit left behind as water evaporates. If you smell a faint mustiness, mold might be starting, and you need to act fast.
These signs tell you the leather’s structure is stressed and needs careful rehab, not just a quick wipe.
Understand the Level of Damage
Not all water exposure is the same. Your response changes based on the “patient’s” condition.
- A Simple Spill: A few drops on a tabletop or a small splash. The leather feels damp in one spot but the water hasn’t soaked through. This is a minor issue if you act quickly.
- Humidity Damage: This is slow and sneaky. Think of a leather bag stored in a damp basement or a jacket worn on a muggy day. The leather absorbs moisture from the air, which can lead to a general stiffness and that musty odor over time.
- A Full Soaking: The leather is saturated. This happens if you get caught in a downpour or an item is fully submerged. The water has penetrated deep into the fibers, and the risk of permanent stiffness, discoloration, and mold is high.
Leather has a memory, and water changes its personality. My old saddle, Mason, has been through many rain showers. After a wet ride, he feels tighter and less supple until I can properly condition him. That change in “handfeel” is your first warning.
Your Immediate Action Plan (First 24 Hours)
The first day is critical. What you do (or don’t do) right now sets the stage for a full recovery or a stiff, cracked result.
The Absolute Do’s and Don’ts
- DO act calmly and quickly.
- DO NOT use direct heat. This is the most common, and most damaging, mistake. Never use a hairdryer, space heater, or place the item on a radiator. Heat cooks the leather, causing it to shrink, crack, and become permanently brittle.
- DO NOT rub the surface vigorously. This can grind water and dirt deeper into the grain.
- DO NOT apply any conditioners or oils yet. The leather needs to be completely dry first, or you’ll trap moisture inside.
Patience and air are your best tools in these first hours.
Step 1: Gentle Surface Drying
Take a clean, absorbent microfiber cloth or a soft, lint-free towel. Gently pat and blot the wet areas to soak up as much surface moisture as you can. Imagine you’re dabbing a wound, not scrubbing a stain. If the leather is very wet, you may need to switch to a dry part of the cloth several times. Choosing the right products and methods matters for leather care. In the next steps, we’ll highlight the best products and methods for cleaning leather.
Step 2: The Right Way to Air Dry
Now, let nature do the work, but you have to set the stage properly.
- Shape and Stuff: For bags, boots, or gloves, you must help them keep their shape as they dry. Crumple clean, white paper (newspaper can bleed ink) or dry towels and gently stuff the item. This supports the structure and absorbs moisture from the inside out. For a jacket, hang it on a wide, padded hanger to keep the shoulders natural.
- Find the Perfect Spot: Place the item in a shaded, well ventilated room. A gentle breeze from a fan set on low (not pointed directly at the leather) is excellent. Avoid sunny windowsills, attics, or damp garages. You want consistent, cool, airy dryness.
- Wait it Out: This is not fast. A heavily soaked piece can take 24 to 48 hours to dry completely to the touch. Be patient. Change the stuffing paper if it becomes damp.
Once the leather feels completely dry and cool all over, only then can you move on to the next phase: assessment and conditioning. Rushing this step is how you lose a good piece.
Gather Your Leather Rescue Kit
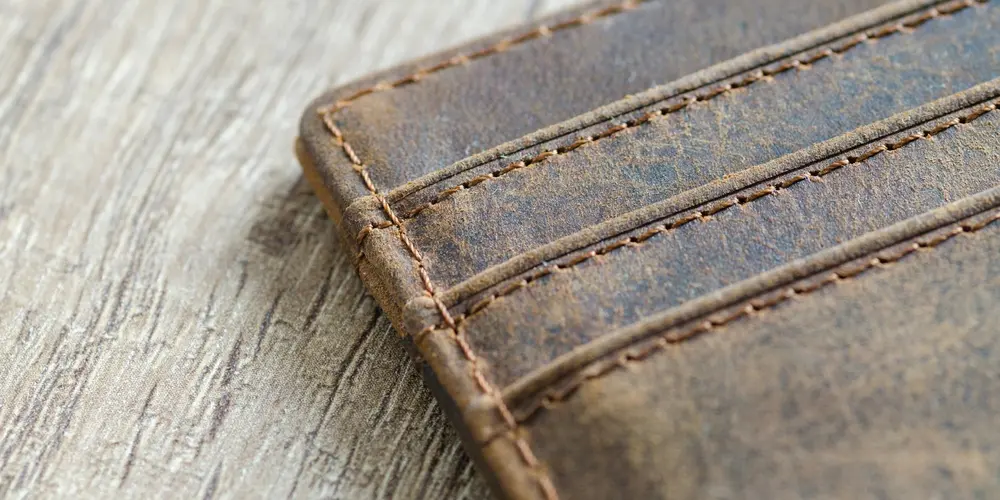
You wouldn’t start fixing June’s jacket without the right tools. The same goes for water damage. A proper kit makes the difference between saving the leather and harming it.
- A soft horsehair brush is your first line of defense. Its gentle bristles lift dirt without scratching the surface.
- Clean with a pH-balanced leather cleaner. It’s made to work with leather’s natural chemistry.
- Have several clean, absorbent cloths ready. Old cotton t-shirts work perfectly.
The restorative products are non-negotiable.
- A quality leather conditioner is the star. This puts life back into the fibers.
- For a boot or bag caught in a real downpour, a mild saddle soap is useful for a deep clean. Think of Mason after a muddy ride.
Some items wait for later stages.
- For suede or nubuck, keep a soft eraser handy for lifting stains.
- If you have a dyed or finished leather, a color restorer can help even out faded spots after everything is dry.
Choosing these items is like picking tools for a specific job on June’s jacket: you match the tool to the material’s need, gently and with purpose.
The Gentle Cleaning & Rehydration Process
Now, with your kit ready, we begin the careful work of recovery. Patience here is your most important tool.
Step 1: Surface Cleaning
First, let the leather dry completely at room temperature. Never use direct heat from a hair dryer or radiator. Once dry, you’ll see what you’re working with. The same air-drying rule applies to leather jackets and leather shoes—dry at room temperature to avoid damage. This careful approach helps preserve color, texture, and longevity for both items.
Take your horsehair brush and gently flick away all the dried dirt and debris. Brush in one direction, following the grain. You’re just clearing the stage.
Next, take a cloth, dampen it with cool water, and wring it out until it’s just barely damp-not wet. Wipe the entire surface lightly. This removes surface grime and salts left by evaporated water. Let the piece air dry again completely before moving on. Rushing causes problems.
Step 2: Deep Cleaning (If Needed)
If your piece was soaked in dirty water, like a garden hose accident, it might need this step. For light rain spots, you can often skip it.
Use a tiny amount of mild saddle soap on a damp cloth. Work it into a light lather in your palm first. Apply this lather in gentle, circular motions on a small, inconspicuous area.
The critical part comes next. You must rinse all the soap off completely to avoid a sticky, damaging residue. Use a fresh cloth dampened with clean water to wipe away every trace of suds. Let it dry fully, which may take a full day for a thick jacket.
Step 3: The All-Important Conditioning
Water washes away leather’s natural oils. This step puts them back. Without it, the leather becomes stiff and can crack.
Apply a quality leather conditioner with your fingers or a soft cloth. Your fingers are best, as the warmth helps it penetrate. Use a thin, even layer. You can always add more.
Think of it like moisturizing very dry skin: apply gently and let it absorb fully before judging if it needs more. For a large item, work in sections.
The leather will look darker now. Don’t worry. Like when I condition my veg-tan wallet Scout, the color often lightens back up as the oils fully absorb over 24 to 48 hours, leaving the leather softer and stronger. If it still feels dry to the touch after a day, apply a second thin layer.
Fixing Specific Water Damage Problems
How to Address Stiff, Cracked Leather
When leather dries out completely, it loses its supple oils. It feels more like cardboard than leather. To bring stiff leather back to life, you need a slow and patient conditioning process, not a single heavy application. Rushing can oversaturate and weaken the fibers.
Start with a rich, pH-balanced leather conditioner or balm. Apply a very thin coat over the entire piece, even areas that seem okay. Let it soak in for a full hour. You will see the leather drink it up quickly. After that hour, gently flex the leather in your hands. Don’t force it, just massage the stiff areas back and forth to encourage movement.
Apply a second thin coat. Let it absorb. You might do this three or four times over an afternoon. My old saddle, Mason, once got caught in a downpour and dried stiff as a board. This multi-application method over two days brought back its flexibility without making the leather soggy.
How to Handle Mold and Mildew
Fuzzy growth means moisture was trapped for too long. Your first job is to stop the mold safely. Always take the item outside to brush off mold spores, so you don’t spread them in your home. Use a soft, dry brush and gently whisk away all the visible growth.
Next, mix one part white vinegar with one part distilled water. Dampen a clean cloth with this solution and wipe down every surface. The mild acidity kills the remaining mold. Let the leather air dry completely outdoors if possible. This is critical. These steps are part of the do remove treat mold from leather items approach. In the next steps, a linked guide will expand on that process. Do not apply any conditioner until you are 100% certain the leather is bone-dry inside and out. Conditioning a damp piece will seal in moisture and cause the mold to return.
How to Fade White Watermarks and Rings
Those pale rings are usually mineral deposits from evaporated water, sitting on top of the leather. Think of it like the spot left by a water glass on a table. You can often remove these marks by gently dissolving the deposits with a mild acid.
Try the same vinegar and distilled water mix you used for mold. First, test it on a hidden spot. If it works, lightly dab the stain, don’t scrub. Follow with a clean, damp cloth to rinse the area. For more stubborn marks, a dedicated leather cleaner designed for stain removal can be more effective. Apply it with a soft cloth using small circular motions, then wipe clean. This method is especially useful for water stains and spots on leather furniture.
Special Cases: Car Seats, Shoes, and Bags

How to Repair Water-Damaged Leather Car Seats
Car interiors are tricky because water pools in hidden spots. Your first step is to check under the seat folds and where the seat meets the backrest, soaking up any pooled water with dry towels. Then, help the seats dry slowly. If the weather is warm, park the car in a garage or shade with the windows cracked. Turn on the cabin heat for short periods to circulate warm, dry air.
Avoid parking in direct sun to dry the seats. Intense sun glare can bake the leather, causing it to shrink and crack faster than the water damaged it. Once fully dry, a thorough conditioning is non-negotiable to restore lost oils. To prevent such damage in the future, take measures to protect your leather car seats.
How to Repair Water-Damaged Leather Shoes
Shoes need shape preservation above all. Immediately remove the insoles and laces to let air reach every part. Stuff the shoes with crumpled newspaper or use cedar shoe trees. The paper absorbs moisture while holding the shoe’s form; the trees help maintain the shape as they dry.
Pay special attention to the welt, the strip where the sole meets the upper. This stitched area can shrink and distort. As the shoes dry, apply conditioner lightly to this seam to keep the leather pliable, preventing future cracking.
How to Handle Water-Damaged Leather Bags
A bag’s structure is its foundation. To dry it without distortion, you must support its shape. Empty the bag completely. Then, gently stuff the main compartment and any pockets with plain white paper or a clean, dry towel. This filler holds the bag’s form, preventing sagging or weird creases as the leather dries. Let it dry at room temperature, away from direct heat. Only remove the stuffing once the bag is completely dry to the touch.
Keeping Your Leather Safe Next Time
Think of your leather like your own skin. A dry, thirsty piece is much more vulnerable to damage than one that’s nourished. Regular conditioning is not a luxury. It’s your first and best defense. A well-conditioned piece has supple fibers that resist water absorption and are less prone to stiffening and cracking if they do get wet.
I condition my pieces like clockwork. For Mason, my saddle, that’s every other month during heavy riding season. For June, my jacket, it’s twice a year. Scout, my wallet, gets a light touch once a year. Your schedule depends on use and climate.
Conditioning: Your Baseline Defense
Conditioning fills the tiny gaps in the leather’s fiber network with nourishing oils and waxes. This keeps the material flexible and less absorbent. Understanding the science of how conditioning oils and waxes penetrate the hide explains these effects. This penetration helps protect the leather from drying, cracking, and wear.
- Use a quality conditioner made for your leather type. For most items, a nourishing oil-based or cream conditioner works perfectly.
- Apply a thin, even coat with a soft cloth. Let the leather drink it in.
- Buff off any excess after 15-20 minutes with a clean, dry cloth.
- A common mistake is using too much product, which can clog the pores and create a sticky surface. Less is more. You can always apply a second light coat if the leather still feels dry after 24 hours.
Understanding Water-Repellent Sprays
Conditioning is maintenance. A water-repellent spray is like putting on a raincoat for a specific storm. These sprays add a protective layer on top of the leather. They are useful, but they have limits.
You have two main choices: silicone-based and non-silicone (often wax or fluoropolymer-based).
How to apply any protective spray correctly:
- Start with clean, fully dry, conditioned leather.
- Hold the can 6-8 inches away from the surface.
- Spray in a steady, sweeping motion for light, even coverage. Avoid soaking any one spot.
- Let it dry completely, usually for 12-24 hours, before using the item.
- Always test the spray on a small, hidden area first to check for any color change.
Remember the limitation: no spray makes leather submersible. They are for rain splashes and accidental spills, not for wearing in a creek.
Smart Storage for Damp Days
When humidity is high or you’re storing a piece for a season, a little forethought prevents problems. Leather needs to breathe, especially in high humidity environments.
- Never store leather in a plastic bag or airtight container. Trapped moisture is the enemy and will promote mold.
- Use a breathable cotton or canvas storage bag instead.
- For closets or storage areas, a renewable desiccant like silica gel packets can help control ambient moisture. Tuck a few in the pockets of a stored jacket or in a boot.
- Keep your leather away from direct heat sources like radiators. Slow, even air drying is always best.
My rule is simple: if the air feels damp to you, it feels damp to your leather. Give it space and airflow.
The Heart of the Matter
Leather is a resilient, natural material. It has endured for centuries. A piece like Mason has seen countless rain showers. June has been caught in sudden storms. With prompt, calm care, they recover and develop more character.
Good care doesn’t make leather fragile. It reinforces the incredible durability that’s already there. By conditioning regularly, using protective sprays wisely, and storing with care, you are working with the leather’s nature, not against it. You are ensuring your trusted companions are ready for whatever comes next.
Common Questions
My leather got absolutely soaked. Is it too late to save it?
It’s rarely too late if the structure is intact. Your immediate focus must be on slow, air-based drying-no heat-to prevent permanent stiffness and shrinkage. After it’s completely dry, a multi-session conditioning process can often restore flexibility.
How soon after drying can I condition my leather car seats?
Only condition once the seats feel completely dry and cool to the touch, especially in the seams. Rushing this traps moisture inside, which can cause mold or ruin the leather from within. Patience here is non-negotiable.
My leather shoes got wet and are now stiff. Did I ruin them?
Stiffness is a common result of oils being stripped out. You likely didn’t ruin them. Use a quality leather conditioner, applying several thin layers over a few days, flexing the leather gently between applications to restore suppleness.
How can I tell if mold is starting, and what’s the first thing I should do?
Look for fuzzy spots or a persistent musty smell. Your first action is to take the item outside and gently brush off the spores with a soft, dry brush to prevent spreading them in your home. Then address it with a vinegar solution as outlined.
After a successful repair, how can I best protect the leather from future water damage?
Maintain a routine conditioning schedule to keep the fibers nourished and less absorbent. For added protection, consider a light, non-silicone water-repellent spray on clean, conditioned leather, reapplying it as the product label recommends.
Your Leather’s Second Chance
The most vital lesson is patience. Rushing the drying process is the surest way to ruin good leather. Gentle cleaning and slow, natural drying give your piece the best opportunity to recover its strength and character. Physics shows moisture diffuses out slowly, reducing internal stress. Slow drying prevents cracking and keeps the finish even.
Proper care is the final, respectful step in the journey of a leather good, honoring the animal and the craft. Each repair you make builds your skill and deepens your connection to the items you choose to keep in your life.
Industry References
- Water-Damaged Leather Restoration: Types and Treatment Methods
- What Happens When Leather Gets Wet & How To Fix It – Von Baer
- Leather Water Damage: Here’s How to Fix It
- How to Repair Salt and Water Damaged Leather
- How to Restore Water-Damaged Leather
Harriet is a avid collector of leather goods such as purses, bags, seat covers, etc and has an extensive background in leather care, recovery, stain removal and restoration. She has worked for a number of years perfecting her leather care techniques and knows the ins and outs of restoring all kinds and types of leather products. With her first hand knowledge in leather care, you can not go wrong listening to her advice.
Drying Leather Correctly