How to Craft and Attach a Leather Patch for Garment or Bag Repair
Published on: November 18, 2026 | Last Updated: November 18, 2026
Written By: Harriet Nicholson
Hello Tannery Talk. A rip in your favorite leather jacket or a worn spot on your bag doesn’t mean it’s time to say goodbye-a well-made patch can restore it with charm.
I will guide you through the practical steps, covering choosing the right leather, cutting a clean patch, preparing the repair surface, and attaching it securely with glue or thread.
As a leather craftsman who has repaired trusted pieces like Mason’s saddle and June’s jacket, I can show you how to make a repair that holds.
Is a Leather Patch the Right Fix for Your Item?
A leather patch is a strong, functional solution for certain problems. It is not a cure-all. Think of a patch like a bandage for your favorite gear. It covers and reinforces the weak spot. But proper care and maintenance are still essential for the longevity of your leather items.
A patch works well for clean tears, worn-through elbows on jackets, or a ripped corner on a bag. It can handle punctures from keys or a snag that pulled the grain apart. I recently patched a small tear on June, my leather jacket, where the shoulder seam was starting to give. The patch gave it years more life. Beyond patches, other repair methods exist for deeper tears or ripped areas in leather jackets. In the next steps, you’ll find quick guides on repairing damaged leather jackets with common techniques.
A patch cannot fix shallow scuffs, surface scratches, or just color loss. Those issues need cleaning and dye. It also struggles with very large, shredded areas or structural seams that have completely failed. For those, a professional repair is the wise choice.
To decide, look closely at your item. Ask yourself these questions.
- Is the hole or tear clean-edged, or is the leather frayed and shredded?
- Is the area around the damage still strong and firm, or is it thin and cracking?
- Is this a spot that gets a lot of flex and friction, like an elbow or a bag corner?
If you have a clean hole in strong leather, a patch will work. For a tiny puncture or cut, you might not need a patch at all. A leather filler compound can work for holes smaller than a pencil eraser. This method is a different skill, like filling a nick in wood.
When the damage is larger than a coin, or the leather is torn, a patch moves from an option to the best plan. It spreads stress away from the weak point, saving the rest of the piece.
Gathering Your Tools and Choosing Your Patch Leather
Good tools make clean work. You do not need a full workshop, but sharp, precise tools are non-negotiable. A dull blade will chew up your leather and ruin the job before you start.
Here is what you need on your bench.
- A sharp utility knife, craft knife, or very sharp scissors.
- Adhesive (a flexible leather glue) OR a leather needle and strong thread for stitching.
- A wood or glass slicker for burnishing edges.
- A heavy book or a smooth weight to press the patch as it dries.
- A ruler and a pen that writes on leather (a fine-point marker or a stylus).
- Fine-grit sandpaper (around 400 grit).
You can find leather repair kits sold for fixing car seats or furniture. These are helpful. They usually contain a piece of leather, adhesive, a colorant, and sometimes a graining paper to match texture. These kits are fantastic for quick color-matched fixes on items you do not see up close every day, like a couch arm.
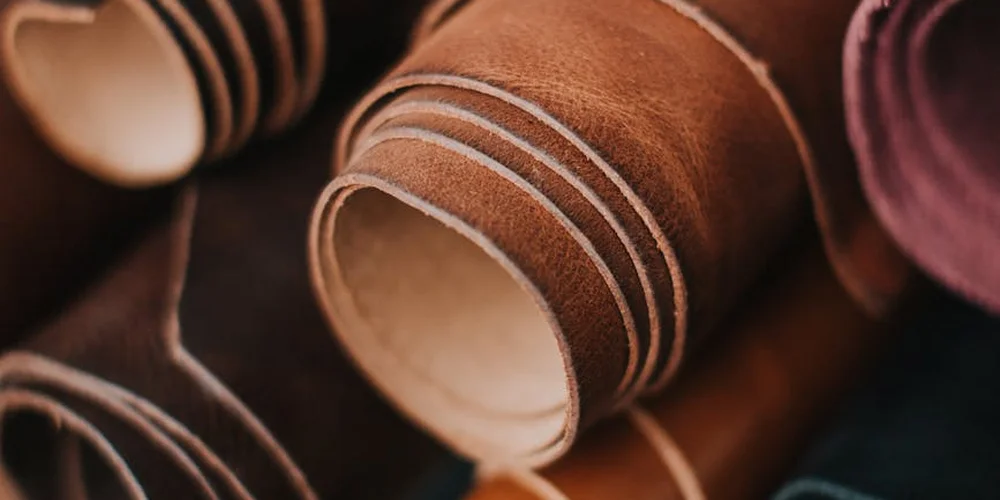
For a garment or bag you love, choosing the right patch leather matters more. The goal is to match three things: weight, grain, and color. The texture and quality of the grain play a crucial role in how the patch will look and feel.
Weight means thickness. Your patch leather should be the same or slightly lighter than the item you are fixing. A heavy patch on a thin jacket will feel stiff and look bulky. For my jacket June, I used a soft calfskin scrap that matched her weight perfectly.
Grain is the surface texture. Is your item smooth? Does it have a pebbled, stamped, or full-grain texture? The closer the match, the more the patch will disappear. You can sometimes sand a patch lightly to mimic a worn texture.
Color is the trickiest part. New leather is always brighter. A nearly perfect color match will look better after conditioning and wear, as both pieces age together. You can dye a lighter patch to get close, but an exact match is difficult. Sometimes, a contrasting patch for a hat or a jacket sleeve can be a stylish choice, turning the repair into a feature.
Using real leather remnants from an old bag or a craft supplier is my preferred method. It behaves like your original piece. Pre-made patches are convenient, but the leather is often thinner and the finish may not blend as well. For sourcing material for a leather jacket, look for “garment leather” or “remnant” bags online or at local craft stores. With proper care, you can refresh and renew leather pieces to restore their original look and feel.
This is a satisfying DIY project. If the tear is on a major seam, the lining is involved, or the damage is very complex, searching for a “leather patch repair near me” is a smart move. A professional has the machines and experience for those big jobs, preserving your item’s value and structure.
The Step-by-Step Process: From Cutting to Securing
Now we get to the good part. Think of this as patching a favorite pair of jeans, but with a bit more finesse. The goal is a repair that’s strong, flexible, and as tidy as you can make it.
Step 1: Prepare the Damaged Area
A clean, stable surface is everything. You wouldn’t glue something to a dusty, crumbly wall. Leather is the same.
- Start by gently cleaning the area with a damp, soft cloth and a neutral leather cleaner. Let it dry completely.
- If the tear has frayed or ragged edges, use sharp scissors or a craft knife to carefully trim them away. You want a smooth perimeter for the patch to adhere to. This stops the damage from creeping further.
This prep work prevents dirt from getting trapped under your patch and gives the adhesive or stitches a solid foundation to grip.
Step 2: Cut and Shape Your Leather Patch
This is the heart of how to make leather patches that look intentional, not bulky. For a small tear on my wallet Scout, I’d use a scrap of similar veg-tan leather.
- Place your patch leather over the damage, ensuring it overlaps the cleaned edges by at least a half-inch on all sides. Trace around it lightly with a pencil or fabric marker.
- Cut the patch out with a sharp knife or heavy-duty scissors. A ruler helps for straight lines.
- Now, make it disappear. This is called skiving or beveling. Use a sharp knife to shave a gentle slope along the *underside* of the patch’s edges. You’re thinning the perimeter so it transitions smoothly into the garment, eliminating a harsh, obvious ridge.
Match the leather type if you can. A thick patch on a thin jacket will feel clumsy. A thin patch on a bag won’t hold up.
Step 3: Choose Your Attachment Method
You have two great paths here: a flexible bond or a forever stitch. The choice depends on your tools, the item’s use, and the look you want.
Using Leather Adhesive
For many internal or low-stress repairs, a quality adhesive is perfect. I steer clear of super-strength, expanding glues like Gorilla Glue; they can stiffen leather and are nearly impossible to reverse. A flexible leather or contact cement is the professional’s choice. If you’re asking ‘are best adhesives glues leather repair?‘, our next section will compare top options for long-lasting fixes. It will help you choose the right glue for your project.
- Apply a thin, even layer to both the back of your skived patch and the prepared area on the garment.
- Let the glue become tacky to the touch (check the product instructions, usually 2-5 minutes).
- This next part is key. Carefully align the patch and press it down firmly, starting from the center and working out to push any air bubbles to the edges.
- Place a flat, heavy book or board on top. Let it cure fully, undisturbed, for at least 24 hours. The weight ensures a flush, lifelong bond.
Hand-Stitching the Patch
For a supremely durable, classic repair-like how to sew a patch on a leather vest for that rugged look-hand-stitching is the way. The saddle stitch is king here. It uses two needles and, if one thread breaks, the other lockstitches hold the line.
- First, temporarily secure the patch with a dab of glue or double-sided tape so it doesn’t shift.
- Mark your stitch holes evenly around the patch perimeter, about 1/8 inch in from the edge. Use a diamond chisel punch for clean, consistent holes through both layers.
- Thread two needles on either end of a waxed thread. Stitch through the first hole, pulling the thread so the ends are even.
- Take the left needle through the next hole on the right side, and the right needle through the same hole from the left. Pull tight. This cross-locks every stitch. Continue all the way around.
- To finish, backstitch a few holes, trim the thread, and tap the ends flat with a hammer.
Hand-stitching is a meditation. It takes time, but the result is a repair that can last as long as the original garment.
Step 4: Apply and Set the Patch
Patience is your most important tool in this step. Rushing now can undo all your careful work.
- For glue: After weighting it, walk away. Don’t poke it. Don’t test it. Give it a full day to develop its full strength in a dry, room-temperature spot.
- For stitches: Once the last stitch is locked, go back and gently hammer the stitched line with a smooth face mallet. This beds the threads into the leather, smoothing the feel and setting the tension.
This is the moment your repair becomes part of the piece. Whether you used glue or thread, that patch is now sharing the load, ready for more adventures.
Finishing Your Repair and Long-Term Care
A raw patch edge can look unfinished. The goal is to help it blend into its new home, both in color and texture.
You can apply a matching leather dye or edge paint to the patch’s side. Use a small brush and build the color in light layers. Let it dry completely between coats.
Once the patch is set and colored, condition the entire piece. Applying a light coat of conditioner over the repair and the surrounding leather unifies the finish and keeps everything supple. It feeds the old leather and the new, ensuring they age together gracefully. My jacket June gets this treatment every season.
For suede or a decorative patch, you might just clean and secure it without dye. For a tiny repair, like on a watch strap, use the same principles but with precision tools and thinner leather. The care is the same. Whether you’re working with suede cords, fabric patches, watch bands, or gloves, the same careful, clean repair approach applies. It helps keep wearables and accessories looking neat and lasting longer.
Remember, a well-executed patch isn’t a flaw. It’s a chapter in your item’s story. It adds character and proves the piece is loved enough to be saved. That’s the real beauty of leather care.
Common Questions
Can I just use a leather repair kit from the hardware store?
Those kits are designed for quick, functional fixes on furniture or car interiors where a perfect cosmetic match isn’t critical. For a beloved garment or bag you’ll see up close, the leather and colorants in kits often lack the quality and nuance for a discreet, long-term repair.
Is leather repair tape a good permanent solution?
No, treat it as a temporary, emergency field repair only. This tape does not breathe or flex like real leather and will eventually dry out, crack, and leave a gummy residue that complicates any proper future repair.
My leather watch band is cracked. Can I patch it?
Rarely. The constant flex and precision fit of a watch strap make patching impractical; a patch would be bulky and uncomfortable. For a valuable strap, seek a professional. For a common one, replacement is usually the most sensible and cost-effective option.
When should I absolutely seek a professional (“leather patch repair near me”)?
Search for a pro when the damage involves major structural seams, the lining, or is very large and complex. A professional conservator has the tools and expertise to preserve the item’s structure and value, which a DIY patch cannot achieve for these significant issues.
How do I maintain a garment after it’s been patched?
Condition the entire piece regularly with a quality leather conditioner. This nourishes both the old and new leather, allowing them to age and patina together uniformly, which helps the patch blend in visually and perform well over time. For restoration, you may wonder whether conditioner or oil is the better choice. The right pick can affect how the patch ages and blends with the surrounding leather.
Finishing Your Leather Repair
A lasting patch repair depends entirely on your preparation. Clean the area thoroughly, cut the patch to fit the wear pattern, and allow any adhesive to cure completely before use.
Choosing to repair leather extends the life of a well-made item and honors the material. With each project, you build the skills to care for pieces like Mason or Scout, fostering a deeper appreciation for responsible craftsmanship. Over time, you’ll learn which methods are most effective for repairing general leather items. This knowledge helps you apply reliable techniques across belts, wallets, jackets, and bags.
Expert Resources and Citations
- Amazon.com: JDLUGH Sofa Leather Repair Patch Tape, Large Self Adhesive Couch, Car Seat, Office Chair, Leather Furniture, Vinyl Repair Patch Kit for Furniture (15×60 Inch, Brown)
- Self Adhesive Leather Patch
- Leather Repair Tape That Actually Works | Match ‘N Patch
- Amazon.com: Self Adhesive Leather Patch
- Leather Repair Kit – Easy to use kit for Leather Repairs | Furniture Clinic
Harriet is a avid collector of leather goods such as purses, bags, seat covers, etc and has an extensive background in leather care, recovery, stain removal and restoration. She has worked for a number of years perfecting her leather care techniques and knows the ins and outs of restoring all kinds and types of leather products. With her first hand knowledge in leather care, you can not go wrong listening to her advice.
Fixing Tears and Rips