How Do You Fix Common Leather Damage? A Hands-On Repair Guide
Published on: June 19, 2026 | Last Updated: June 19, 2026
Written By: Harriet Nicholson
Hello Tannery Talk. That torn strap or cracked surface on your leather item can feel like a major setback. I know the worry, but with a few trusted methods, you can often make a solid repair yourself.
This guide will walk you through evaluating the damage, selecting the right repair approach, executing steps for gluing or stitching, and finishing with protective care.
My advice comes from years at the bench, personally restoring pieces like my worn saddle Mason and patching June’s jacket.
How Do You Know If Your Leather Can Be Fixed?
Before you reach for any tools, you need to know what you’re dealing with. A quick inspection tells you everything.
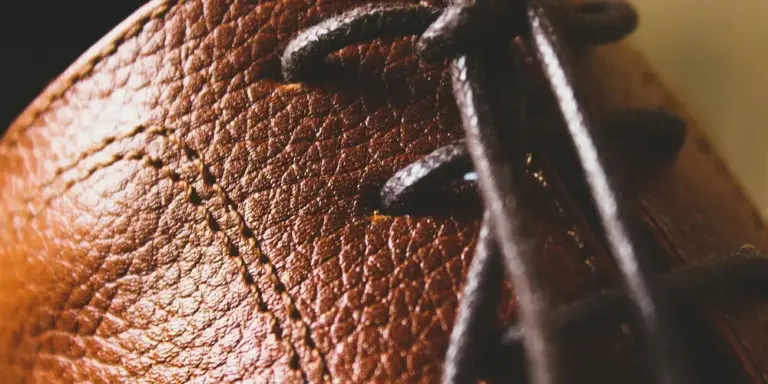
Start with a simple touch test. Run your fingers over the damaged area. Does the leather feel flexible, like my old saddle Mason? Even with deep creases and scuffs, his surface is supple. This is a sign of healthy, well-conditioned leather. If the leather still bends and feels soft, you can almost certainly fix leather damage.
Now, look closely. Repairable damage includes:
- Light surface scratches and scuffs
- Small tears or punctures with clean edges
- Frayed or broken stitching
- Loose seams or peeling edges
Think of these like a scraped knee. They need cleaning and patching, but the skin beneath is still alive.
Some damage means the leather is too far gone. Look for these signs:
- Dry rot or brittle cracks: The leather feels stiff, powdery, and cracks when bent. Imagine the difference between a flexible twig and a dry, dead stick that snaps. This is structural failure.
- Mold or mildew: Fuzzy patches or a musty smell that doesn’t go away after cleaning. This can weaken the fibers deeply.
- Severe discoloration or burns: Damage that has chemically altered the leather’s structure.
With Mason, I watch the stress points near the stirrup leathers. Flexible, polished wear is fine. But if I ever saw a network of tiny, dry cracks forming there, I’d know the leather’s integrity is failing. For severe damage like this, professional restoration is the only real option, or you risk the repair failing completely.
Gathering Your Toolkit: What You Need for DIY Leather Repair
You don’t need a workshop full of gear. A small, thoughtful kit handles most common problems. Here’s what to gather.
First, the essentials for cleaning and prep. You can’t fix dirty leather.
- A soft-bristled brush (like a horsehair detailing brush)
- A pH-balanced leather cleaner or saddle soap
- Soft, lint-free cloths (microfiber works well)
- A good leather conditioner
Cleaning the area first removes oils and dirt, giving your repair materials a clean surface to bond with. This step is non-negotiable.
Next, the repair essentials. This is your core do it yourself leather repair kit:
- Water-based leather glue: This is my top recommendation for how to fix leather tears and reattach seams. It doesn’t smell toxic, it cleans up with water, and it dries flexible. For a small tear on June’s jacket sleeve, this is what I’d use.
- Strong, curved stitching needles and heavy-duty thread: For repairing seams and reinforcing glued areas.
- Backing patches: Thin, flexible leather or fabric patches. These go on the backside of a tear to bridge the gap and add strength, like a bandage under a wound.
- A smooth-edged tool for burnishing: A wooden slicker, a polished bone folder, or even the back of a spoon. This helps smooth and seal edges.
Let’s talk glue for a moment. Many older kits suggest strong contact cement or rubber cement. These often contain solvents like toluene. They bond fast but are brittle, smelly, and harsh on the leather. A water-based adhesive might take a few minutes longer to set, but it creates a strong, flexible bond that moves with the leather. It’s the safer, more forgiving choice for most repairs. If you’re weighing options for leather repair, you might ask: what are the best adhesives for leather repair? Many professionals favor water-based glues for a durable, flexible bond.
How does this toolkit translate to real fixes?
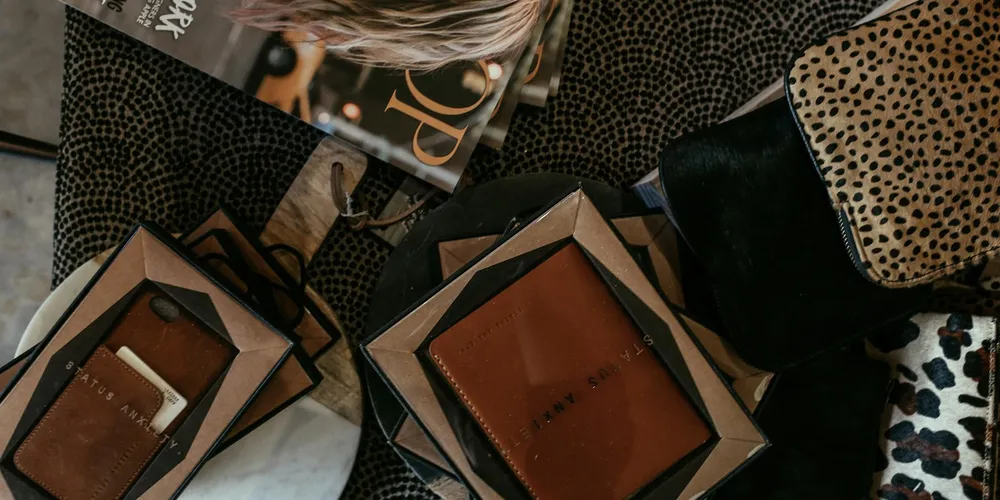
For a worn car interior seat seam, you’d clean the area, apply water-based glue under the peeled seam, press it flat, and place a weighted book on it for an hour. For a torn pocket on Scout the wallet, you’d glue a small backing patch behind the tear, let it cure, then carefully re-stitch the edge for a clean finish.
Start simple. Practice a glue repair on an unseen area first. The goal is a lasting fix that keeps your leather in service for years more.
Fixing Scratches and Surface Damage on Leather
Small marks on leather happen to everyone. The process to fix them is gentle and often feels like giving your item a good drink of water.
For most surface damage, a simple clean-condition-buff routine works wonders to heal the leather from the inside out. This method relies on the leather’s natural ability to recover when properly nourished.
- Clean. Use a soft, lint-free cloth dampened with water or a dedicated, pH-balanced leather cleaner. Wipe the entire area gently to lift any dirt. Let it dry completely.
- Condition. Apply a small amount of leather conditioner to another clean cloth. Rub it into the scratched area using small circles, then spread it over a wider section to ensure even absorption.
- Buff. Once the conditioner has soaked in (usually 10-15 minutes), take a dry cloth and buff the area. You’ll hear a soft, smooth sound as the cloth glides over the grain. This blends the conditioner and restores a unified, smooth feel.
My wallet, Scout, picks up light scuffs from daily life. This three-step process always brings back its rich, dark brown color and supple handfeel.
For Light Scuffs and Marks
These are superficial marks that haven’t broken the leather’s surface. Your own body heat can be a useful tool here.
For the faintest marks, use your fingertip to gently warm and massage a dab of conditioner directly into the scuff. The warmth helps the oils penetrate and the leather fibers to swell slightly, which can make shallow scratches virtually disappear. Buff lightly with a cloth afterward.
For Deeper Scratches
When you can feel a groove with your fingernail, the repair needs more material. Think of this like filling a small dent in wood before refinishing.
- Clean the area thoroughly and let it dry.
- Apply a leather filler paste or a colored leather cream that matches your item. Use a small spatula or a finger to press it firmly into the scratch, overfilling it slightly.
- Let it dry completely. This can take several hours.
- Once rock-hard, use a very fine-grit sandpaper (like 400 grit) to sand the filler down flush with the surrounding leather. Use feather-light pressure.
- Apply a conditioner over the entire repaired area to re-hydrate the leather and blend the finish. Buff to a seamless look.
The key for deeper repairs is patience during drying and a gentle touch during sanding to avoid creating a bigger problem. Always test your filler or cream on a hidden spot first to check the color match.
Repairing Tears and Rips in Leather Goods
A tear feels more serious than a scratch, but many are repairable. The goal is to close the gap and add strength so it doesn’t reopen.
Assess the damage first. A clean, straight tear along a seam is often a candidate for re-stitching, while a ragged rip in the middle of a panel usually needs a patch.
For a small tear, like on a bag’s gusset, you can sometimes fix it from the back. It’s like mending a favorite pair of jeans from the inside.
- Apply a flexible, water-based leather glue to both sides of the tear.
- Press them together firmly and wipe away any excess glue that seeps out.
- Place a piece of breathable cloth or a thin leather patch over the glued area on the backside (the “wrong” side of the leather). Glue this patch in place. This backing patch is crucial-it acts like a splint, spreading stress so the tear doesn’t just reopen next to the glue line.
- Place a flat, heavy book on top and let it cure for at least 24 hours.
Specific Cases: Car Seats and Bag Handles
These areas suffer from constant stress, so reinforcement is non-negotiable.
For a split in a car seat or a bag handle, a strong internal patch is your best friend for a lasting repair. The process is similar to the one above, but your backing material must be robust. Use a heavyweight leather patch or strong fabric like denim.
Cut the patch larger than the tear. Apply glue to the patch and press it firmly onto the backside of the leather, bridging the tear completely. Apply weight and let it cure fully before using the item. This method doesn’t make the damage invisible from the front, but it restores function and prevents the tear from growing.
A common mistake is using a weak adhesive or skipping the backing patch. This leads to a quick failure. Taking the time to add that structural support makes all the difference.
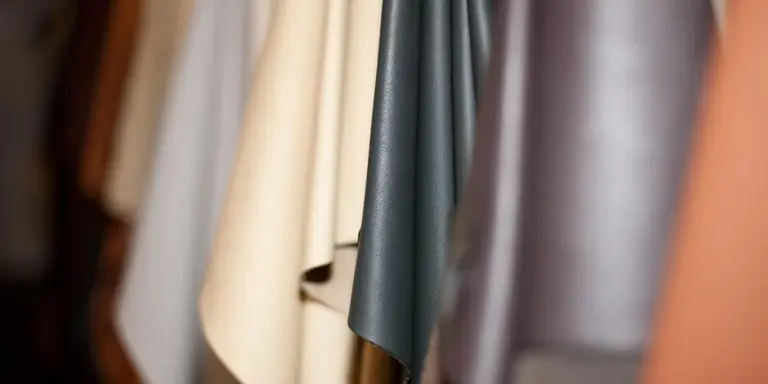
How to Fix Faded and Discolored Leather
A faded leather jacket or a discolored bag is not a lost cause. It’s just a piece telling its story. I’ve brought back the rich color on June, my calfskin jacket, more than once. The method you choose depends on how much pigment has actually been lost. That approach also works for a faded leather bag. The same care applies to restoring and repairing the color on a faded leather bag.
Reviving Color with Conditioners vs. Dyes
Think of conditioners as a tall drink of water for thirsty leather. They can often bring back a surprising amount of depth to leather that’s simply dry and dull.
Specialized color-enhancing conditioners contain pigments. They work like a light tinted moisturizer for your skin, adding a subtle wash of color while they nourish. This is perfect for mild, even fading across an entire piece.
For a general refresh, always try a nourishing conditioner first before reaching for a dye.
Leather dye is for when the pigment is gone. It’s like repainting a faded wooden fence. Use it for deep scuffs that show a lighter base, severe sun bleaching, or when you want to completely change the color. If you’re looking to refresh a leather couch or restore leather furniture, a dye recolor can help bring back the richness. It’s a practical DIY option for reviving worn surfaces, so you can tailor the shade to your space.
Step by Step: Restoring Even Color
Sun-damaged leather can be tricky because the fading is often uneven. Here’s how to get a smooth, consistent result.
- Clean Thoroughly: Use a pH-balanced leather cleaner. Any dirt or old conditioner will block new color from absorbing evenly. Let it dry completely.
- Test in a Hidden Spot: Always test your product on a seam or inside flap. Check for color match and absorption.
- Apply in Thin Layers: Whether using a pigmented conditioner or dye, apply with a soft, lint-free cloth or a specialty dauber. Use small, circular motions.
- For conditioners: Work a small amount into the entire panel, not just the faded spot, to avoid a patchy look.
- For dyes: Apply the first coat as a very light wash. Let it dry for several hours. Then assess and apply a second thin coat if needed. Three thin layers always look better than one thick, sticky layer.
- Allow Full Dry Time: Patience is key. Let the piece sit undisturbed for at least 24 hours in a warm, dry room before you use it.
Keeping the Color You Just Fixed
After you put in the work to restore color, protect it. Sunlight is leather’s biggest enemy for fading.
Consider a light spray of a UV-protectant leather product. It acts like sunscreen, filtering out the most damaging rays. Store leather items away from direct sunlight and heat sources. For my saddle Mason, this means a saddle cover and a spot in the tack room away from the window.
Regular, light conditioning every 3-6 months does more than keep leather soft; it maintains a protective barrier that slows down fading.
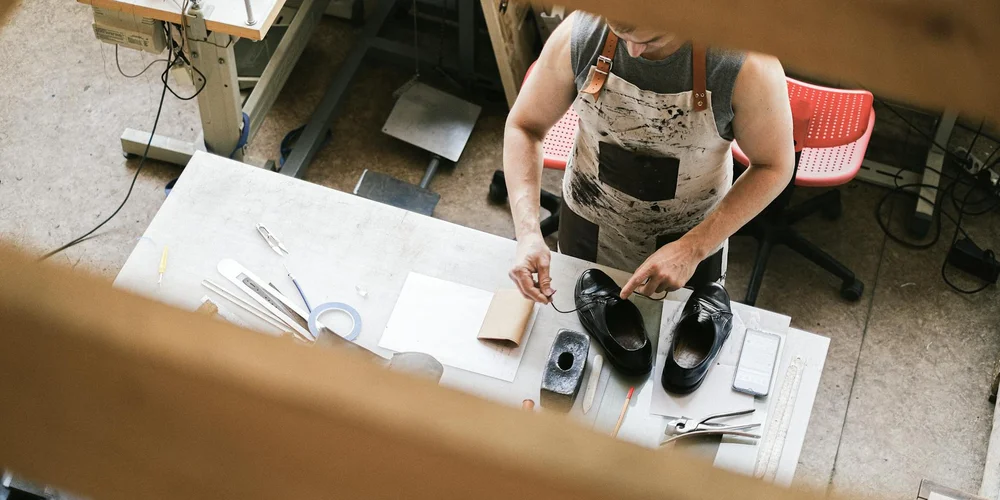
DIY vs. Professional: When to Fix It Yourself
Knowing when to tackle a repair yourself and when to call a pro saves your wallet and your favorite piece. I base this decision on three things: the scale of damage, the tools needed, and the sentimental value.
Small, clean cuts, light scuffs on furniture or car interiors, faded color, and dry, cracked leather are all in the DIY realm. You can fix leather interior scratches with a simple conditioner or a color-matched filler cream. These are maintenance, not major surgery, especially for car seats and dashboards.
If the repair involves basic cleaning, conditioning, or filling a small flaw, you can almost certainly handle it with a little guidance.
For large tears (over an inch), complete separation of seams, significant structural damage, or heirloom pieces you can’t risk, seek a professional. Replacing a full lining or re-stitching a load-bearing strap on a bag requires specific machines and expertise.
Let’s make it clearer with a simple comparison.
| Repair Type | Try DIY When… | Call a Pro When… |
| Scratches & Scuffs | They are surface-level and don’t expose lighter leather underneath. A conditioner rub often minimizes them. | The scratch is deep, wide, or on a highly visible, smooth leather where filler would be obvious. |
| Color Damage | The fading is even or you’re touching up a small spot with a matched dye pen. | The entire piece needs a full, flawless re-dye, especially on a smooth, aniline leather. |
| Small Tears & Holes | It’s a clean puncture, like from a rivet, in a non-stress area. A patch kit from the inside can work. | The tear is on a stress point (like a bag corner) or the leather is rotten and weak around it. |
| Seam Separation | A single stitch or two has popped on a decorative seam. | The main structural seam of a bag, shoe, or saddle is coming apart. This needs professional strength. |
Think of my wallet, Scout. If the stitching on the bill compartment came loose, I’d restitch it myself. But if the entire wallet started to split at the seams from years of overstuffing, I’d send it to a specialist. Your time and the item’s future life are what matter most.
After the Fix: Caring for Your Repaired Leather
Your work isn’t done when the glue dries or the last stitch is tied. Think of a repair like a small surgery. The area needs time to heal and strengthen. Good aftercare makes the difference between a fix that lasts for years and one that fails in months.
I treat every repaired piece with extra kindness for the first few weeks. My jacket, June, had a small tear in the lining I stitched up last fall. By following a simple routine, that repair is still holding strong, and the leather around it feels better than ever.
The Post-Repair Care Routine
This simple, three-part routine protects your handiwork. Do this immediately after a repair, and then fold it into your regular leather care.
- Clean Gently: Wipe the entire piece with a barely damp, soft cloth to remove any dust or residue from the repair process. If you used adhesives, wait at least 24 hours for them to fully cure before any cleaning.
- Condition Thoughtfully: Apply a light coat of a pH-balanced leather conditioner to the whole item, not just the repaired spot. This keeps the leather supple and prevents the repaired area from drying out and cracking. Let it absorb fully.
- Store with Care: Keep the item in a cool, dry place with good air flow. Never store it in a plastic bag or a damp basement. For the first 48 hours, try to let the repaired area rest without being bent or compressed.
Conditioning the leather around a repair prevents a weak, dry ring from forming that could lead to a new tear.
Handling Your Leather with Care
Patience is your best tool here. Adhesives and threads reach their full strength over time, not instantly.
With June’s jacket, I avoided wearing it for a heavy bike ride or stuffing my hands in the repaired pockets for a full week. I let the stitches settle. For the first month, I was mindful not to put sharp stress on that area. Now, I treat it just like the rest of the jacket, with confidence.
A common mistake is testing a repair too soon by pulling on it. If you’ve glued a sole back on a boot, walk around your house on carpet first. Don’t go for a hike. If you’ve stitched a bag strap, carry something light like a notebook before loading it with a laptop.
Gentle handling in the weeks after a repair allows the materials to fully bond and integrate with the surrounding leather.
Preventative Care to Avoid Future Repairs
The best repair is the one you never have to make. Consistent, simple care keeps leather strong and resilient from the start.
- Make Conditioning a Habit: Like hydrating your skin, leather needs moisture. Condition items like belts, bags, and shoes every 3-6 months. Do it every 6-12 months for jackets and furniture. More frequent use means more frequent conditioning.
- Act Fast on Spills: Blot moisture immediately with a dry cloth. Let it air dry away from direct heat. For oil or grease, sprinkle on a little cornstarch to absorb it, let it sit overnight, then brush it off.
- Use the Right Support: Store bags stuffed with tissue paper to hold their shape. Use broad, padded hangers for jackets. This prevents unnatural creases and stress points that can lead to cracks.
Scout, my wallet, gets a tiny dab of conditioner on my finger rubbed into its seams every few months. It takes twenty seconds. This keeps the veg-tan leather from drying out at the stress points where it flexes in my pocket every day.
Regular, light maintenance is far easier than emergency repairs and preserves the natural character and strength of the leather for decades.
Quick Answers
What’s the real difference between leather glue and cement?
Leather glue is water-based, dries flexible, and is ideal for most repairs because it moves with the material. Cement is solvent-based, creates a stiff bond, and can dry out and crack the leather over time. To ensure lasting adhesion on leather and other surfaces—wood, metal, plastic—use the proper adhesive and surface preparation. Proper technique is key for durable bonds.
Can a repaired bag handle ever be as strong as new?
No, a repair restores function but creates a stress point. Always reinforce it with a substantial internal patch and avoid overloading it to prevent future failure.
Is dyeing leather a good way to cover up damage?
Dye only addresses color, not structure. It can make scratches more visible if not properly filled and will not strengthen a weak, torn, or rotten area.
When should I just stop trying to fix a piece?
Stop when the leather is brittle, powdery, or crumbles to the touch-this is dry rot. No adhesive or patch will hold on structurally failed material.
Putting Your Skills to Work
When repairing leather, your best tool is patience. Rushing a fix can do more harm than the original problem ever did.
Caring for your leather items extends their life for years, turning every careful repair into a commitment to quality and away from waste. With each project, you build not just a repaired item, but the skills and confidence for the next one.
Further Reading & Sources
- How to repair leather: A guide to repairing real and faux leather
- Mastering Leather Repair: A Complete Guide for Longevity
- 7 Easy Steps to Repair Leather at Home (No Experience Needed!)
- Amazon.com: Leather Repair Kit for Furniture, Sofa, Jacket, Car Seats and Purse. Vinyl Repair Kit. Super Easy Instructions to Match Any Color, Restore Any Material, Bonded, Italian, Pleather, Genuine : Automotive
Harriet is a avid collector of leather goods such as purses, bags, seat covers, etc and has an extensive background in leather care, recovery, stain removal and restoration. She has worked for a number of years perfecting her leather care techniques and knows the ins and outs of restoring all kinds and types of leather products. With her first hand knowledge in leather care, you can not go wrong listening to her advice.
Filling Deep Cracks