How Do You Repair Cracked Leather on Shoes and Boots?
Published on: May 13, 2026 | Last Updated: May 13, 2026
Written By: Harriet Nicholson
Hello Tannery Talk. Seeing cracks in your favorite leather shoes is distressing. I am here to tell you that, with the right approach, you can often bring them back from the brink.
This guide walks you through a practical, craft-focused process. We will cover assessing the true damage, properly cleaning the leather, filling cracks for stability, and matching color for a seamless repair.
My advice comes from years of hands-on care, repairing everything from Mason’s scuffed saddle to Scout’s well-worn wallet.
What Makes Leather Crack in the First Place?
Leather cracks when it dries out. It’s that simple. Think of a high-quality hide like the skin on your hands. Without lotion, it gets dry, tight, and can flake or split.
Leather is a network of fibers held together by natural oils and tannins. Every time you bend your boot or expose it to the elements, those fibers stretch and tiny amounts of moisture and oil escape. Over years, the leather slowly starves.
If the leather isn’t fed with conditioner, those fibers become brittle and snap, creating permanent cracks.
Four main culprits cause this starvation:
- Lack of Conditioning: This is the number one reason. Leather needs hydration, just like your skin. If you wear boots for months without a conditioning session, you’re asking for trouble.
- Sun and Heat Exposure: Leaving leather in a hot car or a sunny window bakes the oils right out of it. It’s a fast track to dryness.
- Constant Wear Without Care: Daily use is a stress test. Dust, dirt, and moisture from rain or sweat get ground into the pores, blocking them from absorbing conditioner later.
- Low-Quality Hides: Thin leathers, or those with a heavy painted-on surface (called a pigment finish), have less natural fiber to work with. They crack more easily because there’s less substance underneath.
I like to compare a cracked boot to a dried-out riverbed. At first, the ground is supple and holds water. After a long drought, it becomes a network of hard, deep fissures. That’s your leather without its oils.
Weather acts like that drought. Salt from winter roads, repeated soakings, and extreme temperature swings all accelerate the drying process. This is why prevention-simple, regular care-is so powerful.
Can You Fix Cracked Leather? How to Tell What You Can Save
Yes, you can fix most cracked leather. I’ve brought pieces back from the brink that looked hopeless. The real question is: what kind of crack are you dealing with?
First, clean the area gently with a damp cloth and a pH-balanced leather cleaner. Let it dry completely. You need to see the true damage without any dirt hiding it.
Now, assess the crack. Bend the leather gently where it’s damaged.
The Three Types of Leather Damage
1. Surface Creasing: These are the fine lines in the bend of a toe or ankle. They’re not cracks yet. They feel soft and the color is uniform. This is just character, like the creases in my jacket, June. A good conditioning will keep these healthy.
2. Shallow Surface Cracks: The top finish has split, but you can’t see the lighter, fibrous underside of the leather. The piece still has flexibility. This is very repairable. The bend test will show the crack opening slightly but not gaping.
3. Deep Structural Splits: The crack is wide. You can see the rough, lighter-colored core of the leather, or even a gap. The leather feels stiff and brittle around it. This requires more advanced repair to seal and reinforce.
The simple “bend test” tells you everything: gently flex the leather. If it moves smoothly and the crack stays closed, it’s superficial. If the crack opens wide like a mouth and the leather is stiff, the damage is deep.
There are limits. Very thin leather or items with a thick, painted pigment layer (like some fashion shoes or brightly colored bags) have less room for error. Once that painted surface cracks, it’s difficult to make it look perfectly seamless again. The goal shifts from perfect restoration to stabilization and preventing further damage.
My old saddle, Mason, had deep cracks from years of hard use and neglect. They weren’t pretty, but with the right steps, I stopped them from spreading and made the leather wearable again. Repairing peeling or cracking leather isn’t just cosmetic—it’s about preventing future damage and maintaining durability over time. Set your expectations on saving the item’s life and comfort, not always on making it look brand new.
The Essential Toolkit for Cracked Leather Repair

You can’t fix cracked leather without the right tools. Think of it like a kitchen. You need the basic ingredients before you can cook. Gather these supplies first before you fix cracks and tears in leather furniture.
- A gentle leather cleaner (pH-balanced is best).
- A quality leather conditioner or oil.
- A leather filler paste or liquid.
- Color-matching cream, dye, or a pigment pen.
- Soft, lint-free cloths and small applicator brushes.
Understanding Repair Kits
Many brands sell cracked leather repair kits. These are great for beginners. A typical kit includes a cleaner, a filler, a colorant, and an applicator. These kits work best for small, focused repairs on items like shoes, handbags, or car interiors where color matching is straightforward. They give you a complete system in one box, which removes the guesswork. For a large, treasured item like a jacket or a vintage bag, you might get better results buying separate, higher-quality products for each step, such as specialized conditioners and cleaners that better suit the material and can provide a more thorough restoration.
Paste vs. Liquid Fillers
Choosing your filler is key. The texture of the crack tells you what to use.
- Paste Filler: Use this for wider, deeper cracks and gashes. It has a thick, putty-like consistency that fills voids. Think of it like spackle for a hole in your wall.
- Liquid Filler: This is for networks of fine, hairline cracks. It’s thinner, so it can seep into all those tiny splits and bind the fibers back together from within.
For most shoe and boot cracks, which are often a mix of both, a good paste is your most versatile starting point.
What to Look For in Products
When you’re looking at products, read the labels. You want conditioners with natural oils like lanolin or mink oil. They feed the leather. For fillers, look for flexible formulas that contain bonding agents like acrylic or latex. Avoid fillers that dry rock-hard; a flexible repair will move with the leather and not flake out. For colorants, cream-based products often contain waxes and pigments that nourish while they color, which is better for a lasting finish than a simple alcohol-based dye on damaged leather. Different leather types may respond differently to these ingredients. Look for formulas labeled for your specific leather type to ensure compatibility.
Your Step-by-Step Guide to Fixing Cracked Leather
Step 1: The Deep Clean
Never skip this step. Dirt and old polish trapped in a crack will prevent any filler from sticking. Dampen a soft cloth with your cleaner and gently wipe the area. Use small, circular motions to lift the grime out of the crevices. Let the leather dry completely. You should see the true, clean leather around the crack. This is your canvas.
Step 2: Restore Lost Moisture
Cracks happen because the leather dried out. Before you fill, you must soften the area. Apply a generous amount of conditioner to the cracked spot and the leather around it. Rub it in thoroughly. Let it soak in for at least an hour, or even overnight for very dry leather.
This conditioning step softens the leather fibers, making them more receptive to the filler and preventing the cracks from spreading further. My old saddle, Mason, has never had a major crack because of a simple rule: condition after every few cleanings. It keeps the leather supple.
Step 3: Filling the Cracks
Now for the repair. Scoop a small amount of filler paste onto a flexible spatula or even a flat-edged toothpick. Press the paste firmly into the crack, overfilling it slightly. You need to work it deep. Use a tool to scrape across the crack, forcing the paste down. Remove the excess paste by scraping it flat across the surface. The goal is to leave the paste only in the crack, level with the leather. Let it dry completely. This can take several hours.
A common mistake is not filling deeply enough. If the paste just skins over the top, it will peel off with the first bend.
Step 4: Blending and Coloring
Once the filler is bone-dry, you may need to lightly sand it with very fine-grit sandpaper to make it perfectly smooth with the surrounding leather. Wipe away all dust. Now, match the color. For small repairs on boots, a leather pigment pen can be surprisingly effective. For larger areas, use a color cream and a small brush.
Apply the colorant in thin layers, feathering the edges out onto the good leather to create a seamless blend. Let each layer dry. It’s better to build up slowly to the right shade than to apply one thick, dark coat. For my wallet Scout, I use a matching cream on high-wear corners every year or so to keep it looking sharp.
Step 5: The Final Seal
The repair is color-matched, but it’s still vulnerable. Apply a leather protectant or sealant over the entire area. This is like putting a clear coat on a piece of refinished wood. It shields the repair and the new colorant from water, scuffs, and dirt. Use a light, even coat. After it dries, give the whole piece another light conditioning treatment. This ensures the healthy leather around the repair stays nourished. These steps mirror the most effective methods used to repair and fix general leather items. They reflect common, proven practices that apply across many types of leather goods. Your fix is now protected and ready for wear.
Repairing Different Types of Leather Goods
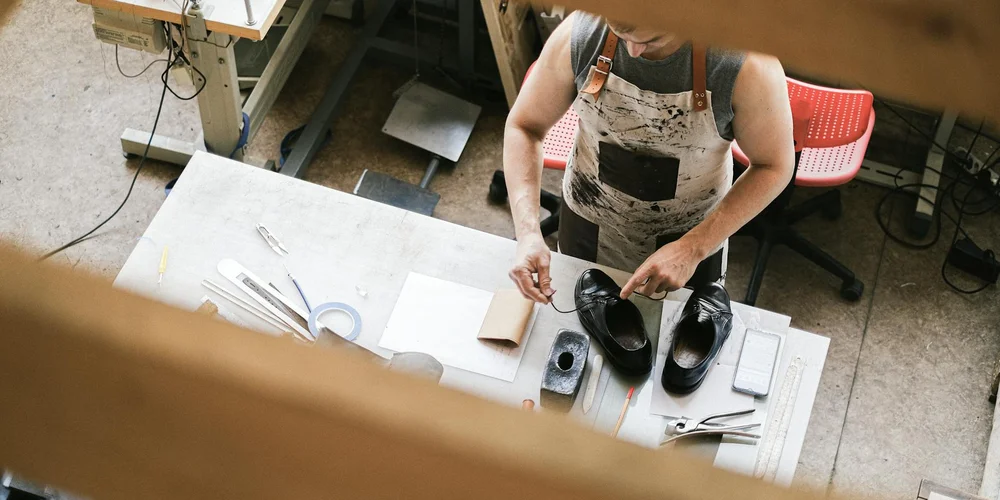
Boots and Cowboy Boots
Boot leather takes a beating. The constant flexing near the ankle creates deep stress creases that eventually crack if the leather dries out. I see it all the time on work boots.
For general boot repair, you start by cleaning deep inside those creases with a soft brush and a neutral leather cleaner. Let it dry completely. Then, you need to condition the leather. Use a thicker conditioner or leather balm for this job. Warm a small amount in your hands and work it into the cracks with your fingers, letting the warmth help it soak in. You want to restore flexibility.
Now, for the visible cracks. After conditioning, you can fill shallow ones with a flexible leather filler. Apply it thinly with a palette knife, let it cure, and sand it smooth with very fine grit sandpaper. Finish by applying a colored leather cream or wax to blend the repair.
A common question is about cowboy boots. Can you fix cracked leather on them? Often, yes. The high shafts on boots like my friend Mason experience less stress, so cracks there are usually from dryness and respond well to conditioning and color touch-ups. Deep cracks on the vamp (the part over your foot) are tougher, as the leather is constantly bent.
The cost to repair them yourself is mostly in the kit-filler, conditioner, and color. A professional repair cost depends on the boot’s value and how many panels are damaged. Replacing a single cracked panel costs less than a full shaft restoration.
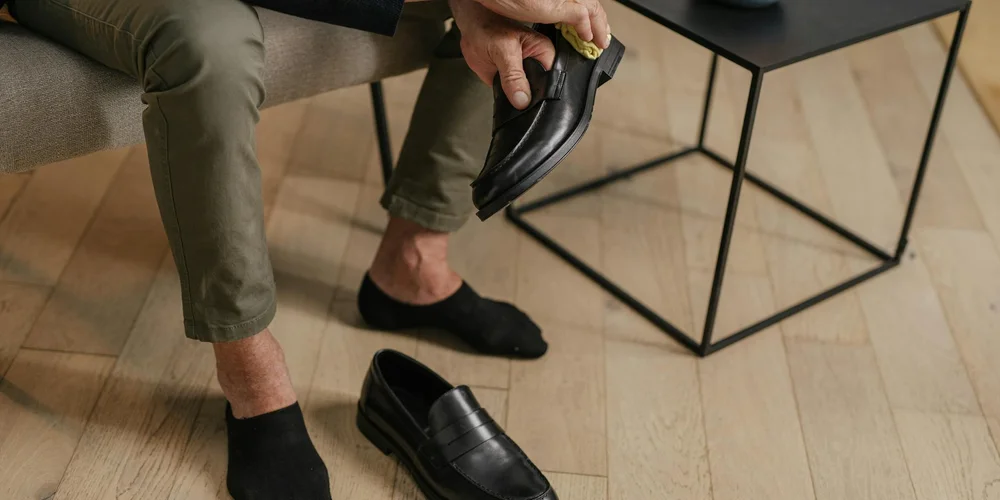
Shoes and Formal Footwear
Dress shoes and loafers need a lighter hand. Their leather is often thinner and finished with a delicate sheen. Aggressive cleaning or heavy conditioners can ruin that finish.
For cracked leather on dress shoes, use a gentle, pH-balanced leather conditioner and apply it sparingly. Buff it in well with a soft cloth. For color loss, use a wax-based polish in a matching shade. Apply it in small circles over the crack to help blend and fill it slightly. The wax adds a layer of protection and can mask minor flaws beautifully.
Suede and nubuck are a different story. You cannot “fill” a crack in suede the same way. The nap hides small flaws, but deep cracks are a serious problem. For minor surface cracking, try gently brushing the area with a suede brush to raise the nap. Use a specialized suede conditioner spray to add moisture back into the leather. This won’t erase the crack, but it can prevent it from spreading and make it less noticeable.
Car Interiors and Other Surfaces
Car leather faces extreme conditions: UV rays, heat, and cold. This baking process is what usually causes the cracking.
To fix cracked car leather, you must use products formulated for automotive use that contain UV inhibitors. These help block the sun’s damaging rays. When repairing leather in automotive interiors—especially seats and dashboards—consider heat exposure, wear patterns, and dye compatibility. This broader topic covers the special considerations for car seats and dashboards to help you achieve a durable, natural-looking repair. Clean the seat or dashboard with an automotive leather cleaner. For cracks, kits designed for car seats are useful. They often include a flexible filler, dye, and a topcoat sealant. The key is color matching. Always test the dye in an unseen spot first, like under the seat.
The process is similar to boots-clean, fill, sand, color, protect-but that final UV-protectant sealant is non-negotiable for anything that sits in the sun.
When to Seek Cracked Leather Repair Services
You can handle surface-level drying and minor cracks at home. Some jobs need a professional’s touch.
You should seek a professional for deep rips where the leather is torn, not just the surface finish. This also covers tears and rips in leather furniture, jackets, or bags. A pro can tailor the repair to the item, preserving both patina and structure. They have the tools and skill to stitch or patch from behind for a lasting fix. Seek help for valuable vintage or antique pieces. The wrong product can permanently damage their patina. Finally, if your careful DIY attempt didn’t work, a pro can likely tell you why and correct it.
Finding a good local artisan starts with looking for shoe repair shops, leatherworkers, or upholsterers. Ask to see examples of their previous repair work. Good questions to ask are: “What is your process for this type of crack?” and “Can you explain how you’ll match the color and texture?”
Service costs vary. A small color touch-up and conditioning might be modest. A repair involving filling, re-dyeing, and finishing a large panel costs more. The complexity of the piece (like a detailed boot shaft) and the need for special color matching also affect the price. Getting a clear estimate before work begins is always wise.
How to Prevent Cracks and Keep Leather Supple

Think of your leather not as a finished object, but as a living material that changes with you. My jacket, June, has light creases from years of wear. They are not cracks. They are a map of our time together, soft and supple because we have a routine. Preventing cracks is a quiet, ongoing conversation with your boots or shoes, built on simple, consistent habits.
Build a Simple Conditioning Routine
Leather loses its natural oils through wear and exposure. Your job is to replenish them. I condition Mason, my saddle, every few months because he works hard. Your daily shoes might need it every season. Leather boots have similar needs, and you might wonder how often to condition them and what the best application method is. A quick guide to frequency and technique will follow.
- Clean first. Wipe away dust and dirt with a barely damp cloth. Let it dry.
- Apply a small amount of a pH-balanced leather conditioner or cream to a soft cloth.
- Rub it in using small, gentle circles. Let the leather absorb it. You are feeding it, not painting it.
- Buff off any excess with a clean, dry cloth after 15-20 minutes.
A common mistake is over-conditioning, which can clog the pores and make leather feel greasy. If the leather doesn’t drink up the conditioner, you are doing it too often.
Support Their Shape in Storage
Leather has memory. Let it rest in its correct form. For boots and shoes, this means using shoe trees.
Shoe trees made from untreated cedar are ideal. The wood absorbs moisture from the inside after a day of wear, helping the leather dry evenly without shrinking or warping. They also hold the toe shape and smooth out minor creases. It is a simple act that makes a profound difference over years.
Act Fast After Rain or Salt
Water is not the enemy. Letting wet leather dry badly is. Salt from winter roads is a true enemy, as it sucks moisture directly from the fibers.
- When your shoes get wet, stuff them with newspaper or a dry towel to draw out moisture and maintain shape.
- Let them dry slowly, away from direct heat like radiators or heaters. Heat bakes the leather, causing it to become brittle.
- Once completely dry (this may take a full day), brush off any salt or dirt residue with a soft brush.
- Follow with a light conditioning. The drying process pulls out oils, so you need to put a little back.
Caring for leather this way is a form of respect. It honors the animal by ensuring its hide serves you well for a long, long time. When you make a pair of boots last a decade, you advocate for a world where things are valued, not discarded. That care starts with these small, quiet rituals. Learning the best general methods for caring and treating leather items can deepen these practices. Such guidelines offer simple, reliable steps to keep leather looking good and lasting longer.
Common Questions
Is a cracked leather repair kit a good choice, or should I buy products separately?
A kit is perfect for beginners tackling a single, small repair. For large, valuable items or multiple projects, buying separate, higher-quality products for each step gives you more control and better results.
How do I find a reputable “cracked leather repair near me”?
Look for established shoe repair shops, leatherworkers, or upholsterers and ask to see examples of previous repairs. A good technician will clearly explain their process for filling, coloring, and matching the texture of your specific item.
What makes repairing cracked leather on cowboy boots different?
The main challenge is matching the unique finish and color of the boot’s shaft or vamp. Repairs on the constantly flexing vamp must use an extremely flexible filler to withstand movement without cracking again.
Are there specific products for cracked leather in car interiors?
Yes, always use products formulated for automotive use. The critical ingredient is a UV-inhibitor sealant to protect the repair from the sun, which causes the cracking in the first place.
What determines the cost to repair cracked leather on cowboy boots?
Cost depends on the number of damaged panels and the boot’s value, as color-matching and finishing a decorative shaft takes skill. A simple conditioning and touch-up costs far less than a full panel replacement or re-dye.
Final Thoughts on Leather Repair
The most critical step is always a gentle, thorough clean before you apply any filler or conditioner. Matching the right product to your specific leather type makes the difference between a quick fix and a lasting repair.
Every repair you perform deepens your connection to the craft and honors the material. Caring for your leather goods properly is the most sustainable practice, extending their life for years of continued use.
Relevant Resources for Further Exploration
- Shoe Repair | Boot Repair | Rago Brothers
- r/BuyItForLife on Reddit: How to repair these leather dress shoes?
- Repairs | Red Wing
- Shop Leather Boot Supplies | Boot & Shoe Repair Supplies
- How to Fix Scratched Leather Shoes | KirbyAllison.com
Harriet is a avid collector of leather goods such as purses, bags, seat covers, etc and has an extensive background in leather care, recovery, stain removal and restoration. She has worked for a number of years perfecting her leather care techniques and knows the ins and outs of restoring all kinds and types of leather products. With her first hand knowledge in leather care, you can not go wrong listening to her advice.
Filling Deep Cracks