What Determines Cowhide Leather’s Value and How Much Can You Yield from One Hide?
Published on: August 10, 2026 | Last Updated: August 10, 2026
Written By: Harriet Nicholson
Hello Tannery Talk. Staring at leather prices or guessing how much hide to buy can feel overwhelming, but understanding a few key points makes all the difference.
This guide will walk you through the factors that set a hide’s price, what truly adds to its value, and how to estimate the usable leather you can get from a single cowhide.
From conditioning June’s jacket to building Scout’s wallet from the ground up, I’ve handled enough leather to know what you’re paying for.
The Raw Ingredients: What Makes One Hide More Valuable Than Another?
Think of a hide like a blank canvas. Its quality is set long before it reaches the tannery. A cow’s breed, its diet, and where it lived all write the first chapter.
Grass-fed cows from open pastures often have tighter, more uniform grain. Cattle raised in rocky or brushy terrain might carry more marks. These are not automatically bad. In my workshop, I see these marks as a history. My saddle, Mason, has a few faint lines on his flaps. They tell a story of use, not neglect.
But from a tanner’s grading perspective, these marks decide the hide’s fate.
- Clear & Clean: The most valuable hides. They have a flawless, tight grain with minimal scars, bites, or brand marks. This is premium furniture or luxury bag material.
- Working Character: Hides with minor scratches, insect bites, or healed scars. These often become beautiful, rugged goods where the marks add personality, like a well-worn boot.
- Utility Grade: Hides with significant damage, deep brands, or many healed scars. They are often split or heavily corrected for less visible uses.
The value starts with the skin’s natural integrity, much like choosing clear, straight-grained wood for a fine table versus knotty wood for a rustic barn door. Flaws can become featured character, but they always affect the price.
Caring for Leather with Character
If your piece has natural marks, care for it normally. Clean gently with a damp cloth and a pH-balanced leather cleaner. When conditioning, pay extra attention to any raised scar tissue, as it can dry out faster. A good conditioner will even out the moisture and help all parts of the leather age together gracefully.
From Raw Hide to Finished Leather: How Tanning and Finishing Set the Price
Once a hide is graded, the real transformation begins. Tanning preserves it, and finishing dresses it. Each step adds time, skill, and cost.
The Tanning Method: Foundation and Cost
Two main methods create completely different leathers.
- Vegetable Tanning: Uses natural tannins from tree bark, leaves, and fruits. It’s a slow, weeks-long process. The result is a firm, moldable leather that ages and develops a rich patina. Think of my wallet, Scout. It started pale and is now a deep amber. This process is more expensive due to time and materials.
- Chrome Tanning: Uses chromium salts. It’s much faster, often taking just a day. This creates soft, supple, and very water-resistant leather from the start. It’s less expensive and makes up most of the leather you see, like in many soft jackets or car interiors.
Veg-tan is like cooking a stew low and slow for deep flavor, while chrome tanning is a quick, efficient sear. The first costs more for its time and tradition.
The Final Finish: The Leather’s “Skin”
After tanning, a finish is applied. This determines the look, feel, and care needs.
Imagine a raw, tanned hide as a plain cooked steak. The finish is the seasoning, sauce, and sear.
| Finish Type | What It Is | Effect on Cost & Feel |
| Aniline | Transparent dye soak. Shows the hide’s natural grain and marks completely. | Most expensive. Incredibly soft, natural handfeel. Requires careful protection from stains and fading. |
| Semi-Aniline | Light pigment spray over aniline dye. Adds a hint of color consistency and protection. | Moderate cost. Retains much natural look but is more durable and color-fast than full aniline. |
| Pigmented | Opaque, painted-on layer of color and protective coating. | Most durable and affordable option. Hides imperfections, creates uniform color. Feel can be less natural. |
Every added layer of protection and uniformity in the finishing process increases the leather’s durability and price, but often at the cost of masking the hide’s natural personality. My jacket, June, has a semi-aniline finish. It shows her grain but resists my morning coffee spills better than a full aniline leather would.
Geography and Grade: The Tags That Tell the Story
Where a hide comes from and how it’s finished tells you almost everything. Think of it like wine or coffee. Regions build reputations over generations for specific qualities you can feel.
Italian tanneries are often celebrated for their supple, aniline-dyed leathers with incredible depth of color. North American hides frequently produce a thicker, firmer leather prized for rugged goods like work boots and saddles. The origin is a hint about the hide’s character, but the grade tells you about its integrity.
The Leather Grading System, Simplified
Grade is about what’s been done to the top layer, the grain. This layer is the strongest part of the hide.
- Full-Grain: This is the entire, untouched grain layer. It shows the hide’s natural markings, like scars and insect bites. It feels solid and develops a rich patina over decades. My English saddle, Mason, is full-grain. Every scratch and shine tells its eight-year story of honest use.
- Top-Grain: Here, the very outermost surface is lightly sanded to remove the most visible imperfections. It feels smoother and more uniform than full-grain but retains good strength. Many high-end bags and furniture use top-grain.
- Corrected-Grain: This leather has been sanded significantly and then embossed with an artificial grain pattern and coated with a heavy pigment or finish. It feels very uniform, almost plastic-like, and won’t develop a natural patina. It’s common in entry-level goods.
Choose full-grain for heirlooms that age with you, and understand that corrected-grain offers a budget-friendly, consistent look that won’t change much. My jacket, June, is a soft top-grain calfskin. It’s durable for daily wear but has a more refined, less rugged handfeel than Mason.
Understanding “How Much Does Cowhide Leather Cost?”
Price swings wildly based on grade, finish, and thickness. You mostly buy leather by the square foot.
For a rough, per-square-foot idea:
- Corrected-Grain (Pigment Finished): $3 – $7
- Top-Grain (Aniline or Semi-Aniline): $8 – $15
- Full-Grain (Premium Vegetable or Chrome Tanned): $12 – $25+
This is why a finished cowhide rug might cost $300 while a “side” of leather (about half a hide) for a DIY project could cost $150. The rug price includes the labor of finishing the entire, irregular-shaped hide into a decorative piece. Within any grade, thickness-called weight-is a huge price factor. A thick, 9-ounce harness leather costs more per square foot than a thin, 3-ounce garment leather of the same grade because it uses more of the hide’s substance.
Measuring Your Hide: How Many Square Feet in a Cowhide?
A whole cowhide is not a neat rectangle. It’s an organic, irregular shape with a neck, legs, and a belly.
On average, a finished hide ranges from 50 to 55 square feet. Some large bulls can yield hides over 60 square feet. Remember, this is total area, not all of it is perfectly usable for your project.
The shape dramatically affects “usable yield.” The back (the area along the spine) is the thickest, tightest-grained, and most desirable section. The belly and neck are thinner, stretchier, and often have more creases. When you plan a project, you must lay your patterns around these natural variations, which always wastes some material.
Here’s a simple way to visualize it: 50 square feet is roughly the size of a small area rug, about 5 feet by 10 feet. Lay that out on your workshop floor. Now imagine cutting several large bag panels from the prime back area, using the firmer flank sections for straps, and perhaps setting the thinner belly pieces aside for small, non-structural items. That’s the reality of working with a whole hide.
From Hide to Product: What Can You Actually Make?
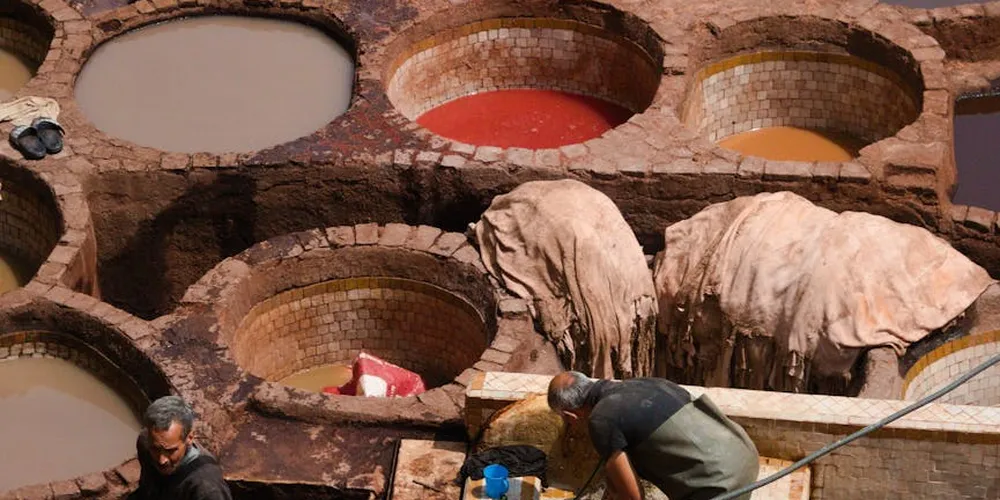
When you look at a full cowhide, it’s easy to see a blank canvas. But a hide isn’t a perfect rectangle. It has a spine, a belly, shoulders, and legs, all with different thicknesses and fiber structures. This means the yield isn’t just about size, it’s about working with the hide’s natural map.
Let’s answer those common questions. A single, good-quality side of cowhide (half a hide) can yield enough leather for about 10 to 12 regulation footballs. For a leather jacket like June, you typically need one full cowhide, as the large panels for the back and front must come from the best, most consistent areas. A compact wallet like my own Scout? You can get the leather for 30 to 40 of them from one hide, as the small pieces can be nested into the leftover spaces.
The thickness of the leather drastically changes the math. Thicker leathers, ideal for belts or heavy-duty bags, yield far fewer pieces than thinner garment leathers.
Here’s a simple look at what one average cowhide can provide:
- Jackets: 1 (requires large, unblemished sections)
- Handbags/Totes: 2-3 (depending on size and design complexity)
- Belts: 10-15 (using the long, strong spine area)
- Wallets: 60-80 (small patterns maximize use of every scrap)
- Key Fobs/Coin Purses: 50+ (perfect for the smaller off-cuts)
The skill of the person cutting the patterns, called nesting, is what turns a hide into products while minimizing expensive waste. A good cutter places each pattern piece like a puzzle, avoiding scars or thin belly sections, ensuring every item gets leather from the appropriate part of the hide. This craftsmanship is a hidden cost and value factor you pay for in a well-made good.
Why This All Matters for Leather Care

That journey from hide to your home tells you exactly how to care for it. The cost and quality of the leather are direct instructions for its maintenance, which include proper cleaning and conditioning.
A premium full-grain leather, like the leather on my old saddle Mason, has all its natural strength intact. It needs simpler, less frequent care than a corrected leather or bonded leather. You’re mostly nourishing the existing fibers, not trying to compensate for a surface that’s been sanded and coated.
The tanning method is your care manual. Vegetable-tanned leather (like my veg-tan wallet, Scout) is absorbent and ages with character. It loves oils and waxes that feed its fibers. Chrome-tanned leather (common in jackets like June) is more water-resistant and flexible from the start, so it often prefers water-based conditioners or specific creams that won’t clog its pores.
One clear tip: for a high-value full-grain item, use a dedicated leather conditioner once or twice a year. For a more economical, pigment-finished item, focus on gentle cleaning and using a protective cream to maintain the color coating that prevents stains. Both approaches aim for the same goal: preserving the item’s value and life for the long term.
Caring for Different Price Points
Your care routine should match your leather’s finish. A premium aniline leather shows off the hide’s natural beauty with minimal pigment. It is luxurious but vulnerable. Condition it with a light, neutral oil or cream, applying a tiny amount to a hidden area first to test for darkening.
A protected pigment-finished leather has a durable topcoat. Clean it with a pH-balanced cleaner and use conditioners designed for finished leathers to keep the base layer supple without damaging the protective color layer on top. This routine also aligns with how to properly clean, condition, and store a leather jacket. It helps maintain its look and durability over time.
Repair approaches differ, too. A high-grade hide with a clean scratch can often be blended and nourished back to health. A deep gash in a lower-grade leather might be stabilized, but the corrected top grain won’t heal or blend the same way. The repair focuses on preventing further damage and maintaining function.
Proper care is how you protect your investment, whether it’s a luxury good or a daily workhorse. The right, simple maintenance keeps the leather supple, prevents cracks, and defends against stains. It honors the resource and the craft, ensuring you get every bit of value from that original hide.
Quick Answers
Does a higher price tag always mean the leather will last longer?
Not necessarily. A high price often pays for aesthetics like a perfect grain or natural finish, which can be more delicate. On that note, the choice between aniline and pigmented finishes affects stain hiding and repair ease. Pigmented leather generally hides stains better and supports easier touch-ups, while aniline offers patina. For pure longevity, a well-maintained, mid-grade pigmented leather will often outlast a neglected, expensive aniline one.
How do I choose leather for a project that needs to be both durable and look good?
Prioritize the finish over a flawless grade. Select a top-grain or good full-grain leather with a semi-aniline or protected finish. This balances natural character with a layer of defense against daily wear and stains. Understanding the types and quality grades of top-grain leather can help you make an informed choice.
I’ve bought a “working character” hide. How do I care for the scarred areas?
Scar tissue is drier and less flexible. During your routine conditioning, apply a quality leather conditioner directly to those marks first, working it in thoroughly. This will prevent them from cracking ahead of the surrounding leather.
How much should I expect to waste when cutting from a whole hide?
Even an expert cutter will have 15-20% waste from the irregular shape and unusable thin sections. Plan your project patterns around the prime back area first, then use the belly and neck for smaller, non-structural pieces.
For a high-value item, is more conditioning always better?
No. Over-conditioning can saturate and weaken fibers or clog pores. For full-grain or aniline leathers, a thorough application of a suitable conditioner once or twice a year is sufficient for preservation.
Putting Leather Value into Practice
Your best return comes from pairing a hide’s grade with your project’s demands and cutting thoughtfully to use nearly every bit. A smart plan turns a single hide into lasting value.
Respect the material by caring for your finished goods and choosing leather from responsible sources. Building your maintenance skills, much like I do with my saddle Mason, ensures your pieces age with a rich, worthy patina.
Industry References
- How Much Does Real Leather Cost: Price Guide
- Is Cowhide Leather Expensive:Which Options Offer the Best Value?
- Leather Price List 2025 – Buckskin Leather Company
- How much leather does on cow typically produce?
Harriet is a avid collector of leather goods such as purses, bags, seat covers, etc and has an extensive background in leather care, recovery, stain removal and restoration. She has worked for a number of years perfecting her leather care techniques and knows the ins and outs of restoring all kinds and types of leather products. With her first hand knowledge in leather care, you can not go wrong listening to her advice.
Full-grain and Top-grain Leather Care