How Do You Fix Scratches on Suede Shoes? Repairing Scratch Damage on Suede Footwear
Published on: July 4, 2026 | Last Updated: July 4, 2026
Written By: Harriet Nicholson
Hello Tannery Talk, that new scratch on your suede shoes might have your heart sinking. I get it, but let me reassure you: most scratches are not the end of the road.
We will cover how to tell if a scratch is deep or superficial, the simple tools you need for repair, the step-by-step restoration process, and how to protect your shoes afterward.
My advice comes from hands-on experience repairing and conditioning leather, from daily companions like my saddle Mason to my jacket June.
What Are You Actually Fixing? Suede and Scratches Explained
Think of a leather hide like a peach. The smooth, tough outer skin is full-grain leather. The soft, fuzzy underside you touch when you peel it? That’s suede.
Suede is made up of millions of tiny, raised fibers called the nap. This gives it that velvety, soft handfeel we all love. A scratch disrupts this delicate surface.
When you get a mark, you’re not dealing with a colored finish you can wipe off. You’re dealing with those fibers.
- A surface scuff happens when fibers get flattened and matted down. They lay in a different direction, reflecting light oddly to create a visible, often lighter, mark.
- A deep scratch means the fibers are physically cut, torn, or even removed. This creates a groove or a bald spot in the nap.
Your repair strategy depends entirely on which problem you have. The good news is most marks are just scuffs.
Is it possible to completely remove scratches from suede? For surface scuffs, often yes. You can lift the fibers back up. For a deep cut, the goal isn’t erasure, it’s camouflage. You can make the damage blend in so well that only you know it’s there.
The Suede Scratch Repair Kit: What You’ll Need
You don’t need a workshop full of tools. You need the right ones. Using the wrong tool can make a small problem much worse.
Here are the essentials I keep in my kit for jobs like this.
Essential Tools
- A Suede/Nubuck Brush: This is your first line of defense. Look for one with brass or nylon bristles. The brass is slightly stiffer, great for really matted fibers. The gentle scritch-scratch sound it makes is the sound of your shoe healing. A regular clothes brush is too soft.
- A Proper Suede Eraser: This isn’t a pencil eraser. It feels like a firm, gritty block of rubber. It works by abrading away grime and lifting fibers through friction. It’s surprisingly effective on surface marks.
- A Clean Microfiber Cloth: Use this for gentle wiping and buffing. An old t-shirt can leave lint behind. Microfiber won’t.
Helpful Add-ons
- Suede Conditioner/Revitalizer Spray: This isn’t a liquid you rub in. It’s a light mist that restores moisture to the leather base, which can help fibers become more pliable and resilient. Think of it as a sip of water for thirsty suede.
- A Suede Cleaning Block: A step up from an eraser, these blocks have different sides for cleaning and raising the nap. They’re excellent for overall revitalization after you tackle the scratch.
- A Soft-Bristled Toothbrush: Perfect for precise work. You can use it to gently tease up fibers in a specific scratch line or to apply a cleaner to a tiny area.
Can you use a suede brush to fix scratches? Absolutely. For scuffs where fibers are just flattened, the brush is often the only tool you need. It’s always your first step.
Avoid the temptation to use household substitutes. Regular sandpaper is far too harsh and will shred the nap. Harsh solvents or all-purpose cleaners can stain the suede or permanently damage the fibers. Stick to products made for napped leather.
Your Step-by-Step Guide to Fixing Scratched Suede
Seeing a scratch on your suede shoes can feel like a minor heartbreak. I have been there. The key is to stay calm and methodical. Suede is more forgiving than you might think if you treat it gently. Follow these steps in order, and you will likely be surprised by the results.
Step 1: Assess and Clean the Area
Do not rush in. First, take a close look at the scratch in good light. Is it just a surface scuff, or can you see a different color underneath? Is there dirt or a greasy mark in the scratch? Your first job is to make the area clean.
Gently brush away any loose, dry dirt with a clean suede brush. Always brush in one direction, following the natural nap of the leather. If you’re curious about the best products and methods for cleaning leather, this guide will cover them. Using the right products and methods can help protect and extend your leather pieces.
If the scratch has a stain, you must clean it before any repair. Use a dedicated suede cleaner on a clean cloth or applicator. Test it on a hidden spot first, like inside the heel. Apply it to the stained scratch with a light dabbing motion. Let the area dry completely before moving on. Working on dirty leather will just grind the grime in deeper. This is especially important if you’re planning to repair any scuffs or marks on leather shoes or boots.
Step 2: The Magic of the Brush
For most light scratches and scuffs, this step alone does the trick. Your suede brush is your best friend. Use firm, confident strokes in one direction to lift the flattened nap. You will hear a soft, consistent swishing sound. You will see the fuzzy texture return.
Think of it like brushing a carpet pile back into place after a piece of furniture has been sitting on it. You are coaxing the tiny leather fibers to stand back up and hide the scratch. Brush the entire shoe to blend the area. Often, the mark simply vanishes.
Step 3: Erasing the Evidence
For a more stubborn mark that brushing did not fix, it is time for a suede eraser. This is not a pencil eraser. It is a special rubbery or abrasive block made for suede and nubuck. The goal is gentleness.
Rub the eraser over the scratch using small, light, circular motions. It works by lifting dirt and abrading the very tips of the matted fibers. Do not scrub hard.
You must brush the area thoroughly again after using the eraser. This removes the eraser debris and re-fluffs the nap. Brush until the area looks uniform with the rest of the shoe. This same brushing method can also help remove marker stains from suede shoes, boots, and other suede materials. If you’re dealing with marker stains, you can apply similar gentle erasing techniques to lift the color without damaging the nap.
Step 4: Nourish and Blend
After cleaning and brushing, the leather fibers might be dry. A suede conditioner or revitalizer spray restores lost moisture. This can help the fibers swell slightly and blend together, making any remaining trace of a scratch less visible.
Hold the spray about six inches away and apply a light, even mist over the entire shoe. Let it dry naturally, away from direct heat. The area may look darker while wet. This is normal and will even out as it dries. This method is particularly useful for darkening suede and leather footwear without causing uneven color.
Once completely dry, give the shoe one final, gentle brushing to revive the nap. Your shoes should look refreshed. The process for repairing scratch damage is: Clean, Brush, Erase (if needed), Condition, and Brush again. Be careful not to damage the nap when polishing and conditioning.
When Scratches Go Deep: How to Handle Severe Damage
Some damage needs a different approach. A deep scratch is more than a surface scuff. You can feel a cut with your fingernail. You might see a distinct color change where the top layer is scraped away to reveal the base leather. The fibers may look torn or severed.
For these, you have advanced options, but you must proceed with caution. Color matching suede is a skilled task. If you are not confident, a professional cobbler is your safest choice.
If you choose to try a repair, you will need a suede dye or pigment in the exact color and a suede sanding block.
- Clean and brush the area impeccably as in Steps 1 and 2.
- Use the sanding block with extreme lightness. You are not trying to sand wood. You are gently roughing the edges of the scratch to help the dye adhere and blend.
- Apply the dye with a small dauber or brush. Use thin layers, letting each dry. Building color slowly prevents dark, blotchy spots.
- Once the final coat is dry, brush the area vigorously to restore the nap and blend the new color.
You must know when to stop. If the leather is punctured, if the scratch is very long, or if the color match is poor after your first attempt, take the shoes to a professional. For deep scratches, the safest removal often involves a professional’s skill with dyes, patches, and specialized tools. It’s crucial to know when to stop handling it yourself and seek expert help.
Home Remedies and Professional Repair: What Really Works?
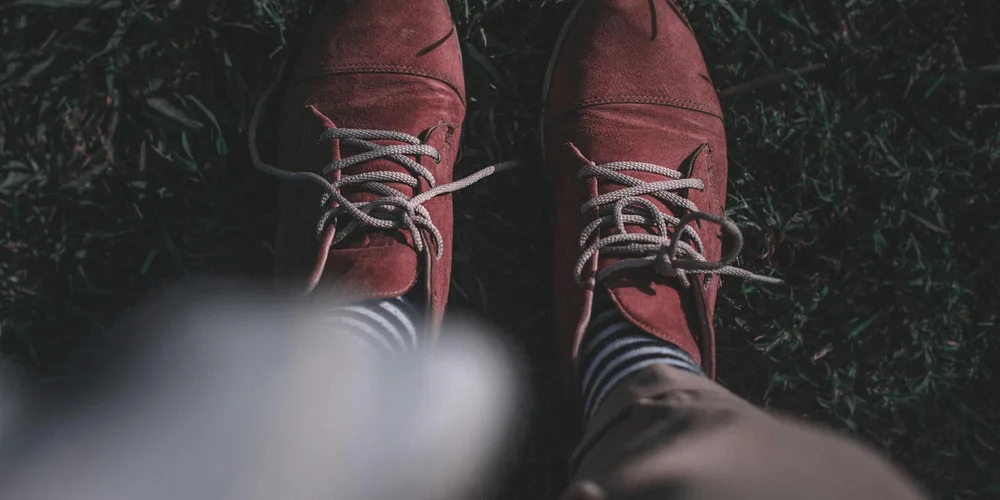
When you see a scratch on your suede shoes, it’s tempting to grab whatever is nearby to try and fix it. I’ve seen many well-meaning attempts go wrong. Let’s sort the risky shortcuts from the genuinely helpful first steps.
What home remedies fix scratches on suede?
This question comes up a lot. The internet is full of quick fixes, but suede’s delicate nap needs a gentle hand.
- A Clean White Pencil Eraser: For a very light surface scuff-not a deep scratch-gently rubbing with a clean, white eraser can lift some marks. It works like a mild abrasive. Be extremely gentle, as pressing too hard can flatten the nap permanently. A proper suede eraser or brush is a much safer choice for this job.
- Emery Boards or Sandpaper: I advise against this strongly. Using an abrasive file might seem logical to smooth a scratch, but it will shred and destroy the suede’s fibrous surface. You’ll create a bald, rough patch that is far harder to fix than the original scratch.
- Vinegar or Household Cleaners: Applying liquids like vinegar, alcohol, or dish soap is a gamble. They can strip natural oils, cause discoloration, or leave a stiff, stained patch. Suede and water don’t mix well without proper technique and products.
Think of suede like velvet. You wouldn’t scrub velvet with soap or sand it down. You’d gently brush the pile back into place. The same principle applies here.
How do professionals repair scratched suede?
For deep scratches, gashes, or when a home fix goes sideways, a professional cobbler or leather specialist has tools and skills we simply don’t have at home. Taking my jacket June in for a professional repair once saved her from a DIY disaster.
Here’s what they can do:
- Re-napping the Panel: For a大面积 damaged area, a pro might carefully shave and re-sand the entire leather panel with specialized tools. This removes the damaged surface layer and raises a consistent, new nap across the whole section. It’s a uniform fix you can’t achieve by spot-treating.
- Expert Color Matching and Re-dyeing: If the scratch has taken off color, a professional can blend and apply pigment to match the original shade perfectly. They use specialized suede dyes and airbrushing techniques for a seamless finish.
- Structural Repairs: If a scratch is actually a cut that compromises the leather, they can reinforce it from behind with a patch and careful adhesive, ensuring the repair lasts and the shoe’s structure remains sound.
For a deep or long scratch, a professional repair is often the most effective and economical choice in the long run, preserving both the look and lifespan of your shoes.
Keeping Your Suede Shoes Scratch-Free: Smart Prevention
Prevention isn’t about being afraid to wear your shoes. It’s about smart habits that let you enjoy them for years. My boots Scout lives by these rules.
How do you prevent scratches on suede shoes?
A little routine care stops most problems before they start.
Apply a Suede Protector Spray from Day One. This is the single best thing you can do. A quality protector spray creates an invisible barrier that repels water, oil, and dirt. Spray a fresh pair evenly in a well-ventilated area and let them dry completely before wearing. Reapply this treatment every few months, especially before rainy seasons.
Smart storage makes a huge difference.
- Use cedar shoe trees. They absorb moisture and help the shoe keep its shape, preventing deep creases where scratches can start.
- Keep them in a cloth dust bag or their original box. Don’t let them tumble around in a crowded closet where buckles or other shoes can scuff them.
Make a quick brush-down part of your routine. After every wear, use a soft-bristled suede brush. Gently brush the entire shoe in one direction to lift the nap and dislodge surface dust before it gets ground in. This 30-second habit is the easiest way to maintain that rich, textured look and prevent grime from causing abrasion. It’s a simple complement to regular cleaning using the right methods and products.
If you get caught in the rain, don’t panic. Let the shoes dry naturally, away from direct heat. Once completely dry, the nap will often be matted down. Use your suede brush to gently revitalize the texture. The protector spray you applied earlier will have given you a critical head start. Properly waterproofing suede and faux suede shoes or boots can significantly protect them from rain stains. The next section will show you how to do it effectively.
Common Questions
What tools are truly essential for a basic suede scratch repair?
You need just two things: a proper suede brush with brass or nylon bristles and a dedicated suede eraser block. Start with the brush; the eraser is for more stubborn marks the brush can’t lift.
Is it possible to completely remove deep scratches from suede?
No, you cannot truly “remove” a deep cut in the fibers. The professional goal is expert camouflage through careful color matching and re-napping to make the damage virtually invisible to the eye.
What’s the biggest mistake people make with home remedies?
Using harsh abrasives like sandpaper or stiff-bristled brushes, which shred the delicate nap. You cannot sand suede smooth; you will create a permanent bald spot that requires professional intervention.
When should I definitely take scratched shoes to a professional?
Take them in when you see a visible color change in the scratch, feel a physical groove, or if your careful brushing and erasing attempts make no improvement. A pro has the dyes and tools for a seamless fix.
Caring for Suede, Step by Step
When a scratch appears, start with the gentlest method first-a soft brush and a suede eraser. Having the right few tools and a patient hand will resolve most marks without a trip to the cobbler.
Regular, careful maintenance is the most sustainable practice, as it honors the material and extends the life of your footwear. Building this simple skill with your suede shoes deepens your connection to well-made goods.
Deep Dive: Further Reading
- A Guide To Leather Scratch Repair | Light & Deep Scratches | Suede & Nubuck – MAHI Leather
- 4 Ways to Fix Suede Shoes – wikiHow
- How to Remove Scratches from a Suede Couch?
- r/AskACobbler on Reddit: Fixing deep scuffs in suede shoes
- How to repair your scuffed suede heels
Harriet is a avid collector of leather goods such as purses, bags, seat covers, etc and has an extensive background in leather care, recovery, stain removal and restoration. She has worked for a number of years perfecting her leather care techniques and knows the ins and outs of restoring all kinds and types of leather products. With her first hand knowledge in leather care, you can not go wrong listening to her advice.
Suede and Nubuck Care