How Do You Repair, Restore, and Maintain Suede & Nubuck Shoes, Boots, and Sneakers?
Published on: January 2, 2026 | Last Updated: January 2, 2026
Written By: Harriet Nicholson
Hello Tannery Talk. You love the feel of suede or nubuck, but spills and scuffs can make that delicate nap seem daunting.
This guide will show you practical steps, covering gentle cleaning, scuff and stain repair, color revival, and daily nap care.
As a leather craftsman who has conditioned everything from worn boots to delicate jackets, I share methods I use on my own gear.
Suede vs. Nubuck: Knowing Your Leather’s Nap
Run your fingers across a pair of suede shoes. It feels soft, fuzzy, almost like a gentle brush. Now, feel a nubuck boot. The texture is finer, velvety, and smoother to the touch. This difference is all in the nap.
Think of a piece of full-grain leather like my saddle, Mason. It has a tight, smooth top surface, called the grain side. The underside is the flesh side, which is soft and fibrous.
Suede is made by sanding and brushing that soft, inner flesh side to create its signature fluffy nap. Nubuck is made by lightly sanding the tough, outer grain side. This gives it that delicate, velvety feel. It is a more premium, and more fragile, material.
While you care for them in similar ways, remember that nubuck is more delicate. Treat it with a lighter touch. Knowing what you have helps you choose the right approach.
I always like to know where my leather comes from. Responsible tanneries manage resources carefully. When you invest in quality suede or nubuck, you are supporting craft that values the material. It makes taking care of it feel more meaningful.
The Right Tools for the Job: Your Suede & Nubuck Care Kit
You would not use sandpaper to clean a window. Having the right tools makes the job easier and protects your leather. Gather these items before you start any repair or cleaning.
Brushes Are Your Best Friend
You need at least two soft-bristle brushes. A brass-bristle brush is your heavy lifter for stubborn dirt and dried mud. Use it gently in one direction. A white nylon-bristle brush is for daily care and raising the nap after cleaning. It is much softer.
A proper brush is not for scrubbing; it is for grooming the leather’s fibers back to life. I use my nylon brush on my jacket, June, to smooth out the creases and lift the surface.
Specialized Cleaners and Erasers
A dry suede eraser looks like a stiff pencil eraser. It is perfect for scuff marks and light oil stains. You rub it gently over the mark. For deeper cleaning, a dedicated suede and nubuck cleaner in a liquid or foam form is safe. Always test it on a small, hidden area first.
Microfiber cloths are indispensable. Use them dry for dusting or slightly damp (with water only) for wiping away cleaner residue. They do not leave lint behind.
The Magic of the Nap Lifter
This tool looks like a rough strip of rubber or a specialized file. After cleaning, your leather’s nap will be matted down. Gently running a nap lifter over the surface fluffs the tiny fibers back up, restoring that rich, textured look. It is the final, crucial step that makes cleaned suede look new again.
Protection is Key
A water-and-stain repellent spray designed for suede and nubuck is your first line of defense. It does not make them waterproof, but it gives you precious seconds to blot a spill before it soaks in. Apply it to clean, dry leather and let it dry fully. Reapply every few months with regular wear.
Set these tools on your worktable before you begin. It keeps you calm and methodical, which is how the best care happens.
Your Daily Cleaning Routine: Brushing Off the Day
Think of suede and nubuck like a cherished wool coat. You wouldn’t wear it all week without a gentle brush-down, right? Your shoes deserve the same respect. The single best thing you can do is brush them. It’s simple, but it makes all the difference.
I keep a dedicated, dry suede brush near my door for my own boots. For Scout, my daily wallet, a quick pass with a soft brass-bristle brush keeps the nap looking fresh. Regular brushing lifts surface dust and dirt before it gets ground into the delicate fibers, which is the main cause of permanent stains and a flat, tired look.
Here is how to do it right.
- Let your shoes dry completely if they are damp.
- Hold the shoe firmly and use a clean, dry suede or nubuck brush. A soft toothbrush works in a pinch.
- Brush in one direction only, following the natural grain of the leather. You will see the color and texture change as you lift the nap.
- Use short, firm strokes. Be thorough but gentle.
- Tap the shoes together or against your palm to dislodge any loosened dirt.
Brushing against the grain can mat the fibers down. Brushing in circles can grind dirt in deeper. Stick to that one-direction method. This two-minute habit maintains the soft handfeel and rich color that makes suede and nubuck so special, effectively preventing most cleaning emergencies before they start. It’s the foundation of good care.
Tackling Stains, Spills, and Caked-On Mud
Seeing a fresh stain on suede can make your heart sink. I get it. The good news is, you almost always start with the same, simple tool. The first step for almost any issue is to gently brush the area with a suede or nubuck brush. This lifts the nap and can remove a shocking amount of surface dirt before you do anything else.
Your Step-by-Step Cleaning Process
Think of this as your standard operating procedure for minor scuffs and everyday grime. Following these steps in order prevents you from accidentally rubbing dirt deeper into the leather.
- Brush First, Always. Use your suede brush in one direction to lift the fibers and loosen dry dirt. Do this even on what looks like a clean shoe before you wear it; it keeps the nap looking fresh.
- Target Scuffs with an Eraser. For dark scuff marks or pencil-like lines, use a suede eraser. Rub it back and forth over the mark like you’re erasing paper. The mild abrasion works wonders.
- Brush Again. After using the eraser, you’ll have some rubber crumbs and debris. Brush the area thoroughly again to remove the residue and re-align the nap. You’ll often find the mark is completely gone.
When Mud is the Problem
Mud requires patience, not elbow grease. If your boots like my old hiking companions get caked, the worst thing you can do is attack them while wet.
- Let the mud dry completely. Leave the shoes in a well-ventilated space for a day.
- Once it’s fully dry and crumbly, use your brush to flick and scrub the bulk of it away. A nylon-bristle brush can be helpful for stubborn chunks.
- For a gritty residue left behind, use the suede eraser technique on the affected areas, then finish with a thorough brushing.
Letting mud dry completely before you brush allows it to release from the fibers instead of smearing into a permanent stain.
Dealing with Grease or Dark Stains
For oil-based spills or stains that brushing won’t touch, you need a specialized cleaner. A water-based suede cleaner is the safest bet. Here’s how to use it without causing a bigger spot.
- First, brush the stained area to lift the nap.
- Test the cleaner on a hidden spot, like inside the tongue, to check for colorfastness.
- Apply a small amount of cleaner to a clean, damp cloth-not directly to the shoe. Gently dab and circle the stain, working from the outside in.
- Let the area air dry completely away from direct heat.
- Once dry, the nap will be matted down. Brush it vigorously to restore the texture. You may need to repeat the process for set-in stains.
The Secret to Fixing Water Stains
Water spots on suede are common and frustrating. They appear as a darker ring because the nap is matted down and wet. The fix is simple but tests your patience.
If you get caught in the rain, once you’re inside, gently brush the entire wet area while it is still damp. Then, let the shoe dry naturally, slowly, at room temperature. As it dries, brush it gently every hour or so. The consistent, gentle brushing as the suede dries helps the fibers stand up evenly, which minimizes the visible line of the water stain. It won’t always be perfect, but this method makes a huge difference. Never apply heat from a hairdryer or radiator; it cooks the stain into place and can stiffen the leather.
Drying Wet Suede and Nubuck the Safe Way
Can you use water on suede? Yes. Getting suede or nubuck wet isn’t a death sentence, but rushing the drying process often is. The goal is to remove moisture slowly and evenly to prevent the leather from stiffening or the nap from becoming permanently matted.
Think of the leather like your own skin after a long bath. Quick, high heat will dry it out and make it tight and uncomfortable. Gentle, ambient air drying keeps it supple. I learned this the hard way with a pair of suede chukkas years ago; a panicked session with a hairdryer left one toe box stiff as cardboard. Leather requires careful drying to avoid damage.
The Step-by-Step Rescue
When your shoes are soaked, act calmly. Follow these steps in order.
- Blot, Don’t Rub: Use a clean, absorbent towel to gently press against the wet areas. Rubbing will grind moisture and dirt deeper into the nap.
- Stuff Them Firmly: Crumple plain newsprint or paper towels and pack the toe and heel of the shoe tightly. This maintains the shape and draws moisture from the inside out. Replace the packing every few hours as it becomes damp.
- Find a Cool, Airy Spot: Place the shoes at room temperature, away from any direct airflow. A shaded corner of a room is perfect. Let time do the work.
This process is not fast. For a thoroughly wet boot, it can take a full 24 to 48 hours to dry completely. Patience is your most important tool.
The Heat Rule: Just Don’t
Never use direct heat sources like radiators, space heaters, hairdryers, or the sun to speed up drying. Intense heat bakes the natural oils and moisture out of the leather’s structure. The result is a stiff, brittle, and often discolored shell that is prone to cracking. The delicate fibers of the nap can also fuse together, creating shiny, hard patches that are almost impossible to revive.
Reshaping with Care
Sometimes, shoes can become misshapen when wet. Once the leather is completely dry, you can attempt to restore the form. Hold the shoe several inches from a boiling kettle’s spout, allowing the gentle steam to waft over the wrinkled area. The mild heat and moisture can relax the fibers. Use your hands to gently coax the leather back into shape. For a comprehensive guide, visit how to remove and fix wrinkles in leather shoes.
An iron, even with a cloth barrier, is a major risk for suede and nubuck. The concentrated, dry heat is too intense and likely to scorch or flatten the nap permanently. If steaming doesn’t work, the creases may now be part of your shoe’s character, like the soft folds on my jacket, June.
Restoring the Nap: Fixing Flat, Shiny, or Crushed Spots
You know that sad, shiny patch on the toe of your boot or the crushed spot on your sneaker’s heel. It happens to every suede and nubuck piece with wear. The good news is, you can almost always bring the nap back to life. It’s a lot like gently grooming a favorite suede jacket you’ve worn for years.
The secret is to relax the leather fibers first, then coax them upright. Trying to brush a hard, compacted spot will just frustrate you. You need to introduce a little moisture.
Step One: Relax with Steam
Never use a hot iron directly on suede or nubuck. Instead, use steam from a kettle. Boil water and hold the item 8 to 12 inches above the rising steam. Move it continuously for just 10 to 15 seconds. You want the area to become slightly damp to the touch, not soaking wet.
This brief steam treatment softens the fibers and oils, making them responsive to brushing again. Let the area cool for a minute. It should feel barely damp and cool, not hot.
Step Two: Lift the Fibers
Now, take your brush. A dedicated suede/nubuck brush with brass or stiff nylon bristles is ideal. A clean, soft toothbrush can work in a pinch for small spots. Hold the item firmly and brush the area in one direction with short, firm strokes. You’re not scrubbing. You’re combing.
- Start gently to see how the fibers respond.
- Increase pressure slightly if needed, but stop if you feel you’re damaging the surface.
- Switch directions occasionally to lift fibers from all angles.
You’ll see the color and texture change as the nap lifts. For extremely stubborn spots, a specialized rubber eraser or nap lifter stone can help scrape away grime and crusted oils that are matting the fibers down. Always test on a hidden seam first.
Can Suede and Nubuck Crease?
Yes, absolutely. Just like my jacket June developed soft creases at the elbows, footwear will crease at the flex points. You cannot prevent it entirely, nor should you want to-it’s part of the material’s character. The goal is to minimize deep, cracked creases.
Using shoe trees after wear is the single best practice to help creases relax and maintain the shoe’s shape as it dries from foot moisture. Light conditioning with a product made for suede/nubuck can keep the leather supple and less prone to deep cracking, but always test it on a small area first. For a complete guide on removing and preventing creases, smoothing leather, and protecting your footwear, we provide comprehensive insights.
The process for a crease is the same: a little steam to relax the area, followed by gentle brushing. The crease will likely remain, but the nap around it will be revived, making it look soft and cared-for rather than damaged.
Repairing Damage: From Scuffs to Small Tears
So, can suede or nubuck be repaired at all? Absolutely, yes. For minor damage, you can handle this yourself with patience and the right tools. For anything structural, like a torn boot seam, a professional cobbler is your best ally.
Camouflaging Scuffs and Worn Spots
A scuff on suede flattens the nap, leaving a pale, shiny mark. On nubuck, it can look like a dark smudge. The goal is to restore color and texture.
For this, a suede dye kit is your best friend. These usually include a cleaner, a dye applicator, and a brush to reactivate the nap. It’s like giving that spot a precise touch-up.
- Clean the entire shoe with the provided cleaner or a dedicated suede/nubuck cleaner. This removes oils so the dye can adhere evenly.
- Let it dry completely.
- Apply the dye with the sponge or dauber in the kit. Use very light, circular motions, building the color slowly. Work from the edge of the scuff outward to blend the new color seamlessly with the old.
- Allow the dye to dry as directed.
- Finally, use a suede brush or a nubuck eraser to gently brush the area. This brings the fibers back up and blends the repair into the surrounding material.
Addressing Small Tears
A clean, small tear is different from a scuff. Here, your goal is to bond the material back together neatly. I keep a tube of flexible, water-based leather adhesive in my kit for jobs like this. It’s strong, dries clear, and doesn’t give off harsh fumes.
With a clean, dry cotton swab, apply a tiny amount of adhesive to one side of the tear. Press the edges together firmly and hold for at least 60 seconds. Wipe away any excess that squeezes out immediately. Let it cure for a full 24 hours before wearing or brushing.
The key is using a minimal amount of glue to avoid a hard, visible lump that can crack with flexing. If the tear is on a high-stress area like the toe crease of a sneaker, this repair may only be temporary.
When to Call a Professional
Know your limits. I learned this early on with a pair of hiking boots. For deep gashes, separated soles, or tears along major seams, a skilled cobbler has the equipment and expertise for a lasting fix. They can often add a nearly invisible patch from the inside or re-stitch with heavy-duty thread.
For a prized pair of boots or expensive sneakers, a professional repair is an investment in their long-term durability. It saves you from a botched DIY job that could make a professional fix more difficult later.
Protecting and Storing Your Footwear for the Long Term
You’ve cleaned the nap and cared for the leather. Now, let’s make sure your hard work lasts. This final phase is about creating a shield and a good home for your shoes.
Applying a Protectant Spray
A quality suede and nubuck protectant spray is your best defense. Think of it as a light, breathable raincoat for your shoes. It won’t make them fully waterproof, but it causes water to bead up and roll off, giving you precious time to blot a spill.
Always test the spray on a small, hidden area first, like the inside of the tongue, to ensure it doesn’t darken or discolor your specific leather.
- Take the shoes outside or to a very well-ventilated area. Protect your work surface with newspaper.
- Make sure the shoes are completely clean, dry, and at room temperature.
- Shake the can vigorously for at least 30 seconds.
- Hold the can 6 to 8 inches away from the shoe and apply a light, even coat. Move the can steadily; don’t spray one spot for too long.
- Let the first coat dry for 10-15 minutes, then apply a second coat for thorough coverage.
- Let the shoes dry completely, away from direct heat, for at least 24 hours before wearing.
A common mistake is spraying too close or too heavily. This can saturate the leather and leave a stiff, sticky residue. Light, even layers are the goal. Proper application is especially crucial if you’re trying to prevent and stop your leather items from cracking and drying out.
Proper Storage for Shape and Health
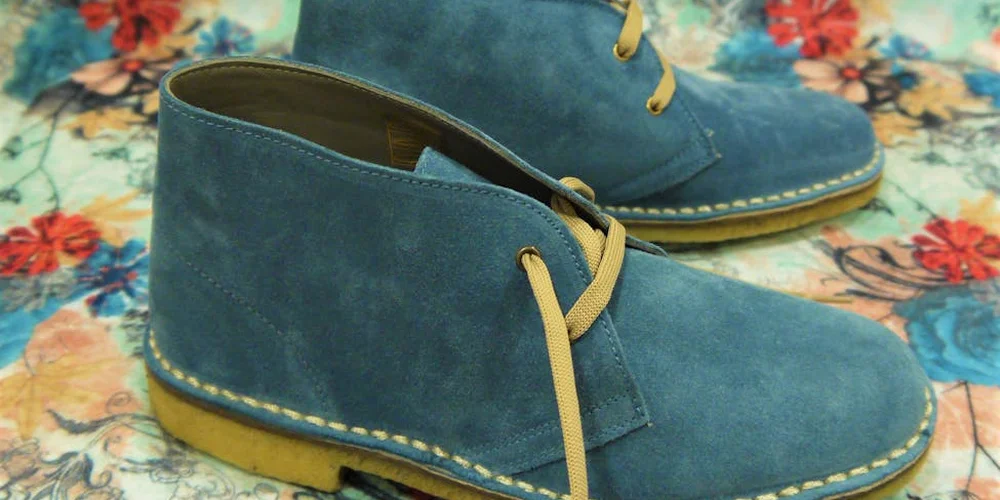
How you store your shoes matters as much as how you clean them. My suede desert boots, “Nova,” taught me this. After a year of being tossed in a closet, they developed a sad, collapsed look.
- Use Shoe Trees: Cedar shoe trees are ideal. They absorb moisture from the inside and maintain the shoe’s shape, preventing deep, permanent creases.
- Choose Breathable Storage: Never store suede or nubuck in plastic. Trapped moisture leads to mildew. Use fabric shoe bags or simply keep them on a shelf.
- Avoid Damp and Heat: Store them in a cool, dry place away from radiators, direct sunlight, or damp basements. Consistency is key.
Letting your shoes rest for a full day between wears allows internal moisture from your feet to evaporate, which dramatically extends their life.
How Often Should You Clean Suede?
There’s no single calendar date. Your cleaning schedule should match your use.
For shoes worn weekly, a quick brush-down after each wear and a full clean with a specialty eraser and brush every 4 to 6 weeks is a good rhythm. That includes suede, so you may wonder what the best methods and products are for cleaning suede shoes and boots. For boots or sneakers worn only occasionally in fair weather, a seasonal check and clean might be enough.
The best rule is to address stains and dirt immediately, and perform a full maintenance clean before the grime gets ground in and the leather looks visibly dull.
This regular, gentle care does more than keep them clean. It builds a story. Each careful brush stroke, each treated rain spot, adds to a soft, unique patina that only comes from being loved and maintained. The colors grow richer, the nap develops a personal map of your journeys. That’s the real reward.
Quick Answers
What’s the real, practical difference between suede and nubuck care?
The core techniques are the same, but nubuck demands a lighter touch. Always use gentler pressure when brushing or erasing its finer, more delicate nap to avoid damaging the velvety surface.
Can I ever use just water to clean a stain?
No. Plain water often spreads a stain and leaves a ring. Only use water slightly dampened on a cloth to dab up residue from a dedicated suede cleaner after you’ve tested it.
How do I fix a spot that’s permanently flattened and shiny?
Briefly hold the area over steam from a kettle to relax the fibers, let it cool slightly, then vigorously brush with a suede/nubuck brush. This lifts the crushed nap back to life.
How often should I really be applying a protectant spray?
For regular wear, apply a fresh coat of water-and-stain repellent every two to three months. Reapply immediately after any major cleaning that might strip the previous protection.
What’s the one storage mistake that ruins suede?
Storing them in plastic bags or boxes. Trapped moisture leads to mildew. Always store in a cool, dry place with breathable fabric bags and cedar shoe trees to maintain shape.
A Last Word on Suede & Nubuck Care
The single most important rule is to care for them gently and often. A consistent, light touch with a suede brush and prompt spot cleaning does more for their life than any heroic, infrequent effort.
Every time you clean and protect these shoes, you honor the material and the animal it came from. Building this skill extends the life of your belongings, which is one of the most sustainable practices a leather owner can adopt. Understanding which cleaning methods best preserve the finish of leather boots and shoes can guide your care choices. Mastering these methods helps safeguard color, texture, and shine for years to come.
Industry References
- Do This, Not That: How to Clean and Restore Suede Shoes at Home – Reshoevn8r
- How to Restore Suede or Nubuck Shoes at Home – Home Explained
- How to Fix Damaged Suede & Nubuck Shoes Easily
- How to Clean Suede and Nubuck Shoes
- Suede & Nubuck Shoe Cleaner Kit | Clean, Revive, Restore – Reshoevn8r
Harriet is a avid collector of leather goods such as purses, bags, seat covers, etc and has an extensive background in leather care, recovery, stain removal and restoration. She has worked for a number of years perfecting her leather care techniques and knows the ins and outs of restoring all kinds and types of leather products. With her first hand knowledge in leather care, you can not go wrong listening to her advice.
Suede and Nubuck Care