How Do You Repair and Maintain Leather Car Seat Covers to Prevent Cracking?
Published on: July 7, 2026 | Last Updated: July 7, 2026
Written By: Harriet Nicholson
Hello Tannery Talk. Those first fine lines on your car seats are a common worry, but with the right care, you can stop wear in its tracks and keep your leather supple for years.
This guide walks you through a practical, craft-focused approach. We will cover gentle cleaning methods, choosing the perfect conditioner, repairing early cracks before they spread, and simple habits to build a protective patina.
My advice comes from hands-on experience conditioning and repairing everything from heavy-use saddles to daily-worn leather jackets.
What Causes Leather Car Seat Covers to Crack and Wear Out?
Think of your car’s leather seats like skin. Skin gets dry and thirsty without moisture. Leather works the same way. Its natural oils slowly evaporate over time, especially in a harsh environment like a car’s interior.
Three main enemies speed up this drying process and lead to cracking.
1. Friction (The Daily Grind)
Every time you slide in and out of the car, your clothes create friction against the seat’s surface. This constant rubbing, concentrated on the outer bolster, slowly breaks down the leather’s protective topcoat and weakens the fibers beneath. It’s a slow, steady grind that thins the material.
You can see this wear on the driver’s seat bolster long before anywhere else, a clear sign of friction’s daily toll.
2. UV Rays and Sunlight (The Silent Fader)
Sunlight is leather’s worst enemy for color and strength. UV rays act like bleach, breaking down the dyes that give leather its rich color. This causes fading, often seen as a pale patch on the headrest or seat cushion. More critically, UV radiation dries out the leather from the inside, making the fibers brittle and prone to snapping.
3. Dehydration (The Core Problem)
Heat from the sun and your car’s heater pulls moisture from the leather. Cold, dry winter air does the same. Without its natural lubricating oils, the leather loses its flexibility. It stiffens. Then, when you move and the leather flexes, those stiff fibers can’t stretch-they crack instead.
Dehydration is the root cause of most cracking; the leather simply runs out of the oils it needs to bend and move with you. It’s important to use the right oil for conditioning leather to keep it soft and prevent cracking.
Using the wrong cleaners, like harsh soaps or all-purpose sprays with alcohol or solvents, strips these oils away even faster. They clean the surface but leave the leather defenseless and parched.
How to Prep Your Leather Seats for Any Repair
You cannot fix leather correctly on a dirty, oily surface. Any repair or conditioner you apply will just sit on top of grime, failing to bond properly. This prep work is non-negotiable for a lasting fix.
Step 1: The Gentle, Thorough Clean
Start with a clean, soft microfiber cloth and a bottle of pH-balanced leather cleaner. A neutral cleaner is safe and won’t damage the leather’s chemistry. Spray the cleaner directly onto your cloth, not the seat, to avoid oversaturation. In the next steps, we’ll explore what are the best products and methods for cleaning leather.
- Wipe the seat section by section using gentle, circular motions.
- For ingrained dirt in the grain, use a soft-bristled brush (like a horsehair detailing brush) to gently agitate the cleaner.
- Immediately wipe away the loosened dirt with a clean, damp part of your cloth.
- Work on one small area at a time, like just the seat cushion, before moving to the backrest.
This clean removes body oils, dirt, and old products that block the leather’s pores.
Step 2: The Crucial Dry Time
This step is where many people rush and ruin their work. The leather and, more importantly, the seams must be completely dry to the touch.
Any moisture trapped under a repair filler or conditioner will eventually wick out, causing the fix to fail or mold to form.
After cleaning, open the car doors and let the seats air dry for at least two to three hours. Run your fingers along the stitching and crevices; they should feel cool and dry, not damp. If you’re in a humid climate, use a fan to circulate air. Never use a heat gun or hair dryer, as direct heat can bake and shrink the leather.
Step 3: Assess the Damage Type
With a clean, dry surface, you can now see the true issue. Good lighting is your friend here. Look closely and identify the problem.
- A Surface Scratch: Only affects the topcoat color. The leather underneath is intact and flexible. You can feel it with a fingernail, but it doesn’t catch.
- A Crack: Looks like a fine, dry line in the leather’s surface. The fibers beneath have split. If you gently flex the area, the crack will widen slightly.
- A Tear or Split Seam: A full separation where you can see the fabric or foam backing underneath. The leather pieces are no longer connected.
This assessment tells you your next move. A scratch needs a color touch-up. A crack needs a flexible filler and conditioner. A tear needs adhesive and a patch from behind. Trying to fill a deep tear with surface paste is like my old saddle Mason getting a bandage when he needed stitches-it just won’t hold.
Your Step-by-Step Guide to Fixing Cracks, Tears, and Seams
Leather seat repair can feel intimidating, but the process is logical once you know the steps. I’ve fixed everything from a small scuff on a wallet like Scout to a major seam split on a jacket like June. The same basic principles apply. Here is a universal method that works for most repairs.
The Universal Process: Clean, Fill, Dry, Color, Seal
Think of this as a five-act play for your leather. Skipping a step is the most common mistake.
- Clean: Use a dedicated leather cleaner on a microfiber cloth. You must remove all dirt, oils, and old conditioners from the damaged area. If you don’t, the repair materials won’t bond properly.
- Fill: For cracks or gouges, you apply a leather filler or repair compound. For tears, you apply a flexible leather glue.
- Dry: This is the patience test. Let the filler or glue cure completely. Rushing this leads to a weak repair.
- Color: Once dry and sanded smooth, you apply a matching leather dye or pigment to blend the repair.
- Seal: A final topcoat or leather sealant protects your color work and blends the sheen with the surrounding leather.
Repairing Cracks and Small Tears with Filler
A crack is a sign the leather’s fibers have dried out and broken. Filler acts like a flexible plaster.
For a successful fill, work in thin layers and allow full drying time between each one.
Start with a perfectly clean and dry area. Use a flexible spatula to press the repair compound firmly into the crack, slightly overfilling it. Let it dry for the time stated on the product, often a few hours. Once hard, use very fine sandpaper (like 400 grit) to gently sand the filler flush with the leather’s surface. Wipe away all dust before moving to the color step. These steps are part of repairing cracked leather shoes, boots, and other damaged surfaces. They align with common methods for fixing damaged leather surfaces.
Gluing a Leather Tear Back Together
For a clean cut or tear where the edges can meet, glue is your best friend. I prefer water-based leather adhesives. They are strong, flexible, and don’t have harsh fumes.
- Clean the area thoroughly.
- Apply a thin bead of glue to both sides of the tear.
- Wait a minute for it to become tacky.
- Press the edges together firmly and evenly. Use binder clips or masking tape to hold it closed without marking the leather.
- Let it cure for at least 24 hours. The bond gets stronger over time.
After the glue sets, you may need to apply a tiny amount of filler over the seam line before coloring to make it disappear.
Fixing a Split Leather Seat Seam
A split seam is usually a thread failure. The fix has two parts: re-securing the leather and re-stitching.
First, glue the leather panels back together along the seam line using the method above. This recreates the base. For the stitching, you have a choice. You can use a heavy-duty needle and strong thread (like nylon or polyester) to hand-stitch along the original holes. Or, you can use a liquid seam sealer, which is a flexible, clear compound you apply into the seam channel that mimics stitching. The sealer is less authentic but much faster and still very durable for seat seams that aren’t under extreme pull.
DIY vs. Professional Leather Seat Repair
So when should you search for “repair leather car seats near me”?
Your DIY approach is excellent for localized damage: a single crack, a tear on a bolster, a split seam. You control the cost, which is just the price of a repair kit, some dye, and your time.
A professional service is the right call for large-scale damage, color matching a complex shade, or if you lack confidence in your results.
They have industrial equipment, a vast library of color formulas, and the skill to make major repairs invisible. This expertise comes at a cost. A professional repair for a tear or series of cracks can range from $100 to $400 per seat, while re-dyeing a full seat cover can cost much more. Weigh the scale of your problem against your budget and willingness to learn.
The Simple Cleaning Ritual That Prevents Damage
Repair is reaction. Cleaning is prevention. A consistent, gentle cleaning habit is the single best thing you can do to stop cracks and wear before they start. My jacket, June, gets this treatment monthly without fail.
The Monthly Maintenance Routine
This takes about 15 minutes per seat. You need a soft brush (like a horsehair detailing brush), several clean microfiber cloths, and a pH-balanced leather cleaner.
- Dust: Use the soft brush to loosen grit from the grain and seams. Vacuum the seat afterward.
- Clean: Spray a small amount of cleaner onto a microfiber cloth, not directly on the seat. Wipe in gentle, overlapping circles. The goal is to lift dirt, not grind it in.
- Dry & Buff: Use a second, dry microfiber cloth to wipe away any residue and buff the surface to a gentle shine.
- Condition (Optional Monthly): Every other month, after cleaning, apply a light coat of leather conditioner. Nourish the leather like you would moisturize your skin.
Handling Spills and Stains
Acting fast is everything. For most spills (coffee, soda), immediately blot-don’t rub-with a dry microfiber cloth. Then, use your pH-balanced cleaner on a damp cloth to clean the area. Dry thoroughly.
For a tricky stain like ballpoint ink, the approach is different. Test any method in a hidden area first. Dampen a cloth with a small amount of isopropyl alcohol (rubbing alcohol) and dab (don’t rub) at the stain. The alcohol can break down the ink. As the ink transfers to the cloth, switch to a clean section. Follow up immediately with your standard leather cleaner to remove any alcohol residue.
Extra Care for Heavy Wear Areas
The driver’s seat bolster and the seat base get constant friction. They dry out and soil faster than any other part.
During your monthly clean, give these high-traffic zones a little extra attention with the brush and a second pass with the conditioner.
Focus the brush on the creases where dirt hides. When you condition, use a bit more product on these areas and really work it in with your fingers. The warmth helps it penetrate. This extra minute of care fortifies the leather exactly where it needs it most, keeping it supple and resistant to abrasion. Think of it like giving Mason’s saddle an extra wipe-down after a long ride. It’s simple, but it makes all the difference over years of use.
Conditioning and Protecting: Your Best Defense Against Cracks
Think of your car’s leather like your own skin. It dries out in the sun and needs moisture. Conditioning is not a suggestion. It’s the single most important thing you can do to stop cracks before they start.
Every time you slide in and out of the seat, you flex the leather. Over months, the natural oils that keep it supple slowly evaporate or get wiped away. Without those oils, the fibers become brittle and snap. That’s a crack. A good conditioner replaces those lost oils.
Think of my old English saddle, Mason. He gets conditioned every few months without fail. That’s why, after eight years of hard use, his surface is still soft and pliable, with a deep patina instead of a network of splits.
How to Condition Your Seats the Right Way
Doing this right gives you protection without a greasy, slippery seat. Here is my reliable method.
- Clean First, Always. Never condition over dirt or body oils. Use a gentle, pH-balanced leather cleaner and a soft microfiber cloth. Wipe the entire seat surface and let it dry completely.
- Apply a Neutral Conditioner. Use a conditioner meant for automotive leather. Pour a small amount onto a clean, dry cloth-never directly onto the seat. Apply it in thin, even circles.
- Let It Soak In. Walk away for 15-20 minutes. Let the leather drink it in. This patience is key.
- Buff It Dry. Take a fresh, dry microfiber cloth and buff the surface firmly. You are removing any excess conditioner the leather couldn’t absorb. The seat should feel nourished, not slick or tacky.
A well-buffed seat should feel supple to the touch, not leave residue on your clothes. If it feels greasy, you used too much product or didn’t buff enough. Just go back with a dry cloth and buff again.
Don’t Forget the Sunscreen
Your car’s windows are a magnifying glass for UV rays. This is what fades and prematurely ages leather. A UV protectant spray acts exactly like sunscreen.
After conditioning and buffing, spray a light, even coat of a leather-safe UV protectant over the seats. Do this every third or fourth conditioning cycle. It creates an invisible shield that significantly reduces fading and drying from sun exposure.
So, what is best for leather car seats? It’s this simple, two-part habit: gentle cleaning followed by regular conditioning, with UV protection layered on top. It’s a routine, not a crisis. Cleaning and protecting leather car seats can help keep them looking good for years.
Should You Use Seat Covers or Protectors?
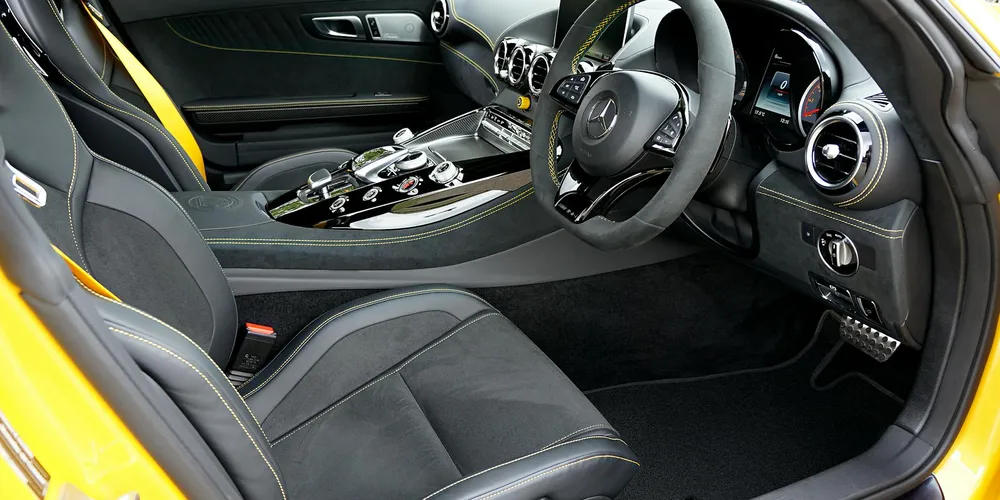
This is a classic dilemma. You want to protect your investment, but you also paid for the look and feel of leather. Let’s weigh the real pros and cons.
The main benefit of a cover is obvious: a physical barrier against scratches, spills, and blue jean dye transfer. The downside is just as big: you hide the leather you wanted. It also traps heat and can sometimes rub abrasively if the material is cheap.
Breathability is Everything
This is how I answer the question, “are leather seat covers worth it?” It depends entirely on the material. Leather needs to breathe. A plastic or cheap vinyl cover will trap moisture and heat against the seat, which can cause mold and actually rot the leather from underneath.
A good cover must be soft, breathable, and non-abrasive-materials like sheepskin, high-quality neoprene, or woven cotton are safe bets. They provide a cushion while still allowing air to circulate. Think of it like putting a high-quality cotton sheet on a mattress, not a plastic bag.
Choosing Protection for Pets and Kids
For focused protection from claws, crumbs, or car seats, a full cover is often overkill. Look for a dedicated seat protector instead.
The best car seat protector for leather is one that grips the seat without adhesive, has a soft underside, and is completely waterproof on top. It should form a bucket to contain spills. Always remove it when not in use to let the leather breathe and check for any trapped moisture.
My advice? For daily driving, skip the full cover and commit to a good cleaning and conditioning routine. For road trips, pets, or hauling messy gear, a soft, breathable cover is a smart temporary shield. Just don’t let it become a permanent, smothering fixture.
When to DIY and When to Call a Professional
Looking at a crack or scrape on your seat can feel stressful. I get it. My saddle, Mason, has seen his share of nicks. The first step is always a calm assessment.
You can confidently handle repairs yourself for surface level issues that haven’t compromised the leather’s structure. These are problems you can fix with a good kit and some patience.
Manageable DIY repairs include:
- Color scuffs and transfers: Where the dye is worn or another color (like from jeans) is rubbed on, but the leather itself is intact.
- Fine, shallow cracking: Early-stage wear in the finish that looks like a spiderweb. You can feel it with a fingernail, but it doesn’t go deep.
- Small, clean scratches: Not tears, just marks on the surface that catch the light.
You should search for ‘repair leather car seats near me’ when the damage is structural. A professional has the tools and materials to rebuild the leather, not just cover it up. For repair and restore damaged leather car seats, professionals restore color, texture, and durability to bring back the seat’s original look.
Call a pro for:
- Large tears or punctures: Anything where you can see the foam or backing material underneath.
- Deep, wide cracks: Damage that has split the leather grain, creating gaps or flaps.
- Extensive wear over a whole bolster or seat section: Trying to blend a repair across a huge area is very difficult for a beginner.
Wondering about ‘repair leather seats cost’? It depends on the labor and the leather. A pro repair for a single tear might cost less than a full professional recoloring of a whole seat. The color match, the type of leather (aniline vs. coated), and your location all change the price. Getting a local quote is often the smartest first move for major damage. If you’re wondering how much it costs to repair or replace leather car seats, getting a few quotes to compare options can help you decide what fits your budget.
Choosing Your Repair Kit
If your damage is in the DIY zone, a good repair kit is your best friend. Think of it like a first-aid kit for your seats.
The best leather repair kit for your car seats is one that matches both the damage type and the color perfectly. Here is how to choose.
First, identify the main task. Kits generally focus on two jobs:
- Filling & Rebuilding: For cracks and small holes. These contain a flexible compound you use to fill the gap.
- Recoloring: For scuffs and scratches where the color is gone but the leather is sound. These focus on dyes and topcoats.
Color matching is everything. Always order a color chart or a sample pot first, even if it takes a few extra days. Test it in an invisible spot, like under the seat. Car leather fades with sun and use, so the ‘official’ color from the manufacturer is often darker than your seats now. You are matching the faded color, not the original.
My wallet, Scout, got a light scrape last year. I used a tiny recoloring kit. The key was applying the dye in several very thin layers, letting each dry completely, to build up a perfect, flexible match.
A Quick Note on Vegan or Faux Leather Seats
Care for vegan leather (usually vinyl or polyurethane) is completely different. Treating it like real leather can cause damage. When weighing natural leather vs faux leather, people often ask which is easier to repair and clean. Faux leather wipes clean more easily, while real leather may need conditioning and spot repairs.
Conditioning for synthetic materials does not mean adding oils, it means preventing the plasticizers from drying out and escaping. Real leather conditioner will just sit on top of faux leather, creating a greasy film that attracts dirt.
For cleaning, use a mild soap and water solution or a cleaner made specifically for vinyl or interior plastics. Avoid harsh degreasers or alcohol-based products, as they can strip the surface and cause fading or cracking.
To protect it and slow down the peeling and cracking we all fear, use a protector designed for synthetic materials. Look for a water-based UV protectant spray made for vinyl or automotive interiors. This creates a barrier against sunlight and abrasion without softening the material in a way it can’t absorb.
The handfeel is different. Real leather like my jacket June gets softer with care. Faux leather needs protection to simply stay intact. Knowing what you have saves you time, money, and keeps your seats looking their best.
Quick Answers
What’s the real cost range for professional leather seat repair?
It hinges entirely on the damage. A single, clean tear might be $100-$200, while re-coloring a full seat or fixing extensive cracking can run $400 or more. Always get a local quote; a pro can assess the labor and precise color match needed.
When should I absolutely search for ‘repair leather car seats near me’?
Call a pro for structural damage where you see the foam backing, or for large, complex areas like a completely worn-out bolster. Their skill and equipment are worth the cost for repairs where a DIY patch would be obvious and fail.
How do I repair leather worn from a child’s car seat?
First, prevent further damage with a proper, non-slip seat protector. For existing indentations and surface wear, thoroughly clean the area and apply a quality leather conditioner repeatedly to help the compressed fibers recover their shape and suppleness.
Can I just glue a leather seat tear shut?
Only if it’s a clean cut with aligned edges. Use a flexible, water-based leather adhesive, clamp it firmly, and let it cure for 24 hours. For frayed tears or gaps, you must fill the void with a repair compound after gluing.
What’s the fastest fix for a small cut or puncture?
Clean the area, then use a flexible leather filler from a repair kit to plug the hole. Once it’s fully dry and sanded smooth, apply a matching dye and sealant to blend it.
Final Thoughts on Leather Car Seats
Treating your car’s leather is no different from caring for a favorite jacket or bag. The single best thing you can do is establish a simple, consistent routine of gentle cleaning and nourishing conditioning. This regular care prevents the deep dryness that leads to permanent cracks, saving you from complex repairs later.
Every time you condition those seats, you’re honoring the material and the animal it came from. Building this practical skill extends the life of your goods, which is the most sustainable and respectful choice a leather owner can make.
Deep Dive: Further Reading
- How to Fix A Hole in a Leather Car Seat | UK Tutorials
- Leather Car Seat Repair In Los Angeles, CA 90232 – Best Way
- Amazon.com: Leather Repair Kit
- r/DIY on Reddit: How to repair leather car seat, or at least stop cut from expanding?
Harriet is a avid collector of leather goods such as purses, bags, seat covers, etc and has an extensive background in leather care, recovery, stain removal and restoration. She has worked for a number of years perfecting her leather care techniques and knows the ins and outs of restoring all kinds and types of leather products. With her first hand knowledge in leather care, you can not go wrong listening to her advice.
Car Interior and Auto Leather Care