How Do You Fix Peeling Leather and Faux Leather on Your Couch?
Published on: April 3, 2026 | Last Updated: April 3, 2026
Written By: Harriet Nicholson
Hello Tannery Talk. That peeling spot on your sofa might look daunting, but with the right approach, you can restore its comfort and character.
This article walks you through the process, covering telling real leather from faux, cleaning and prepping the peel, choosing and applying a repair filler, and matching the color and texture.
My advice comes from hands on experience repairing daily wear on pieces like my jacket, June, and preserving leather for the long haul.
Why Is Your Couch Peeling? The Root Causes
Peeling is a sign of distress, but its meaning changes completely based on what your couch is made of. Real leather and faux leather fail for different reasons.
With genuine leather, the problem is almost never the hide itself. Think of a leather couch like my old saddle, Mason. Over years, the natural oils and waxes that keep it flexible slowly evaporate or get stripped away by harsh cleaners. This leaves the protective topcoat brittle and dry. That’s exactly why I focus on preventing my leather items from cracking and drying out in the first place. A simple routine of conditioning and proper storage can keep the surface supple and long-lasting.
When that dried-out topcoat loses its grip, it starts to crack and flake off, just like old paint on a sun-bleached fence. The main culprits are direct sunlight, heat from vents, and chemical-based “cleaners” that do more harm than good.
Faux leather, like vinyl or polyurethane (PU), has a different story. It’s a plastic layer bonded to a fabric backing. This bond is the weakest link. With repeated flexing, sitting, and general use, that plastic film simply lets go of the cloth underneath.
For faux leather, peeling is a material limitation, not a reflection on your care. It’s like a sticker eventually losing its adhesive. The plastic layer can’t breathe or self-repair like real leather, so once it starts to separate, the process often continues.
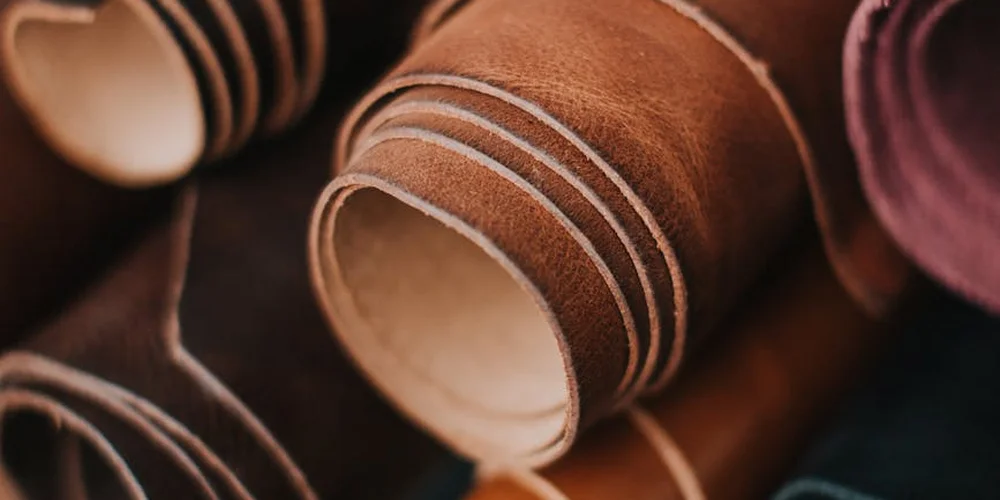
First, Know Your Material: Real Leather or Faux?
You must get this right. If your couch is damaged, you’ll want to handle scratches, tears, and cracks correctly. Using a real leather repair method on a faux couch (or vice versa) will make the damage worse. Here’s how to tell them apart with a simple two-step check.
Start with the tactile test. Find a worn spot, like the front of an armrest. Run your fingers over it. Genuine leather will feel warm and have a unique, uneven texture-the natural grain, scars, and wrinkles will be visible, just like the beautiful patina on Mason. No two spots will feel exactly the same.
Faux leather feels different. It’s cooler to the touch and has a perfectly uniform texture. The surface feels like smooth plastic because that’s essentially what it is. You won’t find the subtle variations of real animal skin.
Next, do a label check. Look for a tag under the cushions or on the frame. Words like “Genuine Leather,” “Full-Grain,” or “Top-Grain” indicate the real thing. Terms like “Bonded Leather,” “PU Leather,” “Vinyl,” or “Man-Made Material” point to a synthetic product. Curious how to tell if your sofa is real leather or faux leather? A label is a good start, and you’ll see more tips in the next steps.
Correctly identifying your material is the single most important step before any repair. If you’re still unsure, check a hidden area like the back or underside of a cushion. Real leather’s unfinished side will look and feel fibrous, like suede. A faux material’s back will look like woven fabric or have a grayish mesh.
How to Fix a Peeling Leather Couch
This is a careful process. Think of it more as a focused restoration than a quick patch job. Your goal is to create a stable, seamless repair that respects the material.
Step 1: Clean and Prep the Flaking Area
You cannot build a good repair on a dirty, unstable surface. Everything starts here.
First, remove all the loose, peeling material. Use your fingers to gently pick away any flakes that are already detached. Be patient and do not force anything that is still somewhat attached.
Next, take a soft, clean cloth dampened with water and gently wipe the entire area. For tougher dirt or body oils, use a drop of a pH-balanced leather cleaner. The aim is to remove all debris from the exposed leather underneath, creating a perfectly clean, dry canvas for your repair materials. Let the spot dry completely before moving on. Any moisture will ruin the next step. Make sure to use the right cleaning products and methods for your leather.
Step 2: Using a Peeling Leather Repair Kit
Don’t let the kit intimidate you. Most contain three main things: a binder or adhesive, a colorant, and a topcoat sealer. We’ll use them in that order.
Your first job is to re-adhere the coating. Use the palette knife or your finger (a disposable glove is smart here) to apply a thin layer of the leather binder or filler over the exposed area and just under the edges of any still-attached coating. Press down firmly to smooth it out and feather the edges so there’s no visible ridge. You are essentially creating a new, level foundation. Let this cure fully as the kit instructions state. Rushing this will cause the color to lift later.
Now for color. Kits often include small pots of dye or paint. Color matching is an art. Test your mix on a hidden spot first, like the back of a cushion. For small repairs, the included color might be close enough. For larger or very visible spots, you may need to custom mix leather paints to get a perfect match. I thin my paints with a bit of water or acrylic medium and apply several light coats with a small brush, letting each dry, just like I did for a scratch on June my jacket. Building color slowly always looks more natural than one thick, globby coat.
Step 3: Seal and Nourish the Repair
The colorant alone is not durable. It needs protection from friction and spills. Apply the clear topcoat from your kit or a dedicated leather sealant with a soft cloth or sponge. Use light, even strokes. This layer is what gives the repair its scuff resistance and a consistent sheen with the rest of the couch.
Finally, think about the bigger picture. Peeling often starts because the leather has dried out and lost flexibility. Once the repair is fully cured (wait at least 48 hours), apply a quality leather conditioner to the entire couch section, carefully avoiding the fresh repair spot. This step also helps prevent future damage and preserve the leather’s durability. This nourishes the surrounding leather, helps prevent new cracks, and blends the repair’s look. Conditioner on the fresh repair can dissolve the topcoat, so be precise.
How to Fix a Fake Leather Couch That Is Peeling
Faux or bonded leather is different. It’s a plastic layer on a fabric backing. When it peels, the plastic is separating. Our approach is about managing damage on a non-porous material. Be prepared that these fixes are often more cosmetic and temporary than repairs on genuine leather.
The Vinyl Repair Approach: Glues and Patches
For small splits or peeling edges, a vinyl repair liquid compound can work. These are designed to slightly melt the plastic edges so they can be pressed back together. You apply the compound, press the material down, and hold it until it sets.
For areas larger than a coin, or where material is missing, a patch is your most reliable option. A liquid repair will just sink into the fabric backing and look messy.
Here is a simple guide for a patch:
- Clean the area well and let it dry.
- Cut a repair patch from a matching vinyl material kit, shaped larger than the damaged spot.
- Apply a thin layer of vinyl adhesive to the back of the patch and the couch surface.
- Press the patch firmly into place, smoothing out any air bubbles from the center outward.
- Place a heavy book on top and leave it for the full adhesive cure time, usually 24 hours.
What About Peeling Leather Repair Spray for Faux?
This is a common question. These aerosol color sprays are purely cosmetic. They are like foundation for your couch. A spray will cover a discolored or slightly scuffed area, but it does nothing to re-adhere peeling material or add structural strength. If the faux leather is still firmly attached but just looks worn, a color spray can be a quick visual refresh. If it is actively peeling or flaking, the spray will simply coat the flakes and they will continue to peel off, taking your new color with them. For a real repair, you need the adhesive or patch method first.
When to Patch, When to Call a Professional

Not every peeling spot needs a professional. But knowing the difference saves your couch and your wallet.
A DIY fix with a leather or vinyl repair kit is often enough for small, cosmetic issues. Think of a coin-sized patch of flaking faux leather on a seat cushion or a minor scratch on real leather that’s just starting to lift. These are surface-level problems you can manage with specialized repair techniques.
Call a professional upholsterer or leather restoration specialist for three main reasons.
- Large Sections Are Peeling: If the damaged area is bigger than your hand, a patch will look obvious and may not adhere correctly to the unstable surrounding material.
- Structural Cracks in Real Leather: This is when the leather itself is dry and splitting, not just the topcoat flaking off. You can see the fibrous inner layer. Think of my old saddle, Mason. When the leather cracks from dryness at a stress point, it needs expert filling, coloring, and reinforcing.
- A High-Value or Heirloom Piece: Sentimental or expensive furniture deserves an expert’s hand to preserve its value and character. A pro can match colors and textures perfectly.
For a beloved but worn real leather couch, complete reupholstery is a significant investment. For a peeling bonded leather or faux leather sofa, replacement is usually the more practical long-term choice. Repairs and patches on real leather can sometimes extend its life, but not always for bonded or faux materials.
Keeping Your Couch from Peeling Again
Repairing a spot is one thing. Preventing the next one is everything. A little regular care builds a strong defense.
Caring for a Real Leather Sofa
Real leather needs to be fed. Its natural oils dry out over time, leading to stiffness and, eventually, cracks. Your goal is to keep it supple. Knowing what oil to use for conditioning leather is crucial.
A simple, consistent care routine is the most powerful tool you have. I treat my daily-carry wallet, Scout, the same way.
- Dust Weekly. Use a dry, soft cloth. This removes grit that acts like sandpaper when you sit down.
- Clean Gently Every Few Months. Use a damp cloth with a drop of pH-balanced leather cleaner. Wipe in sections and dry immediately with another cloth.
- Condition Every 6 to 12 Months. This is the crucial step. Apply a quality leather conditioner with a clean cloth, using circular motions. Let it soak in overnight. It will darken temporarily, then lighten back to a rich, nourished hue.
- Keep it Out of Direct Sunlight. UV rays are leather’s biggest enemy, causing fading and accelerating dryness. Use blinds or curtains.
Caring for a Faux Leather Sofa
Faux leather is a plastic coating on fabric. You can’t condition plastic. Your care is about protecting that coating from abrasion and chemicals. Regular, gentle cleaning helps keep faux leather looking new and prevents cracking.
Never use leather conditioner or oil on faux leather; it will break down the plastic and cause sticky, permanent damage.
- Clean spills immediately with a damp cloth. For stickier messes, use a mild soap solution, then wipe with water to rinse.
- Dust and vacuum it regularly to prevent abrasive dirt from grinding into the surface.
- Consider a protectant spray made for vinyl or faux leather. It can create a barrier against stains and minor scuffs. Always test it on a hidden area first.
- Just like real leather, keep it out of direct sunlight to prevent the plasticizer from drying out and the color from fading.
Common Questions
1. How do I choose the right peeling leather repair kit on Amazon or elsewhere?
First, match the kit to your confirmed material: a “leather repair kit” for genuine hide, a “vinyl/faux leather repair kit” for synthetic. Read the product description thoroughly to ensure it includes adhesive, colorant, and sealer for a complete repair.
2. Is a peeling leather repair spray a good permanent fix?
No. A color spray is only a cosmetic cover-up for minor scuffs or fading on stable material. If the coating is actively peeling, the spray will not re-adhere it and will simply flake off with the loose material.
3. How do I maintain my couch after a successful repair?
For real leather, apply a quality conditioner to the surrounding area every 6-12 months to keep it supple. For faux leather, clean only with a damp cloth and mild soap, and never use conditioners or oils which will degrade the plastic coating. Knowing the best general methods for caring and treating leather items helps you pick the right care approach. This also sets the stage for comparing real vs. faux leather care.
4. Can a repair kit truly fix large sections of peeling bonded leather?
Kits are best for small, contained damage. For peeling larger than your hand on bonded or faux leather, a professional patch or full replacement is more practical, as the material failure is often progressive.
Caring for Your Leather After a Repair
Start every repair by cleaning the area with a gentle, pH-balanced cleaner. This prepares the surface so adhesives or conditioners can bond properly and last.
Responsible leather care, like the routine I give Mason or June, is a sustainable choice that honors the material. Building your maintenance skills keeps your sofa-and all leather goods-functional and beautiful for years.
Deep Dive: Further Reading
- Amazon.com: Peeling Leather Repair Kit
- r/howto on Reddit: How to fix peeling leather
- How to repair peeling or flaking leather?
Harriet is a avid collector of leather goods such as purses, bags, seat covers, etc and has an extensive background in leather care, recovery, stain removal and restoration. She has worked for a number of years perfecting her leather care techniques and knows the ins and outs of restoring all kinds and types of leather products. With her first hand knowledge in leather care, you can not go wrong listening to her advice.
Repairing Peeling Surfaces
