How to Paint and Dye Suede with Angelus Leather Paint: A Guide to Restoring and Customizing Your Leather
Published on: June 30, 2026 | Last Updated: June 30, 2026
Written By: Harriet Nicholson
Hello Tannery Talk. If you’re looking at a faded suede jacket or scuffed boots and wondering if you can bring them back to life, I understand that mix of hope and hesitation. You absolutely can.
This guide walks you through the entire process, from cleaning to the final protective coat. We will cover the crucial difference between paint and dye for suede, how to properly clean and prepare the nap, step-by-step application with brushes and daubers, and the finishing steps that lock in your work.
I’ve revived everything from scuffed suede loafers to vintage bags using these exact materials and techniques in my own workshop.
What You Need to Know Before You Start: Suede and Angelus Paint
Can you use Angelus paint on suede? The short answer is yes, but you need the right product from their line. Angelus makes both acrylic leather paint and leather dye. For suede, you should use their suede and roughout dye, which is formulated to penetrate the fuzzy nap without stiffening it. Their standard acrylic paints sit more on the surface and can clog the suede’s texture, making it feel plasticky.
You might wonder if any acrylic paint will work on suede shoes. Generic craft acrylics are a risky choice. They lack the flexibility needed for leather that bends and creases. I tried a generic paint on a scrap of suede years ago. It looked okay until it dried, then it cracked and peeled with the first flex. Angelus dyes are different. They contain binders that move with the leather, which is why they are trusted for restoration, especially when trying to restore and revive faded color on suede shoes.
Think of painting suede like coloring a piece of velvet cloth. If you glob paint on top, you lose the soft, textured feel. But if you use a thin dye, it soaks into the fibers and colors them while keeping the velvet touch. Painting smooth leather is more like coloring paper—a predictable, flat surface. Painting leather requires a different set of techniques. Suede requires a gentler, more absorbent approach.
This method works for all kinds of suede projects. I have used it to restore the faded burgundy on a pair of suede boots and to completely change the color of a suede bag. It is perfect for shoes, jackets, hats, or any item where you want to renew the color or try something new.
Gathering Your Tools and Materials
Having the right tools before you start makes everything smoother. Here is your complete list.
- Angelus Suede & Roughout Dye: This is your color. Choose your shade from their official color chart online, as screen colors can be misleading.
- Suede Cleaner or Deglazer: A specialty suede cleaner or a leather preparer is needed to strip any old finishes and dirt. This gives the dye a clean surface to bond to.
- Sealant/Finisher: A suede protector spray. This locks in the color and provides a water resistant barrier after dyeing.
- Brushes: You will need two types. A soft bristle brush, like a suede brush or toothbrush, for cleaning and working dye into the nap. A wider, soft paintbrush (1/2 inch to 1 inch) for applying dye to larger areas smoothly.
- Protective Gear: Nitrile or latex gloves are essential. Dye stains skin. Work in a well ventilated space, like a garage with the door open.
- Other Supplies: Painter’s tape for masking off areas you do not want dyed, clean white cloths, and a disposable container (like a plastic cup) for your dye.
People often ask where to find Angelus suede dye. You will most likely need to order it online from leather craft suppliers or directly from Angelus. Some local shoe repair shops might carry it, but it is less common. Always check the Angelus color chart before buying, as the color name on the bottle can look different in person. If you’re wondering where to buy suede dye or how to dye shoes and boots black, online leather-supply shops and some craft stores are common sources. With the right shade and proper technique, you can refresh sneakers, boots, or other suede items to a sleek black finish.
Brush choice matters because of suede’s texture. A stiff detail brush is great for scrubbing cleaner into stained spots. A soft, broad brush helps you lay down thin, even coats of dye without oversaturating one area. For a piece like Scout, my wallet, I would use a very small detail brush for the edges. For something like a jacket, a wider brush saves time.
Step 1: Preparing Your Suede Surface
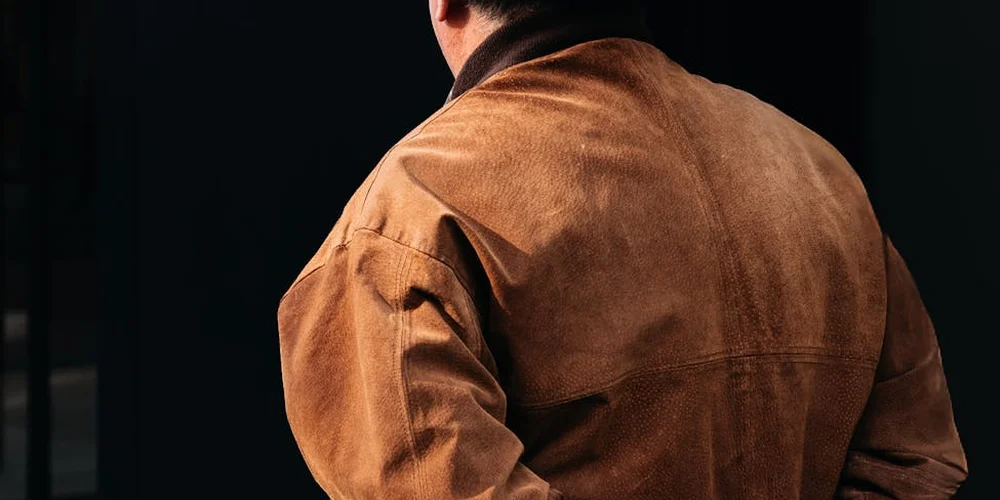
Think of this step like priming a wall before you paint. The work you do here decides how the final color looks and how long it lasts.
You need clean, open fibers. Any dirt or old finish will block the paint.
Cleaning and Brushing Techniques
Start with a suede-specific cleaner. These are gentle and won’t saturate the delicate nap. Apply it with a soft cloth, dabbing at stains instead of rubbing. For general grime, a light, even pass is enough. Knowing how to treat various stains will help you clean your shoes effectively.
Let the cleaner dry fully. Now, take a suede brush or a soft-bristled nail brush. Use a gentle, circular motion to lift the nap. This is not about scrubbing hard. You are just waking up all those tiny fibers so they stand ready to receive color. It feels like brushing velvet back into shape.
For stubborn oil stains, a specialist suede eraser can help, but test it on an inside seam first to be safe.
Applying a Suede Preparer
This is the non-negotiable step. A suede preparer or deglazer is a liquid that removes any final residues and, most importantly, opens up the leather’s fibers.
Without it, the paint just sits on top like makeup. It will crack and peel with the first bend. I learned this the hard way on an old suede bag. The color looked great for a week, then flaked off in the creases.
Apply the preparer with a lint-free cloth, working in small sections. You will see the suede darken slightly as it absorbs the liquid. That means it’s working.
Let the piece dry completely in a warm, airy spot for at least an hour, maybe two. Do not rush this. Painting on damp suede is a recipe for blotchy, uneven color.
Step 2: Applying Angelus Paint to Suede
Now for the transformation. Suede soaks up color, so your approach is different from painting smooth leather.
First, shake your paint well. For detailed work or a very thin coat, you can add a few drops of the brand’s recommended thinner. For full coverage, you often can use it straight from the bottle.
Use a detail brush for control. Load the brush, then wipe off the excess on the bottle’s rim. You want the brush damp, not dripping.
Painting Techniques for Best Results
Your first coat will look streaky and weak. This is normal. Apply thin, even coats, brushing lightly in the direction of the suede’s nap. Imagine you are petting a cat, following the lie of its fur.
If you lay the paint on too thick, it clogs the pile. The suede loses its soft, textured handfeel and becomes stiff and plasticky.
Let each coat dry for 15-20 minutes before adding the next. You will likely need 3 to 5 coats for solid, vibrant coverage. Patience builds a durable finish.
For custom designs or color restoration on just a worn toe cap (like on a suede boot), use painter’s tape to mask off areas. Apply your thin coats right up to the tape’s edge.
Always test your color and technique on a hidden spot first, like inside a tongue or on a scrap piece. This tells you how many coats you’ll need and how the color dries on your specific suede.
Step 3: Using Angelus Dye on Suede
Think of paint as a new layer on top of the suede. Dye is different. It soaks into the fibers, coloring them from within. It’s like how water gets absorbed into a sponge, changing the sponge itself. This is why dye is fantastic for full color restoration or a bold, uniform change.
Choosing and Mixing Your Color
Angelus offers a suede dye color chart. Use it as your roadmap.
- For a complete overhaul, colors like black or dark brown are powerful and forgiving.
- For fun customization, vibrant shades like pink or red can make a statement. Lighter colors may need more coats to cover fully.
- You can mix dyes to create a custom shade. Start with a base color and add others drop by drop, testing on a hidden area first. Write down your ratios so you can mix more if needed.
Always test your mixed or chosen dye on an inconspicuous spot, like the inside of a strap or under a flap, to see the true dried color.
Application: The Key is Speed and Consistency
You will need a soft dye dauber or a small, clean sponge. Work in a well ventilated area.
- Shake your dye bottle very well for at least a minute.
- Pour a small amount into a non porous dish or the dauber bottle cap.
- Apply the dye in quick, light, circular motions. Do not press hard or scrub.
- Keep your strokes overlapping. Aim for a light, even first coat. You can always add a second.
The dye dries fast, so you must keep a wet edge to prevent visible lines or dark spots where you stop and start. Work on one small, manageable section at a time, like one shoe panel or one side of a bag.
Achieving Even Color with Dye
Applying dye evenly is like watering a garden. You want every patch of soil to get the same amount of water. If you pour it all in one spot, you get a muddy puddle.
For suede that is worn down or discolored, those thirsty areas will grab more dye and look darker. The fix is simple. Apply a very light, fast first coat over the entire piece. Let it dry. This primes all the fibers. Your second coat will go on much more evenly.
If a spot still looks lighter, don’t just dump dye on it. Use a nearly dry dauber to gently build up color there over several passes. Patience prevents a blotchy mess. I learned this on an old suede journal cover that had faded on the spine. A rushed job would have ruined it.
Sealing and Protecting Your Work
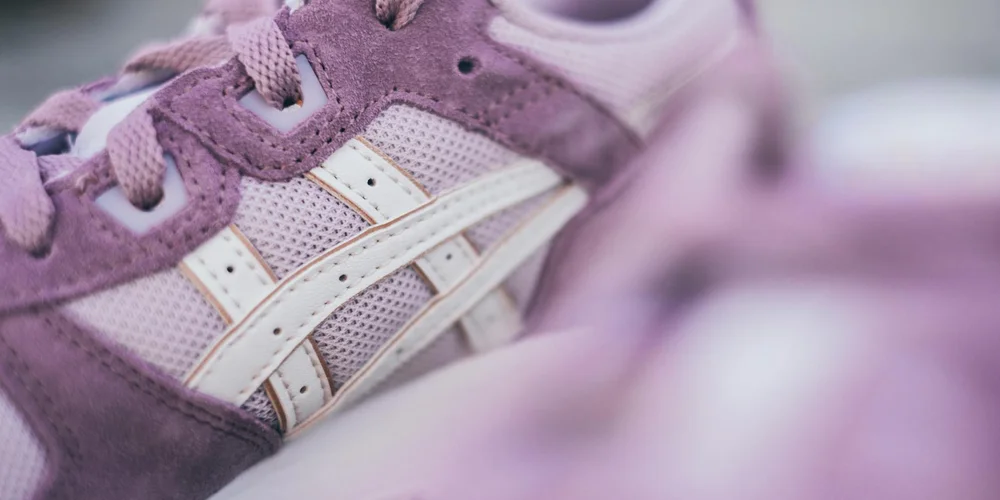
Sealing is not an optional step. Freshly dyed suede is vulnerable. The sealer locks the color in, protects it from scuffs, and provides crucial water resistance. Without it, the first rain shower will cause the dye to run or spot.
Choosing and Applying a Sealer
Use a sealer made specifically for suede or nubuck. A generic leather finish can mat the nap down and ruin the texture. Aerosol spray sealers are the easiest for getting a thin, even coat.
- Ensure your dyed suede is completely dry, usually after 24 hours.
- In a clean, dust free area, hold the can 6 to 8 inches from the surface.
- Apply a light, even mist in a steady sweeping motion. Do not spray heavily in one area.
- Let this first coat dry for 10 15 minutes.
- Apply a second light coat for full protection.
- Allow the piece to cure for a full 24 hours before using it.
That light, even spray is everything. A heavy spray will saturate the suede, potentially causing discoloration or a stiff feel. Think of it as a gentle mist, not a shower.
Caring for Your Sealed Suede
The sealer is a shield, but it isn’t armor. Care for it gently. Use a soft suede brush for regular upkeep to lift the nap and remove dust. For spills, immediately blot (do not rub) with a clean, absorbent cloth. The sealer gives you a critical moment to react before moisture soaks in.
Over time, the protective layer will wear down, especially on high contact areas like shoe toes or bag handles. You can lightly reapply sealer to those spots every 6 to 12 months to maintain protection, following the same light spray method.
Common Questions and Smart Alternatives
You have the basics down, but a few nagging questions always pop up. Let’s clear those up first.
Your Top Questions, Answered
I’ve used this paint on everything from scuffed suede boots to the nap of an old bag. Here’s what I’ve learned.
Angelus paint holds up well on suede because it’s flexible and soaks into the fibers, not just sitting on top. It won’t crack like a cheap coating. The color stays put through gentle wear. For my jacket June, a touch-up with a matching shade blended right in and survived a rainy season.
White dye is a special challenge. Suede loves to soak up color, and white pigment isn’t as strong. One coat often looks gray or patchy. You will need three or four thin coats of white to get a solid, bright result, and even then, it may not be pure white. Patience between coats is your best tool here.
For small touch-ups on a scuff or faded corner, the process is simple.
- Clean the spot with a soft, dry brush to lift the nap.
- Use a fine detail brush to dab a tiny amount of paint onto the area. Do not rub.
- Let it dry for two hours. If the color is too light, apply one more thin layer.
- Once fully dry, gently brush the nap with a suede brush to restore the texture.
Can You Use Regular Dye or Acrylic Paint Instead?
Maybe you have other products on your shelf. Here’s a quick comparison to help you choose between fixing an old favorite or making something new.
| Product Type | Best For | Pros | Cons |
| Regular Leather Dye (Alcohol-based) | Restoration, matching original color on smooth leather. | Penetrates deeply, very durable color. | Can overly saturate and stiffen suede, may bleed easily. |
| Standard Acrylic Craft Paint | Permanent customization on items with low flex. | Wide color range, inexpensive. | Peels and cracks on flexible suede, creates a plastic feel. |
Think of it like this. Using regular dye on suede is like pouring water on a sponge-it goes everywhere and can darken it too much. Acrylic paint acts like a sticker on velvet; it might look okay until you bend it. For suede, a paint made for leather, like Angelus, works like a careful stain, coloring the fibers without destroying their soft hand—unlike regular suede dye.
A Note on Other Repair Methods
Sometimes color loss is just dirt. For very light, surface-level grime, you can try a dedicated suede eraser and gentle brushing. This can revive the original color without any paint. I’ve saved Mason’s saddle straps this way.
For a unique fix, embroidery over a stained spot on suede can work. It adds character and covers the flaw. But for reliable, all-over color correction or change, a quality leather paint is the most consistent path. Brushing or embroidery can solve specific problems, but a dedicated suede dye gives you full, even control.
This might seem like a lot of steps. I get it. When my wallet Scout got a bleach spot, I felt the same urge to rush. Go slow. Let each coat dry. Test on a hidden seam. With careful work, you can absolutely rescue a beloved piece from the back of the closet and give it more years of use. The patience you invest now pays off every time you wear it.
Common Questions
Where can I find Angelus Suede Dye locally?
You’ll most likely need to order it online from a leather craft supplier. Call your local shoe repair or cobbler shop to check if they carry it or can order it for you. If you’re dealing with cracked leather, you’ll want to explore repair methods for damaged surfaces on boots and shoes. In the next steps, we’ll link to practical guides and product recommendations for fixing these issues.
How do I use the Angelus color chart correctly?
Always reference a physical chart if possible, as screen colors lie. Order a small bottle to test the dye on a hidden seam of your item first, as the final color depends on your suede’s original shade.
Is Angelus Suede Dye durable for daily wear?
Yes, if properly sealed and maintained. The longevity depends entirely on the quality of your sealant coat and avoiding excessive abrasion or moisture.
What’s the best approach with a dark color like black?
Black dye is very forgiving for full coverage. Apply it in quick, light, and even coats to avoid creating overly saturated, stiff patches on the suede.
How do I keep a vibrant color like red or pink from fading?
Use a high-quality suede protector immediately after dyeing. Reapply the protector to high-wear areas every few months to shield the color from UV light and friction.
Finishing Your Suede Project
Your success rests on a clean, bare surface and thin, patient layers of color. Rushing the prep or the paint will only show in the final result.
Every piece you restore or customize is one less item needing replacement, which is the heart of sustainable craft. The skills you build here on a spare swatch can give new life to a worn piece, much like the careful repairs on my old jacket, June.
Further Reading & Sources
- Suede Dye for Vibrant Color Restoration & Customization · Angelus Direct
- r/Customsneakers on Reddit: Do you use Angelus finish on Suede or just the leather swoosh
- How to Paint Suede Shoes Easily (Acrylic, Angelus, Spray)
- r/CustomShoes on Reddit: leather paint on suede shoes
- Angelus Leather and Suede Dye Frequently Asked Questions
Harriet is a avid collector of leather goods such as purses, bags, seat covers, etc and has an extensive background in leather care, recovery, stain removal and restoration. She has worked for a number of years perfecting her leather care techniques and knows the ins and outs of restoring all kinds and types of leather products. With her first hand knowledge in leather care, you can not go wrong listening to her advice.
Restoring Color and Re-Dyeing