How to Dye Suede Shoes and Boots Black: A Sourcing and Step-by-Step Guide
Published on: January 31, 2026 | Last Updated: January 31, 2026
Written By: Harriet Nicholson
Hello Tannery Talk. I hear the hesitation in your question-the worry that one wrong move could ruin a favorite pair. Dyeing suede can feel intimidating, but it’s a straightforward rescue mission with the right approach.
This guide will walk you through where to find quality dye, how to pick the right product for suede versus leather, and my personal, careful process for applying it.
I’ve revived everything from Mason’s faded saddle flaps to June’s scuffed jacket cuffs, learning which products work without sacrificing the soft hand of suede.
Can You Really Change the Color of Suede?
Yes, you absolutely can. I’ve brought faded suede bags and scuffed boots back to life on my bench more times than I can count. The process is straightforward, but it asks for a bit of patience and a steady hand. Think of it like this: you’re not just painting the surface, you’re guiding color deep into the fibers.
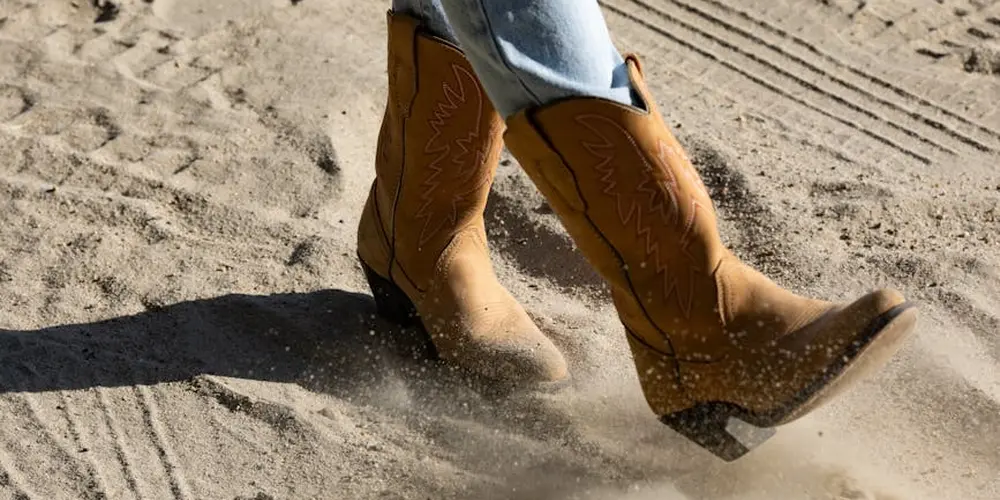
Can you dye suede shoes black? You can. It’s one of the most common color changes because it covers so well. The key is to start with a perfectly clean, dry surface, or the dye will not absorb evenly. The change is permanent, so be sure black is what you want.
My jacket, June, has a suede collar. When it got a stain I couldn’t lift, I used a matching dye just on that area. It blended right in because I took my time. This same careful approach works for a whole shoe. Nubuck, suede’s close cousin, follows nearly the same rules, which is a perfect lead-in to knowing exactly what you’re working with.
Suede vs. Nubuck: Knowing Your Leather
Feel the surface of your shoe. Suede has a raised, fuzzy nap because it’s made from the inner layer of the hide. Nubuck feels more like a velvety peach skin; it’s the top grain of the leather that’s been lightly buffed. The difference is in the handfeel-one is softly fuzzy, the other has a gentle, consistent grain.
Can nubuck be dyed? Can you dye nubuck leather? Yes, to both. Both materials are porous and will drink up dye. The main difference is in preparation. Nubuck’s fine grain can be more easily matted down if you scrub too hard while cleaning. Suede’s nap can get clumpy if it’s over-wet. Knowing which one you have prevents simple mistakes.
Compare them to well-worn pieces. Suede is like the soft lining of an old work glove. Nubuck is more like the surface of my wallet, Scout, after years of handling-smooth but with a detectable texture. Treating them right starts with identifying their unique character.
Your Step-by-Step Guide to Dying Suede and Nubuck
Here is the practical method. Gather a suede/nubuck cleaner, a soft-bristle brush (like a horsehair dauber), your dye, and a well-ventilated space.
- Test First. Always. Apply a small dot of dye to a hidden area, like inside the tongue. This checks final color and leather reaction.
- Clean Thoroughly. Use a dedicated cleaner to remove all dirt and oils. Let the shoe dry completely for 24 hours. Dye will not stick to grease.
- Apply the Dye. Use gentle, circular motions with your brush, working the dye into the nap. Avoid soaking the leather. Two thin coats are better than one gloopy one.
- Dry and Restore. Let the shoes dry naturally, away from heat, for a full day. Once dry, use a soft brush to gently lift the nap back up.
A common mistake is rushing the drying time. Heat can bake the dye into a stiff, unnatural crust. Patience gives you a flexible, even color. If you see a dark spot where you applied too much dye, you can sometimes lighten it by gently brushing the area with a clean, dry eraser made for suede after the dye is fully dry.
Dye or Paint? Choosing Your Color Medium

Before you buy anything, you need to pick your tool. Dye and paint work in opposite ways.
Dye soaks into the leather, becoming part of it. Paint sits on top, forming a new layer. This difference changes everything about the look, feel, and durability of your finished shoes.
Think of it like working with wood. Dye is like stain. It seeps into the grain, enriching the natural texture. Paint is like varnish. It coats the surface, creating a solid, often shiny, finish. For suede, which is all about that soft, fuzzy nap, this choice is critical.
Dyeing for a Natural Black Finish
If you want to dye suede black and keep its character, use dye. It penetrates the fibers so the color change looks born from the material, not slapped on. The suede will keep its soft, tactile handfeel. I’ve revived many items this way. For a pair of boots, dye lets them age gracefully, developing a patina like my saddle, Mason.
Apply a suede-specific dye in thin, even layers with a soft brush or sponge. Let it dry completely between coats-this usually takes a few hours. You might need two or three coats for a deep, even black.
Dye is forgiving; it blends with the leather’s natural variations, so small mistakes are less noticeable.
Painting for a Bold, Opaque Change
Choose paint if you need to cover stains completely or want a uniform, solid color. Acrylic-based leather paints are common. They create a powerful, opaque finish. But on suede, paint has a cost. It can fill in the nap, making the surface stiff and flat, losing that signature suede feel.
For example, painting a jacket like June would permanently change its drape and softness. Reserve paint for when you are okay with a coated look or are working on smooth leather areas.
How to Choose for Your Shoes
Your decision comes down to use and finish. Ask yourself two questions.
- How are the shoes used? For daily boots that face scuffs and weather, dye is more durable. It won’t crack or peel because it’s in the leather, not on it. For dress shoes worn occasionally, paint might be an option if you prioritize perfect coverage.
- What finish do you want? A matte, natural look that shows texture? Dye. A consistent, possibly glossy, coat? Paint.
A common mistake is using paint on suede without realizing it will alter the texture. A simple fix is to always test first.
Test your dye or paint on a hidden spot, like inside the tongue or on a spare scrap, and let it dry fully to see the true result.
If you go with paint on suede, you must prepare the surface. Clean it thoroughly with a neutral suede cleaner. Some crafters use a very light sanding or a leather primer to help the paint adhere, but this changes the material permanently. With dye, a good clean is all you need before you start.
Where to Buy Suede Dye and Paint
Finding the right products is your first step. You don’t need a magic potion, just the correct type of colorant for suede’s unique nap.
Online Retailers
This is where most people start. Large online marketplaces carry nearly every brand. The upside is clear: huge selection and doorstep delivery.
The trick is reading product descriptions and reviews carefully. Look for dyes and paints specifically labeled for suede or nubuck. A product made for smooth leather can clog the fibers and ruin the handfeel.
Always verify the product is intended for suede, as using the wrong type is the most common and costly mistake.
Local Craft or Shoe Repair Shops
Never underestimate the value of a local expert. A good shoe repair shop is a treasure trove. They often sell small bottles of dye behind the counter.
Walk in with your boot. The person behind the counter has likely handled a hundred pairs just like yours. They can show you the exact shade of black they use and might even give you a quick tip on application. It’s how I learned to feather edges on a scuffed toe box.
If you’re unsure where to start, a quick search for “black suede dye near me” or “shoe repair near me” can point you to these local hubs. They can guide you on how to repair, restore, and maintain suede nubuck footwear. A five-minute conversation with a seasoned cobbler can save you hours of frustration and a potentially botched job.
Specialty Leather Suppliers
These are the professional’s source. Stores that supply leatherworkers, saddlemakers, and upholsterers will carry high-grade dyes and finishers. The staff here are typically deeply knowledgeable.
You might find a wider range of black tones here, from jet black to more muted charcoal. They can also advise on complementary products, like a neutral cleaner to prep the suede or an acrylic finisher to lock the color in. Think of it like the difference between a general hardware store and a woodworker’s specialty shop.
My practical advice? Check locally first. Call a shoe repair shop or a craft store that carries leatherworking supplies. If they have what you need, you get it today and can ask questions in person. If not, then turn to a trusted online specialty retailer. Scout, my wallet, got its first conditioning treatment with supplies from a local shop I found just this way.
Gathering Your Toolkit for Dyeing Suede
Think of this step like conditioning my old veg-tan wallet, Scout, before a long trip. You wouldn’t just rub oil on a dirty surface. You clean it first, inspect it, then apply care with the right tools. That preparation is everything. For suede, it’s even more critical because the nap holds onto dirt, and dye can’t penetrate a grimy surface evenly.
This is your checklist. Gather it all before you start. You don’t want to be searching for a brush with dye-covered gloves.
The Core Supplies
- Suede & Nubuck Cleaner: A specialized, neutral pH cleaner is non-negotiable. It lifts dirt without damaging the delicate fibers or altering the pH for the dye.
- Black Suede Dye or Paint: Dye soaks into the leather, while paint sits on top. For a lasting, natural look that wears in, a penetrating dye is best. For total, opaque coverage on severely faded spots, a pigmented paint or dye-finish works.
- Soft-Bristle Brushes (Multiple): You’ll need at least two. One very soft brush (like a suede eraser brush or soft toothbrush) for cleaning and raising the nap. A second, slightly stiffer brush (a dedicated suede dye applicator brush or a clean, stiff-bristle paintbrush) for applying the dye.
- Clean, Lint-Free Cloths: White or light-colored microfiber cloths are perfect. You’ll use them for applying cleaner, buffing, and checking your work.
- Nitrile or Latex Gloves: Dye stains skin. Gloves keep you clean and prevent oils from your hands from transferring to the suede.
- A Well-Ventilated Workspace: A garage, patio, or a room with multiple windows open is ideal. The fumes from some dyes are strong.
- Painter’s Tape: For masking off soles, linings, or any part of the shoe you don’t want dyed.
Tips for Specific Items
Not all suede is the same. The soft nap on a pair of UGG boots is different from the rugged grain on a work boot.
For delicate items like UGG boots or suede Birkenstocks: Use the gentlest brushes you have. A suede eraser brush or even a very soft, clean clothes brush is perfect for these. Their nap flattens easily, so you must be patient when brushing it back up after cleaning and dyeing.
For rugged boots or shoes: Your brushes can be a bit more robust. The goal is still to be gentle, but the leather can usually handle a more vigorous brushing to work cleaner deep into the grain.
A Note on Common Mistakes
The biggest error is rushing the cleaning step. If you dye over dirt or old conditioner, the color will be blotchy and may not adhere. Cleaning is not just a suggestion; it is the foundation for a perfect dye job. Another mistake is using too much dye at once. It’s better to apply two or three thin, even coats, letting each dry completely, than to flood the leather with one thick coat that can stiffen it.
Step-by-Step: How to Dye Your Suede Shoes or Boots Black
Think of this like the annual deep care I give to Mason, my old English saddle. It’s not a rush job. It’s a methodical process of preparation, application, and patience. A calm approach is your best tool for success.
Step 1: Deep Clean Your Suede
You must start with perfectly clean suede. Any dirt, oil, or old protector spray will act like a shield, blocking the dye from soaking into the fibers evenly. This step is non-negotiable for a smooth, professional finish.
Use a suede eraser first. Gently rub it over stains and scuffs to lift the dirt out of the nap. Follow this with a stiff suede brush or a brass bristle brush. Brush the entire surface firmly in one direction to lift and clean all the tiny fibers. For a thorough job, you can use a very small amount of a white vinegar and water solution (1:1 mix) on a clean cloth for spot cleaning, but never soak the material.
If you’re starting with brown suede, a perfect clean is even more vital, as it ensures the new black dye has a consistent base to adhere to for full coverage.
Step 2: Test the Dye in a Hidden Spot
Never skip this. It is the only way to avoid a color disaster or a ruined texture. I always test new products on a hidden part of any piece, like the inside of a boot’s tongue, the top of the heel counter, or under a strap.
Apply a small amount of your chosen dye or paint to this hidden area. Let it dry fully. You are checking for three things: the final dried color (is it the deep black you want), any change to the suede’s softness or nap, and how long it takes to dry completely.
This five-minute test can save your shoes, giving you a clear preview of the results before you commit to the whole project.
Step 3: Apply the Dye Evenly
Now for the main event. Work in a well-ventilated space and lay down newspaper. Wear gloves. For liquid dye, I prefer a small, soft sponge or a dedicated dye applicator brush. You want control.
Start with a small section, like the toe. Apply the dye with light, even strokes, moving in one direction. Do not soak the suede. The goal is to let the dye soak in, not pool on top. Work your way around the shoe, maintaining a wet edge so you don’t get lines or overlaps. This is particularly important when dyeing faux suede or genuine suede shoes.
Pay extra attention to creases and seams, using the tip of your brush or a folded edge of the sponge to gently work the dye into these tight areas for uniform color. The motion should be gentle and consistent, much like applying conditioner to a jacket like June, ensuring every part gets attention.
If Using Suede Paint
Suede paint (often an acrylic-based product) applies differently. It sits more on the surface. Use very thin layers. Apply one light coat, let it dry completely as per the instructions, then check if you need a second for opacity. Building up thin coats is the secret.
Be aware that paint can stiffen the suede. To minimize stiffness, flex the shoe gently by hand as it dries between coats to keep the material pliable, and soften the material if needed.
Step 4: Let It Dry Completely
Patience here defines the final result. Place the shoes in a warm, dry room with good air circulation. Never use a hair dryer, radiator, or direct sunlight to speed this up. Intense heat can bake the dye into a crust or cause cracking.
Drying time varies. It could take a few hours or overnight. How do you know it’s done? Touch a hidden test spot lightly. Wait until the suede feels dry and cool to a light touch, with no dampness or tackiness left behind. It’s the same principle as waiting for a good leather oil to fully absorb; rushing just creates problems.
Step 5: Brush and Restore the Nap
The dyeing process can mat down the suede’s soft, fuzzy surface (the nap). This final step brings it back to life, especially after dyeing or restoring faded color. Once the shoes are bone-dry, take a clean suede brush.
Brush the entire surface vigorously. Use circular motions and then finish by brushing in one direction. You will see the fibers lift and the color even out as you remove any loose, excess dye particles.
This brushing is what restores the soft, luxurious handfeel and gives you a professional, integrated black color, rather than a flat, painted look. It’s the satisfying final touch, like the last buff on a well-maintained boot.
After Dyeing: Locking in the Color and Care
The dye is dry. The work is done. But your care isn’t. Think of dyeing as giving your shoes a new start. Protecting that new color is how you make it last for years.
Just like my leather jacket, June, needs a fresh coat of protectant every season to shield her from rain, your newly dyed suede needs the same defensive layer. Without it, the first splash of water can leave a dark, permanent spot.
Sealing Your Work with a Protector
A suede protector is not a conditioner. It is a clear, invisible shield. It sits on the surface of the fibers to repel water, oil, and dirt before they can soak in and stain.
Applying a protector is the single most important step after dyeing to ensure your hard work doesn’t wash away. For shoes you’ve dyed black, this step is about preserving that deep, even color from fading and spots.
Here is how to apply it correctly:
- Make absolutely certain your dye is completely dry. This can take a full 24 hours. Touch a hidden area-if it feels cool or damp, wait longer.
- Work in a well-ventilated space. Hold the can about 6 inches from the shoe.
- Apply a light, even mist over the entire surface. Do not soak the leather. A fine, damp layer is the goal.
- Let the shoes dry for the time recommended on the product, usually one to two hours.
- Apply a second light coat for thorough coverage. Two thin coats are always better than one heavy, soggy one.
Your New Maintenance Routine
Dyed and protected suede has simple needs. A consistent, gentle routine prevents big problems later.
Regular brushing with a proper suede brush is non-negotiable; it lifts the nap, removes surface dust, and prevents dirt from getting ground in. Brush your shoes every few wears, always in one direction to keep the texture even.
For spills or scuffs, act fast. Use a clean, dry microfiber cloth to blot-never rub-any liquid. For dry dirt or salt marks, a suede eraser is your best friend. Gently rub the marked area, then brush the residue away.
If a stain persists, a dedicated suede cleaner is safer than household products. Apply a small amount to a cloth and dab at the stain, working from the outside in. Let it dry completely, then brush the area to restore the texture. For different stains, refer to How Do You Remove Different Types of Stains from Suede Material.
A Note on Common Mistakes
I see two errors often. First, over-applying protector. This can leave a stiff, shiny film on the suede. Stick to light coats. Second, using harsh cleaners or brushes with metal bristles. These can strip the dye and damage the delicate suede fibers. Use tools made specifically for suede.
Maintaining shoes you’ve dyed black is about vigilance. A quick brush-down after wearing them and a fresh application of protector every few months will keep them looking their best. It’s a small habit, like the occasional touch-up I give June’s jacket, that pays off in the long life of your favorite gear.
Fixing Common Dyeing Mistakes
Even with careful work, dyeing suede can be tricky. Mistakes happen. I’ve seen them on my own projects, like a blotchy spot on an old pair of boots I was trying to revive. The good news is, many errors are fixable. Let’s look at the usual suspects.
Uneven Color or Streaks
This is often the first sign of trouble. You finish, let the shoes dry, and see light and dark patches. It usually means the dye didn’t soak in evenly.
The fix starts with figuring out the root cause: was the suede not clean, or was the dye applied unevenly?
- Let the shoes dry completely for 24 hours.
- Use a clean, soft suede brush and brush the entire area vigorously. This can sometimes blend minor streaks by redistributing pigment in the nap.
- If brushing doesn’t work, the surface needs to be prepared for another light coat. Use a clean eraser or very fine-grit sanding block to gently go over the uneven spots. This removes excess surface dye and roughs up the nap slightly.
- Wipe away all dust with a slightly damp cloth and let it dry.
- Apply a very thin coat of dye, using a daubing or misting method, focusing on blending the lighter areas into the darker ones.
Blotches or Dark Spots
Blotches are typically areas where too much liquid pooled. It could be dye, cleaner, or even water from your prep step that you didn’t notice.
I once got a water spot on June, my jacket, during conditioning. The principle for fixing it is similar. Your goal is to try and lift the excess pigment from that specific spot before it sets permanently.
- Act quickly. Before the dye fully dries, take a clean cloth dampened with the dye’s recommended thinner or a neutral cleaner. Gently dab (don’t rub) the dark blotch.
- You might lift some color from the blotch and the area around it, creating a light spot. This is okay. Let the area dry fully.
- Once dry, you will need to re-dye that entire panel or section to blend everything back together. You cannot just spot-dye a blotch.
Stiff, Crusty, or Gummy Spots
This means a product built up on the surface. It happens if you applied too much dye at once, didn’t let layers dry, or used a dye not suited for porous suede.
Stiffness means the suede’s nap is glued down with residue, and you need to physically break it up.
- Let the spot dry for at least 48 hours. Trying to fix it while still damp will make it worse.
- Take a suede brush or a soft-bristled nail brush. Scrub the stiff spot gently in a circular motion. You’re trying to lift and separate the matted fibers.
- For a persistent, gummy feel, lightly rub the area with a clean pencil eraser. The eraser crumbles and absorbs some of the residue.
- Brush again. Repeat until the handfeel is soft and fuzzy like the surrounding suede.
Can You Dye Black Suede Shoes?
Yes, you absolutely can. I get this question a lot. People want to refresh faded black suede or cover up a bad dye job with a different color.
Redyeing black suede is one of the easiest color corrections because black pigment is so strong and forgiving. It often covers previous mistakes completely.
Think of my wallet, Scout. It’s a dark veg-tan, but if I needed to, dyeing it black would be straightforward. The process is the same as a first-time dye job, with one critical extra step:
- Clean the shoes thoroughly with a suede-specific cleaner.
- Let them dry.
- Lightly sand the entire surface with a fine-grit sanding block. This is non-negotiable. It removes the old, sealed layer of dye and opens up the nap so the new dye can grip.
- Brush off all the dust with a damp cloth. Let dry.
- Apply your new black suede dye in thin, even coats. You will likely need fewer coats to get solid coverage because you’re going over an already dark base.
Black is a great reset button for suede. It gives a uniform, deep color that can make an old, tired pair look sharp and new again.
Recommended Suede Dyes for a Reliable Black Finish
Finding the right dye is less about a magic brand and more about understanding what works with suede’s unique surface. A bottle labeled for ‘suede’ or ‘nubuck’ is your first checkpoint. My go-to for years has been an alcohol-based formula.
Alcohol-based dyes are my standard because they penetrate the fibrous nap deeply, which leads to a richer, longer-lasting color that resists flaking. They dry quickly, which helps prevent blotchiness. You might see products marketed as ‘spirit dyes’ or ‘non-water-based’-these are often what you’re looking for.
When people ask for the best black suede dye, they’re usually seeking three things: deep coverage, fade resistance, and a finish that doesn’t feel crusty. A quality dye will deliver a uniform, intense black without totally matting down the suede’s soft handfeel. For tough boots that see weather or casual shoes that get daily scuffs, this deep penetration is what prevents the original color from peeking through with every brush.
What a Trustworthy Dye Feels Like
From re-dying scuffed boot collars to refreshing faded jackets, the right product makes the job smooth. Here’s what I’ve learned to expect:
- The color suspends evenly in the bottle and applies without streaking.
- It dries to a consistent, deep shade without a heavy, plastic-like film on top.
- The suede remains pliable. If it dries stiff, the product is likely sealing the surface rather than dyeing it.
I used a reliable black suede dye on a well-worn pair of casual shoes last season. The process was straightforward: clean, dye in two thin coats, and restore the nap. The result was a cohesive, vibrant black that brought new life to the shoes without changing their comfortable, broken-in texture. The dye held fast, and a simple brush-up after wear kept them looking sharp. Curious whether dye can recolor suede shoes or boots and restore their color appearance? This example shows that it can, with careful application.
Avoiding Common Pitfalls
The biggest mistake is using a paint or a heavy acrylic finish meant for smooth leather. These products sit on top of the suede, clogging the fibers and creating a stiff, unnatural shell that will eventually crack. You want a dye that soaks in, not a paint that coats over.
Another tip: always do a test spot. Apply a small amount of dye to a hidden area, like inside the tongue or on a rear seam. This tells you two things: the true final color and how the suede reacts. If the test spot dries stiff or blotchy, that dye isn’t right for your project.
Common Questions
Is Angelus suede dye effective for black suede?
Angelus is a reputable brand, and their suede-specific dyes penetrate well without stiffening the nap. Always test on a hidden area first to confirm color and ensure compatibility with your leather.
Where can I find black suede dye near me?
Check local shoe repair shops or craft stores that carry leather supplies-they often stock it and provide practical advice. If unavailable, a quick search for “shoe repair near me” online will direct you to the closest reliable source.
What’s the best approach for dyeing UGG boots black?
Use a gentle brush and apply dye in thin, even coats to avoid matting the delicate fibers. After drying, brush thoroughly to restore the soft nap and maintain the boot’s texture.
How do I choose the best black suede dye for my shoes?
Opt for an alcohol-based dye labeled for suede or nubuck, as it soaks in deeply for a lasting, flexible finish. Avoid paints or products for smooth leather, which can clog the nap and cause stiffness.
A Final Word on Suede Care
Your most important job happens before the dye even touches the boot. Clean the suede thoroughly and always test your chosen product in a hidden spot first. This simple step saves countless projects from turning into regrets, a lesson I learned the hard way with an early attempt on a pair much like Scout.
Good care extends the life of your leather goods, which is the most sustainable choice you can make. Trust the process, take your time, and you’ll find that each repair or refresh builds not just your skills but a deeper connection to the items you choose to keep.
Further Reading & Sources
- r/dyeing on Reddit: Could I dye these suede shoes black?
- Buy Black Suede Dye | Angelus Brand Suede Dye | Sneaker Care Kit · Angelus Direct
- Amazon.com: Angelus Suede Dye – Black – 3 oz Premium Liquid Dye for Suede, Nubuck, and Nappy Leather : Clothing, Shoes & Jewelry
- Shoe Dye | Suede & Leather Dye | Timpson
Harriet is a avid collector of leather goods such as purses, bags, seat covers, etc and has an extensive background in leather care, recovery, stain removal and restoration. She has worked for a number of years perfecting her leather care techniques and knows the ins and outs of restoring all kinds and types of leather products. With her first hand knowledge in leather care, you can not go wrong listening to her advice.
Restoring Color and Re-Dyeing