How Can You Fix a Sticky or Damaged Leather Steering Wheel?
Published on: November 11, 2026 | Last Updated: November 11, 2026
Written By: Harriet Nicholson
Hello Tannery Talk. That tacky, unpleasant feel on your steering wheel is more than an annoyance, it’s a cry for help from leather that’s dried out or been coated with the wrong products. The good news is, with some patience and the right steps, you can restore it.
This guide will walk you through the process from start to finish. We will cover identifying the type of damage, the right way to deep clean built-up grime, how to properly condition dry leather, and what to do for more severe cases like peeling or cracks.
I’ve brought countless leather pieces back from similar states, from my old saddle Mason’s sweaty grip to June the jacket’s worn cuffs.
What’s Making Your Steering Wheel Sticky or Damaged?
That unpleasant, tacky feeling happens to the best leather. Think of your steering wheel like my old jacket, June. Over years, she picked up a film of city grime, lotion, and everyday oils that made her feel less soft and more sticky. Your steering wheel faces a tougher life.
The main culprits are the things your hands leave behind every single drive. Sweat and natural skin oils soak into the leather. Hand sanitizer residue, which is often alcohol-based, dries out the leather’s natural oils and can leave a gummy film. Sunlight through your windshield acts like a slow oven, baking those residues into the surface and drying out the leather until it can crack.
Your first job is to figure out what you’re dealing with. Run your fingers over the wheel. Does it feel uniformly tacky, like it’s coated in syrup? That’s likely a build-up you can clean. Do you see deep cracks, peeling, or areas that feel brittle and flaky? That’s wear and tear from the leather drying out and breaking down, and sometimes it’s splitting or peeling like you might find on leather shoes or furniture.
For a simple sticky film, a good clean will often restore the feel. For cracks or peeling, the leather’s top layer is compromised. A do-it-yourself clean and condition can help, but it won’t glue the leather back together. That’s when people start searching for a steering wheel repair service, which can involve re-dyeing or wrapping. The steering wheel repair cost for a professional service is often many times more than a bottle of quality leather cleaner, so a DIY clean is always the best first step.
Is It Just Dirt or Real Damage?
Here’s a simple test. Take a clean, dry, soft cloth and wipe a small section of the wheel firmly. Now feel it again. If the stickiness is mostly gone and the leather underneath feels dry but solid, you’re winning. You just need a proper clean. If the stickiness remains thick or you see color on your cloth from flaking dye, the problem is deeper. If the leather feels crunchy or looks like alligator skin, the damage is structural. A sticky film wipes away. Cracked, flaky leather needs more than a wipe.
How to Clean a Sticky Leather Steering Wheel, Step-by-Step
This process is about removing the gunk without harming the good leather underneath. You don’t need many tools, just the right ones and a bit of patience. Learning how to clean a sticky leather steering wheel yourself saves a trip to a detailer and gives you control.
You will need two things:
- A few soft, clean microfiber cloths (terry cloth can be too rough).
- A pH-balanced leather cleaner. This is made for automotive leather and won’t strip its protective coatings.
Never spray cleaner directly onto the steering wheel, as excess liquid can seep into seams and electronics. Work in a shaded, cool spot, not in direct sunlight. This keeps the cleaner from drying too fast and leaving a residue.
Step 1: The Gentle Clean
Shake your cleaner well. Spray a small amount onto one of your microfiber cloths until it is damp, not soaking. Start with the top of the wheel, which gets the most sun and wear. Wipe in gentle, overlapping circular motions. You’ll see grime transferring to the cloth. Turn the cloth to a clean section often. For stitched areas, you can gently run the damp cloth along the stitch line to lift dirt. If you feel a textured build-up in the grain, a soft bristle brush (like a horsehair detailing brush) can help gently scrub it loose.
Step 2: The Essential Dry
This step is non-negotiable. Take a second, dry microfiber cloth and immediately go over the area you just cleaned. Buff it gently but thoroughly to remove all cleaner residue and lift away the last of the dissolved grime. Let the wheel air dry completely before you drive, for at least 30 minutes to an hour. This is like letting conditioner soak into leather, Scout; the leather needs a moment to settle. If you feel any dampness or coolness to the touch, it’s not ready. Driving with wet hands on a partially damp wheel will just put oils back into porous leather.
Once completely dry, do the finger test again. The stickiness should be gone, replaced by a clean, matte feel. If a slight tackiness remains in spots, you can repeat the clean-and-dry process just in those areas. For a wheel that now feels clean but dry, a light application of an automotive leather conditioner on a separate cloth will restore suppleness. If the damage was beyond a simple clean, you’ll know now, and can accurately describe the issue if you look for steering wheel repair near me.
Fixing Scratches, Cracks, and Worn-Out Spots
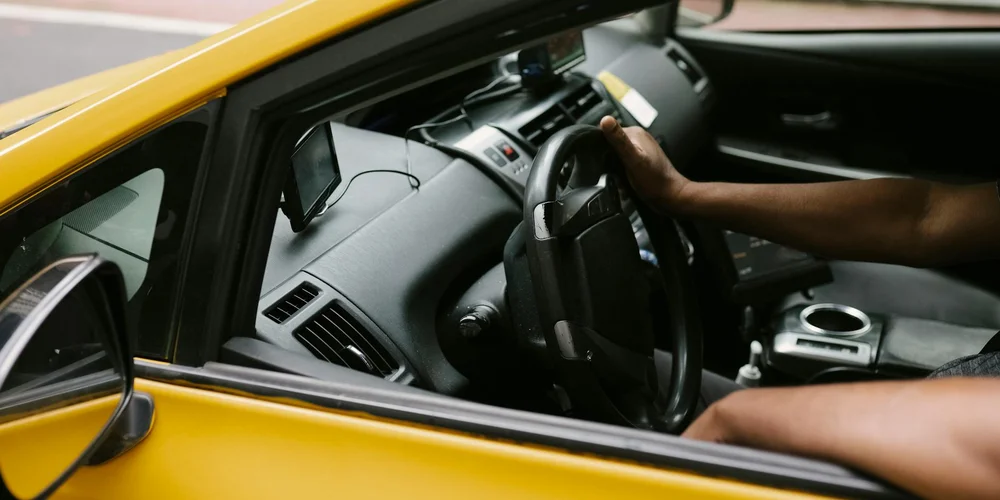
When the leather on your steering wheel is scratched or worn thin, you have two clear choices. You can try to fix it yourself with a specialized kit, or you can hire a professional. The right path depends on the damage and your comfort with hands-on work.
A steering wheel leather repair kit is a complete system in a box. It works by rebuilding the leather’s surface. First, a flexible filler compound fills in gouges and cracks. Then, you layer on pigment to match the color. Finally, a sealant locks it all in and provides a protective, matte finish. Think of it like skilled woodworking for your wheel: fill the hole, sand it smooth, stain it, and apply a topcoat.
Some people use steering wheel repair tape as a quick cover-up. It’s a vinyl or leather-look wrap you stretch over the damaged section.
- Pros: It’s very fast and cheap. It instantly hides severe wear and can improve grip.
- Cons: It’s a bandage, not a cure. The texture and color rarely match perfectly, it can peel with temperature changes, and it doesn’t address the underlying leather damage, which can worsen underneath.
For severe damage-like large areas where the top coat has peeled away, deep structural cracks, or if the wheel rim itself is compromised-a professional steering wheel repair service is your best bet. They often remove the entire wheel, strip the old finish, repair the base leather, and re-dye and seal it with industrial-grade materials and precision color matching. The result feels like factory-new leather.
You might wonder about the cost. A professional steering wheel repair estimate can vary widely. It depends on the vehicle make, the extent of damage, and whether the wheel needs to be removed. A simple re-dye costs less than a full rebuild. For specific models, like seeking a steering wheel repair for a Sequoia Gen 1, always call a specialist. Older vehicles sometimes need custom color mixes or techniques that general shops may not offer.
Using a Leather Repair Kit at Home
If you’re handy, a repair kit can work well for moderate scuffs and cracks. Set aside a few hours in a well-ventilated space. Here is the basic process.
- Clean Thoroughly. Use a dedicated leather cleaner or a mild, pH-balanced soap and water. You must remove all dirt, oils, and old dressings. Any residue will prevent the repair materials from bonding.
- Sand Lightly. Gently scuff the damaged area and a small margin around it with a very fine-grit sandpaper (often included in the kit). This isn’t about removing material. It’s about creating a slightly rough surface for the filler to grip onto. Wipe away all dust.
- Apply the Filler. For shallow scratches, use the liquid compound. For deep gouges, you may need a steering wheel repair epoxy-a thicker, putty-like filler. Apply it sparingly with a spatula, pushing it into the crack. Overfill it slightly, as it will shrink as it cures.
- Color Match. Once the filler is fully dry and sanded smooth, apply the color. Kits usually include a base coat and a tintable topcoat. Mix the pigments drop by drop. Test the color on a hidden spot first. Apply in thin, even layers with the provided sponges, letting each layer dry.
- Seal the Repair. The final step is a clear sealant or topcoat. This protects your color work and gives it the correct finish-usually a satin or matte look. Apply it evenly over the entire repaired section.
The most common mistake is rushing the drying times between steps. Patience here makes the difference between a patchy repair and one that blends in.
When to Call a Professional
DIY has its limits. You should call a pro if you see major peeling where the leather’s colored top layer is flaking off in sheets, if the cracks are so deep you can see the foam or structure beneath, or if the wheel itself feels loose or damaged. I learned this lesson years ago with an old jacket, June. I tried to fix a large tear myself, but the underlying structure was too weak. A professional had to back it with new leather for a lasting repair. The same principle applies to your steering wheel: if the foundation is bad, a surface fix will not hold. It’s similar to fixing cracks and tears in leather furniture.
Keeping Your Leather Steering Wheel Smooth and Protected
Prevention is always easier than repair. A few simple habits will keep your steering wheel feeling like new for years.
Your hands transfer oils, sweat, and dirt directly into the leather. Make a habit of cleaning your hands before you drive, especially after eating, applying lotion, or working on the car. It’s the single easiest thing you can do. Even with the best care, sometimes oil stains can find their way onto your leather items, and you’ll need to know how to clean them properly.
Conditioning replaces the natural oils that heat and friction pull out. Use a conditioner made for automotive leather. These are formulated to resist UV damage and won’t leave a slippery residue. Apply a small amount to a soft cloth and work it into a clean, dry wheel every three to four months.
A good rule is to check your steering wheel with each seasonal change. If it looks dry or feels less supple, it’s time for conditioner.
The sun is leather’s biggest enemy. UV rays break down the fibers, causing fading, dryness, and cracking. Use a windshield sunshade every time you park. It dramatically reduces the cabin temperature and protects your dashboard and wheel.
Are leather steering wheel covers a good protectant? They can be, but choose carefully. A poorly fitted vinyl or synthetic cover can trap moisture and cause sweating and mildew on the real leather underneath. If you use one, select a breathable, genuine leather cover that fits snugly without adhesive. Remember, it’s a barrier, not a replacement for caring for the wheel itself.
Common Questions
What’s a realistic steering wheel repair cost for a professional job?
A proper restoration by a specialist, involving wheel removal, stripping, repairing, and re-dyeing, typically starts around $200 and can exceed $500. Always get a detailed steering wheel repair estimate upfront, as cost hinges entirely on the level of damage and your vehicle’s model.
How do I find a trustworthy steering wheel repair service near me?
Search for “automotive leather repair” or “auto upholstery” specialists, not just general detailers. A reputable steering wheel repair service will have a portfolio of actual wheel repairs and use high-grade, flexible pigments and sealants, not just generic dyes. That expertise should extend to leather automotive interiors—seats and dashboards—where cracking, fading, and flexing require special care. Seek specialists who handle interior repairs, offering proper color matching, UV protection, and flexible finishes for components like seats, dashboards, and trim.
Can a steering wheel repair kit fix deep cracks for good?
A quality kit with epoxy filler can successfully bridge moderate cracks, but it’s a cosmetic fix on compromised leather. For deep structural damage where the leather is brittle or the foam base is exposed, a professional rebuild is the only lasting solution.
Is steering wheel repair tape a smart option?
It’s a temporary, cosmetic cover-up that does not address the underlying deterioration. The adhesive can fail with heat, and moisture trapped underneath can cause further damage to the leather, especially peeling and cracking, making a proper repair more difficult later.
What’s the single most important step to prevent needing another repair?
Keep your hands clean before driving and use a sunshade. This simple duo prevents the daily grind of oils and the brutal UV damage that dries and cracks leather faster than anything else. If you’re wondering how to protect leather car seats from sun damage, spills, and wear, here are practical tips. The next steps expand on covers and care options.
Caring for Your Leather Steering Wheel
The single most important step is always a gentle hand. Start with a soft, damp cloth to lift grime, use a dedicated leather cleaner for the sticky finish, and follow with a light conditioner to restore suppleness. Proper cleaning techniques are essential, especially when dealing with leather boots and shoes.
Every careful repair extends the life of a leather good, making responsible care a sustainable practice. Your growing skill in maintenance honors the material and the craft behind it, especially when you know the right repair techniques.
Further Reading & Sources
- r/Detailing on Reddit: Leather steering wheel repair
- Furniture Clinic Leather Steering Wheel Repair Kit
- Leather Steering Wheel Repair Kit by Leather Magic!
- Leather Steering Wheel Repair – Craft Customs
Harriet is a avid collector of leather goods such as purses, bags, seat covers, etc and has an extensive background in leather care, recovery, stain removal and restoration. She has worked for a number of years perfecting her leather care techniques and knows the ins and outs of restoring all kinds and types of leather products. With her first hand knowledge in leather care, you can not go wrong listening to her advice.
Car Interior and Auto Leather Care