How Do You Fix a Tear in Leather?
Published on: May 19, 2026 | Last Updated: May 19, 2026
Written By: Harriet Nicholson
Hello Tannery Talk. You look at that rip in your favorite chair or the tear in your trusted bag, and your heart sinks a little. I know that feeling, and I am here to tell you that most damage can be beautifully and durably repaired.
This guide walks you through the process, from assessing the damage to the final polish. We will cover patching from behind, filling and coloring a clean split, and the right stitches to secure a long repair.
I have handled everything from a small nick in a wallet like Scout to a significant tear in a work saddle like Mason.
How Do I Figure Out What Kind of Damage I’m Dealing With?
Before you reach for any glue, take a moment. Look at the damage closely and feel it with your fingers. Knowing exactly what you’re working with changes everything. A misdiagnosis here can lead to a repair that fails quickly.
Is It a Tear or a Rip? Your First Clue
Run your finger over the damaged spot. A tear is like a crack in an old, cherished map. The leather fibers are split, but the edges are still mostly connected. You might see a thin, jagged line. A rip is different. It feels like a torn piece of thick cloth where the edges have fully separated, leaving a gap. Knowing this difference tells you if you need to bond a gap or just mend a crack.
Size and location matter just as much. A small tear on the back panel of a bag is a weekend project. A long rip on a high-stress area, like the knee of leather pants or the flap on my saddle Mason, needs a more robust plan involving internal patching.
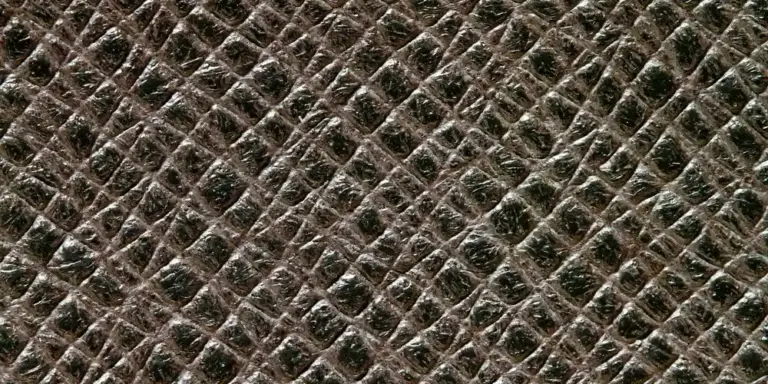
Next, identify your leather. Pinch a small, inconspicuous area. Full-grain leather feels substantial and shows a natural grain pattern, like the surface of my wallet Scout. Corrected grain or bonded leather feels smoother, almost plastic-like, and won’t have that unique texture. This matters because full-grain accepts repairs and develops a patina, while corrected grain might not take filler or glue as well.
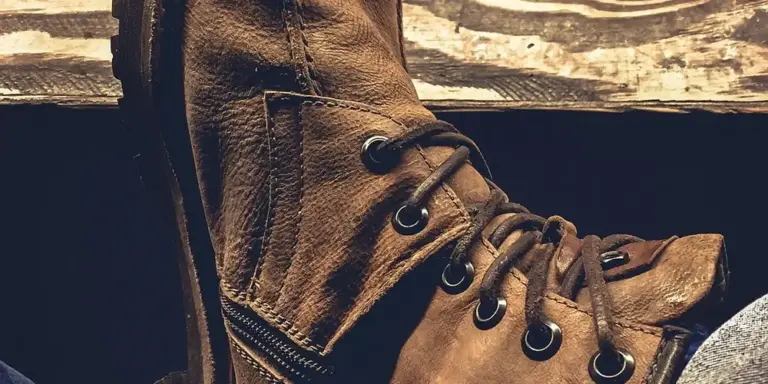
Always consider the item’s purpose. A tear on a car seat faces constant friction and sun, demanding a very durable, flexible fix. A rip on a soft suede jacket needs an invisible mend that preserves its drape. A scuff on a work boot just needs to be sealed from moisture. Your approach changes for each one.
What Should I Have in My Leather Repair Toolkit?
You don’t need a workshop full of tools, but a few key items make repairs clean and lasting. Having these on hand turns a panic moment into a simple fix.
- Leather Adhesive: This is your anchor. A quality glue forms the bond.
- Filler Compound: For tears and holes, this paste builds up the missing material so the surface is level.
- Patching Material: A piece of thin, flexible leather or sturdy fabric. This acts as a reinforcement behind large rips, like a bandage on the inside.
- Clean Cloths & Brushes: A soft-bristle brush and lint-free cloths for cleaning the area before and after the repair.
- Conditioner: Leather often dries out and becomes brittle near damage. A good conditioner restores pliability after the repair is complete.
The Adhesive Choice: Strong Hold vs. Gentle Care
Your glue choice impacts your health and the leather’s life. Solvent-based contact cements are fiercely strong and flexible, which is why they’ve been used for decades. But they release strong fumes and require careful ventilation.
I prefer water-based leather glues for most repairs on items like jackets, bags, and furniture. They have no toxic smell, spread evenly without clumping, and clean up with water. The bond is plenty strong for everyday mends and is much kinder to both you and the leather’s natural fibers compared to other adhesives used for leather repair. Reserve the heavy-duty solvents for structural repairs on items like saddles or belts that undergo extreme stress.
When a Repair Kit is Your Best Friend
A pre-made leather repair kit is a fantastic starting point, especially for a first-time repair on a sofa arm, bag corner, or small wallet tear. A typical kit includes color-matched filler, adhesive, a spatula, and sometimes grain papers to blend the repair. It takes the guesswork out of color matching.
A kit is perfect when you have a single, straightforward project and want an all-in-one solution. Gathering supplies separately gives you more flexibility and higher-quality individual components for a wider range of future repairs. For a one-off fix on your couch, a kit is often the simplest and most effective path.
How Do I Fix a Tear in Leather Step-by-Step?

A clean tear, where the edges are still touching, is the best candidate for a home repair. The goal is to bond it back together and make the seam disappear. Patience is your best tool here.
- Clean the area. Use a soft cloth dampened with a neutral leather cleaner. Gently wipe away any dirt or oils. Let it dry completely. Any residue will weaken the bond.
- Apply filler if the tear is deep. For cuts that have taken out a sliver of leather, you need a leather filler paste. Using a flexible spatula, press a tiny amount into the gap until it’s flush with the surface. Scrape off the excess. You should hear a soft, smooth scraping sound when it’s level.
- Bond the tear. Apply a thin line of flexible leather adhesive under both edges of the tear. I prefer water-based adhesives; they’re strong, non-toxic, and easier to control. Carefully press the edges together. You’ll feel them grab.
- Smooth it out. Immediately wipe away any glue that squeezes out with a damp cloth. Then, use a smooth, rounded tool (like the back of a spoon) to burnish the repair. Roll it back and forth firmly. This melds the fibers and creates a seamless look.
- Let it cure. Follow your adhesive’s instructions, but give it at least 24 hours of undisturbed curing before you even think about using the item. Rushing this ruins everything.
This method works for many items, but your focus changes. For a how to fix a tear in leather boots or a sofa, prioritize strength with a heavier-duty filler. For my jacket June, flexibility is everything-I use the minimum filler needed. For a handbag tear, precision and a perfect color match matter most to keep the repair invisible.
Mending Tears on Furniture and Car Interiors
These areas face constant pressure. A simple bond might not hold. For a tear in a car seat or sofa arm, I add a hidden patch for strength. After cleaning, I apply adhesive to the tear, then press a small piece of thin, strong fabric (like denim or canvas) onto the backside of the leather. This patch acts as a permanent internal bandage. The visible repair on top then has a solid foundation. Color-matching is crucial here; use a leather dye kit to blend the repaired spot with the surrounding patina.
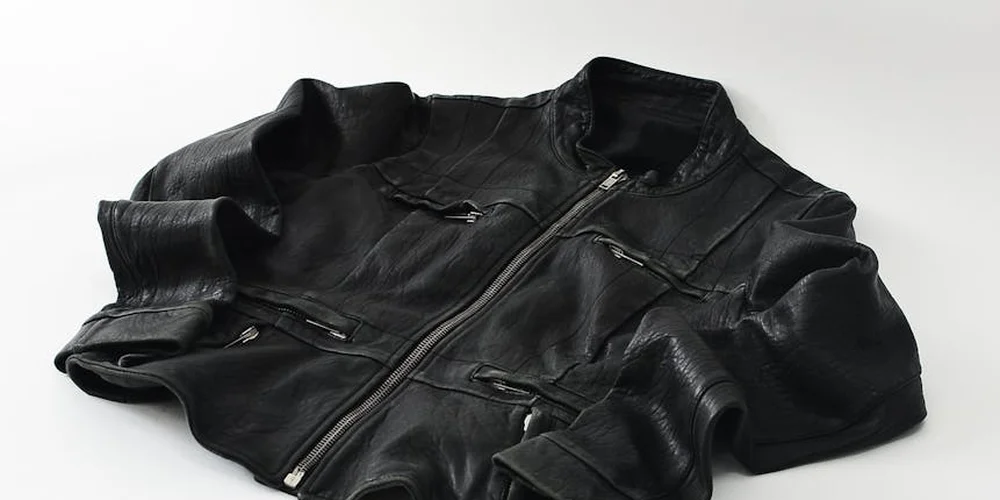
Fixing Tears on Jackets, Bags, and Personal Gear
With a piece like June, the leather needs to move and fold. A stiff, obvious repair on a sleeve would crack and feel terrible. The key is to use products labeled as flexible and to apply them sparingly. Avoid heavy fillers. Often, just bonding the clean edges with a flexible adhesive and burnishing well is enough. The goal is to restore strength without changing the soft handfeel you love.
How Do I Mend a Rip in Leather When the Edges Are Apart?
A rip is more serious. The edges are ragged and separated. Your mission is to realign them perfectly and lock them in place. This is where many rush and end up with a lumpy, weak repair.
- Carefully align the ragged edges. This takes time. Dry-fit them first, like a puzzle, until the grain pattern matches as closely as possible.
- Apply adhesive sparingly. Use a toothpick to run a micro-thin bead of adhesive along the torn edges. Too much will ooze out and create a hard, visible ridge.
- Press firmly and hold until set. Align the edges perfectly and press down hard for several minutes. You can use binder clips or weights with protective paper to hold it while the adhesive sets initially.
- Consider an internal fabric patch. For any rip over an inch, or in a high-stress spot like a bag strap, an internal patch is non-negotiable. It provides the long-term support the rejoined leather needs.
This differs from a simple tear repair in its need for surgical alignment. A misaligned rip will leave a permanent bump you can feel and see. For common issues like a how to fix leather rips in car seats or a torn boot shaft, the internal patch method is your most reliable fix.
Reinforcing Rips in High-Stress Spots
Some areas are always under tension. Think bag corners, jacket elbows, or belt loops. Here, bonding alone might fail again. After gluing and adding an internal patch, I reinforce these spots with hand-stitching. Use a sturdy thread and saddle stitch around the perimeter of the rip. This double-stitching distributes the stress away from the fragile tear line. For a very large rip, your internal patch should be significantly larger than the damage, giving the adhesive more surface area to grip.
How Do I Make the Repair Last and When Should I Call for Help?
Once your repair has cured fully (wait 48 hours to be safe), it needs aftercare. The adhesive and filler can dry out the surrounding leather.
Gently apply a dab of leather conditioner over and around the repaired area. Buff it in softly. This restores flexibility and helps protect the spot from future cracking. For my wallet Scout, this regular conditioning is what prevents small nicks from turning into tears. It’s all about taking care of your leather to prevent and stop them from cracking and drying out.
Not every job is for DIY. Here are clear signs you need a professional:
- The damage is larger than your hand.
- The item is a valuable antique or has serious sentimental value.
- The structure is compromised, like a torn bag strap where the mounting hardware is loose.
- You’ve attempted a fix and it failed, making the damage worse.
Searching for “leather repair near me” will show local options. A reliable service will ask for photos and give a clear estimate. Cost depends on size, complexity, and the need for color matching, ranging from a modest fee for a small tear to a significant investment for rebuilding a sofa cushion. If you’re curious about DIY repair methods for ripped leather or tears in couch upholstery, a quick guide can help you decide. The next steps will include links to practical methods and tips.
Spotting the Jobs for a Professional Leatherworker
Professionals have tools and materials we don’t. They can seamlessly reweave leather, replace entire panels, and expertly match difficult finishes. For extensive sofa damage or an heirloom leather coat where the lining also needs repair, their expertise is what saves the item. It’s often more cost-effective than replacing the piece entirely, especially when dealing with holes and tears in leather furniture.
Easy Daily Habits to Keep Leather Strong
The best repair is the one you never have to make. Simple care prevents most tears and rips.
- Keep it clean. Dirt acts like sandpaper, grinding down fibers.
- Condition leather every 3-6 months. Supple leather resists tearing. I condition Scout every few months without fail.
- Store items properly; don’t overstuff bags or hang heavy jackets on flimsy hooks.
- Be mindful of sharp edges like keys, belt buckles, or pet claws.
It’s a quiet routine, but it keeps your leather companions like Mason, June, and Scout ready for years more adventure.
How Do I Make the Repair Last and When Should I Call for Help?
Your patch is set and the adhesive is dry. The job is not done. The leather around your repair has been through stress. It needs gentle care to stay flexible and strong.
After the adhesive has fully cured, usually in 24 to 48 hours, apply a small amount of conditioner. Conditioning the repaired area restores lost oils and prevents the leather from becoming brittle, which could cause new cracks around your fix in damaged leather. Use a soft cloth and work in a thin, even layer over the repair and the surrounding leather.
I do this with all my pieces. After fixing a small scratch on June, my jacket, I gave the whole panel a light conditioning. It blended the work and kept the leather supple. Let the conditioner absorb fully before you use the item again.
Spotting the Jobs for a Professional Leatherworker
Knowing when to step back is a sign of a good caretaker. Some damage needs a specialist’s touch to save the piece.
- Large or Complex Tears: A rip longer than a few inches, damage on a major seam, or a hole on a high-stress area like a sofa seat or bag strap often requires internal reinforcement and specialized equipment.
- Structural Damage: If the frame of a bag is broken, a zipper is torn out, or a sofa’s internal cushion is exposed, the repair is about more than just the leather skin.
- Valuable or Antique Items: Heirloom pieces or expensive goods carry more risk. A professional has the right materials and techniques to preserve their value and character.
- Uncertain Leather Type: Some older or specially coated leathers react poorly to standard glues and creams. A pro can correctly identify and treat it.
Costs for professional repair vary widely. A small, clean tear on a jacket might cost as little as a nice dinner. Re-paneling a section of a sofa or fully restoring a vintage bag can run into the hundreds. The price depends on labor time, materials needed, and the item’s complexity.
To find a reliable service, look for a craftsman with a portfolio of their work. A good shop will clearly explain their process and the materials they use. Ask if they source quality leather for patches. If the item is a garment or a bag, ask if they can do a create-and-attach leather patch repair that blends with the piece. A shop ready to do that will explain how the patch is attached and finished. A transparent conversation about the repair method and cost is the best sign you’ve found a trustworthy professional.
Easy Daily Habits to Keep Leather Strong
The best repair is the one you never have to make. Simple, consistent care prevents most tears and rips from starting.
Think of it like caring for your own skin. Keep it clean. Wipe down bags and furniture every few weeks with a soft, damp cloth. For my wallet, Scout, I empty it and give it a gentle brush every month to remove grit that can grind into the seams.
- Condition Regularly: This is the most important habit. Dry leather cracks. Condition your items every 4 to 6 months with a product suited for their finish. A thin, even coat is all you need.
- Mind the Edges: Be aware of sharp corners on tables, buckles on other bags, or pet claws. These are common culprits for snags and tears.
- Store with Care: Don’t overstuff bags. Use a padded hanger for jackets. Keep leather out of direct, hot sunlight which dries it out fast.
- Act on Small Signs: If you see a tiny scratch or a seam starting to lighten, a bit of conditioner can often stop it from becoming a bigger problem.
Regular conditioning maintains the leather’s natural flexibility, creating a barrier against the wear and tear that leads to rips. It’s the quiet, consistent work that gives items like Mason my saddle its decades of service.
Common Questions
What’s the most common mistake people make when using glue for a tear?
Applying too much adhesive. Excess glue oozes out, creates a hard ridge, and weakens the bond by preventing proper fiber contact.
Is a repair kit a good choice for my ripped sofa arm?
Yes, for a single, straightforward rip, a kit with color-matched filler and adhesive is efficient. It simplifies the process and ensures you have all necessary components in one box.
What’s a ballpark cost for professional repair on a car seat tear?
For a standard tear, expect to pay between $50 and $150, depending on size and location. Complex damage or high-end materials can increase the cost significantly.
How do I find a trustworthy local leather repair service?
Look for craftsmen with a portfolio of before-and-after photos. Ask about their process and materials; a reputable technician will explain clearly and offer a firm estimate.
Can conditioning really prevent tears from happening?
Absolutely. Regular conditioning keeps leather supple, preventing the dryness and brittleness that lead to cracks and tears. Make it a routine part of your care every few months.
Giving Your Leather a Second Life
You can fix torn leather, and the single most important thing is patience. A careful, clean repair with the right adhesive and patch will always outlast a rushed job. These principles apply to most general leather items, from belts to jackets. Knowing the best method for each item helps you repair it properly.
Every repair you make honors the material and keeps a good piece out of the landfill. Building your skill over time turns maintenance into a craft, deepening your connection to the leather goods you choose to keep in your life.
References & External Links
- How to repair leather: A guide to repairing real and faux leather
- How to Repair Leather: A Guide to Tears and Rips – Andar
- Amazon.com: Leather Repair Kit
- How to Repair Leather Tears in 5 Steps | Buffalo Jackson
Harriet is a avid collector of leather goods such as purses, bags, seat covers, etc and has an extensive background in leather care, recovery, stain removal and restoration. She has worked for a number of years perfecting her leather care techniques and knows the ins and outs of restoring all kinds and types of leather products. With her first hand knowledge in leather care, you can not go wrong listening to her advice.
Fixing Tears and Rips