How Do You Prepare and Shape Cowhide Leather for Your Projects?
Published on: March 10, 2026 | Last Updated: March 10, 2026
Written By: Harriet Nicholson
Hello Tannery Talk. You’ve got a beautiful piece of cowhide and a great project in mind, but you might be wondering where to even start to get it ready.
This guide will walk you through the simple, essential steps to take your leather from raw material to a joy to work with. We will cover how to assess your leather’s condition, the right way to clean and moisturize it, and the techniques to shape it without causing damage.
My advice comes from years of hands-on care for pieces like my saddle, Mason, and my daily-wear jacket, June, treating leather to last.
Picking the Perfect Hide: How to Choose Cowhide for Your Project
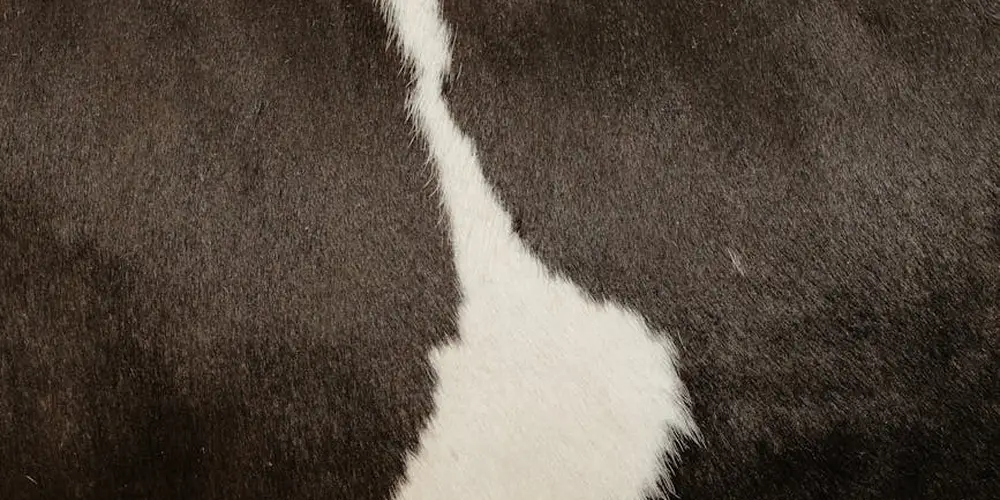
Think of a cowhide like a piece of fine wood or a pair of jeans. The way it’s cut and finished changes its character completely. You have three main types to know.
Full-grain leather is the entire, untouched outer layer of the skin, complete with its natural grain and markings. It is the most durable type. It develops a rich patina over time, like my saddle Mason, where every scratch and shine tells a story. Compare it to a solid oak plank with its unique grain pattern. Different types and qualities of leather have different uses and characteristics, but full-grain remains the top choice for durability and longevity.
Top-grain leather is sanded and buffed to remove surface imperfections, then often embossed with a new, uniform pattern. This makes it smoother and more consistent, but a bit less rugged than full-grain. It is like a planed and sanded piece of pine, ready for a flawless paint job.
Suede is created by splitting the hide and brushing the inner flesh side to a soft nap. It has a wonderfully tactile feel but marks more easily. Think of it like the soft, brushed inside of your favorite sweatshirt.
Matching Leather to Your Vision
Your project’s purpose should guide your choice.
- For a durable bag, belt, or pair of work boots that must last for years, full-grain is the trusted choice.
- For a sleek wallet, delicate upholstery, or a formal jacket where a uniform look is key, top-grain works beautifully.
- For tactile accents, linings, or decorative items where softness is the priority, suede is perfect.
When you are ready to buy a hide, lay it out on a large, clean floor and really look at it. Run your hand over the surface. You are looking for consistent thickness, which makes cutting and stitching predictable. A tight, pebble-like grain usually signals strong, high-quality hide. Now, grab some chalk or a water-soluble pen.
Mark around any scars, bug bites, or brand marks. These are natural and tell the animal’s story, but they might be weak spots. Plan your pattern pieces to avoid them, or use them as character in a less critical area. This step saves leather and frustration later.
Choosing quality material also means thinking about its origin. I always recommend asking your supplier about their tannery. Responsible tanneries that manage waste properly and source hides as a by-product of the meat industry help ensure the craft is respectful and sustainable.
Getting Ready: How to Prepare and Condition Your Cowhide
You have your beautiful hide. Do not cut into it yet. Preparing it first makes every step that follows easier and protects your final product. This is not about curing a raw hide; that complex tanning process is done by professionals. Our job is to prepare the already-tanned leather for our hands.
Start with a clean surface. Take a soft, lint-free cloth, dampen it with cool water, and wring it out thoroughly. Wipe down the entire grain side of the leather to lift dust and any surface residues. For a deeper clean, use a dedicated saddle soap. Work it into a lather with a damp sponge and apply it in gentle circles.
Conditioning is what brings the leather to life, restoring the oils that make it supple and workable. Think of my jacket June. Before I repaired a seam, I conditioned that area. It made the leather more forgiving for the needle and prevented it from cracking. Use a pH-balanced leather conditioner or a light oil. Apply a thin, even coat with your hands or a cloth, rubbing it into the leather thoroughly. You will feel it start to drink it in.
Now, let it rest. Lay the hide flat, grain side up, on a clean table or a rack. Do not hang it, fold it, or put it near direct heat. Let it dry naturally, which usually takes overnight. This prevents the leather from stiffening or warping as the moisture evaporates evenly. Patience here pays off with a perfectly prepared canvas.
Your Pre-Work Checklist
- Clean the surface with a damp cloth or saddle soap to remove dust and residues.
- Condition the leather with a suitable product to make it pliable for cutting and tooling.
- Let it dry completely, flat and away from heat, for at least several hours or overnight.
- Lay it perfectly flat on a clean, smooth cutting surface before marking your patterns.
The Leatherworker’s Bench: Essential Tools for Cowhide Projects

Start with these four tools on your bench. They are the foundation for every cowhide project.
- A sharp utility knife or round knife
- A metal ruler
- A self-healing cutting mat
- A sturdy mallet
Your knife is the most personal tool. A sharp blade glides through cowhide with a quiet, satisfying slice. A dull blade tears and crushes the fibers, leaving a ragged edge that’s hard to fix. I keep my knife sharp enough to cleanly trim the frayed edge on Scout, my wallet, without any pull on the leather.
A sharp cut feels precise and controlled, while a dull cut feels like you’re fighting the material.
The metal ruler gives you straight lines. Press it down firmly to prevent the knife from slipping. You’ll feel a solid connection between the ruler, the leather, and your mat. For projects like a flat card holder, this trio ensures your pieces are square and true.
The self-healing mat protects your table and keeps your knife sharp. It has a slight give that feels secure under the leather. The mat absorbs each cut, so the blade tip stays sharp longer. It’s a silent partner that makes every other tool work better.
A sturdy mallet delivers force with consistency. The weight and balance matter. When you strike a hole punch or set a rivet, you want a solid, confident thud, not a weak tap. I used mine to gently reform the shape of June’s collar after a repair, using even, measured strikes.
The right mallet transfers your energy cleanly into the tool, preventing bruised leather or bent punches.
Tools for Finishing Touches
Once your piece is cut, these helpers refine it. You don’t need them all at once, but they solve specific problems.
- Edge bevelers shave a slight angle from the raw leather edge. This removes the sharp corner, making it ready to burnish and smooth.
- Hole punches, from small pricking irons to larger drive punches, create clean holes for stitching or hardware. A clean punch leaves a crisp hole, not a mangled one.
- Blunt needles and strong thread are for hand stitching. The needle should pass through the pre-punched holes without forcing or splitting the leather.
Think of edge bevelers like sanding wood before finishing. They prepare the surface. For Mason’s girth straps, beveling the edges was the step that made them comfortable and durable.
Sharp, quality tools are not a luxury; they are a safety feature and a guarantee of cleaner work. A dull knife requires more pressure and can slip toward your hand. A flimsy mallet can cause a punch to wobble and scar the leather. Invest in good basics. They last for years and make the process enjoyable, not frustrating.
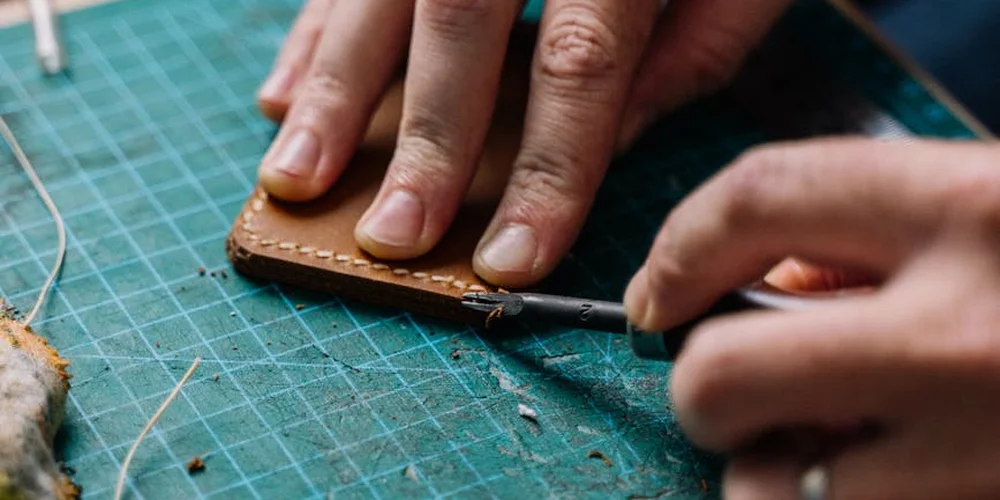
Making the Cut: How to Cut Cowhide Leather Properly
A clean cut is the first step to a professional-looking project. A jagged edge can haunt you through every stitch and burnish. My rule is simple: prepare twice, cut once.
The Step-by-Step Method for Clean Cuts
Follow this order every time. Rushing leads to regret.
- Secure the Hide. Place your cowhide on a perfectly flat, clean surface. Use weights (like small anvils or smooth stones) or clips to hold it down firmly. Any lift or wrinkle will cause your blade to skip or drag.
- Mark Your Line. For long, straight cuts, I use a groover. It physically creates a shallow channel for your blade to follow. For curves or detailed patterns, a water-soluble pen or tailor’s chalk works well. Never use a standard ballpoint pen or permanent marker, as the ink can bleed into the leather permanently.
- Execute the Cut. Hold your rotary cutter or sharp utility knife at a consistent, comfortable angle. Apply firm, confident pressure and pull the blade toward you in one smooth motion. Let the tool do the work. If you’re using a knife, try to cut through in a single pass.
Common Mistakes and How to Avoid Them
The wrong technique wastes good leather. Here’s what I see most often.
People press too hard with a dull blade. This tears the fibers instead of slicing them, creating a ragged, fuzzy edge. It’s like trying to cut a tomato with a spoon. A sharp blade and moderate pressure gives you control and a clean line.
Another mistake is not securing the hide. The leather shifts, your line wobbles, and suddenly your perfectly measured strap is crooked. Those weights are your best friends.
Forgetting to check the backside is a silent error. Sometimes the top cut looks clean, but the underside is torn or folded. Always lift a corner to check your work before you finish the cut.
Tips for Tricky Shapes and Thick Sections
Complex patterns test your patience. For small, intricate parts like a wallet’s card slot-the kind of precision needed for my piece, Scout-switch to a sharp swivel knife or a precision craft blade.
Cut slightly outside your marked line. You can always sand or trim the edge down to the exact size later. This gives you a safety margin.
For very thick cowhide, you may not get through in one cut. Score your line deeply first, then follow the same groove with two or three lighter passes until you cut through completely. This maintains control and keeps the edge vertical.
Cutting Cowhide for Furniture Projects
Furniture changes the game. You’re working with large, expensive sections where pattern matching is crucial.
Lay out your entire hide and visualize the piece. Look for scars, bug bites, or wrinkles in the grain. Plan to cut your main panels from the cleanest, most consistent areas of the back. The less perfect areas can be used for smaller cushions or the back of a seat.
If your design needs two symmetrical halves, like chair back panels, fold the hide carefully along the spine line. Cut both layers at once. This guarantees a mirror image.
When cutting, support the entire weight of the leather. Let it drape over the edge of your table instead of trying to lift and maneuver the whole piece. Use long, smooth strokes with a rotary cutter and a metal straightedge for those big, beautiful lines.
Adding Color: How to Dye and Stain Cowhide Leather
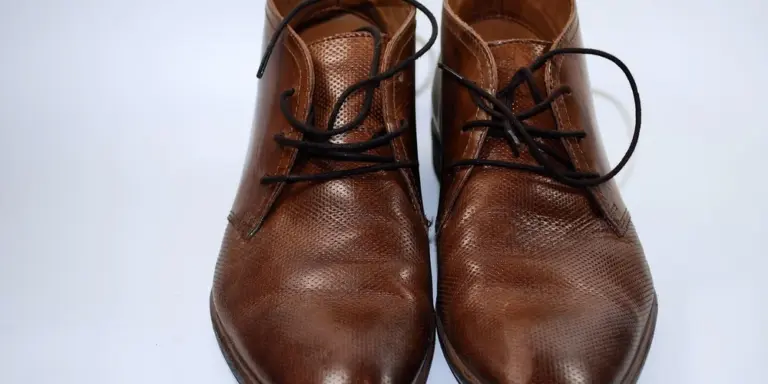
Changing the color of leather is one of the most rewarding steps. It’s also where many projects can go sideways if you rush. The first, and biggest, choice is between dye and stain. That decision also leads into a home step-by-step guide for dyeing leather shoes, boots, and other footwear. The next steps will walk you through dyeing, color change, and restoration techniques.
Think of penetrating dye like watercolor paint. It soaks deep into the leather fibers, becoming a part of the material itself. A surface stain acts more like a thin acrylic paint. It sits more on top, coloring the surface without a deep soak. Dye shows the leather’s natural markings beautifully but can be less uniform. Stain offers more consistent coverage but can obscure the grain. That deeper soak comes from the science of leather porosity and capillary action, where pores draw liquids into the fiber. Different leathers vary in porosity, so some stains sink deeper than others.
For a result that ages gracefully and shows character, a penetrating dye is often the choice for craftsmen wanting the leather itself to tell the story.
Your Step-by-Step Guide to Applying Dye
This process is about patience. Rushing leads to dark, muddy spots and a stiff finish. I learned this the hard way on an early project.
- Prep with Deglazer: Most leather has a factory finish that blocks dye. Dampen a clean cloth with a leather deglazer or preparer and wipe the entire surface. You’ll see the color lift slightly and the leather will look dull and thirsty. This opens the pores.
- Apply in Thin Layers: Always use a dedicated dye dauber or sponge. Pour a small amount of dye into a dish. Dab the applicator and work in small, circular motions over a section. The goal is to build color slowly with multiple thin coats, not to flood the leather in one go.
- Let it Dry Fully: After one coat, set the piece aside. Let it air dry completely, which can take several hours. You’ll feel the difference-the dampness will be gone. Then, assess the color. Apply a second thin coat only if you need more depth.
- Buff and Condition: Once fully dry (I usually wait overnight), buff the leather with a soft, clean cloth. This removes any waxy residue and evens the sheen. Finally, apply a light conditioner to replace moisture. The dyeing process is drying, so this step is non-negotiable for soft, supple results.
The Golden Rule: Test Your Color First
Dye always darkens leather. The color in the bottle is not the color you will get. The leather’s original shade, its tannage, and how absorbent it is all change the final result. Especially with lighter leathers like cognac.
You must always test your dye on a scrap piece of the exact same leather you’re using for your project. Let the test piece dry and condition it, just as you will the main piece. This is the only way to know what you’re really working with. It saves heartache.
How Your Leather’s Finish Changes Everything
The result you get depends almost entirely on whether you start with aniline or pigmented (finished) leather.
My wallet, Scout, is made from veg-tan aniline leather. It has no topcoat paint. When I dyed it, the color soaked right in, creating rich, deep tones that highlighted every scratch and mark. It looked alive.
Pigmented leather, like many mass-produced bags or shoes, has a painted polymer layer on top. A deglazer can strip this, but the result underneath can be uneven. Dye may take blotchily. Often, with pigmented leather, you are better off using a specialized leather paint or refinisher designed to bond with that surface.
Aniline leather absorbs dye uniformly and celebrates imperfections, while pigmented leather often requires a different approach altogether for recoloring. Knowing which you have is the first step to a successful project.
The Final Touch: How to Finish, Seal, and Repair Cowhide
Why a Sealant is Non-Negotiable After Dyeing
Think of a dye job without a sealant like writing in sand. The first rain or rub will wash it away. A sealant, such as resolene or a natural wax, acts as a clear, protective barrier. It locks the color molecules into the leather’s fibers so they can’t transfer to your hands or clothes. Choosing the right sealant is crucial to ensure durability and color protection.
This topcoat does more than fix color, it defends against water, spills, and the gentle abrasion of daily use.
I never skip this step on my own gear. On Mason, my saddle, a proper sealant is what preserves that earned patina from turning muddy or dull.
Applying Your Finish: The Art of the Thin Coat
The trick is to build protection without changing the leather’s character. You want it to feel protected, not plastic.
- Choose your tool: a clean, damp sponge (wrung out tightly) or a soft, lint-free cloth. A sponge helps acrylic finishes spread more evenly.
- Pour a coin-sized amount of sealant onto your applicator. Start with less than you think you need.
- Work in small, overlapping circles across the entire surface. Keep your pressure light and consistent.
- Let this first coat dry fully. This can take one to two hours in a well-ventilated space.
- Hold the piece under a light. Look for any shiny, missed spots and apply a second whisper-thin coat only where needed.
A thick coat will dry brittle, crack with flexing, and give the leather an artificial feel you can’t easily fix.
The goal is to hear that soft creak of good leather, not a stiff crackle. The grain should still be visible and tangible.
Repairing a Scratch or Scuff in Minutes
Small marks are part of a leather’s story, but you can blend them away easily.
First, clean the spot. Use a pH-balanced leather cleaner on a soft cloth. Gently wipe the scuff and let it air dry completely.
Next, take a matching leather cream or conditioner. Apply a pea-sized amount to your fingertip. Rub it into the scratch, following the natural direction of the grain.
Finally, buff it smooth. Use a clean, dry cloth and buff in small circles until the cream disappears and the surface is even.
For deeper marks, let the conditioner sit on the leather for five minutes before buffing to allow for better penetration.
My jacket June has seen a few sidewalk scrapes. This method makes them fade into the rest of the soft calfskin, keeping the look uniform.
Attaching Cowhide to Wood for Furniture or Decor
Whether you’re covering a table top or a cabinet door, a strong, clean bond is key.
For a seamless look, use a water-based contact cement. It creates a powerful, flexible hold without the strong fumes. Apply a thin, even layer to both the back of the leather and the sanded wood. Wait until both surfaces feel tacky to the touch (about 5-10 minutes). Then, carefully align and press the leather onto the wood, working out any air bubbles with a firm roller.
For a project with visible hardware, upholstery tacks offer a secure and decorative fix. Space them evenly along the edges for a crisp, finished line.
Always do a test bond on spare pieces of leather and wood first to check for staining or adhesion issues.
This approach ensures your leather stays firmly in place, letting the material’s beauty last for the life of the project.
Keeping it Right: How to Store Cowhide and Work Safely
You’ve cut, stitched, and finished your piece. Now, the care you give it when you’re not actively working determines its future. Proper storage isn’t just about tidiness; it’s about preserving the material you’ve invested so much time in.
Storing Your Hide and Projects
Think of a cowhide like a living skin. It reacts to its environment. The goal is to keep it in a stable, gentle state until you’re ready for your next session.
For long-term storage, always lay the hide or a large project flat on a clean, dry surface. If you must roll it, do so loosely with the hair or grain side facing outward. Rolling it tight or with the flesh side out can force a permanent crease into the leather, just like folding a piece of paper for too long.
I store Mason’s saddle on a wide rack, never on a narrow hook that can distort its shape. For spare hide, I use a spare closet shelf.
- Keep it cool, dry, and dark. Avoid attics, basements, or spaces near heaters.
- Heat dries leather out from the inside. Dampness invites mold, which looks like fuzzy white or green spots and can eat into the fibers.
- Direct, strong light will fade dyes and dry the surface over time.
- A simple cotton sheet or unbleached muslin cloth makes a perfect dust cover. Avoid plastic tarps or bags, as they trap moisture and don’t let the leather breathe.
Displaying Finished Pieces with Care
That beautiful cowhide rug or wall hanging deserves to be shown off, but you must do it thoughtfully to prevent damage.
For wall hangings, avoid puncturing the leather with nails or staples directly. Instead, create a fabric sleeve along the top back edge and slide a dowel rod through it. Hang the rod on the wall. You can also use strong, wide velcro strips-sew one side to a fabric backing that’s glued to the leather, and stick the other to the wall.
For a rug, use a quality non-slip pad underneath. This prevents the hide from sliding and stretching on hard floors. It also adds a cushion that protects the grain from abrasive foot traffic.
- Rotate your rug or wall hanging every few months if one side gets more sun or wear.
- Vacuum it gently on a low setting, but never use a beater bar attachment.
- Keep it away from direct heat vents and fireplaces. The sudden, dry heat can make the leather brittle.
Your Workshop Safety Checklist
Working with leather is a joy, but it involves sharp tools and chemicals. Respecting them keeps you safe and your work clean. Exploring how leatherworking tools have evolved through the ages illuminates timeless best practices for safe, efficient crafting. From ancient awls to modern carbide blades, this evolution informs today’s techniques and tool care.
Ventilation is non-negotiable. When using contact adhesives, leather dyes, or deglazers, open windows and use a fan. Many leather chemicals release fumes that are unpleasant and, with long exposure, harmful. I made the switch to water-based adhesives years ago for this reason-the lack of toxic stink is worth it.
Wear a simple dust mask when sanding edges or buffing. Leather dust is fine and you don’t want it in your lungs.
A sharp blade is a safe blade. This might sound wrong, but it’s true. A dull knife requires more force to cut, which increases the chance of a slip. Keep your utility blades, skiving knives, and rotary cutter blades fresh. You’ll get cleaner cuts and more control.
- Keep a basic first-aid kit in your workspace. Cuts happen.
- Always cut away from your body and free hand.
- Good lighting prevents eye strain and helps you see your cut lines and stitch marks clearly.
The Final Step of Respect
Cleaning your tools, putting away your hide, and storing your finished work isn’t just cleanup. It’s the final, respectful step in working with a natural material.
This hide came from an animal. It was tanned by skilled hands. You’ve now shaped it with your own. By storing it correctly and working safely, you honor that entire journey. You ensure the piece you made for a friend, or the jacket you’re crafting for yourself, like my June, will be around for years of good use. That’s the real goal of any project.
Common Questions
How do you clean and condition cowhide leather as part of routine maintenance?
For dust, wipe with a clean, dry, soft cloth. For dirt or light soil, use a damp cloth with a drop of pH-balanced leather cleaner, then buff dry and follow with a light conditioner every 6 to 12 months.
What’s the one safety rule you should never break in the workshop?
Always ensure strong ventilation when using any chemical, like deglazer or contact cement. Good airflow protects your lungs from harmful fumes that are an unavoidable part of this craft.
Can you fix a deep cut or gouge in the leather, or is it ruined?
It’s rarely ruined. For a clean cut, you can often glue it from the back with leather cement and clamp it. For a missing chunk, fill it with a leather-compatible filler, sand it smooth, and re-dye the area to match.
What is the single biggest mistake people make when storing their hides?
Storing leather in a plastic bag or tub. Plastic traps moisture, which leads to mold-the white fuzz that eats your hide. Always use a breathable cloth cover in a stable, dry environment.
Finishing Your Cowhide Project with Care
The most valuable step is always to condition your leather before you cut or stitch. This simple act prevents drying and cracking, letting the material work with you for decades.
Seek out leather from tanneries committed to animal welfare and sustainable practices. Your dedication to regular care builds both your skill and a deeper respect for every hide you use.
Citations and Authoritative Sources
- Process of Antique Cowhide Leather Making – Artsome
- r/Leathercraft on Reddit: traditional process of making leather from cow / deer hide
- How To Make Leather
Harriet is a avid collector of leather goods such as purses, bags, seat covers, etc and has an extensive background in leather care, recovery, stain removal and restoration. She has worked for a number of years perfecting her leather care techniques and knows the ins and outs of restoring all kinds and types of leather products. With her first hand knowledge in leather care, you can not go wrong listening to her advice.
Full-grain and Top-grain Leather Care