How Do You Dye Leather Shoes and Boots at Home? A Step-by-Step Guide to Changing Color and Restoring Footwear
Published on: February 21, 2026 | Last Updated: February 21, 2026
Written By: Harriet Nicholson
Hello Tannery Talk. Seeing scuffs or fading on your favorite leather shoes can make you wonder if a vibrant new color is even possible.
This article provides a clear, methodical path to transform your footwear. We will cover assessing your leather, gathering the right materials, preparing the surface thoroughly, applying dye in layers, and finishing with a protective coat.
I have spent years conditioning, repairing, and yes, dyeing leather goods, from trusted boots to my own well-worn jacket June.
Is Dyeing Your Leather Shoes the Right Move?
You’re not just looking to clean a stain. You want a new look or to erase those worn spots for good. I get it. My jacket, June, had a faded shoulder that bothered me for a year before I gave her new life with dye.
Dyeing is a powerful alternative to buying new. Financially, it’s a fraction of the cost. For our planet, it keeps a well-made item out of a landfill. But the real value is emotional. Restoring a favorite pair you’ve broken in perfectly, that’s a win you can’t buy.
Your results hinge completely on what your shoes are made from. Set your expectations here, and you’ll save yourself frustration later.
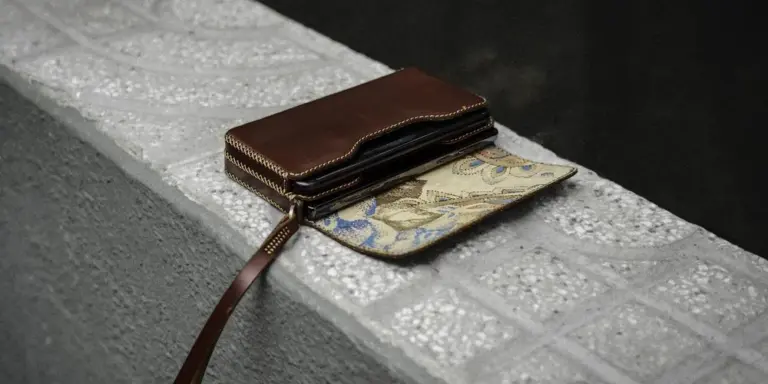
So, can you dye leather? Absolutely. But some leathers welcome dye like a dry sponge, while others resist it. Full-grain leather, the top layer with all its natural pores and markings, absorbs dye beautifully. It’s like coloring on a paper towel. Veg-tan leather, like my wallet Scout, is especially thirsty for color.
Heavily finished or corrected grain leathers are tricky. They have a thick, painted-on topcoat that acts like a plastic barrier. The dye can’t penetrate easily, often leading to a streaky, painted-on look that may rub off. If your shoes have a very shiny, uniform surface with no visible grain, proceed with caution.
Gathering Your Tools: The Dyer’s Workbench
Success starts with a prepared space. Clear a well-ventilated area-a garage, workshop, or even a patio is ideal. Lay down plenty of newspaper or a disposable cloth. This is about control and keeping the mess contained.
Here is everything you will need within arm’s reach:
- Leather Prep: Rubbing alcohol (at least 70%) or dedicated leather deglazer. A bowl of clean water. Several lint-free cloths (old cotton t-shirts work perfectly).
- The Color Itself: A bottle of spirit-based or alcohol-based leather dye. This is key.
- Application Tools: Disposable gloves (nitrile is best). A dedicated dyeing sponge or a pack of cheap makeup wedge sponges. A small, soft-bristled brush for getting into seams.
- Safety & Clean-Up: A respirator mask rated for organic vapors, or at the very minimum, a well-fitted disposable mask. Good ventilation is non-negotiable. Have paper towels ready for spills.
- The Finishing Touch: A high-quality leather conditioner or balm.
You must understand the difference between dye, paint, and polish to avoid a disappointing result. Leather dye soaks into the fibers to permanently change the leather’s color from within. Leather paint sits on top as a flexible coating, which is better for covering major imperfections on resistant leathers. Shoe polish merely tints and shines the very surface; it will not cover scuffs or create a true color change.
Gloves and a mask are your first step, not an afterthought. These dyes are potent, and you don’t want them on your skin or in your lungs. Open a window and turn on a fan if you can.
This same kit is exactly what you’d use to dye a leather jacket like June, a bag, or a belt. The process remains the same, only the scale changes.
The Step-by-Step Dyeing Process
Step 1: The Deep Clean & Strip
Never dye over dirt or factory finish. First, wipe the entire shoe with a damp cloth to remove surface grime. Let it dry completely. Whether you plan to do paint, dye, or customize suede, shoes, boots, or other footwear, proper prep matters. This prep lays the groundwork for even color and long-lasting results.
Next, dampen a clean cloth with your rubbing alcohol or deglazer. Wipe down the leather thoroughly. You will see color and finish come off on your cloth. This step removes oils and opens the leather’s pores so the dye can penetrate evenly. Let the shoes dry for 15-20 minutes. Keep in mind that alcohol can strip the leather’s finish. For preserving the finish, the best cleaning methods for leather boots and shoes are explored in the next section.
A proper prep strip is what separates a professional-looking dye job from a blotchy one.
Step 2: Applying the Dye
Shake your dye bottle vigorously for a full minute. Put on your gloves and mask. Pour a small amount of dye into a disposable cup or onto a paper plate.
Dab your sponge into the dye, then blot it on a paper towel to avoid soaking the leather. Apply the dye in quick, light, circular motions. Work on one small section at a time, like a toe or heel panel.
Your first coat will look uneven and splotchy. This is normal. Let it dry for 5-10 minutes. Apply a second thin coat, and a third if needed. Multiple thin layers always beat one thick, gloopy layer that can crack or feel sticky. Use your small brush to carefully dab dye into stitching and tight creases.
Step 3: Conditioning & Final Dry
After your final dye coat, let the shoes dry completely for at least 2-4 hours, or even overnight. The dye should no longer smell strong and should not transfer to your finger when touched lightly.
Once fully dry, the leather will feel thirsty. Apply a generous amount of leather conditioner with a clean cloth, working it in thoroughly. This replaces the natural oils stripped during prep and keeps the leather supple. Let the conditioner absorb for an hour, then buff off any excess with a clean, dry cloth.
Wait a full 24 hours before wearing your newly dyed shoes. This lets the color and conditioner settle completely for maximum durability.
Common Mistakes & Simple Fixes
Even with care, small hiccups happen. Here’s how to handle them.
Mistake: The dye looks streaky or blotchy after drying.
Likely Cause: Inconsistent prep (some areas still had finish) or applying dye too thickly in patches.
Simple Fix: Let it dry fully, then lightly sand the entire area with a very fine grit sandpaper (400+ grit). Wipe away dust and apply one more even, thin coat of dye.
Mistake: Dye got on the shoe’s sole or fabric lining.
Likely Cause: A slip of the sponge or over-application.
Simple Fix: Act fast. For soles, a cotton swab dipped in alcohol can sometimes lift fresh dye. For fabric, it’s often permanent, which is why careful, controlled application is so important.
Mistake: The finished shoes feel stiff.
Likely Cause: Not using enough conditioner after dyeing, or not letting it absorb properly.
Simple Fix: Apply another round of conditioner. For severe stiffness, use a conditioner specifically made for softening leather, and let it soak in overnight before buffing.
The Step-by-Step Process: From Scuffed to Refreshed
Step 1: The Deep Clean
Think of your leather like skin. You wouldn’t put makeup on a dirty face. Dye needs a perfectly clean surface to bond with the leather fibers. Any dirt, old polish, or grease will act like a barrier, causing the new color to fade quickly or apply unevenly.
I start every project, whether it’s a boot or a bag like June, the same way. Use a dedicated leather cleaner or a bar of saddle soap. Dampen a soft cloth, work up a light lather, and wipe the entire surface in gentle circles. The goal is to lift grime, not soak the leather. It’s important to know how to clean and disinfect leather properly to avoid any damage.
The most critical part comes next: letting the leather dry completely. Pat it with a dry towel and then leave it in a warm, airy spot for at least 24 hours. If the leather feels cool or damp to the touch, it is not ready. Rushing this step traps moisture under the dye and can lead to mold or a weak bond.
Step 2: Prepping the Leather Surface
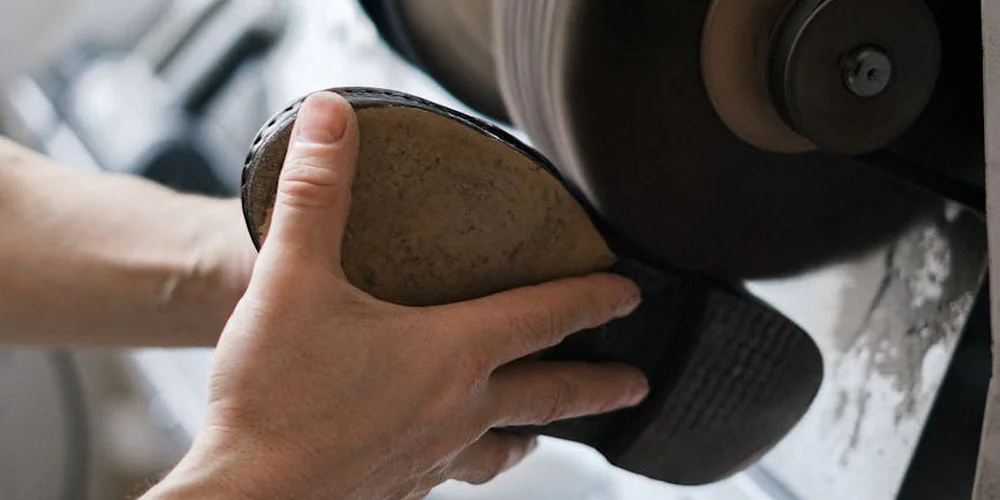
Most shoes and boots have a factory-applied topcoat or finish. This shiny layer protects the color but will also repel your new dye. To get the dye to stick, we need to gently rough up that surface.
For standard leathers, use a fine-grit sanding sponge (like 400-grit). Lightly scuff the entire area in one direction. You are not trying to remove leather, just to create a slightly “toothy,” matte surface for the dye to grip. Wipe away all the dust with a tack cloth. If ink stains are present on the leather, address them before dyeing. The next steps cover how to remove ink stains from leather surfaces and items.
An alternative is a leather deglazer or preparer applied with a cotton ball. This chemical option strips the finish without sanding. Always work in a ventilated area when using chemical preppers, and wear gloves.
Now, protect what you don’t want colored. Use a low-tack painter’s tape to carefully mask off the sole, any fabric linings, and the stitching. Press the tape down firmly to prevent dye bleed.
Can you dye aniline leather? Yes, but the process is different. High-quality aniline leather is often porous and lacks that heavy topcoat. It may only need the deep clean, not sanding. Always test your prep method on a hidden spot, like inside the tongue, first.
Step 3: Applying the Dye
This is where patience pays off. I use small, disposable dauber brushes for most jobs. They give good control. For very even coverage on large areas, a wool applicator pad works well. An airbrush is for advanced projects.
Shake your bottle of leather dye for a full minute. Pour a small amount into a dish or the dauber’s plastic lid. Dip just the tip of your applicator. Starting with the seams and hard-to-reach areas, apply the dye in long, smooth, overlapping strokes.
Your first coat should look thin and uneven, almost translucent. That is correct. Let this coat dry for 15-20 minutes. Then apply a second thin coat, going in a perpendicular direction to the first. This cross-hatch method ensures even coverage. Most projects need 3-5 thin coats for a rich, solid color.
Always test your dye color on a hidden spot first. The final result can look different on your leather than on the bottle. The inside of the shoe’s tongue is the perfect test canvas.
Step 4: Sealing and Conditioning
The dye alone is not waterproof or scratch-resistant. If you stop here, the color will rub off on your socks. A sealant, often called a leather finisher or resolene, creates a clear, protective shield.
Once the final dye coat is completely dry (wait another 24 hours), apply the finisher with a clean, soft cloth or sponge. Use the same thin-coat principle. One or two even layers are enough. It will dry to a slight sheen.
The dyeing process can be drying for the leather. After sealing it properly, it’s time to nourish it back. Use a light, pH-balanced leather conditioner.
Apply a small amount with your fingers, rubbing it into the leather in small circles. Let a quality conditioner soak in for about 20 minutes, then gently buff off any excess with a clean, dry cloth. My wallet, Scout, gets this treatment twice a year to stay supple. Your refreshed shoes now have vibrant color, a protective layer, and the moisture they need to last. These steps reflect the best leather care polishing techniques for maintaining and restoring the appearance of leather footwear. Following this routine helps preserve color, suppleness, and a lasting shine.
Tackling Common Color Changes
Most home dye jobs fall into one of two camps: going darker or making a bold switch. The first is straightforward. The second asks for more patience. Think of it like painting a wall: going from beige to charcoal is simple, but going from navy to butter yellow requires more layers and prep.
How to Dye Leather Shoes Black or Darker
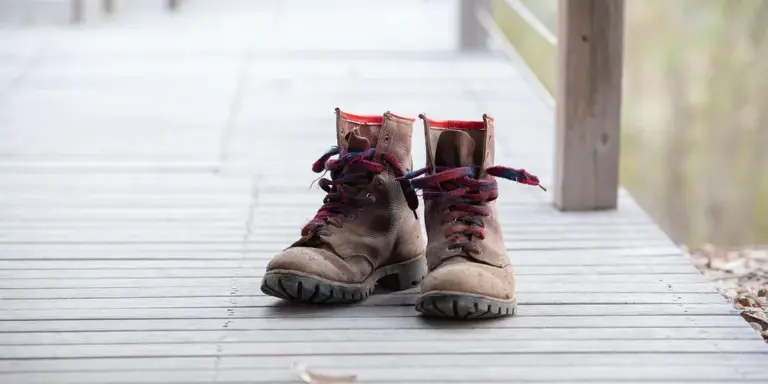
This is your best starting point. Going darker is forgiving because it covers imperfections and the previous color easily. My old work boot, Mason, started as a medium brown. A few years of scuffs made him look tired, so I gave him a new life with a deep black dye. It was like a full reset.
The key to a solid, even black finish is in the preparation and thin, controlled layers.
If you are covering brown leather with black, follow these steps closely:
- Clean the leather thoroughly with a neutral cleaner. Every speck of dirt or old polish will block the dye.
- Lightly sand the surface with a fine-grit sanding sponge. This isn’t about removing leather, it’s about roughing up the top finish so the dye can grip. Wipe away all dust.
- Apply a leather pre-dye or deglazer. This step is non-negotiable for a professional result. It strips the factory finish so the dye can penetrate the leather fibers directly.
- Start with a thin first coat of dye. Use a quality wool dauber or airbrush. Do not soak the leather. Apply in quick, even strokes and let it dry completely for 20-30 minutes.
- Inspect the coverage. You will likely see the brown base peeking through. Apply a second thin coat, focusing on lighter areas. Most projects need 2-4 coats for full, rich opacity.
- Once fully dry, seal the color with a dedicated leather finisher or resolene. This protects your work and prevents the black dye from rubbing off on your socks.
The same process works for dyeing leather shoes darker from any shade, like navy to a deeper midnight or burgundy to a near-black oxblood. Remember, patience between coats always beats one thick, sticky application that can crack. For suede footwear—like boots or shoes—darkening typically uses suede-safe dyes or conditioners. We’ll cover the best methods for darkening suede and leather, including dyes, conditioners, and home remedies, in the next steps.
How to Dye Leather Shoes Red or a Lighter Color
This path is more adventurous. Lighter or brighter dyes are less opaque, so the original color underneath will influence your final result. Trying to dye black shoes red is the toughest challenge. The black pigment fights to show through, often resulting in a muted, dark wine color unless you take drastic steps.
Success with lighter colors demands perfect prep and often a strategic base coat. For my calfskin jacket, June, I once added crimson accents. To get a true red, I first applied a coat of neutral leather filler to create a more uniform, pale canvas for the vibrant dye to pop against.
Here is a cautious approach for bold colors:
- Prep is everything. Cleaning and using a deglazer is even more critical here to ensure maximum dye absorption.
- Consider a base coat. For a true red over medium or dark leather, applying a white or grey leather dye first can help neutralize the underlying tone and make your final color brighter.
- Test first. Always dye a small, hidden area (like inside the tongue) and let it dry fully to see the real color.
- Apply multiple thin coats, allowing for full drying time between each. Bright colors may need more coats than you think to become vibrant and even.
Some people ask about dyeing leather shoes with coffee or tea. I have tried this on scrap veg-tan leather, like what my wallet Scout is made from. These methods create a gentle, antiqued tint, not a permanent, even dye job. The color is subtle, it won’t cover stains, and it can fade or become patchy with wear or cleaning. It’s a fun experiment for a vintage look on natural leather, but don’t rely on it for a full color transformation on finished shoes.
Caring for Your Newly Dyed Leather Shoes
You just gave your boots a new life. That color looks great. Now, let’s make sure it stays that way for years. The dye is in the leather, but it needs time to settle. Your care routine from this day forward is what protects your work.
Let the Dye Settle Before You Step Out
Patience is the first rule. I know you want to wear them immediately. Resist that urge. Fresh dye needs to cure and bond with the leather fibers completely.
For most shoes, a full 24 to 48 hours of drying at room temperature is the minimum. Think of it like fresh paint. A cool, dry spot with good air circulation is perfect. Avoid direct heat like radiators or hair dryers, as this can make the leather brittle and crack the new color.
Walking on them before the dye is fully cured is the fastest way to cause color rub-off or premature creasing.
Here’s a simple test. After 24 hours, gently press a clean, white cloth against a hidden area, like the inside of the tongue. If no color transfers, you’re likely good to go. If you see a tint, give them another day.
Building a Simple, Long-Term Care Routine
Think of this like caring for my jacket, June. You don’t clean and condition it every day, but a regular schedule keeps it soft and the color rich. The same logic applies to your newly dyed shoes.
Your goal is to keep the leather nourished. Dry leather cracks and faded dye are usually the result of neglect, not wear. Follow these steps every four to six weeks, or anytime they get very dirty or soaked.
- Clean Gently. Use a soft brush or cloth to remove dirt. For deeper cleaning, a dab of neutral, pH-balanced leather cleaner on a damp cloth works. Wipe the entire surface and let it dry completely. Never use household soaps, they strip natural oils.
- Condition Thoroughly. This is the most important step. A light leather conditioner or cream replenishes the oils the dye process removed. Apply a thin, even coat with your fingers or a cloth, rubbing it in well. Let it absorb for 15 minutes, then buff off any excess with a dry cloth. Conditioning is what maintains flexibility and prevents the dyed leather from drying out and cracking.
- Polish for Protection (Optional). For a shine and an extra layer of scuff protection, use a wax-based polish in a matching color. Apply it in small circles with a cloth, let it haze, and buff to a shine.
Should You Use a Protector Spray?
Yes, absolutely. A protector spray is your best defense against daily life. It creates an invisible shield against water, salt, and minor scuffs that can stain or wear away the new dye.
Choose a spray made for leather, ideally one that is water-based and silicone-free. Silicone can sometimes create a plastic-like barrier that prevents the leather from breathing. You want protection that doesn’t smother the material. As you compare products, you can decide between a leather conditioner and a waterproofing spray to see which you really need. That distinction shapes how you protect and maintain the leather over time.
Apply the spray after conditioning, once the shoes are clean and dry. Do this in a well-ventilated area. Hold the can about 6 inches away and spray a light, even coat over the entire shoe. Let it dry for the time specified on the can, usually 2-4 hours. One coat is often enough, but for boots facing harsh weather, a second light coat can add security.
A quality protector spray won’t change the color or feel of your leather, but it will buy you precious seconds to wipe away a rain drop or coffee spill before it becomes a stain.
A final tip. Always test any new product, be it conditioner or spray, on a small, inconspicuous area first. This lets you see how your specific dyed leather reacts. It’s the same careful approach I take with every piece, from Scout my wallet to Mason the saddle. If dye from colored products ever bleeds onto leather, there are repair steps to restore the finish. I’ll cover those dye-damage fixes in a coming guide for easy reference.
Solving Dyeing Problems: What to Do When It’s Uneven
Even with careful steps, dye can sometimes behave in unpredictable ways. The leather on your shoes has a history-its grain, previous treatments, and wear patterns all affect how it absorbs color. If your result is patchy or messy, take a breath. Many issues can be corrected.
Fixing a Patchy or Uneven Color
Patchy color usually means the dye was absorbed at different rates. A worn spot on the toe will soak up more dye than a pristine section on the heel. This happened on an old work boot I refinished, where the creases turned much darker.
The first step is to determine if the dye is still wet or has fully dried. If it’s still damp, you can sometimes blend it by gently applying a little more dye to the lighter areas with a very light touch.
If it’s fully dry and patchy, your best path is often to even it out with a second, controlled coat over the entire surface. Here is a reliable method:
- Let the first dye coat dry completely for 24 hours.
- Use a very soft brush or cloth to apply an extremely thin second coat of dye. Work in small, overlapping circles.
- Focus on building color slowly. It is far better to apply three whisper-thin coats than one heavy, blotchy one.
Sometimes, a slightly uneven finish adds character, like the varying shades on my saddle, Mason. But if you seek uniformity, patience with thin layers is your only tool.
Stopping Dye Bleed and Cleaning Sticky Residue
A sticky feeling or dye that rubs off on your hands means there’s excess dye sitting on the surface. It hasn’t fully penetrated or bonded. This is a common fix.
Dye bleed is a sign you used too much product or didn’t let it dry long enough before handling. To fix it, take a clean, dry, lint-free cloth and vigorously buff the entire surface. This friction picks up the loose pigment.
If a sticky residue remains after buffing, the leather is telling you it’s saturated and can’t absorb any more. Wipe the surface gently with a cloth barely dampened with a neutral leather cleaner. Let it dry. Then, apply a very small amount of a pH-balanced leather conditioner. The conditioner helps seal any remaining surface pigment.
Removing Dye from Soles and Stitching
Accidents happen. Dye on light-colored soles or stitching is noticeable, but it doesn’t have to be permanent.
For synthetic or rubber soles, act quickly. Use a cotton swab dipped in a high-percentage isopropyl alcohol. Gently rub the stained area. The alcohol breaks down the dye without harming the sole material. Test this on a hidden spot first.
For dye on stitching, a gentle, patient approach preserves the thread’s strength. Use the same alcohol-dipped swab, but dab and roll it instead of scrubbing. For tougher stains, a drop of specialized leather deglazer on a toothbrush can work. Brush parallel to the stitch line to avoid fraying the threads.
If the stain persists, consider it part of the shoe’s story. On my jacket, June, some darkened stitching from an old repair adds to its character. Perfect isn’t always the goal.
Knowing When to Call a Professional
Some situations are beyond a home fix. Recognizing them saves you time and can save your shoes.
- The leather has deep, dry cracks before you even start. Dye will pool in these cracks, making them more visible and brittle.
- You’ve applied multiple coats and the color is a streaky, muddy mess. A professional can strip it all back correctly, which is a delicate process.
- The dye job is technically even, but the color is a complete mismatch from what you wanted. Professionals have mixing systems to achieve precise shades.
- You’re dealing with a very delicate or expensive leather (like suede or antique calfskin). The risk is often greater than the reward.
A good leather repair specialist has the tools and experience to correct major issues without compromising the integrity of your footwear. It is an investment in preserving something you love. There is no shame in it. For my most complex projects, seeking expert help was the choice that guaranteed the item lived another decade.
DIY vs. Professional Leather Dyeing: Making the Call
You have a pair of scuffed brown boots you want to dye black. Or maybe you found a faded leather bag at a thrift store. The idea of changing its color yourself is exciting. It can also be daunting. Before you open that dye bottle, take a moment. Ask yourself the right questions.
Should You Do This Yourself? A Simple Self-Check
Think of this like choosing a recipe. A simple soup is different from a five-tier cake. Your project has a difficulty level. Be honest with yourself about it.
Grab the item and look it over. Run your fingers over the surface. Ask these questions:
- What is the current condition? Are there deep scratches, cracks, or areas where the top finish is completely gone? Minor scuffs are fine. Dry, cracked leather needs major rehab before any dye touches it.
- What is the leather type? Is it a smooth, finished leather (like most shoes and bags) or a porous, unfinished leather (like some belts or work boots)? Unfinished leather soaks up dye evenly and is friendlier for beginners.
- How big and complex is the item? Dyeing a flat wallet is straightforward. Dyeing a structured leather jacket with a lining, zippers, and seams is a project that requires patience and meticulous taping.
- What is your goal? Are you covering stains on daily wear boots, or restoring a sentimental heirloom? The higher the emotional or financial value, the more you should consider a pro.
If your item is in relatively good shape, made of unfinished or lightly finished leather, and isn’t a complex, high-value piece, you are likely a good candidate for a DIY job. My old wallet, Scout, was a perfect first project-small, veg-tan, and forgiving.
What a Professional Restorer Does (That You Probably Can’t)
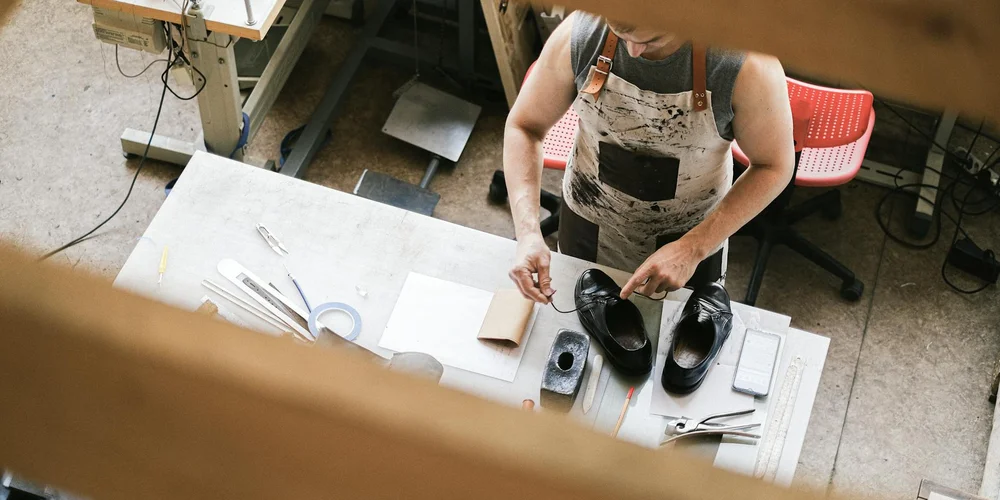
When you search “dye leather shoes near me,” you’re not just paying for dye. You’re paying for specialized equipment, a controlled environment, and years of muscle memory. Here’s what happens in a good shop that’s hard to replicate on your kitchen table.
- Complete Stripping and Refinishing: Pros use industrial-grade strippers to remove every trace of old dye and finish without damaging the leather. At home, we can only deglaze and clean the surface.
- Professional-Grade Equipment: They use spray booths and airbrush systems to apply dye in microscopic, even layers. This prevents the blotchy, painted look that comes from using a dauber or sponge.
- Expert Color Matching: A pro can mix custom pigments to match a specific shade perfectly. They can also recreate complex antique finishes or sun-faded patinas.
- Structural Repairs First: They will fix tears, replace worn soles, and re-stitch seams before any color work begins. The dye job is the final step, not a cover-up for underlying problems.
For a piece like my jacket June, which needed careful seam work, I took it to a professional. The dye job was flawless because the foundation was solid.
The Honest Pros and Cons
There is no single right answer. Both paths have value. This table lays out the reality of each choice.
So, can you dye a leather coat at home? Technically, yes. Should you? If it’s an everyday jacket you’re experimenting on, and you accept the risk, go for it. If it’s your grandfather’s vintage flight jacket, the safer bet is to find a skilled artisan. Your goal is to preserve the leather’s life, not just change its color.
Common Questions
Can a professional really do a better job than I can at home?
Yes, primarily due to their controlled environment and professional spray equipment that achieves a factory-level, even finish. For high-value, complex, or already damaged items, their expertise in structural repair and color matching is a worthwhile investment in preservation.
Is Angelus the best dye for shoes?
Angelus is a reputable, widely available brand of spirit-based dye that works well for this purpose. The “best” dye is any quality, alcohol-based formula applied correctly after thorough surface preparation.
How do I maintain shoes after dyeing them a darker color?
Follow a strict routine of gentle cleaning and conditioning every 4-6 weeks to keep the leather supple. Always finish with a leather protector spray to shield the new color from water and scuffs. If you’re wondering what are the best products and methods for cleaning leather, this guide covers trusted cleaners and techniques. It helps you choose the right routine for your leather type and use case.
Where can I find reliable video tutorials on this process?
Search for channels focused on leathercraft, shoe repair, or sneaker customization, as they demonstrate proper technique. Watch critically, ensuring their methods emphasize prep, thin layers, and final sealing-skip any that skip these core steps.
Final Thoughts on At-Home Leather Dyeing
Your success depends more on meticulous preparation than on the dye itself. A perfect, long-lasting color starts with a perfectly clean and conditioned surface, where you, the craftsman, have the most control.
Taking the time to revive an old pair is one of the most sustainable choices you can make. Practice on scrap leather first, and with each project, you’ll build the confidence to care for all your leather goods, from Mason to a favorite old boot.
Relevant Resources for Further Exploration
- r/femalefashionadvice on Reddit: I dyed my leather boots and here is how it went.
- Shoe Win: How to Dye Leather Shoes Like a Pro – Paper and Stitch
- Amazon.com: Griffin Black Leather Dye for Shoes & Boots – 2.5oz – Repairs Scuffs, Scratches & Fading – Permanent Leather & Suede Dye for Furniture, Car Seats, Jackets, Upholstery & More – Made in USA : Clothing, Shoes & Jewelry
- Dye Shoes, Boots, and Purses – Wyatt & Dad Cobbler Co.
- Brown Leather Dye | Shoe Restoration · Angelus Direct
Harriet is a avid collector of leather goods such as purses, bags, seat covers, etc and has an extensive background in leather care, recovery, stain removal and restoration. She has worked for a number of years perfecting her leather care techniques and knows the ins and outs of restoring all kinds and types of leather products. With her first hand knowledge in leather care, you can not go wrong listening to her advice.
Restoring Color and Re-Dyeing