How Do You Soften and Break In New Leather Boots and Shoes?
Published on: February 25, 2026 | Last Updated: February 25, 2026
Written By: Harriet Nicholson
Hello Tannery Talk. That initial stiffness in new leather can make every step feel like a negotiation, but I promise it’s a temporary phase.
I will guide you through selecting the right conditioner, wearing them in smart stages, and using controlled warmth or dampness safely.
I’ve broken in countless pairs in my workshop, learning what truly works without harming the leather.
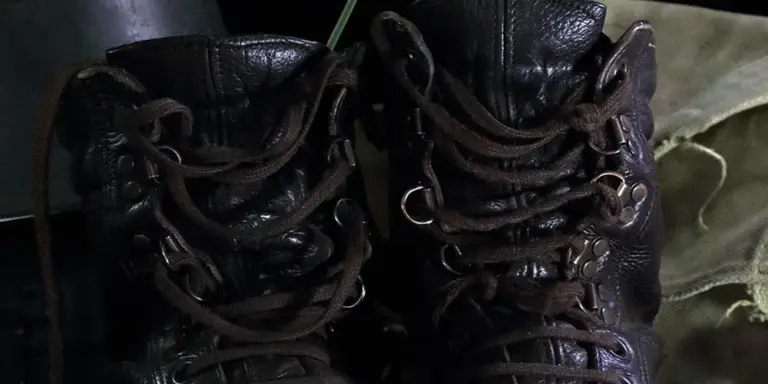
Why do new leather boots and shoes feel so stiff and uncomfortable?
Think of new leather like a new, stiff denim jacket. It hasn’t been moved or shaped to your body yet. The leather fibers are tight and dry, fresh from the tannery and holding their original shape firmly.
Leather is a skin. When it’s new, its fibers haven’t been flexed millions of times. They are resting in a tight, compact state. This stiffness is a sign of quality and durability, not a flaw. Your job isn’t to fight the leather, but to gently encourage it to move with you.
Softening is the process of adding flexibility back into those dry fibers, not weakening the material. With the right care, you guide the leather from being a rigid object to becoming a supple, personal tool that fits you perfectly, just like June’s jacket molded to her shoulders over time.
How should I prepare my new leather boots before trying to soften them?
Rushing to apply conditioner is the most common mistake. Preparation is simple but non-negotiable. Your first touch should always be for inspection and cleaning.
Start by giving your boots a close look. Run your fingers over the stitching, like I do when checking Mason’s saddle for wear. Look for any loose threads or minor imperfections from the factory. This is your baseline.
- Take a soft, lint-free cloth and dampen it with cool water. Wring it out completely so it’s only slightly moist.
- Wipe down the entire exterior of the boot. This removes any light dust, tannery residues, or surface finishes that could block conditioner.
- Let the boots air dry naturally, away from direct heat or sunlight. This could take a few hours. You must wait.
The critical rule is to never apply any conditioner, oil, or cream to leather that is damp or dirty. Moisture trapped under a conditioner can lead to mildew, and dirt will grind into the pores, causing scratches. Wait until the leather feels cool and dry to the touch all over.
Once they are clean and dry, you’re ready. You’ve respected the material, and now you can start the real work of making them yours.
What is the safest, most effective way to soften leather with conditioner?

Conditioning is not about adding a slick coating. It is the process of replenishing the natural oils that leather loses over time, just like your own skin needs moisturizer. This keeps the fibers supple and strong from the inside out.
Different products serve different purposes. Think of them like lotions for different skin types.
| Conditioner Type | Best For | Key Trait |
|---|---|---|
| Balm or Paste | Thick, hard-wearing leathers like work boots and saddles. | Rich, wax-heavy. Great for weather resistance. |
| Cream | Most jackets, bags, and shoes. A great all-rounder. | Balances oils and waxes. Often contains color. |
| Liquid Oil | Dry, porous, or unfinished leathers (like some veg-tan). | Deeply penetrating. Use sparingly. |
For breaking in new boots, a cream or balm is usually your best starting point, as it softens without over-saturating.
The step-by-step conditioning process
You need a clean surface. Wipe your boots with a slightly damp cloth to remove dust. Let them dry completely.
Apply a dime-sized amount of conditioner to a soft, lint-free cloth. Rub the cloth in your hands to warm the product slightly.
Work the conditioner into the leather using small, overlapping circles. Cover the entire surface, paying extra attention to stiff areas like the heel and ankle collar. The leather will start to look darker as it drinks the oils in.
Now, wait. Let the boots sit for at least an hour, preferably overnight. This is when the magic happens-the oils migrate deep into the fibers. The scent of the conditioner, often beeswax or lanolin, will be subtle and pleasant.
After the waiting period, take a fresh, dry cloth and buff the surface gently. You are removing any excess conditioner that didn’t absorb. Buffing brings up a soft, satin sheen and prevents a sticky feel.
Feel the difference. The leather should feel warmer and more pliable in your hands, like the difference between a stiff new baseball glove and one that’s ready to play.
I condition June’s jacket once or twice a year, more if it gets caught in the rain. For new boots you’re actively breaking in, one good conditioning at the start is often enough. Over-conditioning can clog the pores and make leather too soft, so always err on the side of less. You can always apply more later.
A common mistake is using too much product. If your boots feel greasy or tacky after buffing, you used too much. Simply buff them again with a clean, dry cloth until the surface feels smooth.
Can I use oils or home remedies to soften my leather boots?
This is the most common question I get, and the answer isn’t a simple yes or no. It’s a “yes, but carefully.” Think of oils like a strong cup of coffee for your boots. They can wake up and soften dry, thirsty leather, but too much can make things jittery and leave a mess.
The Role of Traditional Oils
Oils like neatsfoot (from cattle) or mink oil have been used for generations, and for good reason. They are powerful. They penetrate deep into the leather fibers, lubricating them from the inside out. This makes them fantastic for heavy-duty, rugged work boots that face mud, water, and hard labor.
Neatsfoot oil is a classic for a reason: it keeps leather supple under stress without forming a heavy, waterproof crust on the surface.
My old work boots, similar to my saddle Mason, lived on a light application of neatsfoot oil. It kept them flexible through years of tough use. But there are trade-offs. These oils can darken leather significantly, sometimes permanently. They can also attract dust and dirt over time.
If you choose a traditional oil:
- Start with a perfectly clean, dry boot.
- Apply a thin, even coat with a clean cloth. Less is more.
- Let the boot absorb it for an hour, then wipe off any excess that hasn’t soaked in.
- Let them dry fully, away from direct heat, for 24 hours before wearing.
The Truth About Coconut Oil and Vaseline
I understand the appeal. You have these items in your home. It seems easy. Here is my honest take from the repair bench.
Coconut oil can moisturize leather initially because it’s a fat. The problem is what happens next. It tends to stay greasy on the surface or within the leather’s pores. This greasy film attracts every bit of lint and grit, creating a sticky, dirty mess that’s hard to clean. Over many months, it can also turn rancid, leading to an unpleasant odor. This is especially problematic when compared to mineral oil or other conditioning treatments that are designed for long-term care.
Vaseline (petroleum jelly) is worse. It doesn’t truly condition or nourish leather. Vaseline sits on top of the leather like a plastic wrap, clogging the pores and preventing the material from breathing, which can lead to premature drying and cracking underneath the greasy layer.
I once repaired a jacket where someone had used Vaseline on a small scuff. The spot was permanently darkened and stiff, while the leather around it had become dry and brittle. We saved it, but it was like fixing a botched home haircut. It’s just not designed for the job.
Choosing Your Softening Partner
For most boots, especially dress shoes, casual boots, or fashion leather, I point people toward a purpose-made leather balm or conditioner. Think of these as a balanced meal for your boots, while pure oils are a potent supplement.
Leather balms typically blend oils, waxes, and conditioners. They soften effectively but also provide protection and are less likely to drastically darken your leather. They are the reliable choice for my jacket June or a wallet like Scout.
How do you decide? This simple guide helps.
Your first step is always to clean your boots. A soft brush and a damp cloth remove the grit that can grind into softened leather. Then, apply your chosen product sparingly. Massage it in with your fingers in a circular motion-the warmth helps it absorb. Let it rest. True softening is a process of gentle, consistent care, not a single, heavy treatment.
How can heat or water help me soften leather boots more quickly?
Using a little water or gentle warmth can speed up the break-in process. The trick is control. You want to relax the leather fibers, not shock or cook them. Think of it like a warm bath for your boots, not a trip through the dishwasher.
Moving slowly with moisture prevents the leather from stretching unevenly or developing stiff, dry spots later. I learned this the hard way with an old pair of work boots years before I met Mason, my saddle. A rushed job leads to regrets.
The ‘Wear with Damp Socks’ Technique
This is my preferred method for a controlled, gentle assist. It uses your body heat and a small amount of moisture to mold the leather directly to your foot’s shape.
- Start with clean, dry boots. If they’re new, a quick wipe with a soft, dry cloth is fine.
- Take a pair of thick socks-wool or a wool blend is perfect. Run them under lukewarm water and then wring them out until they are just damp, not dripping wet.
- Put the damp socks on, then put your boots on. Lace them up to your usual snugness, but not painfully tight.
- Wear them indoors for 30 to 45 minutes. Walk around. Sit down. Let your feet warm the moisture and gently push the leather out.
- Take the boots and socks off. Let the boots air dry at room temperature, away from direct heat sources. Stuff them with crumpled paper to help them hold their shape as they dry.
- Once completely dry, apply a light coat of a quality leather conditioner to replenish any moisture lost from the process.
This method is effective because it’s gradual. The leather softens and forms to your foot without being saturated. I’ve used a version of this on June, my jacket, using a light steam from a shower to help relax a crease, followed by immediate conditioning.
A Strong Warning About Extreme Heat
It might be tempting to blast a stiff spot with a hair dryer or park your new boots on a radiator. Please don’t. Extreme, dry heat is one of the fastest ways to ruin good leather, especially when it gets wet. Proper drying techniques are crucial to maintain leather’s quality.
High heat rapidly boils away the leather’s natural oils, leaving it brittle and prone to cracking. The damage might not show up immediately, but the leather’s strength is gone. It becomes weak, like a piece of paper that’s been left in the sun.
Radiators, space heaters, and hair dryers create an uneven, intense heat that the leather cannot handle. You might see the leather soften for a minute, but you are literally cooking its life out. The finish can bubble, the fibers can burn, and the results are permanent.
If you want to use warmth, let it come from your own body during the damp sock method, or from the natural, ambient air as they dry. Patience here saves you from heartbreak later. Your boots, like Scout my wallet, are built to last for years. We should care for them in a way that honors that.
What is the best way to break in boots just by wearing them?
Wearing them in is the most natural method. It lets the leather mold to the unique shape of your foot. The process requires patience, but it builds a deep, personal connection to your gear. Think of my saddle, Mason. That perfect fit wasn’t achieved in a day; it came from hundreds of steady rides.
Follow a patient wear schedule
Start slow. Rushing causes blisters and stresses the leather’s fibers.
- Wear your new boots indoors for just one hour on the first day. Walk around your home.
- If there are no hot spots or pinching, wear them for two hours the next day.
- Gradually add an hour each day over the next week.
- By the second week, you should be comfortable wearing them for a full workday.
This gradual approach lets the leather relax and stretch slowly, creating a durable and comfortable fit that lasts for years.
Wear your regular socks
The socks you break boots in with matter. Always wear the exact socks you plan to use most often, whether they are thin dress socks or thick wool hiking socks. This ensures the leather stretches to accommodate that specific thickness.
Breaking boots in with thin socks only to later wear thick ones will make them feel tight again. Your foot, plus your regular sock, is the mold you are creating.
Protect your feet during the process
Even with a perfect schedule, you might feel some friction. Pressure points at the heel or around the little toe are common.
Apply a strip of moleskin or a dab of anti-blister balm to these areas before you put your boots on. This creates a protective barrier that reduces rubbing and prevents raw skin. It is a simple fix that makes the breaking in period much more comfortable.
Protecting your feet lets you wear the boots longer during each session, which actually helps the leather soften and form faster. It is a kinder way for both you and the leather.
How do I soften specialized gear like leather football boots or jackets?

The tools are the same, but the goal changes. For a piece like a leather football boot, you need flexibility right now. For a jacket like my June, you want to encourage a comfortable, personal shape over time.
Softening Leather Football Boots for Flexibility
Think of a new football boot’s leather like a stiff hinge. You don’t want to break it, you want to teach it to move smoothly. Your main tool here is your hands, not a bottle of conditioner.
Start with the boot off your foot. Grab the toe and gently but firmly flex it upward, then downward. Do this for a minute or two on each boot. Apply steady pressure to the sole and upper to mimic a kicking motion, which helps the materials learn to work together.
Next, work the critical areas by hand. Massage the leather around where your little toe and big toe sit, as these are common pressure points. The leather will begin to give.
The Critical Conditioning Difference
Here is where care for sports gear splits from regular boots. A football boot fights sweat, grass, and water every use. This dries leather out fast.
- After breaking in by hand, use a tiny amount of a lightweight, pH-balanced leather conditioner.
- Apply it only to the inside of the upper, where it contacts your foot and absorbs moisture. Avoid the outside and stitching if you can.
- Let it soak in overnight. This replaces oils lost to sweat without over-softening the external leather, which needs to keep its shape.
You will need to condition football boots more often than casual shoes, perhaps every few weeks during a season, to combat the drying effects of intense use. Always let them dry naturally, away from direct heat, first.
Breaking in a Leather Jacket, Like June
My jacket, June, didn’t become soft in a day. A leather jacket molds to your body, not just your hands. Wear it as often as you can. Sit in it, drive in it, let the sleeves naturally crease at your elbows.
When you feel stiff areas, focus conditioner there. After wearing it on a dry day, feel for tight spots across the shoulders or back. Use your fingers to apply a small dab of conditioner just to that stiff leather and gently work it in.
The patina, that beautiful worn-in color and sheen, develops from this life of wear and spot-care, not from soaking the entire jacket in product. Over-conditioning a jacket makes it heavy and can darken it unevenly.
For a new jacket, a single, light overall conditioning when it’s new is plenty. After that, let your movement and targeted care do the work. In a few months, it will feel like a second skin, with its own unique character, just like June.
What are the biggest mistakes people make when trying to soften leather?
I see it all the time. The excitement of new boots can lead to some quick fixes that hurt more than they help. Let’s talk about what to avoid so your boots age like my favorite pieces, not fall apart in a season.
Harmful Shortcuts That Damage Leather
Some methods promise fast results but wreck the material. They break down the fibers that give leather its strength.
- Rubbing Alcohol or Harsh Cleaners: These strip away the leather’s natural oils in an instant. What’s left is dry, brittle, and prone to cracking. It’s like using strong soap to wash your hands twenty times a day. The skin gets raw and weak.
- Silicone-Based Sprays and “Waterproofers”: These products sit on top of the leather like a plastic wrap. They might add a temporary shine and repel water, but they also seal out any beneficial conditioner you apply later. The leather underneath dries out, unseen, until it’s too late.
- Using Excessive Force to Stretch: Soaking boots and then forcing them onto a stretcher or your foot can overstress the seams and fibers. You might get a minor size change, but you risk permanent tears or misshapen panels. Good leather breaks in with you, not against you.
Why Kitchen Products Fail for Leather Care
It’s tempting to grab something from the pantry. These items seem gentle and moisturizing, but leather is skin, not a salad.
Vaseline (petroleum jelly) and cooking oils like olive or coconut oil have very simple molecules. They sit on the surface or create a greasy, sticky film. They don’t nourish the leather fibers deeply. Over time, they can go rancid, attract dirt, and actually speed up the decay of the material. They lack the balanced formulation of a proper leather conditioner designed to protect and penetrate.
Your boots deserve food made for them, not a kitchen experiment.
The Simple, Safe Path to Soft Boots
Think of breaking in boots like building a friendship with Mason, my saddle. It takes consistent, gentle effort. Here is the safe method.
- Start Clean. Use a soft horsehair brush to remove factory dust or dirt. For a deeper clean, a damp cloth with a drop of pH-balanced leather soap works.
- Condition Gently. Apply a light, even coat of a natural leather conditioner or cream. Use your fingers to feel it soak into tight areas like the vamp and heel collar.
- Wear Them Slowly. Put them on for just an hour or two indoors at first. Walk around. Flex your feet. Let the heat and movement from your body start the molding process.
- Repeat and Rotate. After a few short wears, condition the boots again if they feel stiff. Never wear the same leather boots two days in a row. Let them rest and dry fully between sessions.
This patience rewards you. It builds a soft, personalized fit without sacrificing the boot’s structure. This careful approach is how you ensure your boots become a trusted companion for years, just like Scout the wallet in my pocket.
How do I keep my boots soft and comfortable after they’re broken in?
Your hard work is done. The leather has molded to your foot. Now, the goal shifts from breaking in to wearing in. You want that perfect, personalized softness to last for years.
Think of my saddle, Mason. It’s eight years old and still as supple as the day it was fully broken in. That’s not magic. It’s a simple, consistent routine. Maintenance is about preventing the leather from drying out and stiffening, which is what causes cracks in leather and discomfort.
Establish a Simple Cleaning and Conditioning Routine
Don’t overcomplicate this. A basic two-step process, done at the right time, is all you need. Your schedule depends on how you use your boots. A pair worn daily in an office needs less frequent care than a pair worn for weekend hikes or outdoor work.
The rule I follow is to condition my leather when it looks thirsty, not on a rigid calendar. Here is the simple process.
- Clean First, Always. Before any conditioner touches the leather, remove dirt and salt. Use a soft horsehair or boar bristle brush to dry brush off loose grit. For stuck-on mud or stains, use a damp cloth with a tiny amount of neutral, pH-balanced leather cleaner. Let the boots dry completely away from direct heat.
- Apply a Quality Conditioner. Choose a conditioner suited to your boot’s leather. For most boots, a light oil-based balm or a cream conditioner works well. Using your fingers or a soft cloth, apply a thin, even layer. Your skin heat helps it penetrate. Buff off any excess after 10-15 minutes with a clean, dry cloth.
A common mistake is conditioning too often. This can oversaturate the leather, weakening the fibers. If the leather feels slick or looks overly dark, you’ve likely used too much or done it too soon. Let the boots rest and wear them normally to let the excess work its way out.
Store Them with Support
What you do when the boots are off your feet matters just as much. Tossing them in a closet lets them collapse and traps moisture from your feet inside. This leads to misshapen boots and can promote mildew.
Using boot trees or simple shoe forms is the single best thing you can do for your boot’s longevity and comfort. They serve two critical purposes:
- They maintain the boot’s shape, preventing deep, permanent creases that can crack.
- They absorb lingering moisture from sweat, helping the interior dry correctly.
I treat my boots like I treat June, my leather jacket. I don’t crumple her on a hook. I give her a broad, supportive hanger. For your boots, cedar shoe trees are ideal as the wood naturally absorbs moisture and odors. If you don’t have trees, stuffing the shafts with acid-free paper or a dry cloth helps maintain shape.
The True Secret to Lasting Softness
Lasting comfort in leather boots doesn’t come from one heroic conditioning session. It comes from gentle, consistent care. It’s the quick brush after a muddy walk. It’s the light conditioning when the leather feels just a bit dry. It’s remembering to use those shoe trees.
This consistent, attentive care builds a history into the leather, a patina of use and respect that keeps it soft, strong, and uniquely yours for the long journey ahead.
Common Questions
Is coconut oil a good leather softener for boots?
It’s a temporary fix with long-term problems. Coconut oil can turn rancid and attract dirt, so I recommend a purpose-made leather conditioner instead.
What’s the difference between a leather softener and a conditioner?
A true conditioner softens by nourishing the fibers, while some “softeners” just coat the surface. For lasting results, use a quality balm or cream that penetrates and preserves.
Will Vaseline soften my leather boots?
No, it will damage them. Vaseline seals the pores, preventing the leather from breathing and leading to drying and cracking underneath the greasy layer.
What’s the fastest way to soften stiff new leather?
Combine methods: apply a suitable conditioner, then wear the boots with slightly damp, thick socks for short indoor sessions. Always let them dry fully away from direct heat afterward.
How do I soften leather football boots without harming them?
Focus on flexibility, not just conditioning. Hand-flex the sole and upper repeatedly, and apply a light conditioner primarily to the interior lining to combat sweat, not the external surface.
Caring for Your New Leather Boots
Start with a generous application of conditioner to nourish the leather, then wear them often but gently to let the fibers soften and mold to your feet. Rushing the process can stress the material, while patience builds comfort that lasts for years.
Taking the time to care for your leather properly respects the life behind the material and the skill of the maker. Every cleaning and conditioning session is a step toward sustainable use and deeper craftsmanship knowledge.
Further Reading & Sources
- How To Break In New Leather Shoes | Bared Footwear
- r/femalefashionadvice on Reddit: How do you guys break in a new pair of shoes?
- How to Break In Your New Leather Shoes
- How to Break In Leather Boots – Drew’s Boots
Harriet is a avid collector of leather goods such as purses, bags, seat covers, etc and has an extensive background in leather care, recovery, stain removal and restoration. She has worked for a number of years perfecting her leather care techniques and knows the ins and outs of restoring all kinds and types of leather products. With her first hand knowledge in leather care, you can not go wrong listening to her advice.
Boot and Shoe Care