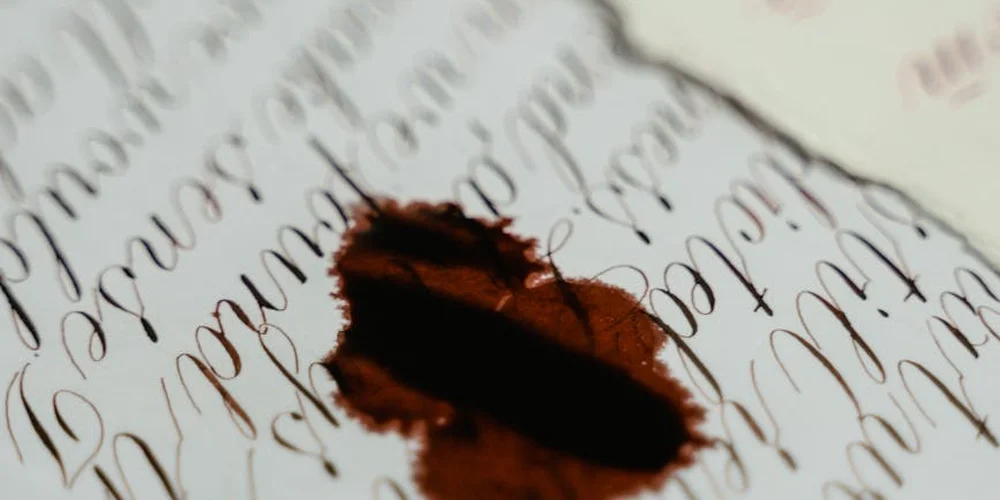
How Do You Safely Remove Ink Stains from Leather?
Published on: February 23, 2026 | Last Updated: February 23, 2026
Written By: Harriet Nicholson
Hello Tannery Talk. I know that sudden ink mark on your favorite bag or chair can feel like a disaster, but take a breath-most stains can be handled with care.
This guide will walk you through a reliable process, covering how to assess your leather and the stain, which gentle cleaners to use, a detailed step-by-step cleanup, and how to nourish the leather afterwards.
I’ve revived pieces like my scout wallet from similar mishaps over years of hands-on leather care.
Start Here: Understanding Your Leather and the Ink Stain
Think of leather like different fabrics. You wouldn’t clean a wool sweater the same way you clean a raincoat. Leather works the same way.
Your approach depends entirely on your leather’s surface.
- Full-Grain or Top-Grain Leather: This is like a sturdy pair of raw denim. It has a natural, porous surface. Ink can soak in, but this surface can also handle gentle cleaning better. My saddle, Mason, is a good example. His tough hide has seen worse than a stray pen mark.
- Coated or Corrected-Grain Leather: This is like that raincoat. It has a thin polymer or pigment layer on top. The ink often sits on this coating, which is good. But the coating itself can be damaged by harsh chemicals, which is bad.
- Suede or Nubuck: This is the velvet of the leather world. That raised nap is delicate. Rubbing can ruin the texture, turning a small ink spot into a large, matted patch.
The ink itself matters too. A standard ballpoint pen uses an oil-based paste. It can sit on the surface for a bit before sinking in. A gel pen or permanent marker uses liquid dyes that are designed to absorb quickly and stay put. They act faster and stain deeper.
Yes, you can often remove ink from leather, but your chances depend entirely on this quick, careful look at the material and the mark. A fresh smear on a coated bag is a simple fix. A week-old gel pen line on suede is a much taller order.
This is why knowing your leather matters from the start. A well-made piece from responsibly sourced hides tends to have a more consistent grain and finish. This predictable quality makes your care work, like stain removal, more effective and less risky.
The First Step You Must Never Skip
Before you touch that stain, you must test your cleaner. Every single time. I have a small, worn spot inside June’s jacket collar I use for this. It has saved her from more than one potential disaster.
Skipping this step is the most common, and costliest, mistake. A product that works on one black bag could strip the color from another. What conditions one leather can seal and ruin another.
Here is how you do it right.
- Find a hidden spot. Look inside a seam, under a flap, or on the backside of a strap.
- Apply a tiny amount of your chosen cleaner to a white cotton swab or soft cloth.
- Gently dab or make a small circle on the hidden spot.
- Wait for it to dry completely. This can take 10 to 30 minutes.
Now, inspect the test spot. Has the leather color changed or transferred to your cloth? Does the texture feel gummy, stiff, or different from the area around it? If you see any change at all, that method is not safe for your item.
This simple test prevents permanent color loss or texture damage that no amount of conditioning can fix later. It sets your expectations. If the test fails, you know to try a milder option or seek professional help, and you’ve only risked a hidden square inch. If it passes, you can proceed with confidence.
How to Treat a Fresh Ink Stain on Leather
Time is your biggest ally here. A fresh ink stain is mostly on the surface, which gives you a fighting chance to lift it without a trace. Your first move is the most important one.
The Critical First Minute: Blot, Don’t Rub
When ink spills, your instinct might be to wipe it, especially if it’s pen or marker ink on leather. Resist that urge completely. Rubbing will grind the ink particles deeper into the leather’s pores and grain, making the stain permanent.
Instead, grab a clean, dry, absorbent cloth-a cotton t-shirt scrap or a microfiber cloth works perfectly. Gently press it onto the stain to soak up the wet ink. Use a dabbing or blotting motion, lifting the cloth straight up after each press to pull the ink out, not smear it around. Switch to a clean area of the cloth frequently so you’re not reapplying ink.
Gentle Cleaning Methods to Try Next
Once you’ve blotted up the excess, you can attempt to clean the residual mark. Always start with the mildest option.
- A Damp Microfiber Cloth: Dampen a corner of a clean microfiber cloth with distilled or filtered water. Wring it out until it’s barely damp. Gently work in small circles over the stain. Let the area air dry completely away from direct heat to see if the mark lifted.
- Mild Saddle Soap: This is my go-to for unknown stains on sturdy leathers like Mason the saddle. Apply a tiny amount to another damp cloth, work it into a light lather, and gently clean the area. Wipe away all soap residue with a clean, water-dampened cloth. Dry thoroughly.
After any cleaning with water or soap, the leather will be thirsty. Condition the area once it’s fully dry to replenish the natural oils you may have removed during cleaning. Use a small amount of a neutral leather conditioner, buffing it in gently.
A Quick Tip for Real Emergencies
If you’re away from your leather care kit, a dab of clear hand sanitizer (with high alcohol content) on a cotton swab can sometimes break down a fresh ballpoint ink stain on leather. This is a last-resort trick, not a standard practice.
You must test this on a hidden spot first, like inside a seam or under a flap, as alcohol can strip dye and severely dry out leather. If the test spot looks okay after a few minutes, dab a tiny amount on the stain, blot immediately, and follow with a generous application of conditioner as soon as possible to counteract the drying effects.
Putting It All Together: A Real Scenario
Imagine my wallet, Scout, sitting in my bag next to a leaky pen. I’d see a small blue smudge on its smooth veg-tan surface. My heart would sink for a second, but then I’d spring into action. I’d grab a clean cloth from my desk and gently press it onto the spot, absorbing the wet ink. I’d then lightly dampen another corner of the cloth and dab at the remaining mark. After letting it air dry, I’d massage in a drop of conditioner. The key is calm, quick blotting-panic and rubbing would have set the stain for good.
Removing Old, Set-In Ink from Leather
A fresh ink spill is a surface problem. An old stain is a deep resident. Think of it like a dye that has settled into the leather’s fibers, making itself at home. It bonds over time. This means you cannot rush. A gentle, patient, layered approach is your only real tool for lifting it without harming the hide.
You must always start with the gentlest option. A dedicated, pH-balanced leather cleaner is your first call. These are formulated to lift dirt and some stains without stripping the leather’s natural oils. Apply it to a soft, white cloth, never directly onto the leather. Work in small, circular motions over the stain and a bit of the surrounding area. Let the cleaner sit for a minute to break down the stain, then wipe it away with a clean, damp cloth.
Patience here is not just a virtue, it is the method. You will likely need to repeat this process three or four times, letting the leather dry completely between attempts. This gradual lifting is what protects the leather’s surface and color.
A Layered Cleaning Process
If the cleaner alone isn’t making progress after several tries, you can introduce a slightly more active step. Create a mild leather cleaning paste.
- Mix a small amount of distilled water with a few drops of a pure, castile soap or saddle soap to form a loose paste.
- Using a soft-bristled brush (like a horsehair detailing brush), gently work the paste into the stain with tiny circles.
- The goal is to create a light, foamy action to lift the ink. Work for no more than 30 seconds on the spot.
- Immediately wipe away all residue with a very clean, damp cloth.
- Let the leather dry fully for several hours. You may see the stain lighten as it dries.
After any cleaning, you must replenish moisture. Apply a light, neutral leather conditioner to the entire piece. This restores pliability and protects the area you worked on.
Considering Mild Solvents
For a persistent stain that remains after the steps above, some might consider a mild solvent. This is advanced care and carries real risk. Solvents can strip dyes and oils, leaving a permanent dull patch or damaging the leather’s finish. It’s especially risky when used on stains from ink, wine, or oil.
If you proceed, you must test any solvent in a hidden area first, like inside a seam or under a flap, and wait to see the result.
- Rubbing alcohol (isopropyl alcohol, 70% or lower) is a common option. Use it sparingly.
- Apply a tiny drop to a cotton swab, not a cloth.
- Dab-do not rub-at the very center of the stain. The goal is to break the ink’s bond, not wash the leather.
- Stop immediately and revert to conditioner if you see any color transfer to the swab or a change in the leather’s texture.
This is a last resort, not a first step. More often than not, you will achieve a significant fade with cleaner and patience, which is better than a clean but damaged spot.
The Faded Briefcase Line
I once worked on a vintage briefcase, a beautiful full-grain piece with a single, thin blue line on the flap. The owner said it was from a leaking pen twenty years prior. The stain was set, a faint but undeniable shadow.
We didn’t try to erase it. We used a leather cleaner over four sessions, each a week apart, followed by a rich conditioner. The line softened from a sharp mark to a gentle, blue-tinted shadow within the patina. In the end, it didn’t look like a stain. It looked like part of the briefcase’s history. Sometimes, success isn’t removal, but integration. Your goal is to preserve the leather first; perfect removal is often a distant second.
Your Toolkit: Step-by-Step Methods to Get Ink Out of Leather
Let’s get to work. I always start with the gentlest method and only move to stronger solutions if needed. This approach protects your leather’s finish and natural oils. Follow these steps in order.
Method 1: The Gentle Clean with Saddle Soap
This is my first move for any new mark on leather, especially light ink smudges. Saddle soap cleans and adds a bit of moisture, which is perfect for general care. I used this on Mason, my saddle, just last week for a grass stain and it worked beautifully.
Saddle soap works by lifting surface grime without harsh chemicals, making it a safe first defense for your leather. Its cleaning properties can vary across different leather types, and some leathers may react differently to saddle soap. Understanding these differences helps you tailor treatment to each material.
Here is how you do it:
- Dampen a soft, lint-free cloth with clean water. Wring it out so it’s only slightly damp.
- Swirl the cloth on the saddle soap to work up a rich, creamy lather.
- Gently work the lather onto the ink stain using small, circular motions. Do not scrub hard.
- Wipe away the lather and loosened ink with a separate clean, damp cloth.
- Let the leather air dry completely, away from direct heat or sun. This can take a few hours.
If the ink is still visible after drying, the stain has penetrated deeper. Move on to the next method.
Method 2: Using Rubbing Alcohol or High-Percentage Hand Sanitizer
For a ballpoint pen mark that won’t budge, this is often the answer. The alcohol breaks down the ink so you can lift it away. I keep a bottle in my kit for emergencies on items like Scout, my wallet.
Isopropyl alcohol (rubbing alcohol) is effective because it dissolves the oils in ink, but it will also dry out your leather’s natural oils.
Precision and follow-up care are everything here. Do not pour alcohol directly on the leather.
- Get a cotton swab and a bottle of 70% or higher isopropyl alcohol (or an alcohol-based hand sanitizer).
- Dip just the tip of the cotton swab into the alcohol. You want it moist, not dripping.
- Lightly dab the center of the ink stain. You will see the ink start to transfer to the swab.
- Use a clean part of the swab or a fresh one to continue dabbing. Switch to a clean, dry cloth to blot the area as you go.
- Stop as soon as the ink is gone. The area will look dry and possibly lighter.
- Condition the entire piece immediately after it dries. This replaces the lost oils.
A common mistake is rubbing, which spreads the dissolved ink. Always dab and blot.
Method 3: Commercial Leather Cleaners and Spot Removers
When a household remedy does not feel right, a product made for leather is your best friend. These cleaners are pH-balanced to clean without damaging the leather’s structure. I used a dedicated spot remover on June, my jacket, for an old oil spot with great success. Consider conditioning after cleaning to keep the finish intact. This helps with stain removal and restoring the jacket’s look over time.
You have two main types: combination cleaner/conditioners and potent spot treatment gels. For ink, a spot treatment is often stronger.
A dedicated leather cleaner is formulated to target stains while preserving the material’s integrity, which household cleaners are not designed to do.
- Always test the product on a hidden area first, like inside a seam or pocket flap.
- Follow the label instructions exactly. Some are applied with a brush, others with a cloth.
- Work the product into the stain gently, usually with a circular motion.
- Most require you to wipe off the residue with a clean cloth after a few minutes.
- Let the leather dry fully. Many products will require you to follow up with a separate conditioner.
Method 4: The Last Resort for Tough Stains
We only talk about this for a stubborn, set-in stain that has survived all other methods. This is for extreme cases, like an ink spill that sat for months. I have used this once, on a neglected bag, and it requires a very steady hand.
Using a solvent like acetone is a last resort because it strips everything, including the leather’s protective dyes and finishes, and can cause permanent dryness or discoloration.
If you must proceed, the rule is test, dilute, and be ready to repair.
- Test in a hidden area. If the color comes off on your cloth, stop immediately.
- Dilute acetone-free nail polish remover (which is still strong) with a little water. Use a 1:3 ratio of remover to water.
- Use a micro applicator, like a toothpick wrapped in cotton, to apply a tiny drop only to the stain.
- Blot instantly with a dry cloth. Condition the area heavily as soon as it’s dry.
This method can leave a bleached spot. Be prepared to use a leather dye to touch up the color afterward. If this sounds daunting, taking the item to a professional restorer is the wisest choice.
Can You Use Household Products Like Rubbing Alcohol or Nail Polish Remover?
You see the ink stain. You look at your medicine cabinet. It’s tempting to grab what’s handy. I get it. Let’s compare your two most common options.
| Product | How It Works on Ink | The Primary Risk |
| Rubbing Alcohol (Isopropyl) | Acts as a solvent, breaking down the ink so you can blot it away. | Extremely drying. It strips the leather’s natural oils instantly. |
| Acetone (Nail Polish Remover) | A stronger solvent that dissolves ink quickly. | Can strip color and the protective topcoat right off the leather. |
Rubbing alcohol is the slightly safer choice of the two, but both are a gamble with your leather’s health.
The Real Risks You Need to See
These aren’t mild cleaners. Think of them more like emergency tools. The dangers are real and often permanent.
- Drying & Cracking: Both alcohol and acetone evaporate fast, taking moisture with them. Leather left bone-dry becomes brittle and prone to cracking, just like skin with no lotion.
- Discoloration: You might remove the ink stain only to find a lighter, bleached spot underneath. This is common with dyed leathers. The solvent removes some of the dye along with the ink.
- Finish Stripping: Many leathers have a protective polymer or wax topcoat. Acetone, especially, can melt this layer away. Your leather will lose its sheen and stain resistance, feeling rough and exposed.
A Simple Rule of Thumb
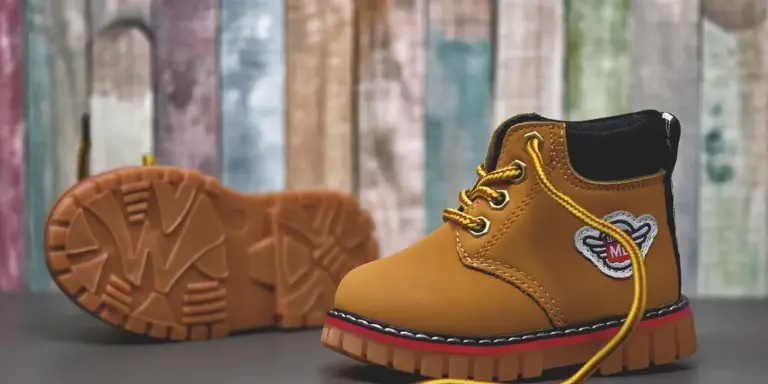
If you must try a household solvent, follow this one rule. Only use it on a durable, thick, and heavily finished leather. Think of work boots, a sturdy belt, or a bag with a glossy coating.
Never use these on suede, nubuck, aniline, or any soft, unfinished leather like my jacket June-the damage will be immediate and severe.
And always, always condition the area immediately after the spot is clean and dry. This is non-negotiable.
Your Questions, Answered Simply
Is rubbing alcohol safe for leather?
Not really, no. It is a last-resort option for specific stains on specific leathers. It is not a general cleaner. Safety depends entirely on your leather’s type and finish.
Will nail polish remover ruin leather?
It very likely will. I see more disasters from acetone than successes. It ruins the finish and color so quickly that I never recommend it. The risk far outweighs the reward.
What should I do instead?
Start gentle and move up. Here is my practical order of operations for an ink stain:
- Blot. Use a clean, dry microfiber cloth immediately on fresh ink. Do not rub.
- Clean. Use a dedicated, pH-balanced leather cleaner with a soft brush.
- Specialize. Use a leather-safe stain remover or ink eraser stick designed for the material.
- The Last Resort. Only then, on a finished leather, would I consider a tiny drop of rubbing alcohol on a cotton swab, tested in a hidden area first.
Conditioning is the final, critical step in any of these processes to restore lost moisture.
How Do You Get Ink Out of White or Light-Colored Leather?
Ink on pale leather is a special kind of worry. The goal isn’t just to remove the mark, but to do it without leaving a shadow or a water ring that’s more noticeable than the original stain. Think of it like cleaning a white cotton shirt versus a dark one-every little change shows. For faux leather, the same careful approach matters: you want to lift the ink without damaging the finish or texture.
Your first move should always be the gentlest one possible, working from the outside of the stain inward.
Start with a Gentle Clean
For a fresh ink mark, a simple, mild cleaner is often your best bet. I reach for a quality saddle soap or a cleaner made specifically for white leather. For pen marks, including ballpoint ink stains on leather, there are reliable removal methods worth trying. We’ll outline those steps next.
- Dampen a very soft, white cloth (an old t-shirt works) with cool water. Wring it out until it’s just damp, not wet.
- Apply a tiny amount of saddle soap or white leather cleaner to the cloth and work it into a light lather.
- Gently dab and make small circles at the very edge of the ink stain. Do not scrub. The goal is to lift, not drive it deeper.
- Use a second damp cloth to wipe away the soapy residue. Let the area air dry completely, away from direct heat.
On my own lighter bags, this method has lifted ballpoint smudges without a trace. The key is patience. Let the leather dry fully to see the true result before you do anything else.
The Critical Patch Test
With light leather, testing is non-negotiable. A solvent that seems fine on dark brown veg-tan can bleach or yellow a creamy white finish.
- Find a hidden spot: the back of a strap, inside a pocket flap, or under a collar.
- Apply a drop of your chosen cleaner with a cotton swab.
- Wait for it to dry completely. Check for any color change, stiffness, or texture difference.
If you skip this step, you risk trading a small ink spot for a large, permanent discoloration. I learned this early on with a vintage cream-colored bag; the “clean” spot was brighter than the rest, which was its own problem.
Avoiding the Solvent Shadow
Strong solvents like alcohol or acetone are risky on dark leather and can be disastrous on light leather. They don’t just clean; they can strip the topcoat and dyes, leaving a faded, often greasy-looking shadow where the stain was.
If a gentle cleaner doesn’t work, your next step should be a neutral, pH-balanced leather cleaning spray designed for delicate finishes. Even then, apply it sparingly to a cloth first, never directly onto the stain.
Remember, on white or pastel leather, a faint, uniform shadow from a gentle partial cleaning is often better than a stark, clean circle from an aggressive one. Sometimes, blending is the goal, not total eradication.
After the Stain is Gone: Conditioning and Protecting Your Leather
Cleaning, especially with a solvent or soap, lifts more than just the stain. It often pulls out the leather’s natural oils and waxes, too. Your leather might feel dry, stiff, or look a bit dull after the ink is gone. This is normal, and applying a conditioner right after cleaning is not a suggestion-it’s a required step to keep the leather healthy. Think of it like washing your hands; you need to moisturize afterward to prevent them from cracking.
How to Choose and Apply a Leather Conditioner
Not all conditioners are the same. For a job like this, you want a product that will replenish oils without altering the color or texture too much.
- Look for a pH-balanced, neutral leather conditioner or cream. These are gentle and designed for maintenance. Avoid heavy oils or waxes meant for work boots on a delicate bag or jacket.
- Always test the conditioner on a hidden area first, like an inside seam. Wait for it to dry completely to check for any darkening or texture change.
Applying it is simple, but patience is key.
- Use a soft, clean cloth (an old t-shirt works perfectly). Apply a small, dime-sized amount of conditioner to the cloth.
- Rub the conditioner into the leather using gentle, circular motions. Focus on the entire cleaned area, not just the stain spot, to ensure even absorption.
- Let the conditioner soak in. This usually takes one to two hours. The leather should drink it up and feel softer, not greasy.
- If the leather still feels dry to the touch, you can apply a second, very light coat. More is not always better; over-conditioning can clog the leather’s pores and make it feel tacky.
Guarding Against Future Spills
Once your leather is clean and nourished, you can add a light layer of defense. A protector spray creates an invisible barrier.
Choose a protector spray that is breathable and silicone-free. Silicone can create a plastic-like film that prevents the leather from aging naturally. Shake the can well and hold it about six inches from the surface. Spray in a steady, sweeping motion across the entire item in a well-ventilated area. Let it dry fully, which normally takes an hour or so.
This barrier won’t make your leather bulletproof, but it will give you precious extra seconds to wipe away a spill before it becomes a stain. It’s especially useful for items like bags or light-colored jackets.
The Long-Term View: Building Resilience
This entire process-spot cleaning, conditioning, protecting-is the cornerstone of long-term leather care. It’s how you build a piece’s history and character without letting accidents define it.
My jacket, June, has a small, barely visible ink spot on the cuff from a leaky pen years ago. I followed these same steps. Now, that spot is just part of her story. The regular conditioning after occasional cleanings has kept the calfskin supple. The light protector spray helps her shrug off rain. Consistent, correct care after a problem is what transforms a damaged item into a resilient companion. Your leather can handle life’s little mishaps and look better for it, as long as you give it what it needs to recover.
Keeping Your Leather Safe from Future Ink Accidents
Let’s be honest. Once you’ve dealt with an ink stain, you don’t want to do it again. The best fix is always prevention. Think of it as building good habits for your leather, just like you would for a favorite piece of clothing or a well-used tool.
Smart, Simple Storage Habits
Most ink stains happen because a pen was simply in the wrong place. A few small changes make a big difference.
- Store pens separately. Never leave a loose pen in a leather bag pocket or on a leather chair arm. Use a dedicated pencil case or the zippered compartment of a bag liner.
- Use pen loops and cases. For planners, journals, or briefcases, a simple leather pen loop or a rigid pen sleeve is a worthy investment. It keeps the tip contained.
- Consider furniture covers. If your home office chair or favorite reading nook is leather, a simple throw or a washable slipcover adds a layer of protection during messy projects. I do this with my own desk chair, where June (my leather jacket) sometimes rests.
The goal isn’t to wrap your leather in plastic, but to create sensible barriers between it and potential messes.
Your Best Defense: A Consistent Care Routine
A clean, conditioned leather surface is more resistant to stains. Dirt and dryness give ink something to grab onto and soak into.
Here is a simple routine I follow for pieces like Mason my saddle and Scout my wallet:
- Gentle Cleaning (Every 1-2 Months): Use a soft, dry brush or cloth to remove surface dust. For light soil, a slightly damp cloth with a drop of pH-neutral leather cleaner is perfect. Wipe, then dry immediately.
- Conditioning (Every 3-6 Months): Apply a small amount of leather conditioner or cream with your fingertips. Rub it in using small circles until the leather no longer feels thirsty. Let it absorb fully, usually for an hour or overnight.
- Buffing (After Conditioning): Use a clean, soft cloth to buff away any excess product. This brings up the shine and ensures no sticky residue is left behind to attract dirt.
This regular care keeps the leather’s natural oils replenished, making it more supple and less absorbent, much like keeping your skin hydrated. A conditioned surface gives you those precious extra moments to blot a spill before it sets.
The Core Philosophy: Know Your Leather, Act Fast
All this advice rests on two simple ideas. First, know what you own. Full-grain leather like my wallet Scout will handle a damp cloth differently than a delicate aniline-dyed sofa. Always test your cleaner on a hidden seam first.
Second, speed is everything. Whether it’s ink, coffee, or rain, your first move should always be the same: gently blot, don’t rub, with a clean, absorbent cloth. Rubbing grinds the stain in. Blotting lifts it out.
I’ve saved June from more than one mishap this way. A quick blot, followed by a spot clean once I got home, left no trace. When you understand your leather’s personality and respond calmly and quickly, you can handle almost anything. Your leather is durable, and with a little mindful care, it will stay looking good for years.
Common Questions
What is the best method for removing ink from leather?
Always start with the gentlest method first: blot fresh stains, then try a damp cloth or pH-balanced leather cleaner. Only consider a solvent like rubbing alcohol as a last resort, and always condition the leather immediately afterward to repair the dryness. This ties into whether these methods preserve the finish on leather boots and shoes. The aim is to clean effectively without dulling or damaging the surface finish.
Is it safe to use rubbing alcohol on leather to remove ink?
It is not safe as a general rule; it’s a last-ditch option for specific, stubborn stains on durable, finished leather only. It will severely dry out the hide, so immediate and thorough conditioning is non-negotiable to prevent cracking.
What household products can remove ink from leather?
Beyond a clean, damp microfiber cloth, a tiny amount of mild saddle soap or castile soap is often the safest household option. I strongly advise against reaching for harsh chemicals like acetone; they often cause more damage than the original stain.
How do you treat an old, set-in ink stain on leather?
Patience is your primary tool. Use a dedicated leather cleaner in multiple, gentle applications over several days, letting the leather dry completely between tries. Understand that perfect removal is rare; the goal is often to fade and blend the stain into the leather’s patina.
Final Thoughts on Ink and Leather
The most reliable way to lift an ink stain is with a gentle hand and patience. Start with the mildest cleaner, like a leather-safe soap, and only move to stronger options like alcohol if you must.
Caring for a stained item is part of its story, a chance to practice the skills that make leather last for generations. My own pieces, like Mason’s saddle or June’s jacket, are proof that with careful maintenance, leather only grows more character with time.
Citations and Authoritative Sources
- r/AutoDetailing on Reddit: Pen ink on leather. What’s the best way to remove safely?
- Ink on Leather? Don’t Panic – Here’s How to Fix It – Vintage Leather Sydney
- What product can I use to remove ink from real leather?
- Cleaning pen off of leather? | Auto Geek Online Auto Detailing Forum
- Removing ink stains – How Do I Do That? – Leatherworker.net
Harriet is a avid collector of leather goods such as purses, bags, seat covers, etc and has an extensive background in leather care, recovery, stain removal and restoration. She has worked for a number of years perfecting her leather care techniques and knows the ins and outs of restoring all kinds and types of leather products. With her first hand knowledge in leather care, you can not go wrong listening to her advice.
Removing Ink and Marker