How Do I Fix Scuff Marks on Black or Faux Suede Shoes?
Published on: February 7, 2026 | Last Updated: February 7, 2026
Written By: Harriet Nicholson
Hello Tannery Talk. Seeing a fresh scuff on your favorite suede boots or shoes is disheartening, but take a breath-most marks are reversible with the right care.
This guide walks you through the process, from assessing the material, gently cleaning the area, to applying targeted repairs for both genuine and faux suede.
I have conditioned and repaired leather goods like my jacket June for years, so these methods come from direct workshop experience.
What Makes Suede and Faux Suede Different to Clean?
Real suede is the underside of an animal hide, sanded to create a soft, fuzzy surface called a nap. Faux suede is usually made from woven polyester fibers that mimic that feel.
Think of it this way: cleaning real suede is like gently brushing a piece of velvet. You’re lifting and realigning delicate fibers. Cleaning faux suede is more like cleaning a sturdy synthetic felt; you can be a bit more direct, but harsh chemicals can melt or stain the plastic fibers.
Using the wrong method is the fastest way to ruin your shoes. A strong cleaner for faux suede can strip color from real suede. A wet brush perfect for real suede might leave a permanent water stain on a faux pair.
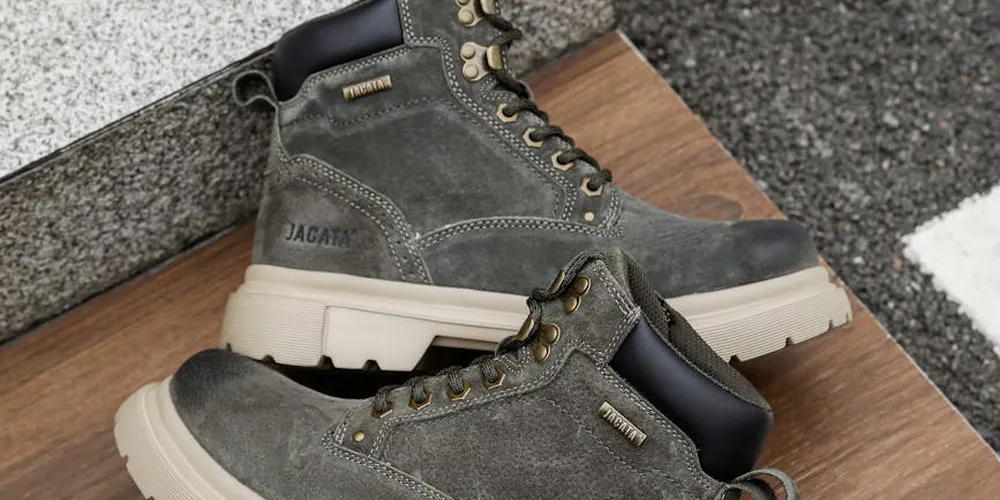
Black suede shows scuffs clearly because a light-colored scuff disrupts the uniform, dark nap. It’s not a stain, it’s the fibers being pressed down or discolored, which creates a visible contrast.
Your First Response: Quick Fixes for Fresh Scuffs
When you first see a scuff, act quickly but calmly. Your goal is to lift the nap back up without grinding dirt deeper.
- Let the shoe dry completely if it’s damp.
- Take a dedicated dry suede brush or a clean, soft toothbrush. Gently brush the area around the scuff to remove loose dirt.
- Brush directly over the scuff using short, light strokes. Always brush in one direction, following the natural grain of the nap.
- For persistent marks, use a suede eraser. Rub it lightly back and forth over the scuff, then brush away the eraser crumbs.
Pressing too hard flattens the nap permanently, creating a shiny, bald spot that’s harder to fix than the original scuff. For many fresh, superficial marks, this process answers the question of whether you can get scuffs out of suede.
Gentle Tools You Already Own
You don’t always need a specialty product. A clean, white pencil eraser (the kind for art, not the gritty kind on a pencil) works wonders on both real and faux suede. Use the same light, dabbing motion you would on paper.
A dry, clean microfiber cloth can also be effective. Drape it over your finger, dampen it with just your breath to create slight moisture, and gently buff the scuffed area. The microfiber lifts the nap.
The brushing technique is everything. Imagine you are petting a cat from head to tail, always smoothing the fur in the direction it naturally lies. Going against the grain will rough up the fibers and make the spot look more obvious. For my own leather pieces, like the gentle creases on June, my jacket, I use this same principle; I work with the leather’s character, never against it.
How Do You Remove Scuff Marks from Black Suede?
I see this question a lot. How do you remove scuff marks from suede shoes? It feels different than dealing with a smooth leather boot like Mason. With suede, you’re working with a raised, delicate nap. A scuff is often just dirt pressed flat into those fibers, not always a true scratch. Sometimes, however, you do need to repair scratch damage on suede footwear.
You need the right tools and a gentle hand. Gather a good suede brush, a cleaner made for suede or nubuck, and a few soft, clean cloths. Always work in a well ventilated area. Before you use any product, test it on a hidden spot, like inside the tongue or behind a strap. This tells you if the color or texture will change.
Step-by-Step Deep Clean for Black Suede
This process cleans the entire panel, which helps the scuff mark blend away. Follow these steps in order.
- Dry brush the entire shoe. Use your suede brush and brush in one direction to lift the nap and loosen surface dirt. Be firm but don’t scrub.
- Apply a small amount of suede cleaner to a damp cloth. Do not pour cleaner directly onto the shoe. Gently rub the affected area and the surrounding suede using small, circular motions.
- For a stubborn scuff, you can use a suede eraser. Gently rub the mark until the eraser crumbs darken with lifted grime. Brush the area clean with your suede brush afterward.
- Let the shoe air dry completely, away from direct heat or sunlight. This can take several hours. Never use a hair dryer.
- Restore the texture. Once completely dry, use your suede brush again. Brush vigorously in one direction to reactivate and lift the nap. This brings back the soft, uniform feel.
The final brush stroke is what brings the suede back to life, erasing the cleaned spot and blending it seamlessly with the rest of the material.
Addressing Color Loss or Light Scratches
Sometimes a deep scuff can wear away the dye, leaving a pale, fuzzy spot. For minor color loss, a black suede color refresher spray can work wonders. It’s like using a colored dry shampoo for your shoes.
Hold the spray 6 to 8 inches away and apply a light, even mist over the faded area and a bit beyond it. The goal is to blend the repair, not create a dark patch that looks obviously newer than the rest of the shoe. Let it dry, then brush gently with your suede brush to re blend the color into the existing nap. For deeper scratches that have cut the fibers, a professional repair might be the most durable option.
The Best Method for Suede Scuff Repair
First, take a breath. A scuff on suede looks worse than it is. This method works for minor scrapes where the suede’s fuzzy surface, called the nap, is just pushed down or roughed up, not for cuts where the material is torn. You are not removing material, you are gently coaxing it back into place.
The process is simple. You will need a suede brush with brass or nylon bristles, a suede eraser, and a clean, dry cloth.
- Brush First. Always start by gently brushing the entire scuffed area with your suede brush. Use light, one-way strokes following the natural direction of the nap. You will often see the mark start to fade immediately as the fibers stand back up.
- Use the Eraser. For any remaining dark marks or stubborn spots, use the suede eraser. Rub it back and forth over the mark gently, like you’re erasing a pencil line. Do not press hard.
- Brush Again. After erasing, brush the area thoroughly again to remove any eraser debris and lift the nap.
- For Loose Fibers. If the scuff left a few fibers completely detached and sticking up, do not pull them. Use a tiny drop of a specialist suede or fabric glue on the tip of a toothpick. Touch it only to the base of the loose fiber to reattach it, then press it down gently with your finger.
I fixed a nearly identical scuff on the cuff of my calfskin jacket, June, last winter. It was a pale mark from brushing against a rough wall. The eraser took care of the color transfer, and a few minutes of careful brushing made it completely disappear. Patience is your best tool here.
Fixing the Nap and Blending the Repair
After the physical mark is gone, the repair area might still look a little flat or different from the surrounding suede. This is normal. The goal now is to rebuild the texture so the repaired spot blends in seamlessly with the rest of the material.
Start with your fingers. Gently rub the repaired area in a circular motion. This helps stimulate the fibers and can bring the nap back up. Follow this with your suede brush, again using consistent, one-way strokes across the entire panel of the shoe, not just the spot. This evens everything out. This is part of the do repair, restore, maintain routine for suede nubuck footwear like shoes, boots, and sneakers.
For a final, professional touch, you can use steam. Hold the shoe a safe distance (about 6-8 inches) from the spout of a boiling kettle or the nozzle of a garment steamer. Let the light steam pass over the suede for just two or three seconds. Do not saturate it.
Immediately after steaming, while the fibers are warm and relaxed, brush the nap vigorously in one direction. The heat and moisture help the fibers remember their original position. Let the shoe dry completely away from direct heat. Once dry, give it one more light brush. The difference this makes is subtle but complete. The spot will have the same soft, uniform feel as the rest of your shoe.
A Special Guide for Faux Suede Footwear Repair

Faux suede needs a different approach than its natural counterpart. Real suede has a raised nap you can gently brush back to life. Faux suede is a flat, synthetic surface. Your goal with faux suede isn’t to revive a nap, but to carefully clean the surface without damaging the fabric coating.
So, how do you repair scuffed faux suede footwear? You start by understanding the scuff. On black faux suede, a scuff is often just a surface mark from another material, like a light-colored stone or concrete. It’s a transfer sitting on top of the fibers, not a removal of the color. This is different from natural suede, where color can be worn off or damaged.
You must avoid harsh chemicals like acetone, strong alcohol, or aggressive stain removers. These can melt the synthetic fibers or strip the color, creating a permanent stain worse than the original scuff.
Your best tool is almost always the simplest. For most scuffs, I start here.
- Take a clean, white cloth and dampen it with cool water. Wring it out completely so it’s only slightly moist.
- Gently dab at the scuff mark. Do not rub hard. The goal is to loosen the foreign material.
- If dabbing with water doesn’t work, add a drop of mild, clear dish soap to the damp cloth. Work it into a light lather.
- Dab the soaped cloth on the scuff with very light, circular motions.
- Use a second cloth dampened with clean water to dab away any soap residue.
- Let the area air dry completely, away from direct heat.
This method lifts away the transferred material. For my own gear, like a faux suede bag I use in the workshop, this fixes nine out of ten marks. Patience and a light touch are everything.
When a Scuff Becomes a Scrape on Faux Material
A deep scrape is different. It means the surface coating of the faux material has been torn or peeled away, revealing a different color or texture underneath. This is more challenging.
For a minor scrape where the fabric is lifted but not fully detached, a clear-drying fabric glue can help. Apply a tiny drop under the flap with a toothpick. Press it down firmly with a clean cloth and place a light weight, like a book, on top for several hours. This is a cosmetic fix to prevent further tearing, not a perfect restoration.
The hard truth is that deep damage on faux suede is often harder to fix permanently than on real leather. Real leather can be sanded, dyed, and refinished. Faux materials lack that depth. A colored shoe polish or marker labeled for synthetic fabrics can camouflage a small, flat scrape, but the texture will never perfectly match the original napped surface. Even attempts to dye faux suede shoes can be tricky and may not yield the desired results.
My jacket June has real leather scuffs I can blend into her patina. A deep scrape on faux suede won’t develop a patina; it will just be a flaw. Your best strategy is prevention and gentle, immediate cleaning of surface marks before they have a chance to become permanent damage.
Dealing with Stubborn Scuffs and Deep Damage
Sometimes, a simple brush isn’t enough. You’ve brushed and brushed, but that pale, rough mark just stares back at you. This happens when dirt gets ground deep into the nap or the suede fibers are physically crushed. It’s frustrating, but don’t get discouraged. This is where a more targeted approach comes in.
If you’re figuring out how to clean scuff marks off suede boots that won’t budge, you need to move from cleaning the surface to cleaning the fibers themselves. This naturally leads you to consider which methods and products are best for cleaning suede shoes and boots. Getting the right approach can make all the difference in restoring texture and color.
For a true suede, a specialized suede cleaner is your best first tool. These are formulated to lift grime without soaking or matting the delicate nap. For lighter-colored suede or faux materials, a very mild white vinegar solution (one part vinegar to three parts water) can help break down stubborn residue. Test this on an inside seam first, especially when cleaning fake suede to avoid damage.
Avoid common household chemicals like dish soap, rubbing alcohol, or magic erasers at all costs. They can strip dyes, leave harsh residues, or permanently flatten the suede’s texture, creating a shiny, irreparable spot—especially when trying to remove stains from suede.
What to Try When Basic Cleaning Fails
Patience is your most important tool here. One aggressive scrub can do more harm than ten gentle passes. Think of it like coaxing the fibers back up, not forcing them.
- Apply your cleaner. Use a clean, soft cloth dampened (not soaked) with your chosen suede cleaner or vinegar solution. Gently dab and roll over the scuffed area. Let it sit for just a minute to work.
- Gentle scraping. This step requires a light touch. Use the dull edge of a butter knife or a suede eraser’s rubber side. Hold the blade almost flat against the leather and gently “flick” across the scuff to lift the crusted material. You’re not scratching or cutting.
- Final, restorative brushing. Let the area dry completely. Then, using your suede brush or a clean toothbrush, brush the nap vigorously in one direction, then the other. This helps the fibers stand back up and blend the cleaned spot with the surrounding area.
You may need to repeat this sequence two or three times, letting the material dry fully between attempts. The goal is gradual improvement through multiple light applications, not instant perfection from one aggressive attempt. Even a deep scuff can often be reduced to a faint shadow that blends in with the character of the boot.
Knowing When It’s Time to Call a Professional
Sometimes, the damage goes beyond a simple scuff. I’ve learned, sometimes the hard way, when my skills reach their limit. Trying to fix certain problems yourself can make them worse—especially on delicate materials like suede or faux suede. For your suede or faux suede shoes, here are the signs that mean you should hand them over to an expert.
Clear Signs You Need a Cobbler
Look for these three types of damage. They are your signal to stop.
- Large Tears or Cuts: A small surface scratch is one thing. A gash that goes all the way through the material is different. If you can see the lining or your sock through the hole, the structure is compromised. A home repair will often look bulky and feel stiff.
- Deep Color Loss: A light scuff just ruffles the fibers. Deep color loss means the dye itself has been stripped away from a concentrated area, leaving a pale, chalky spot. This is common on black suede from a hard scrape against concrete. If a gentle suede eraser and brush do nothing, the color is gone.
- Damaged Backing Material: This is critical for faux suede and some thinner real suedes. If the fuzzy top layer is peeling or bubbling away from the fabric or leather backing underneath, your adhesive or glue has failed. Fixing this requires separating, cleaning, and re-gluing with professional-grade adhesives for a flexible, lasting bond.
My rule is simple: if the damage changes the shoe’s structure or removes its color, a professional should look at it. I once tried to glue a separated seam on an old bag and used too much adhesive. It seeped through and created a permanent, stiff stain. I won’t make that mistake again.
What a Professional Cobbler Can Do
A good cobbler has tools and materials we don’t keep at home. Their work can make a damaged shoe look and feel whole again.
- Re-dyeing and Re-coloring: They can mix an exact match for your shoe’s color and apply it evenly across the entire panel. This is like repainting a wall instead of just touching up a chip. The result is seamless, especially important with black, which can show slight variations in shade.
- Patching and Reinforcing: For tears, they can skillfully insert a patch behind the damage. They’ll use a material that matches the flexibility and weight of your shoe. The repair is nearly invisible from the outside and prevents the tear from growing.
- Re-weaving Suede Nap: For bald spots on real suede, some specialists can actually re-texture the area to blend new fibers with the old. This is a detailed art that restores the look and handfeel of the material.
Think of it like my friend June, the leather jacket. She had a lining tear I couldn’t neatly fix. A tailor did it perfectly, preserving the jacket for years more wear. A cobbler offers the same preservation for your shoes.
Seeking Help is a Smart Choice
There’s no shame in taking a beloved pair to a professional. In fact, it shows you care about making them last. A quality repair protects your investment and keeps shoes you love out of the landfill.
Bringing a damaged item to a specialist is an act of care, not a failure. It often costs less than replacing the item with something of similar quality. You also keep the unique comfort and character a broken-in shoe provides. Your favorite footwear deserves the best chance at a long life, and sometimes the best help is from someone with the right bench, the right tools, and years of practice.
Keeping Your Shoes Safe: Scuff Prevention Tips
Fixing a scuff feels good, but stopping the next one is smarter. This is where simple care becomes easy maintenance. Think of it like this: a little effort now saves a lot of repair later.
The single best thing you can do is apply a suede protector spray before you ever step outside. This invisible shield repels water and dirt, so scuffs and stains don’t get a deep hold. Here is how to do it right.
- Take your clean, dry shoes outside or to a very well-ventilated area.
- Hold the spray can about 6 inches from the shoe and apply a light, even coat. Cover the entire surface.
- Let the shoes dry completely for the time listed on the product label, usually 10 to 15 minutes.
- Apply a second light coat for thorough protection. Let them dry again before wearing.
Good habits are just as important as products. A few small changes make a big difference.
- Always use a shoe horn. This keeps the heel counter from collapsing and getting scuffed from the inside.
- Rotate your shoes. Don’t wear the same pair two days in a row. This gives the material time to breathe and recover its shape.
- Store them properly. Use shoe trees for real suede to maintain form, and keep them in a dust bag when not in use.
Prevention is what gives leather goods their long life, just like with my daily wallet, Scout. I don’t wait for the edges to fray before I give it a touch of conditioner. A quick brush and a spot check every few weeks keep it looking sharp. Your shoes deserve the same thoughtful attention.
Protection for Faux vs. Real Suede
You can use the same protector spray on both real and high-quality faux suede. The key is to always check the product label first. A label that says “for suede and nubuck” is usually safe for faux materials too, but a quick test on a hidden spot never hurts.
Regular, gentle brushing is the secret to keeping that soft, textured look on any suede. Use a soft-bristled suede brush or a clean, dry toothbrush. Brush in one direction to lift the nap, the tiny fibers on the surface. Do this every few wears. It prevents dirt from getting ground in and stops the nap from matting down, which is how scuffs start to form.
If the nap does get matted from a light scuff or spill, don’t panic. Let the area dry fully, then use that soft brush to gently work the fibers upright again. Sometimes, that’s all it takes to make a mark disappear.
Quick Answers
What’s the single most important rule for daily suede care?
Brush them. Use a dry suede brush after every few wears to lift the nap and prevent dirt from becoming a permanent scuff. This routine maintenance is more effective than any repair.
How can I tell if a mark is a scuff or a stain?
A scuff is typically a surface disruption that changes how light reflects off the nap, often looking lighter. A stain has penetrated or altered the color of the fibers themselves. Always try dry brushing first; if the mark remains, it may be a stain requiring a different approach.
I’ve fixed the scuff, but the spot still looks flat. What now?
This is common. Use the “steam and brush” method: pass light steam from a kettle over the area from a safe distance, then immediately brush the nap vigorously in one direction as it dries. This re-energizes the fibers.
How do I stop scuffs from coming back so easily?
Apply a quality protector spray before the first wear and reapply it every few months. More importantly, store shoes properly with shoe trees and in a dust bag to prevent surface abrasion while not in use.
When should I absolutely stop trying to fix a scuff myself?
Stop if you see a cut through the material, significant peeling of the surface layer, or if the mark worsens after two careful cleaning attempts. Continuing risks permanent damage that a professional can no longer fix cleanly.
Final Thoughts on Suede and Faux Suede Repair
Always address scuffs gently and immediately with the right tools, like a suede brush or a specialized eraser. This approach preserves the material’s texture and often makes a full recovery simple.
Good care extends the life of your footwear, honoring the craft and reducing waste. I find that practicing these skills fosters a deeper appreciation for the leather goods we choose to keep and use.
Research and Related Sources
- r/AskACobbler on Reddit: Fixing deep scuffs in suede shoes
- 4 Ways to Fix Suede Shoes – wikiHow
- How to repair your scuffed suede heels
- How to Clean Suede Shoes: Subduing Stubborn Scuffs and Stains – FootFitter
- Simple Ways to Repair Torn Suede Shoes: 11 Steps (with Pictures)
Harriet is a avid collector of leather goods such as purses, bags, seat covers, etc and has an extensive background in leather care, recovery, stain removal and restoration. She has worked for a number of years perfecting her leather care techniques and knows the ins and outs of restoring all kinds and types of leather products. With her first hand knowledge in leather care, you can not go wrong listening to her advice.
Fixing Surface Scratches and Scuffs