How Do You Apply Protective Spray to Suede Shoes and Boots Correctly?
Published on: November 17, 2026 | Last Updated: November 17, 2026
Written By: Harriet Nicholson
Hello Tannery Talk. That soft suede feels great but worries about rain or spills can ruin the joy. Let’s fix that together.
We will cover picking the right spray, cleaning your suede first, applying thin, even layers, and drying them properly.
I have conditioned and shielded suede pieces like my jacket June for years, so I know these methods work.
Gear Up and Get Ready: Preparing Your Suede
Applying protector spray to suede is like giving it a raincoat. But if the coat is dirty underneath, it will not work well. Preparation ensures the spray bonds to the leather, not to dust or grime. I think of it like brushing off my English saddle, Mason, before I condition it. A clean surface is everything.
How Do You Clean Suede Before Spraying?
Start with a dry suede brush. Gently brush the entire surface in one direction to lift the nap and knock loose any dirt. For stubborn spots, use a suede eraser. Rub it lightly over the mark, then brush the area again to restore the texture. Different stains require different approaches, so you’ll see how to remove common suede stains in the next steps. Oil-based, ink, and water-based marks each need a slightly different treatment. Your goal is to have the suede looking uniform and feeling clean to the touch before you even think about spray.
What Spray Should You Use? (And Does Faux Suede Need It?)
You should only use a protector made specifically for suede and nubuck. Look for a water-based, breathable formula. These sprays repel water and stains without clogging the delicate nap. For synthetic or faux suede boots, you can use a spray, but do so with caution. Test it first, as some materials may react differently. The real question of what to use always comes back to the label: if it does not say “for suede,” do not use it.
The Crucial First Step: Testing on a Hidden Spot
Never skip this. Find a hidden area like the inside of the tongue, the heel, or under a strap. Spray a small amount and let it dry completely. Check for any darkening or discoloration. If the color changes, you know that spray is not right for your shoes. This step is non-negotiable. It is the same care I take when preparing Scout, my veg-tan wallet, for its first coat of wax-always test in an unseen corner.
The Spray Session: Applying Protector Like a Pro
Now for the main event. A good spray job is about control and patience. Rushing this can lead to blotches or a stiff feel. Follow these steps for a perfect, protective finish.
Setting Up Your Spray Area for Success
Work in a well-ventilated space, like a garage with the door open or outdoors. Lay down newspaper or a drop cloth. Keep the area away from heat sources and open flames. Have your clean shoes and the spray can ready. This simple setup prevents mess and keeps you safe from fumes.
How to Spray Suede Shoes Evenly (Without Blotches)
Hold the can about 6 to 8 inches from the shoe. Use slow, steady sweeps across the surface. Keep the can moving. Do not focus on one spot or you will soak the suede. You should hear a consistent hiss, not a sputter. Pay special attention to seams and edges-these areas need light, even coverage too. Imagine you are painting with a very fine mist. The suede should look lightly damp, not wet and dark.
Patience Pays: Drying Time Between Coats
After the first coat, let the shoes dry. Touch them gently after 10 to 15 minutes. They should feel dry to the touch, not tacky. If they are still cool or damp, give them more time. Proper drying lets the protector settle into the nap. Rushing this step is a common mistake that can trap moisture and cause damage. The same care applies to drying a leather jacket and leather shoes. Avoid heat or direct sun to prevent damage.
How Many Coats of Spray Do You Really Need?
For most suede, two thin coats are perfect. The first coat creates a base layer. The second coat, applied after full drying, builds complete coverage. More coats are not better. Too much spray can make the leather feel stiff and look plasticy. Think of it like seasoning a cast-iron skillet-a couple of light, even layers work best for long-term protection.
The Waiting Game: Drying and First Wear
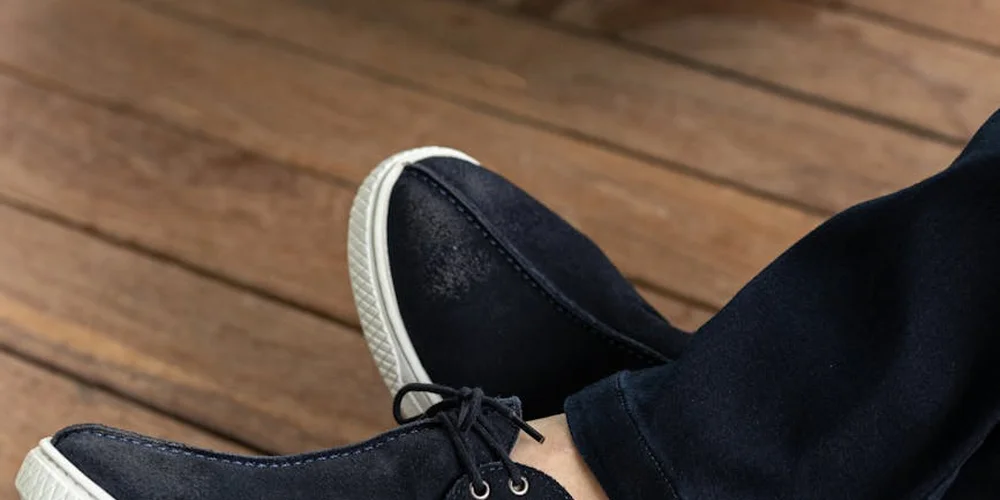
You have sprayed your shoes. The hardest part is over, but your work is not done yet. Now, you wait.
Patience here is what separates a good job from a great one, and it protects your investment in the leather. Rushing this step can lead to a tacky feel or even trap moisture, which suede does not like.
When Are Your Shoes Truly Dry and Ready?
Touch is your best tool. After the initial 15-30 minute surface dry, the protector is still curing underneath. Full protection needs about 24 hours in a warm, dry room with good air flow.
Here is how you check. Place the back of your hand against the suede. It should feel completely dry, like fabric, with no cool or damp sensation. Press lightly with a fingertip. If it feels at all tacky or sticky, it is not ready. Give it more time.
I treat this like I treat Mason, my English saddle, after a heavy conditioning. If I put him back to work before the oil is fully absorbed, the leather can stiffen in the wrong places. The same principle applies to your suede.
The First Walk: What to Expect After Protection
When you finally slip them on, do not be alarmed if they feel slightly different. The suede nap might feel a little stiffer or less fuzzy at first. This is normal. The spray has created a microscopic barrier, and that changes the handfeel slightly.
This change does not mean the spray failed; it means the active ingredients are in place and working. The feeling will soften again with wear as the material flexes. Your first walk should be a dry one. Avoid puddles and rain for this inaugural outing to let the protection settle in fully.
Keeping Them Protected: Maintenance and Common Questions
Protection is not a one-time event. It is a routine. With the right care, your suede shoes or boots can handle daily life gracefully for years.
How to Clean Suede Shoes After They’re Protected
Regular cleaning is simple and prevents deep stains. After wearing, always give them a gentle brush with a suede brush or a clean, dry toothbrush. This lifts the nap and removes surface dust. For tougher marks, learn how to remove stains from suede shoes, boots, jackets, and furniture. With the right technique, you can keep all suede items looking their best.
For spots or salt marks, act quickly. Use a slightly damp, soft cloth (like microfiber) to dab the area. For tougher marks, a dedicated suede eraser works well, especially when removing water stains from suede. Never soak the leather. Let the area dry completely, then brush the nap back up.
This gentle, consistent cleaning is the best way to maintain the look and effectiveness of the protective barrier.
How Often Should You Reapply Suede Spray?
There is no single calendar date. Reapplication depends entirely on how you use your shoes. Think of it like feeding a plant, you do it when it needs it.
- For boots you wear daily in all weather, consider a fresh coat every 2-3 months.
- For occasional shoes worn mostly indoors, once or twice a year may be enough.
- A simple test: sprinkle a few drops of water on an inconspicuous spot. If the water beads up, your protection is still good. If it soaks in quickly, it is time for a new coat.
Does Protective Spray Darken or Alter Suede Color?
This is the most common worry I hear. When the spray is wet, it will darken the suede. This can be dramatic on light tan or grey suede. Do not panic.
As the spray dries and cures completely, the color will return almost entirely to its original shade. It is exactly like how my wallet, Scout, darkens when I condition it but returns to his rich brown after a day. Always test on a small, hidden area first to be sure with your specific pair.
Special Cases: Should I Spray My Suede Birkenstocks or Boots?
Yes, absolutely. The type of item does not change the material’s needs. Suede is suede. Your Birkenstock sandals face spills, dust, and sweat. Your boots face rain, salt, and mud. They all need a shield.
Apply the spray the same way. For Birkenstocks, you can remove the footbed to spray the base if it is suede, but protect the cork edges from overspray. For boots, pay extra attention to the seam where the upper meets the sole, a common spot for water seepage.
Caring for suede this way, with patience and regular maintenance, is how you extend its life significantly. It is a responsible choice that honors the material and the craft behind your shoes.
Common Questions
Does the spray make suede completely waterproof?
No, it makes it water-resistant. The spray creates a barrier that causes liquids to bead up and roll off, giving you time to wipe them away. It is a shield, not a submersion suit, so avoid wearing suede in heavy, sustained rain.
How do I properly test the spray on a hidden spot?
Spray a light coat on the inside of a strap or the heel’s backstay and let it dry fully for 24 hours. Check not just for color change, but also for any unwanted stiffness or texture alteration before treating the entire shoe. This prep helps set you up for doing restore and revive faded color suede shoes. For the next steps, follow a color-restoration routine tailored to suede.
My shoes got soaked after spraying. What now?
Let them air dry at room temperature, away from direct heat, with shoe trees or crumpled paper inside to hold their shape. Once completely dry, brush the nap gently and reapply a fresh coat of protector, as the original barrier has likely been compromised.
Can I use the spray on suede with other finishes, like two-tone or waxed suede?
Proceed with extreme caution and always test first. Sprays can alter the appearance of waxed, oiled, or finished sections unpredictably. When in doubt, consult the shoe manufacturer’s care instructions for tailored advice.
How should I clean a spill off my protected suede?
Blot-never rub-the excess liquid immediately with a clean, absorbent cloth. For residue, use a slightly damp microfiber cloth to dab gently. Allow the area to air dry completely, then brush the nap to restore the texture.
Keeping Your Suede Safe for the Long Run
The most important step is always a clean, dry surface. A good protective spray applied in thin, even layers will do more for your shoes than any amount applied to dirt or moisture. Cleaning your leather shoes properly is essential for preserving their finish.
Caring for your leather is a responsible practice. Using the right products thoughtfully extends the life of your goods, honoring the material and your own skill in maintaining it. Exploring the best general methods for caring and treating leather items can guide your approach. Understanding these general methods helps you choose appropriate products for different leathers and finishes.
Industry References
- 7 Best Suede Protectors – Sprays For Any Footwear in 2025 | FashionBeans
- How to use Scotchgard™ Suede & Nubuck Protector
- Suede Protector Spray | Foot Locker
Harriet is a avid collector of leather goods such as purses, bags, seat covers, etc and has an extensive background in leather care, recovery, stain removal and restoration. She has worked for a number of years perfecting her leather care techniques and knows the ins and outs of restoring all kinds and types of leather products. With her first hand knowledge in leather care, you can not go wrong listening to her advice.
Suede and Nubuck Care