How Have Leatherworking Tools Evolved? A Practical Guide to History and Use
Published on: November 2, 2026 | Last Updated: November 2, 2026
Written By: Harriet Nicholson
Hello Tannery Talk. If you’ve ever picked up a modern skiving knife and felt curious about the bone awls of the past, you’re in the right place.
We will walk through the simple tools that started it all, how innovation changed the craft, and the best ways to use and care for your tools today.
My hands have shaped leather for years, using everything from antique pricking irons to modern sewing machines on pieces like June and Scout.
What Tools Did the Earliest Leather Workers Use?
Picture someone thousands of years ago, holding a sharpened bone. That was their awl. Their scraper was a shaped piece of flint. These were the first leather tools.
They used stone scrapers to clean hides. You can almost hear the gritty, persistent sound of stone dragging across skin, removing every bit of flesh and hair. It was hard, physical work. A bone awl was then pushed through the hide to make holes for stitching with sinew or plant fibers. The pull of the thread through that rough hole required real force.
Today, I pick up a polished steel awl to fix a torn strap on Mason, my old saddle. The motion is the same-pierce, guide, pull-but the effort is so much less. The direct line from that bone tool to my steel one is clear: we’ve always needed a way to make a clean hole without tearing the leather. The evolution is in precision and ease, not in the fundamental task.
The Foundational Toolkit: From Hides to Hardware
The ancient toolkit was small but did everything needed to turn a raw hide into usable leather. Caring for leather starts with preparing it correctly, and these tools laid the groundwork.
- Awls: For piercing stitching holes. A dull awl would tear the hide, a mistake early workers fixed by patiently resharpening their bone points.
- Blunt Knives: Used for scraping and thinning hides. The goal was an even thickness, a principle that still guides how we skive leather today for repairs.
- Smooth Stones: The original burnishers. Rubbing a smooth stone along a cut edge would compress and seal it, just like I use a wooden burnisher on Scout’s wallet edges to make them durable and neat.
This process of clean, scrape, and seal is the heart of leather preparation. Getting it right meant the difference between a garment that lasted a season and one that could endure for years. There’s a science behind waterproofing treatments and how they bond with leather and resist wear. Understanding this helps you gauge how long those treatments will last and when to reapply.
How Did the Industrial Revolution Change Leather Tools?
The 18th and 19th centuries turned leatherworking on its head. Tools were no longer one-of-a-kind items from a local blacksmith. Factories began making them by the thousand, identical and affordable.
Key inventions changed everything. Standardized steel punches replaced hand-drilled holes. Early stitching machines, though clunky, could sew a straight seam faster than any human hand. This shift meant that for the first time, repairing a pair of boots or a harness could be done with predictable, repeatable results. Consistency in tools led to consistency in care.
Think of it like this: before, cobbling a shoe was an art. Every stitch was placed by feel. After, it became more of a science. Factory-produced soles and standardized nails meant repairs were quicker and more uniform. This reliability trickled down to everyday maintenance. You could now buy a bottle of conditioner and a brush knowing they would work the same way every time you cared for your gear.
Tools That Built a Modern Craft
This era gave us the reliable tools that fill my workshop today. They took the guesswork out of leather care and repair.
- Adjustable Hole Punches: A single tool with a rotating head for different hole sizes. This let someone precisely match existing holes on a worn bag or belt during a repair, preventing weak spots from misalignment.
- Metal-Edged Rulers and Precision Knives: For cutting patches or trimming damaged edges. A straight, clean cut is vital when preparing leather for a patch on a jacket like June. A wobbly cut from a dull knife is a common mistake; the fix is always a sharp blade.
These tools made tasks methodical. When I condition a dry piece, I first assess it with my eyes and hands-a practice as old as leather itself. Then I use a metal ruler to mark a clean area for testing, ensuring my care doesn’t create new problems. The best practice born from this era is simple: use the right, well-made tool for the job. It saves the leather and your effort. That same care extends to choosing the best products and methods for cleaning leather. These considerations help me decide what to use next.
What Does a Modern Leather Care Toolkit Include?
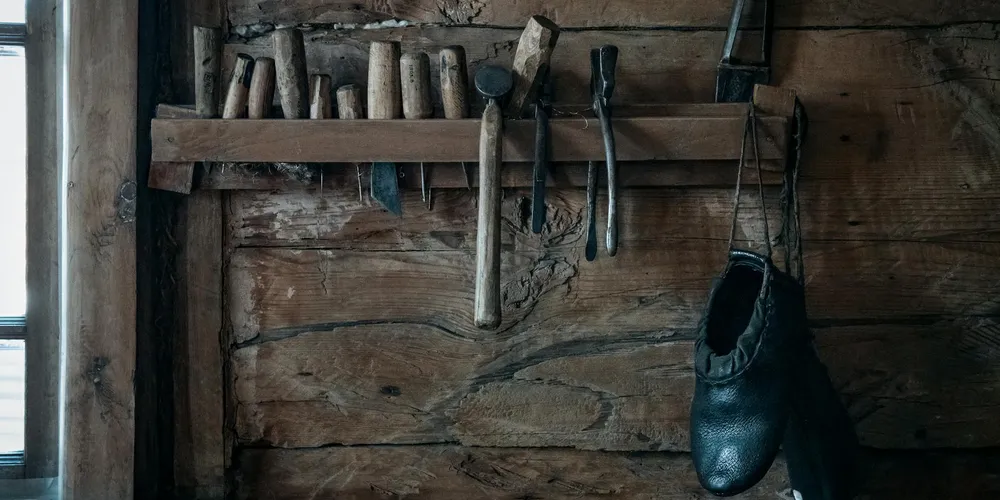
You do not need a workshop full of gear. A modern care kit is about precision and gentle power. It lets you perform minor repairs and serious maintenance at home. Think of it as first aid for your leather goods, from a scuffed boot to a loose bag strap.
The goal is to preserve your item’s life with tools that are kinder and more precise than their historical ancestors. Where a medieval cobbler might use a simple awl heated in a fire, we have adjustable rotary punches. Where thread was laboriously waxed by hand, we have electric waxers that coat it evenly in seconds. This evolution means cleaner, stronger, and more reversible repairs for your cherished pieces.
Tools for Cutting and Shaping
Trimming a frayed edge or reshaping a stiff leather tab requires a clean cut. A ragged cut stresses the leather and looks messy.
Your main choice is between a utility knife and a head knife. A utility knife with replaceable blades is your go to for straight lines and precision trimming, like cutting a new leather insole. A head knife, with its curved blade, is for sweeping, controlled cuts, perfect for shaping a rounded patch for June’s jacket.
For most care tasks, a sharp utility knife is the safest and most versatile choice, letting you apply even pressure without tearing the grain.
Tools for Stitching and Repair
When a seam gives way on a bag or a belt loop comes loose, hand stitching is the most trustworthy fix. The core tools have ancient roots, but modern versions are refined.
Start with saddler’s needles. They are blunt, designed to push between existing thread holes rather than pierce new ones and damage the leather. For making new holes, pricking irons create a neat, angled slot for the needle to follow, leading to straight, professional looking stitches.
Always use a palm guard. This simple leather pad protects your hand when pushing the needle through tough leather. Trying to stitch without one is a sure way to get a sore, punctured palm.
This simple trio-blunt needle, pricking iron, palm guard-follows the same principle as ancient awls but gives you control for repairs that are strong and nearly invisible.
Tools for Finishing and Beauty
After a repair or a deep clean, these tools restore the finished look. They work on the edges and surface.
An edge beveler shaves off the sharp, 90 degree corner of a piece of leather. This prevents the edge from curling and makes it ready for slicking. An edge slicker, often just a wooden tool with a groove, is rubbed briskly along the bevelled edge with a little water. The friction melts the leather fibres, creating a smooth, rounded, and sealed edge.
For the surface, a set of soft and medium bristle brushes is key. A soft horsehair brush lifts dust after conditioning. A stiffer brush can work conditioner into the grain or buff wax polish to a gentle shine on a pair of boots.
These finishing steps transform a repair from merely functional to beautifully integrated, protecting the leather from future wear.
How Do You Care for Your Leatherworking Tools?
Dull, rusty tools damage leather. They tear fibres, create jagged holes, and make every job harder. Caring for your tools is the first step in caring for your leather. I keep my awls sharp because a clean hole in Mason’s saddle strap is easier for the thread to follow, creating a longer lasting repair.
Well maintained tools are not a luxury, they are a requirement for any repair that respects the material.
Keeping Blades and Edges Sharp
A sharp blade cuts leather. A dull blade crushes and rips it. Honing your edges is a simple, regular task.
For knives and bevelers, a two stage process works best. First, use a fine grit sharpening stone. Hold the blade at a consistent angle, around 20 degrees, and push it across the stone in a smooth motion. Do this 5 10 times per side.
Next, use a leather strop with a polishing compound. This is just a strip of leather. Drag the blade backwards along the strop another 10 times per side. This aligns the microscopic edge of the metal, making it razor sharp.
A minute of honing on a strop after each use will keep your blade ready for the next clean cut.
Preventing Rust and Corrosion
The oils and moisture from your hands and the leather itself will make tools rust. Prevention is straightforward.
After every use, wipe down all metal parts with a dry, soft cloth. Then, take a separate cloth with two drops of light machine oil or mineral oil and give the metal a very light wipe. You are aiming for an invisible film, not a greasy coating.
Pay special attention to pricking irons, needle eyes, and any pliers. This routine takes less than a minute but adds years to your tool’s life.
Storing Tools Properly
Never throw tools loose into a drawer. They will bang together, dulling edges and causing damage.
Keep them in a dry place. A simple tool roll, a wall mounted rack, or a toolbox with compartments works perfectly. It protects the tools from dust and moisture, and it protects you from reaching for a sharp blade blindly.
For cutting tools, use blade guards or sheaths. For punches and awls, a block of wood with drilled holes keeps their points safe. When your tools have a dedicated home, you can find the right one instantly and start your repair with confidence.
Organized storage is the final, critical step in a tool care routine that ensures every interaction with your leather is careful and precise. Proper storage for leather goods and shoes helps prevent damage and extends their lifespan. A thoughtful setup keeps leather breathable and protected from moisture and crushing.
What Are the Best Practices for Using Tools on Leather Goods?
Your tools are not just for building. They are for mending and preserving. Using them on a finished piece is a different kind of work. It requires a gentler touch and an eye for detail. You are a caretaker, not a constructor.
Start with a clean, stable surface. Secure your leather item, but don’t clamp it so tightly you leave marks. For my wallet, Scout, I just lay it on a flat piece of cork. That gives me enough resistance to work safely. These basics connect to the broader question of the best general methods for caring and treating leather items. In the next steps, we’ll outline how to choose and apply those methods.
Punches for Adding Straps or Hardware
When you need to add a new key ring or replace a worn strap, a rotary punch or drive punch is your best friend.
- Mark your spot with a fine awl or scratch awl. This small dent guides the punch and stops it from skating across the surface.
- Place the punch straight up and down. A tilted punch makes an oval, sloppy hole that wears out faster.
- Use a firm, steady pressure with your hand, or a light tap with a mallet. The most common mistake is hitting the punch too hard, which can tear the leather’s fibers and create a weak point. Think of pushing through butter, not hammering a nail.
Knives for Trimming Frayed Edges
A sharp, small utility knife or a dedicated head knife is perfect for this. A dull blade will crush and tear the leather, making the fray worse.
- Lay the frayed edge flat. For a wallet flap, I might slip a thin piece of cardboard inside to protect the lining.
- Use a metal ruler as a guide. Never cut freehand on something you care about.
- Draw the blade towards you in one smooth, light pass. Let the sharpness do the work. You are shaving off the fuzzy bits, not sawing through the leather.
After trimming, a light sanding with fine-grit paper (400 grit or higher) followed by a dab of gum tragacanth and a quick burnish will seal the fresh edge.
Slickers for Burnishing and Sealing
A wood or canvas slicker is for finishing. It creates heat and friction to polish and seal the leather’s edge, giving it a smooth, professional look and protecting it from moisture.
Dampen the edge slightly with water or a dedicated edge slicking solution. Press the slicker firmly against the edge and pull it towards you quickly. Repeat. You’ll feel the leather warm up and see it become glossy; that’s the collagen fibers melting and fusing together. The goal is consistent pressure, not brute force. For a small item like Scout, I do this by hand. For the thick edges on Mason the saddle, I might use a powered burnisher. Finishing and sealing the edges truly makes a difference in the final look.
Testing on Scrap Leather First
This is the single most important rule. Every piece of leather reacts differently. The same punch on two different hides can give you two different sized holes. Always, always test first.
Keep a box of leather scraps from old projects. Before you trim June’s jacket cuff, make a few practice cuts on a piece of similar calfskin. Before you punch a new hole in a belt, test the punch on a scrap end. This tells you how much force to use, how the leather will compress, and what the finished result will look like. It takes two minutes and saves you from a permanent mistake.
Matching the Tool to the Leather Type
Your approach changes completely based on the leather. It’s the difference between trimming a delicate silk blouse and a heavy canvas jacket.
For soft, thin leathers like the calfskin on my jacket June, use lighter tools and less pressure. A sharp craft knife is better than a heavy utility blade. A hand-held rotary punch is safer than a drive punch and mallet. The leather gives easily.
For thick, dense leathers like the saddle leather on Mason, you need robust tools. A sturdy head knife, drive punches, and a solid mallet are necessary. The leather resists, so your tools must be sharp and your movements confident. Using a light tool on heavy leather will just frustrate you and likely slip, causing damage.
Creating a Regular Maintenance Ritual
Set aside a little time each month. It’s not just for the leather goods, but for the tools that care for them.
- Wipe down your tools with a soft, dry cloth to remove dust and any leather residue.
- Check knife blades for sharpness. A quick pass on a honing steel keeps them ready.
- Inspect your leather items. Feel for new dry spots, look for loose threads or stitching. A five-minute check lets you spot a small issue before it becomes a big repair.
- Wipe the item with a dry, soft brush or cloth. This removes surface grit that acts like sandpaper in the grain.
This ritual keeps you connected to your belongings. You notice the way Scout’s edges are just starting to lighten from wear, or how the creases in June’s sleeves are settling in. You catch things. That’s the heart of good care.
Common Questions
Has tool evolution actually made my repairs last longer?
Yes, fundamentally. Modern precision tools like pricking irons create cleaner holes than old awls, and sharp factory-made blades make cleaner cuts. This reduces stress on the leather fibers, making your repairs stronger and less likely to fail at the edges. These principles apply to repairing a wide range of leather items. They point to the most effective methods for fixing general leather goods, where tool choice and technique matter most.
What’s the one modern tool I shouldn’t try to replace with a “budget” version?
A proper skiving knife. A cheap, dull blade will tear and gouge the leather instead of cleanly shaving it. Invest in a good one, keep it sharp on a strop, and you’ll preserve the integrity of every piece you thin for a patch or repair.
I inherited some old tools. Are they still usable, or just for display?
Test them. Clean off surface rust with fine steel wool and oil, then hone the edge. If an old head knife takes a sharp edge, it’s a fantastic tool. The steel in old tools is often excellent, but their usability depends entirely on their current condition, not their age.
When should I absolutely NOT try a repair at home?
When the damage is structural or requires re-lasting, like a completely detached shoe sole or a cracked leather frame on a suitcase. These repairs need specialized equipment and pressure only a professional shop has. Attempting it yourself often causes irreversible damage.
Honoring the Craft with Your Tools
The most valuable tool in your kit is knowledge of its purpose and past. Start with a few trusted implements, care for them diligently, and let your skill grow with each project.
Good leather stewardship begins with ethical sourcing and continues with a commitment to maintenance. This naturally raises questions about whether ethical, sustainable sourcing of leather hides influences material properties. Exploring these connections can help guide decisions in both craftsmanship and maintenance. Always seek to improve your techniques, ensuring the leather goods you make or mend are built to last.
Industry References
- The History of Leathercraft – River City Leather
- The History and Heritage of Leather Crafting
- The History of Leather Craft
Harriet is a avid collector of leather goods such as purses, bags, seat covers, etc and has an extensive background in leather care, recovery, stain removal and restoration. She has worked for a number of years perfecting her leather care techniques and knows the ins and outs of restoring all kinds and types of leather products. With her first hand knowledge in leather care, you can not go wrong listening to her advice.
Fixing Hardware and Stitching