How Did Waterproofing Leather Evolve From Greasing to Nano-Tech?
Published on: October 6, 2026 | Last Updated: October 6, 2026
Written By: Harriet Nicholson
Hello Tannery Talk, you might polish a boot or treat a jacket and wonder, how did we get from smearing on bear fat to invisible protective sprays?
Let’s walk through the timeline together, covering the ancient use of animal fats and waxes, the chemical innovations of the last century, and the rise of today’s nano-technology coatings.
I’ve conditioned pieces like Mason my saddle with historic recipes and tested modern sealants on Scout my wallet, giving me a practical view of this entire story.
Why Did Our Ancestors Need to Waterproof Leather?
Take a piece of dry, unfinished leather and put a drop of water on it. Watch it vanish in a second. The leather soaks it up like a dry sponge. This is the core problem they faced: leather that’s prone to drying out and cracking.
When leather gets soaked and then dries, it doesn’t just go back to normal. It becomes stiff, like cardboard. This makes a boot unbearable to walk in or a saddle painful to sit on. If it stays damp, a sour, earthy smell starts. That’s the beginning of rot, which slowly eats away the fibers until the leather falls apart.
Imagine a Roman soldier on a week-long march in the rain. His sandals and pack straps had to survive. Picture a sailor hauling wet ropes on a wooden deck; his gloves and tool sheaths couldn’t stiffen up. For a traveler, a waterskin was useless if it leaked. Their daily survival depended on keeping leather supple and functional.
Every single waterproofing method in history, from bear grease to modern sprays, started as a direct answer to this one relentless problem: stopping water from turning a vital material into a brittle, ruined mess.
What Were the Original Leather Waterproofing Recipes?
Our ancestors worked with what they had. Their recipes came straight from the land, the hunt, and the hive. The goal was simple: fill the leather’s pores with a hydrophobic substance to block water.
The most common method was rubbing in animal fats. Think bear fat, tallow from beef, or lard from pigs. People would warm the fat in their hands until it became soft and then work it deeply into the leather. It was a messy, hands-on job that left gear smelling distinctly of the animal and the campfire.
Beeswax was a premium option. You’d melt it gently and brush it on, or rub a solid block firmly over the leather, letting friction do the warming. As it cooled, it created a slightly tacky, protective shell. Plant oils, like linseed or tung oil, were also popular. Leather would be soaked or heavily brushed with these oils, which would slowly harden inside it.
How Cultures Adapted the Basics
- Roman Military Sandals: They often used a mix of animal fat and beeswax. This created a hard, protective coating on the soles and straps that could repel mud and water on long roads.
- Mongolian Saddles (like Mason): In the dry, cold steppes, fat-based treatments were key. They kept the leather from drying out and cracking in the wind, while also providing some moisture resistance for the rider.
- Nordic Seafaring Gear: Sailors favored fish oils and whale blubber. These oils were plentiful and created a very water-repellent, though pungent, finish on boots and clothing.
The Traditional Greasing Process: A Step-by-Step Look
Let’s say you had a leather wallet like Scout, three hundred years ago. Here’s how you might have greased it.
- Clean: Wipe off any surface dirt with a dry cloth. No fancy cleaners existed.
- Warm the Fat: Take a small lump of solid tallow or lard. Hold it in your hands or place it near a hearth to soften it completely. It should be spreadable, not liquid.
- Apply and Massage: Using your fingers, rub the fat into every inch of the leather. Press firmly, working it into the grain. You’d spend several minutes on this, ensuring it wasn’t just sitting on top.
- Let it Feast: Leave the piece in a warm, dry place for a full day, sometimes two. The leather slowly absorbs the fat.
- Buff Off Excess: After it soaked in, you’d buff the surface vigorously with a cloth. This removed any leftover grease that could attract dust.
This process fundamentally changed the leather, making it darker, heavier, and giving it a distinct, organic scent that faded to a deep, earthy smell over years.
These old methods had side effects we still see today. Animal fats could eventually turn rancid, damaging the fibers. Oils and waxes always darkened the leather significantly, sometimes creating a rich patina we now cherish. The smell, while strong at first, mellowed into the character of a well-used item. Every scratch and scuff told the story of the care it received, a history written in grease and wax.
When Did Waterproofing Stop Being Just Kitchen Stuff?
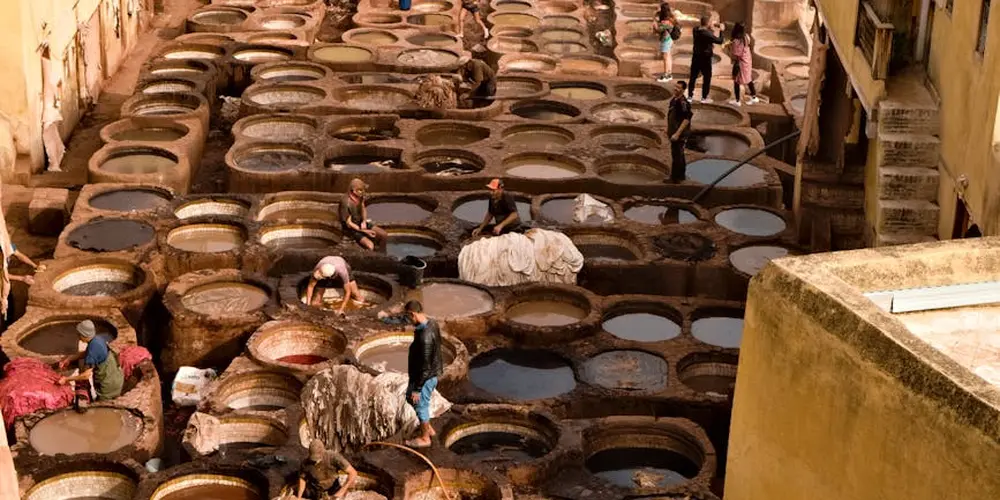
For centuries, waterproofing leather was a chore done at home or by the local saddler. You used what you had: animal fats, beeswax, and plant oils. Industrialization changed everything. Factories needed faster, more uniform ways to protect leather goods being made by the thousands. Today, designers weigh natural oils against synthetic sealants for leather waterproofing, balancing breathability with lasting protection. The choice between them shapes modern care and performance.
The shift moved from natural blends to precise chemical treatments. These new formulas promised consistent results and longer shelf lives. The goal was no longer just to repel water, but to do it efficiently for mass-produced items like work boots, car seats, and luggage.
A Timeline of Chemical Advances
Here is a simple look at how factory-made treatments evolved.
| Era | Development | What It Did |
|---|---|---|
| Late 1800s / Early 1900s | Petroleum-based Oils & Greases | Factories began refining and selling these. They were cheaper and more plentiful than animal tallow but could darken leather significantly. |
| Mid-1900s | Silicone Sprays | These created a quick, water-beading surface. Very convenient, but the coating could peel and sometimes made leather feel plasticky. |
| Late 1900s | Acrylic & Polyurethane Finishes | These formed a durable, clear plastic-like layer on top of the leather. Great for heavy-duty protection, but they often completely sealed the surface, stopping it from breathing. |
Why Some Formulas Stayed and Others Left
User experience decided what lasted. A product that worked well but ruined the feel of the leather was often abandoned by everyday users.
Old formulas like pure beeswax blends stayed popular because they worked with the leather, not just on it. They soaked in, nourished the fibers, and developed a beautiful, water-resistant patina over time. My saddle, Mason, has lived on a diet of wax and oil for eight years. It’s not perfectly waterproof, but it’s healthy, supple, and repels rain long enough for a ride.
Many heavy acrylic finishes vanished from general care because they were too extreme. They made leather stiff, could crack, and trapped moisture underneath, leading to rot. People missed the natural handfeel. Silicone sprays are still around for quick fixes on low-value items, but most care specialists avoid them for fine leathers. They can build up, attract dirt, and make future conditioning or repair very difficult.
How Does Modern Nano-Technology Actually Work on Leather?
Modern nano-technology is like giving your leather an invisible, breathable raincoat. Imagine water beading up and rolling off a freshly waxed car. That’s the effect, but the coating is measured in billionths of a meter-so thin you can’t see or feel it.
These products use microscopic particles that bond directly to the leather’s individual fibers. They don’t sit on top in a thick layer. Think of it as a microscopic shield around each thread in the leather’s fabric. Unlike conditioners, these products create a physical barrier.
The key difference from old waxes is that this shield is porous to air but not to liquid water. This lets moisture vapor from your skin or the air pass through, so the leather can still “breathe.” Understanding the science behind these treatments clarifies how they deliver ongoing protection. Their longevity depends on how the formulation bonds to the leather and withstands wear over time. Older waxes and oils waterproof by filling the gaps between fibers, which can sometimes slow this breathability.
Traditional vs. Modern: A Side-by-Side Look
Let’s compare approaches using my old saddle, Mason, as the example.
- Traditional Wax/Oil (Mason’s Routine):
- I clean the leather with a damp cloth.
- I melt a blend of beeswax and conditioner into the leather with my hands, warming it to help it soak deep into the fibers.
- I buff off the excess after 24 hours. This adds weight and darkens the leather slightly, building a rich, deep patina. Water beads for a while, but a long soak will eventually wet it. The leather stays supremely supple.
- Modern Nano-Coating:
- You must start with impeccably clean, dry leather. Any dirt sealed under the coating is trapped forever.
- You apply a light, even mist from a spray bottle, often from about 6 inches away.
- You let it dry completely, usually for 12-24 hours. It forms a chemical bond at the fiber level.
The result is a surface that causes water to bead dramatically and dry quickly, without changing the leather’s color or texture. For a vintage piece like Mason, I prefer the traditional wax method-it’s part of his history. But for a light-colored bag or a suede jacket you want to keep looking new, a nano-coating is a remarkable tool. It offers strong protection without altering the leather’s character, which is something the old factory finishes could never do. Regular cleaning, conditioning, and protection help prevent cracking and stains on a leather bag over time. A simple routine keeps the piece looking its best without sacrificing its character.
How Do You Pick a Waterproofing Method for Your Gear Now?
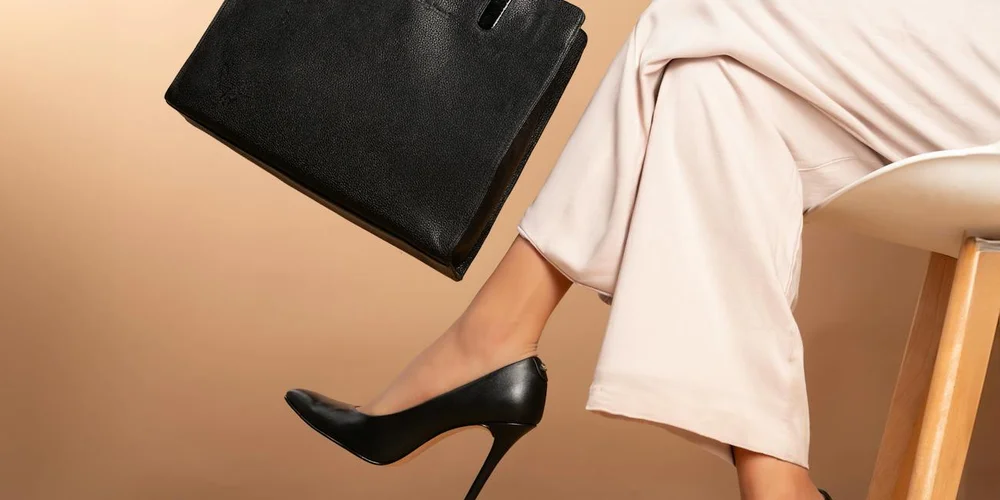
With so many options from history and the present day, picking one can feel overwhelming. The best choice depends entirely on the leather itself and the job you need it to do. For durable belts and watch straps, look for full-grain or top-grain leathers that wear well. The right type balances strength, texture, and how it ages.
Think of it like choosing a coat. You wouldn’t wear a heavy waxed canvas jacket to a formal dinner, and you wouldn’t wear a thin rain shell to chop wood in a blizzard. Leather care works the same way.
A Direct Comparison: Matching Method to Mission
Here’s a simple guide to match the waterproofing method to your leather’s purpose.
| Method | Best For | Considerations |
| Greases & Heavy Oils (e.g., Mink Oil, Dubbin) | Work boots, hiking boots, field saddles, tool holsters. | Significantly darkens leather; can feel slightly tacky; needs reapplication after heavy exposure. |
| Conditioner-Based Sprays & Creams | Everyday bags, jackets, furniture, dress shoes. | Easy to apply; minimal color change; offers good protection for urban use and light rain. |
| Nano-Technology & Silicone Sprays | Delicate or finished leathers (like smooth calfskin), suede, nubuck, light-colored items. | Leaves an invisible barrier on top; preserves original color and handfeel; not a conditioner. |
My old English saddle, Mason, gets a good greasing every fall before the wet season. It darkens his chestnut color, but that deep nourishment is what keeps him supple after years in the damp. My jacket June, on the other hand, gets a lighter conditioner spray. It protects her from coffee spills and commutes without altering her soft finish.
The One-Minute Water Test: What’s Already on Your Leather?
Before you add anything new, you need to know what’s already there. A finish or old conditioner can repel new products.
Find an inconspicuous spot, like the back of a strap or inside fold of a bag.
- Make sure the leather is clean and dry.
- Using a spoon or dropper, place a few drops of clean water on the spot.
- Watch what happens for 60 seconds.
- The water beads up and sits on top: Your leather already has a water-resistant finish or sealant (like a nano-coating or silicone). You’ll need to clean this off thoroughly with a specialized leather cleaner before most new products can penetrate.
- The water soaks in quickly and darkens the spot: The leather is unfinished or thirsty. It’s ready to accept oils, greases, or conditioners.
- The water soaks in slowly: This is common. The leather has some natural resistance or light conditioning but will still benefit from protection.
This simple test saves you time and product. It tells you if you need to clean first or if your leather is ready for a fresh layer of care.
Maintenance Tips: Blending Old Wisdom with New Science
Caring for leather isn’t a one-time event. It’s a rhythm, and the schedule depends on what you use.
For oiled or greased items (like Mason the saddle): Reapply when the leather looks dry or pale, or after it’s been thoroughly soaked. You’ll feel the difference. The leather loses its suppleness. A heavy oil might be needed once or twice a year with regular brushing in between. Make sure to use the right oil for conditioning leather to keep it soft and prevent cracking.
For items with a nano-sealant or spray coating (like a delicate bag): These surface barriers wear off with friction and time. Reapply when water stops beading up on the surface. This could be every few months for a frequently used item. Remember, these are not conditioners. Sometimes it only needs a conditioner for nourishment, and other times a waterproofing spray is what it really needs. We’ll explore those choices—leather conditioner vs waterproofing spray—in the next steps. You must clean the leather and apply a conditioner first if it needs nourishment, let it dry completely, and then apply the waterproofing spray as the final step.
A common mistake is piling spray on top of spray without cleaning. This creates a gummy, ineffective layer that traps dirt.
Why Your Boot Needs History and Your Bag Needs Tomorrow
The history of waterproofing guides us to the right choice. A rugged boot is like the leather tents and rigging of old. It needs the penetrating, nourishing power of grease-it’s armor that becomes part of the material itself.
A fine leather bag or a light-colored suede shoe is different. Its primary job isn’t to survive a storm, but to look good and resist daily life. Here, modern nano-technology is perfect. It’s the invisible umbrella that protects the delicate finish and original color that historical methods would alter.
My wallet Scout gets a tiny dab of conditioner every year to keep the veg-tan leather from drying out, but I don’t slather it in grease. That would ruin its compact shape and clean look. The right method honors the leather’s purpose.
Look at your gear. Is it a workhorse or a showpiece? Does it need deep nourishment or a light, invisible shield? Your answer tells you which chapter of history to use for its care.
Common Questions
How often should I really be waterproofing my leather goods?
There’s no universal schedule-it depends on use and exposure. For a heavily used work boot, check and treat it monthly; for a dress shoe worn occasionally, once a season may suffice.
Can I mix old greasing methods with new nano-tech sprays?
Never apply a nano-sealant over a grease or oil; the spray cannot bond to a saturated surface. Always use a penetrating conditioner or grease first, let it fully absorb and dry, then apply the nano-coating as a final top layer if you need extreme water beading.
Does nano-technology damage or change the leather over time?
A proper nano-coating itself doesn’t damage leather, as it bonds without clogging pores. The risk is neglecting conditioning; remember, these sprays protect but do not nourish, so the leather underneath can still dry out.
What’s the one mistake everyone makes when trying to waterproof at home?
They apply product to dirty leather. Any sealant will lock in grime, accelerating wear. Always clean thoroughly with a proper leather cleaner and let it dry completely before any treatment.
Your Leather’s Waterproofing Legacy
The best waterproofing method for your leather depends entirely on what it is and what you ask it to do. A heavy work boot thrives on the old-school protection of oils and waxes, while a sleek bag might need a modern, breathable spray to stay looking its best. That same care applies to jackets, boots, and shoes, where proper waterproofing guards against rain and moisture.
Good care means respecting the material-avoid harsh chemicals, treat only when needed, and choose products from brands committed to responsible practices. By learning these methods, you become part of the story, ensuring your trusted pieces like Mason or June are prepared for many more years of adventure.
Deep Dive: Further Reading
- The Art of Waterproofing Leather: A Comprehensive Guide – Tandy Leather, Inc.
- r/Leatherworking on Reddit: Leather waterproofing
- Waterproofing leather – www.leather-dictionary.com – The Leather Dictionary
- How to Waterproof Leather in 4 Steps | Buffalo Jackson
- Otter Wax Boot Wax | Heavy-Duty Leather Waterproofing Treatment
Harriet is a avid collector of leather goods such as purses, bags, seat covers, etc and has an extensive background in leather care, recovery, stain removal and restoration. She has worked for a number of years perfecting her leather care techniques and knows the ins and outs of restoring all kinds and types of leather products. With her first hand knowledge in leather care, you can not go wrong listening to her advice.
Waterproofing Leather (Sprays vs. Waxes)