How Do You Clean and Protect Leather Car Seats from Sun Damage, Spills, and Wear?
Published on: September 13, 2026 | Last Updated: September 13, 2026
Written By: Harriet Nicholson
Hello Tannery Talk. Seeing your leather seats fade in the sun or stress over a new spill is a familiar worry, and I’m here to help.
We will cover gentle cleaning for daily grime, shielding leather from UV rays, tackling spills before they set, and simple habits to reduce wear.
With years spent conditioning and restoring leather from heavy-use saddles to soft jackets, I offer advice tested on my own well-loved gear.
Your Car’s Leather is Not Like Mason’s Saddle
My saddle, Mason, has seen eight years of rain and ride. His chestnut hide drinks in oil and shows every scratch as part of his story. Your car seats are built for a different life.
Most automotive leather is coated. Think of it like a raincoat. It has a clear, protective top layer that seals the leather beneath. Raw leathers, like Mason’s or a suede jacket, are more like a cotton shirt. They absorb everything.
This coating gives your seats a smooth, uniform feel and makes them highly resistant to immediate spills. But that top layer is not invincible. Heat from the sun, friction from sliding in and out, and time itself can cause the coating to wear thin. When that happens, the leather underneath can dry out, stiffen, and crack. To address this, I prevent and protect my leather car seats from cracking and drying out by conditioning regularly and shielding from sun. The result is leather that stays supple longer and resists cracking.
The feel is different, too. Run your hand over it. It likely feels consistently smooth, with less of the natural grain variation you’d find on a jacket like June. It might even have a slight synthetic scent, a hint of the protective process.
As a craftsman who values material origins, I note that the automotive industry often uses leather from responsibly managed sources. It’s a durable material meant to last the life of your car, and caring for it properly honors that resource. Knowing the different types of soft leather and their key characteristics is essential for proper maintenance.
Gather Your Leather Care Kit First
You wouldn’t use dish soap to wash your hair. The same logic applies here. Using the wrong tools on coated leather can create a sticky, cloudy finish or even break down the protective layer.
Start by collecting these simple items:
- A soft-bristle brush (like a horsehair detailing brush)
- Three or four clean, color-safe microfiber cloths
- A small vacuum with a soft brush attachment
Now, for the products. You need just two, but choosing correctly is everything.
First, pick a cleaner formulated for coated or automotive leather. Look for the words “pH-balanced.” This means it’s gentle enough not to strip the protective coating but strong enough to lift dirt and body oils. It will usually be a light, neutral liquid. Using a neutral cleaner helps preserve the leather’s finish by maintaining the correct pH and reducing coating wear. Neutral formulas are recommended because they are gentler on coatings and less likely to cause discoloration over time.
Your second product is a protectant, and it must contain UV inhibitors. This is your shield against sun damage, which is the main cause of fading and cracking. In leather aging, UV light plays a major role in oxidation and degradation. That’s why guarding against UV exposure helps slow the aging process. Avoid heavy oils or conditioners made for raw leather. They are too rich. They can’t penetrate the coating and will just sit on top, creating a greasy film that attracts more dirt.
I learned this lesson early. Using a product like saddle soap, perfect for Mason, on a car seat would be a mistake. The soap’s moisturizers can’t get through, and the residue can dull the surface. Stick with products designed for the job.
The Right Way to Clean Leather Seats
Think of this like giving my leather jacket, June, a gentle wipe-down after a dusty day. You are removing the day’s grime, not trying to erase its history. Do this every few months, or immediately after a spill.
What You’ll Need
- A vacuum with a soft brush or crevice tool.
- A gallon of distilled or filtered water.
- A neutral, pH-balanced leather cleaner.
- Several soft, white microfiber cloths.
- A soft-bristled detailing brush (like a horsehair brush).
The most important step happens before you pour a single drop of cleaner: always test it in a hidden spot first, like under the seat or behind a headrest. This checks for color transfer or unwanted finish changes.
- Vacuum All Cracks and Seams. Grit and sand act like sandpaper on leather. Use the crevice tool to get deep into the seams where the seat back meets the bottom. This prevents you from grinding dirt into the grain during cleaning.
- Test Your Cleaner. Apply a dab of cleaner to a microfiber cloth, dampen it with a little water, and gently rub the hidden test area. Wait a minute and check for any discoloration or residue.
- Work in Small Sections. Never spray cleaner directly on the seat. Spray it lightly onto your cloth first. Work on one seat cushion or backrest at a time. This stops the cleaner from drying on the leather, which can leave streaks.
- Use Gentle, Circular Motions. With your damp cloth, massage the cleaner into the leather with light circles. For textured grain or heavy dirt, use the soft brush gently. Never scrub hard. You are coaxing dirt out, not blasting it.
- Wipe Away Residue. Take a second microfiber cloth, dampen it with clean water (distilled is best to avoid water spots), and wipe over the section you just cleaned. This removes any leftover cleaner that could attract more dirt.
- Dry Thoroughly. Immediately use a third, dry microfiber cloth to buff the area completely dry. Let the seat air out for at least 30 minutes, or until it feels cool and dry to the touch, before moving to protection.
How to Protect Seats From Spills and Wear
Protection only works on perfectly clean, bone-dry leather. Applying conditioner to dirty seats just traps the dirt. This step is like putting a fresh coat of wax on Scout, my wallet, to keep it supple and resistant to life’s little accidents.
Conditioner vs. Protectant Spray
These are two different tools for the same goal: longevity.
- A leather conditioner (often a cream or balm) replenishes the natural oils that sun and heat zap away. It keeps the leather from drying out and cracking. Use it every 3-6 months.
- A leather protection spray creates a top-layer barrier. It helps repel water-based spills (like coffee or soda) and adds mild resistance to scuffs and UV fading. Use it after conditioning, or on its own for a quick refresh.
For the best defense, apply a conditioner first, let it absorb, then follow with a protectant.
The Application Process
- Apply a Thin, Even Layer. Put a small amount of conditioner or protectant on a fresh microfiber cloth. Rub it into the leather using wide, even circles. You should not see thick, goopy streaks. More is not better. A thin layer penetrates and protects without clogging the pores.
- Wait for Absorption. Let the product soak in. This usually takes 15-30 minutes. The leather will look darker at first, which is normal. The seat should feel slightly cool, not sticky.
- Buff to a Matte Finish. After the waiting period, take a clean, dry microfiber cloth and buff the entire seat firmly. This removes any excess product sitting on the surface that could feel greasy or attract dust. You are done when the leather has a soft, natural matte sheen and your cloth glides smoothly over it.
A common mistake is applying too much product and not buffing enough. If your seats feel tacky the next day, simply buff them again with a dry cloth. That usually fixes it.
Fighting Sun Damage and Heat Cracking
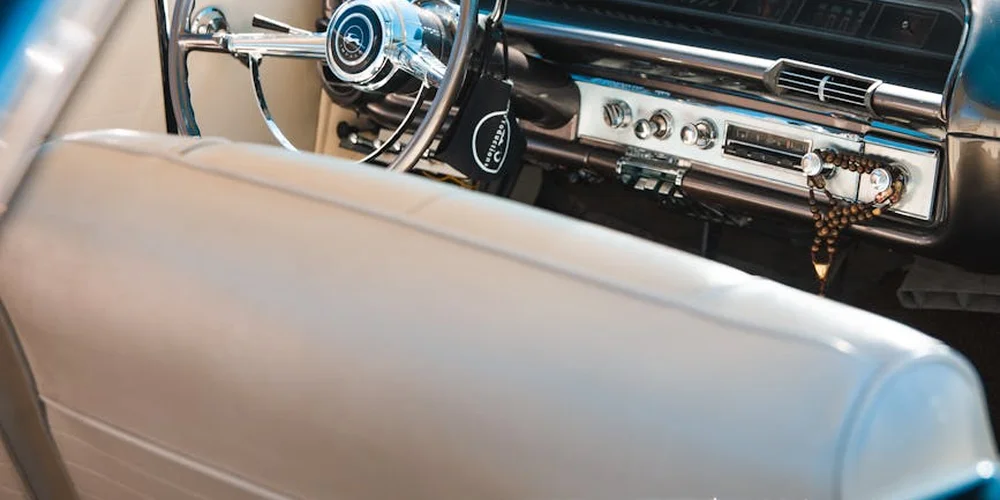
Sunlight is a slow, quiet enemy for your car’s interior. Those UV rays don’t just fade the color; they break down the very oils and fibers that give leather its strength and suppleness. I’ve seen jackets and saddles left in sunny spots become brittle and stiff, like an old, dried-out sponge. Your car seats face this every single day.
Your first and best defense is a dedicated leather protectant with UV blockers built right into the formula. Think of it as sunscreen for your seats. After a thorough cleaning, applying this creates an invisible shield that absorbs or reflects damaging rays before they can do their work.
Beyond chemicals, physical barriers are incredibly effective. Using a windshield sunshade every single time you park is one of the smartest habits you can form. It dramatically cuts the interior temperature and blocks the most direct sunlight. Tinted windows, where legally permitted, offer a constant layer of protection that works even while you drive.
No shield is perfect forever, which is where conditioning comes in. Just like my old English saddle, Mason, needs regular oiling to stay flexible, your seats need their moisture replenished. Every three to six months, use a quality leather conditioner. Apply it to a clean, cool seat, working it in thoroughly with a soft cloth. Let it absorb fully. This keeps the leather fibers pliable and resistant to the tiny stress cracks that heat and dryness cause.
Are Seat Covers a Good Idea?
Many people ask me if putting covers over leather seats defeats the purpose. It’s a fair question. The short answer is: sometimes they’re a practical tool, but they come with trade-offs.
Leather seat covers offer clear physical protection. They are excellent for guarding against sharp pet claws, sudden coffee spills, or the constant abrasive wear from work gear. If your daily life is messy or active, a good cover can be a worthwhile buffer.
The major risk with any cover is trapping moisture and heat against the leather you’re trying to protect. A non-breathable cover can make your seat sweat, potentially leading to mildew or speeding up the breakdown of the leather’s finish. They can also interfere with side airbag deployment or the function of heated and ventilated seats if they aren’t designed for them.
If you choose to use a cover, opt for custom-fit styles made from breathable, natural fabrics like cotton or wool. Avoid cheap, universal-fit covers with rough backing or elastic that can constantly rub and scuff the leather’s surface. A poorly fitting cover can cause more damage than the wear it’s meant to prevent.
For many, a simpler and more effective alternative is to focus protection where it’s needed most. Consider a thin, high-quality leather sheath or wrap for your steering wheel, which sees constant contact from hands, sweat, and sunscreen. Protecting this one high-touch area can preserve its feel and appearance for years, without the complications of full seat covers.
When to Get Professional Leather Seat Protection
You might search for “leather seat protection for cars near me” and “price” when you feel out of your depth. That is a smart move. A professional treatment is an investment, not just an expense. Prices vary widely, from a basic clean and protect for a couple hundred dollars to a full multi-step restoration for a thousand or more. The final cost depends on your car’s size, the leather’s condition, and the detailer’s skill level. If you’re wondering how much does it cost to repair or replace leather car seats, you’re not alone. We’ll outline typical price ranges and options in the next steps.
Think of it like this. My regular conditioning of June, my jacket, is like giving it a good drink of water. A professional treatment for a car seat is more like a spa weekend with a deep tissue massage, a facial, and a new coat of armor. It is a different level of care.
What Does a Professional Treatment Involve?
A reputable pro does not just wipe on a spray. They follow a meticulous process. First, they perform a deep clean, often using specialized steam or extraction tools to pull grime from the pores of the leather that a wipe-down can’t reach. Next, they assess and repair. This means filling in minor scratches or recoloring worn areas with matched dyes.
The protection phase is where they build resilience. A professional applies multiple, dedicated layers-a nourishing conditioner, then a sealant, and finally a topcoat protectant-each formulated to do a specific job without interfering with the others. This creates a far more durable shield than any all-in-one product you might use at home.
DIY vs. Pro: Making the Call
For regular upkeep on leather in good shape, you are more than capable. Cleaning up a new coffee splash or applying conditioner to prevent sun damage is perfect DIY territory. You know your seats best. Getting the right products and techniques for cleaning, maintaining, and repairing genuine and faux leather in automotive interiors can guide your next steps.
Call a professional when the problem is beyond surface-level. I think of when my old saddle, Mason, was neglected before I got him. The leather was stiff, discolored, and thirsty. That needed expert attention.
- Major Staining: Set-in ink, deep dye transfer from jeans, or large unknown spills that have soaked in.
- Restoring Neglect: Leather that is extremely dry, cracked, or has a whitish, chalky film from old, degraded products.
- Color Repair: Significant fading from the sun or scuffs that have removed the topcoat of dye.
- Before a Big Change: If you are about to start daily drives with kids and pets, a professional ceramic leather coating can give you a strong head start on protection.
Finding and Vetting a Reputable Specialist
Do not just pick the first listing. Your car’s interior deserves a craftsman. Start by looking at their portfolio of past work. Do the “after” photos look natural and rich, or plastic and shiny? A good finish should look like healthy leather, not a vinyl wrapper.
Ask specific questions. “What type of cleaner and conditioner do you use?” Listen for answers about pH-balanced, leather-specific products. Ask, “Can you explain your process for repairing a small scratch?” They should easily describe cleaning, dye matching, and sealing. A true specialist will talk about leather grain, aniline dyes, and absorption rates, not just about making it “look shiny.”
Finally, read reviews that mention long-term results. You want to see phrases like “the protection lasted over a year” or “the repaired spot still looks perfect.” This shows their work has durability, which is the whole point. It takes time to find the right person, but your leather seats will thank you for years.
Common Questions
How often should I use a leather conditioner versus a protectant spray?
Apply a conditioner every 3-6 months to replenish lost oils. Use a protectant spray with UV blockers after every thorough cleaning, or every few months, to shield against sun and spills.
Can I use the same product on my leather steering wheel as on the seats?
Yes, the same coated-leather specific products are safe. Clean and protect the wheel more frequently, as hand oils, sweat, and friction cause faster wear there.
What’s the most important thing to look for in a leather protection spray?
UV inhibitors are non-negotiable for preventing sun damage. Ensure it’s formulated for coated automotive leather to avoid a greasy, sticky residue.
Is professional leather protection worth the cost for a new car?
For a new car, a professional ceramic leather coating offers the most durable barrier. It’s a strong upfront investment that simplifies your long-term maintenance routine.
Does living in a sunny climate like South Africa change the care routine?
Absolutely. It demands stricter discipline with UV protectant applications and physical sun barriers. The intensity of the sun accelerates fading and drying, making consistency key.
Caring for Your Leather Seats
Keep your seats clean and conditioned—that simple habit is your best defense against sun, spills, and daily wear. Address spills immediately with a damp cloth and use a quality leather conditioner every few months to maintain suppleness and color.
Good leather care honors the material and the animal it came from, so I advocate for products from responsible sources. Building your maintenance skills, much like I did with Mason’s saddle or June’s jacket, lets you extend the life of your goods thoughtfully and sustainably, enhancing their patina over time.
Related Guides and Information
- Revitalize Your Car’s Interior: We Test the Top Car Leather Cleaners
- r/cars on Reddit: Tips for owning leather car seats?
- r/AutoDetailing on Reddit: Amateur here. What products would I use to clean my leather interior so it looks more matte, like when I got it.
- 5 EASY STEPS TO CLEANING AND PROTECTING YOUR LEATHER CAR SEATS
- Car Leather Cleaners | Chemical Guys
Harriet is a avid collector of leather goods such as purses, bags, seat covers, etc and has an extensive background in leather care, recovery, stain removal and restoration. She has worked for a number of years perfecting her leather care techniques and knows the ins and outs of restoring all kinds and types of leather products. With her first hand knowledge in leather care, you can not go wrong listening to her advice.
Car Interior and Auto Leather Care