How Do You Paint Over Suede to Restore Its Look?
Published on: August 9, 2026 | Last Updated: August 9, 2026
Written By: Harriet Nicholson
Hello Tannery Talk. That scuffed or faded suede piece doesn’t have to be retired. With the right approach, you can give it a fresh, textured finish that feels like new.
This guide walks you through the process safely. We will cover how to properly clean and prepare the suede, choose a quality suede effect paint, apply it for an even and realistic finish, and set your work for durability.
I’ve brought life back to many textured leather items in my workshop, learning what works to preserve their unique hand and appearance.
Is Painting Your Suede the Right Choice?
Painting suede is a rescue mission, not regular maintenance. You cross that line when the damage is permanent.
Think about a deep oil stain on a suede boot or severe sun-fading on a car interior. No amount of brushing will lift that color back. Painting becomes a viable fix to give the item a second life when you can’t live with the flaw anymore.
This is very different from the simple care a piece like my leather jacket, June, needs. For her light creasing and dust, a gentle brush and a specialist conditioner for napped leathers is all it takes. The handfeel stays soft and supple. With lambskin, clean care helps keep the surface soft and guards against damage. Regular cleaning and conditioning can extend softness and prevent wear.
Can you paint over suede shoes? Yes, but you must accept that the soft, fuzzy nap will be sealed under paint, changing the texture forever. It will feel more like a smooth, matte leather. This is a permanent alteration. Painting and dyeing suede requires special techniques to ensure a lasting finish.
Painting is a commitment. It’s the step you take after all cleaning has failed. For a favorite pair of boots with a ruined toe, it can be a worthy trade-off to keep them in service. However, make sure to follow proper techniques for painting leather to achieve the best results.
What You’ll Need: Gathering Your Supplies
Preparation is everything. Using the right materials is the difference between a patchy, stiff result and a smooth, durable finish.
Here is your essential toolkit:
- Dedicated Suede Cleaner: This is for the final clean before paint. It removes surface oils and dirt so the primer can bond properly.
- Suede Brush (and possibly an eraser): Use this to lift the nap and clean out ingrained grit after washing.
- Fine-Grit Sandpaper (320 grit or higher): A light sanding on the damaged area helps create a slightly rough surface for the primer to grip. Be very gentle.
- Suede Paint or Suede Effect Paint: This is your color. “Suede effect” paints often contain fine particles to mimic a matte, textured look, which is ideal for this project.
- A Compatible Primer: Do not skip this. A flexible primer designed for leather or suede creates a stable base layer for the paint to adhere to. It prevents peeling.
- A Flexible Top Coat (Finisher): This seals and protects the paint. For any item that will see sun, like shoes, bags, or car seats, a top coat with UV protection is non-negotiable to prevent rapid fading. This directly addresses the need for a durable ‘paint over suede paint exterior’ solution.
- Applicators: Soft-bristle brushes, makeup sponges, or airbrush kits. Brushes offer control, sponges can help create a more even, stippled texture.
Lay everything out before you start. Working in a clean, well-ventilated space makes the process smoother and safer.
The Heart of the Job: Preparing Your Suede Surface
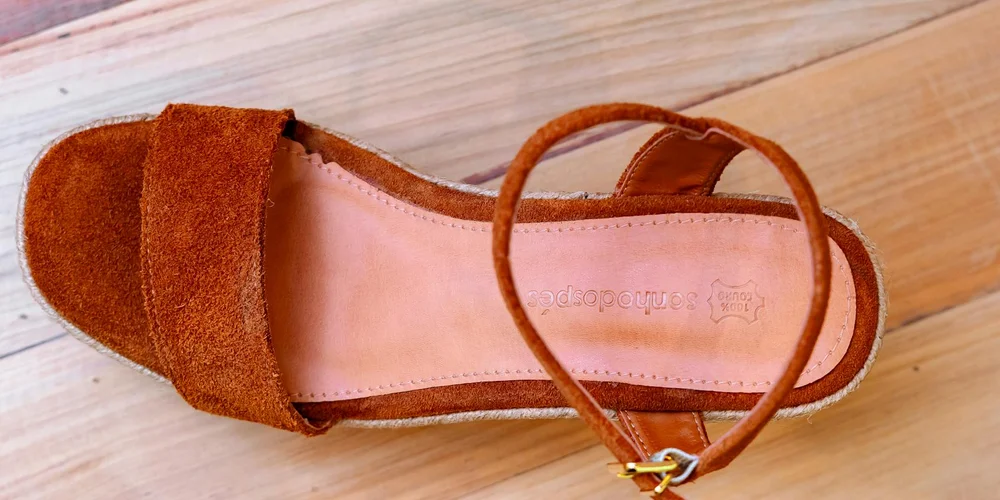
This is the foundation. Flawless preparation stops paint from peeling and makes sure it sticks for good. You cannot rush this. I learned that the hard way on an old bag, and now I treat every piece with the same care I give Mason before a conditioning.
Step 1: A Thorough Deep Clean
You must remove every trace of dirt, skin oils, or old spray-on protectants. Start with a dedicated suede cleaner or a mild, neutral cleaner. Apply it with a soft, clean cloth using small, gentle circles. Make sure to apply protective spray correctly after cleaning.
Work section by section until the entire piece looks and feels uniformly clean. Aim for the fresh, consistent handfeel of my wallet, Scout, after a careful wipe-down.
Let the suede air dry completely in a room with good airflow. Do not use heat. Any hidden moisture will cause the paint to bubble and fail. This drying can take several hours.
Step 2: Brushing and Creating a ‘Tooth’
Once bone-dry, take a suede brush or a clean, soft-bristled brush. Gently brush the entire surface to lift the nap. You are erasing any matted spots and creating a slightly rough, consistent texture. It’s important to brush gently to avoid damaging the suede.
This “tooth” is what the paint will mechanically grip onto. Brush in one direction for an even result.
If your suede is very worn smooth or has a previous paint job you’re covering, you need more grip. Take a piece of fine-grit sandpaper (around 400 grit). Lightly sand the surface in one direction to gently scuff it, which is essential for covering old suede effect paint. Be feather-light. You’re just texturizing, not grinding it down.
How to Apply Suede Paint for a Flawless Finish
Now comes the transformation. This part is rewarding, but your patience is more important than your brush.
Understanding Your Paint: The Suede vs. Suede Effect Difference
This choice changes everything. Suede paint is formulated to penetrate and bond with the fibers of genuine suede. Suede effect paint is designed to create a fuzzy, suede-like finish on top of leather, vinyl, or other materials.
Using suede effect paint on real suede can leave a strange, top-coat feel. Using suede paint on a non-porous surface might not stick. Always match the paint type to your material for an authentic texture.
Read the product instructions first. For instance, if a paint like Ralph Lauren’s has specific steps, follow them. Brand directions are your shortcut to a good result.
The Application Process: Thin Coats and Patience
Shake your paint can or stir your bottle thoroughly. I use a soft, flat brush or a small sponge applicator for control.
Apply the first coat with a dabbing or stippling motion. Do not brush it on like wall paint. You want to lay down a very thin, even layer that lets the suede texture show through.
Thin coats are the secret to a natural feel and to preventing cracks. A thick, gloopy coat will dry like a plastic shell.
Let the first coat dry completely. This usually takes at least an hour. Then, check the coverage. Apply a second thin coat the same way. You might need three or four.
If you are painting over existing suede paint to change color, the process is the same. Building opacity slowly with multiple thin layers is how you paint over suede paint without creating a stiff, heavy crust. Rushing the drying time between coats is the most common mistake. It leads to a finish that feels wrong and cracks over time.
Sealing the Deal: Applying a Protective Top Coat
Think of your fresh suede-effect paint as a beautiful, new color layer. The top coat is its raincoat and armor. This clear layer locks in the color you worked so hard to apply and shields it from daily wear.
For a piece like Mason the saddle, which sees constant friction and the elements, skipping the top coat means your repair might only last a few months. A good top coat adds serious durability and scuff resistance, turning your touch-up into a long-term fix.
How to Apply a Finish Over Suede-Effect Paint
You must let the paint cure completely first. This usually takes 24 hours. Rushing this step will trap moisture and create a cloudy, sticky finish.
- Choose a clear, flexible, matte or satin finish designed for leather or suede. A glossy finish will make your suede look plastic.
- Shake the can or bottle well. Apply the top coat in an extremely thin, even layer. Imagine you are barely dusting the surface.
- Use a soft, clean brush or the applicator provided. Work in one direction to avoid streaks or bubbles.
- Let this first layer dry fully, as per the product instructions (often 1-2 hours).
- Apply a second thin layer. Two thin coats are always better than one thick, gummy coat.
- Allow the final top coat to cure for at least 48 hours before using the item. The longer it cures, the tougher it gets.
Troubleshooting: What to Do When Things Don’t Go as Planned
Even with careful prep, sometimes the result isn’t perfect. Don’t panic. Most issues have a straightforward fix.
Peeling or Flaking Paint
This usually means the surface wasn’t clean or de-greased enough before painting, or the layers were applied too thickly. The fix is to remove the problem area and start again in that spot.
- Let the area dry completely.
- Use a fine-grit sandpaper (like 400 grit) to gently sand away the peeling paint until you reach a stable base.
- Wipe away all dust with a slightly damp cloth and let it dry.
- Reapply your suede-effect paint and top coat to just that area, blending the edges carefully.
Cracking or a Stiff Feel
This is almost always caused by applying product too thickly, which creates a brittle shell that can’t move with the leather. On a jacket like June, this would feel terrible. Prevention is key: always use thin layers. If it’s already cracked, you will likely need to strip the area and redo the work carefully.
Painting Over Existing Suede Paint
Maybe the color isn’t right, or an old repair needs refreshing. You can paint over suede paint, but prep is different than for raw suede.
- Clean the painted surface with a neutral leather cleaner to remove any oils or dirt.
- Lightly scuff the entire painted area with fine sandpaper. This gives the new paint something to grip onto.
- Wipe away all sanding dust completely.
- Apply a very thin “tack coat” of your new suede paint first, let it dry, then proceed with your full, thin layers.
Knowing When to Stop
If the leather base is severely cracked, torn, or mold-damaged, painting over it is just a temporary cover-up. Deep structural damage needs professional attention to prevent the item from falling apart. My wallet Scout is simple and sturdy, but if its seams were splitting, glue and paint wouldn’t help. Be honest about the leather’s condition. Sometimes the most skilled repair is knowing when to call a specialist.
Quick Answers
Can I mix different brands of suede paint and primer?
Don’t risk it. Use the primer and top coat recommended by your paint manufacturer to ensure chemical compatibility and prevent peeling. Sticking with one product line is the safest bet for a durable finish.
How do I care for a painted suede item going forward?
Treat it like a finished leather, not raw suede. Use only water-based cleaners and conditioners made for painted or finished leathers to avoid stripping your work. Never use a suede brush or eraser on the painted area again, especially when trying to remove stains from suede.
Is the painted finish still breathable like real suede?
No, the sealing process sacrifices breathability for durability. This trade-off is fine for items like shoes or bags, but it’s a key reason we don’t paint full-grain leathers like Mason the saddle that rely on flex.
Can I use a regular leather protector spray over suede effect paint?
Only if it’s labeled for use over paint or refinished surfaces. Many standard protectors are designed for porous leather and can react poorly with the paint film, causing cloudiness or tackiness.
My painted area feels good but looks flat. Did I do something wrong?
Not necessarily. Suede effect paint replicates color and a matte texture, but it cannot replicate the deep, variable nap of raw suede. A perfectly executed job will still have a uniform, velvety-matte appearance.
Final Steps for Your Suede Revival
The most vital step is always the first one: a perfect, clean, and dry foundation. Skipping this prep work is the main reason a fresh coat of paint fails to stick properly.
Giving a worn suede piece a second life with careful restoration is a deeply responsible practice. It builds your skills for maintaining all your leather goods, honoring the material’s history with every thoughtful repair.
Related Guides and Information
- Suede Dye for Vibrant Color Restoration & Customization · Angelus Direct
- Suede re: paint \ DIY Suede bag restoration – Dr.Leather Ukraine – YouTube
- How to Paint Suede Shoes | TikTok
- Angelus Suede Dyes
Harriet is a avid collector of leather goods such as purses, bags, seat covers, etc and has an extensive background in leather care, recovery, stain removal and restoration. She has worked for a number of years perfecting her leather care techniques and knows the ins and outs of restoring all kinds and types of leather products. With her first hand knowledge in leather care, you can not go wrong listening to her advice.
Suede and Nubuck Care