How Do You Remove Super Glue and Other Adhesives from Leather Without Causing Damage?
Published on: May 28, 2026 | Last Updated: May 28, 2026
Written By: Harriet Nicholson
Hello Tannery Talk. That sudden dread when glue drips on your leather is real, but I can show you how to fix it without harm.
We will cover how to identify the adhesive, gentle removal steps for super glue and similar products, and the aftercare to restore your leather’s look and feel.
From careful repairs on June’s jacket to maintaining Mason’s saddle, I’ve handled these sticky situations for years.
Is It Even Possible to Remove Glue from Leather?
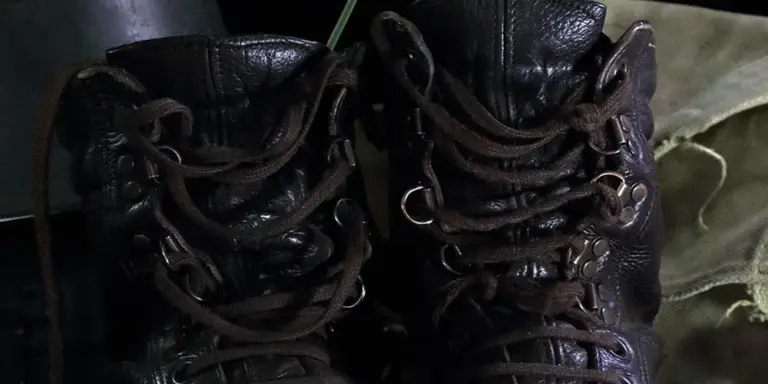
Yes, absolutely. You can save your leather. I have fixed glue spills on my own boots and salvaged pieces like June’s jacket from similar fates. Leather is tough, and most adhesives sit on the surface.
Your success comes down to three simple things.
- The type of leather you have.
- The type of glue you’re fighting.
- Your own patience.
Delicate leathers, like a suede boot or a very thin lining, need a gentler touch. Rugged full-grain leather, like Mason the saddle is made from, can handle a bit more. Think of it like your own skin. A dab of glue on your fingertip is annoying but manageable. Getting it in your eye is a different story. The approach changes with the surface.
The golden rule is to start with the mildest method and work your way up slowly.
First, Identify Your Adhesive: Not All Glues Are the Same
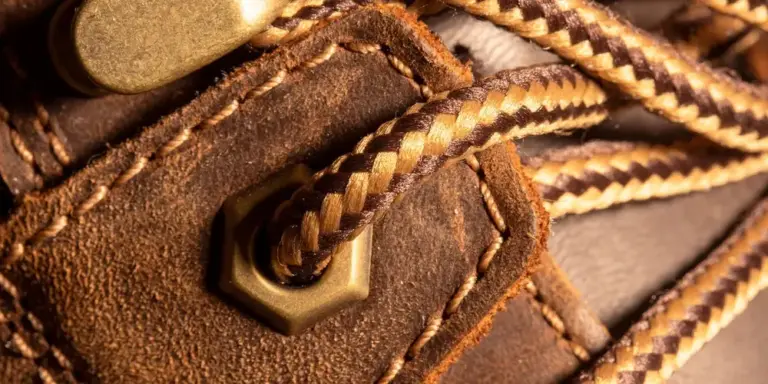
You need to know what you’re dealing with before you start. A good look and a gentle scratch with your fingernail will tell you most of what you need to know.
Here are the usual suspects.
- Cyanoacrylate (Super Glue): This dries clear and rock hard. It feels like a brittle plastic shell on the leather.
- White or PVA Glue (School Glue): This dries to a rubbery, opaque film you can often peel.
- Contact Cement: This leaves a thick, yellowish, or brownish rubbery residue. It smells strong when fresh.
- Sticky Residue: This is the gummy leftover from a price tag, tape, or old repair. It’s tacky, not hard.
Imagine super glue is like a thin layer of clear candy shell. Sticky residue is like chewed gum. You wouldn’t clean them off the same way. Your removal strategy changes completely based on this simple identification.
Knowing your glue tells you if you need to dissolve it, freeze it, or gently peel it away.
Your Safe Removal Toolkit: What You’ll Need
Before you start, get your supplies ready. Having the right tools makes the job safer and easier for your leather.
- Gentle Applicators: Cotton swabs, soft microfiber cloths, and a dull plastic scraper. A clean guitar pick or an old plastic gift card works perfectly.
- Safe Solvents & Softeners:
- Pure acetone (for super glue only).
- Isopropyl alcohol (for other sticky residues).
- A mild oil, like olive oil, or your regular leather conditioner.
- The Cleaning Cloth: A separate, damp cloth to wipe away residue as you work.
Gather these items from around your house, but leave the harsh chemicals in the cabinet.
The Step-by-Step Guide: How to Get Super Glue Off Leather
Super glue is the toughest common adhesive. This method uses pure acetone, which breaks the glue’s bond. I’ve used this on a hardened glue spot on Mason’s saddle flap, especially when repairing and fixing general leather items.
- Find a Hidden Spot to Test. Turn the shoe inside out or check under a cuff. Apply a tiny drop of acetone on a swab and dab it on the leather. Wait two minutes. If the color or finish changes, stop. Most quality leathers will be fine.
- Apply the Acetone. Dampen a cotton swab with pure acetone. Do not soak it. Gently dab it directly onto the super glue spot. Do not rub the surrounding leather.
- Wait and Watch. Let it sit for about 30 seconds. You will see the glue turn cloudy and start to crumble.
- Lift the Glue Away. Use your plastic scraper to gently nudge the softened glue. It should flake off. For stubborn bits, repeat the dab-and-wait process.
- Condition Immediately. Acetone dries leather out. Once the glue is gone and the area is dry, apply a generous amount of leather conditioner. Massage it in and let it absorb fully.
Work slowly with small areas, and never pour acetone directly onto the leather. Patience protects the finish. There are myths about acetone on leather, and the real risks deserve attention. The myth use acetone clean leather risks explained guide covers these risks.
For Fresh, Wet Glue Spills
Speed is your friend here. I once caught a spill on a workbench before it hit a bag.
If you see wet white craft glue or a similar water based adhesive, grab a cloth. Blot the spot immediately. Do not smear it, or you will push the glue deeper into the grain.
Next, dampen a clean cloth with warm water and gently dab at the edges of the spill. The goal is to lift the glue away before it sets and bonds. You may need to rinse the cloth several times. Once the glue is up, let the leather air dry completely away from heat.
For Dried-On Glue and Sticky Residue
For old tape marks, label goo, or dried glue that isn’t super glue, use a gentler approach. This is the “soften and lift” method I used on an old price tag stuck to Scout’s wallet.
Apply a small amount of leather conditioner or a mild oil like olive oil directly to the residue. Let it sit for ten to fifteen minutes. The oils will slowly break down the sticky bond. However, be cautious and avoid using oils on leather surfaces that are already stained.
Take your plastic scraper or even your fingernail and gently try to roll the edge of the residue. If it’s ready, it will peel up in a gummy ball. If not, apply more conditioner and wait longer.
Gentle pressure and patience will lift the gunk without needing harsh chemicals. Finish by wiping the area with a damp cloth to remove any oily film, then condition the entire piece as normal.
Special Cases: Suede, Delicate Leathers, and Car Interiors
Not all leather is the same. The methods that work for a sturdy belt can ruin a delicate shoe. You must change your approach for porous or highly finished surfaces.
Suede and Nubuck
These surfaces are a brushed nap, like velvet. Liquids can stain them instantly and flatten the fibers forever. Your first move is always a dry one.
- Start with a stiff, dry bristle brush (a suede brush or even a clean toothbrush). Brush gently in one direction across the glue spot. You can often flick away dried bits.
- For more stubborn spots, use a specialized suede eraser or a clean pencil eraser. Rub it lightly back and forth.
If you must use a solvent, it is a last resort. Apply the smallest drop of pure acetone to a cotton swab. Do not soak it. Dab very lightly at the glue, not the leather around it. Let it dry completely, then brush the nap back up. Test any liquid, even water, on a hidden seam first to check for color loss or texture change.
Patent or Aniline Leather
Patent leather has a plastic-like coating that solvents can cloud or melt. Aniline leather is dyed but has little topcoat protection, so it stains easily. To keep patent leather clean and conditioned without cracking or clouding, use mild cleaners and a conditioner designed for patent finishes. Avoid solvent-heavy products that can damage the finish.
For these, your testing must be more conservative. Find the most hidden spot you can-inside a strap, under a flap. Use a cotton bud with your chosen cleaner (like a pH-neutral leather cleaner) and press it against the spot for 10 seconds. Blot it dry. Check for any discoloration, swelling, or dullness after an hour. If the test spot looks different, stop and consider professional help for the visible area.
Car Leather Interiors
Car seats are a complex project. They are often coated with dyes and protective finishes that can be sensitive. Many also have perforations for ventilation; liquid can seep in and cause problems you cannot see.
Your process needs extra patience. Use a very mild, foam-based leather cleaner. Apply it to a soft microfiber cloth, not directly to the seat. Gently dab at the adhesive. Rinse your cloth with clean water, wring it out completely, and dab the area to remove cleaner residue. Dry immediately with a separate dry cloth. Working in small, controlled steps prevents moisture from sinking into those perforations or seams and causing a stiff spot later. This method is especially important when dealing with stubborn stains like ink, coffee, or grease.
Common Mistakes: How to Avoid Making the Damage Worse
In a rush to fix the problem, it’s easy to create a bigger one. I’ve seen it happen. Here is what to avoid.
- Do not scrape with a metal tool or your fingernail. You will almost certainly gouge the leather’s surface, creating a permanent scratch that is worse than the glue.
- Do not soak the leather. Drenching the area can cause water stains, distort the shape, and weaken the fibers. My saddle, Mason, can handle some moisture, but even I would never let water pool on it.
- Do not use acetone or nail polish remover on suede, nubuck, or unfinished leathers. It will strip color and oils aggressively, leaving a harsh, bleached-looking patch.
- Do not rub aggressively in circles. This grinds the adhesive deeper into the grain and can fray the leather’s surface, making it look fuzzy and worn.
Why Some “Quick Fixes” Fail
People often ask about using rubbing alcohol or standard nail polish remover. Here is why they are risky.
Rubbing alcohol (isopropyl alcohol) is a strong solvent. It does not just dissolve glue; it can also strip the dyes and natural oils right out of the leather, leaving a dry, faded spot. The result looks like a bleach stain on an old pair of jeans.
Standard nail polish remover is usually acetone-based but often contains perfumes, oils, and colorants. These additives can deposit a new stain on your leather as the acetone evaporates. You trade a glue spot for a greasy, discolored one.
Imagine a small, stiff, discolored patch on the elbow of a jacket like June. The character is gone, replaced by damage. The goal is to remove the adhesive while preserving the life and story of the piece. Go slow, test first, and let the leather guide you.
Aftercare: Restoring and Protecting Your Leather
You got the glue off. Great. Now, we need to care for the leather you just saved. Any cleaning process, especially one using a solvent, strips natural oils from the leather. It leaves the area thirsty.
Conditioning the spot is not a suggestion, it’s a required step. It replaces lost moisture and oils to keep the leather flexible and strong.
Here is my method, the same one I use on Mason’s saddle after a deep clean.
- Let the cleaned area air dry completely. Give it a few hours. You want no leftover solvent moisture.
- Apply a small amount of a pH-balanced leather conditioner or cream to a clean, soft cloth.
- Rub it into the area with gentle, circular motions. You don’t need to soak it, just give it a good, even coat.
- Let the conditioner absorb. I usually leave it overnight.
- Buff it gently with a dry cloth the next day to remove any residue and restore the sheen.
This conditioning step prevents the leather from becoming brittle and cracking where the adhesive was, ensuring your repair lasts and bonds well.
Be prepared that a slight shadow or texture change might remain where the glue was. This is normal. Think of it as a small scar. On my jacket June, a small repair spot has a slightly different sheen. I don’t see it as a flaw anymore. It’s part of her story, her patina.
Prevention: The Best Way to Deal with Glue on Leather
The absolute best fix is to avoid the problem altogether. A little forethought saves a lot of delicate cleanup later.
My workshop rules are simple and effective.
- Mask it. When gluing near leather, run a strip of painter’s or masking tape along the edge of the leather. It creates a protective barrier for any drips or slips. Peel it up when you’re done.
- Contain it. Always work on a dedicated, protected surface-not directly on your kitchen table or your good trousers. A piece of cardboard or a silicone mat works perfectly.
- Go slow. Apply adhesives in small, controlled amounts. You can always add more. It’s much harder to take away excess.
For future leather repairs, consider your adhesive choice. I moved away from strong solvent-based glues years ago. A quality water-based leather glue is plenty strong for most repairs, doesn’t give off harsh fumes, and is much easier to clean up if you make a mistake. It’s a simpler, safer way to work.
Leather is durable, but it appreciates careful hands. With the right preparation and the right materials, you can keep your favorite pieces like Scout looking good for years without any adhesive emergencies.
Common Questions
What if the acetone isn’t working on the super glue?
If pure acetone isn’t breaking the bond, you’re likely not dealing with cyanoacrylate. Stop and re-identify the adhesive; a rubbery residue needs a different approach, like a leather conditioner soak.
How do I deal with a lingering sticky film after the glue is gone?
Dab the area with a tiny amount of isopropyl alcohol on a cotton swab, then wipe immediately with a damp cloth. Always follow this with a thorough conditioning to replenish the stripped oils.
Can I use heat, like from a hairdryer, to soften the glue?
I do not recommend heat. It can cook the oils out of the leather, making it brittle, and can permanently set some adhesives or melt finishes on patent leathers, unlike proper care techniques that prevent heat damage from sun exposure on leather car interiors.
What’s the safest glue to use for future leather repairs?
Choose a quality, water-based leather cement. It provides a strong, flexible bond and is far easier to clean up with water if you make a mistake before it dries.
When should I just take it to a professional?
If the leather is highly valuable, delicate, or the adhesive has stained deeply into an unprotected aniline leather, professional conservation is the safest investment. Your peace of mind is part of the repair.
Final Thoughts on Leather Adhesive Removal
When adhesive spills happen, your best move is to always test any removal method in a hidden spot first and proceed with gentle, leather-safe products. This patience protects the hide’s integrity and keeps pieces like Mason or June looking their best for years.
Caring for leather responsibly means choosing methods that respect both the material and its origins, reducing waste through skilled maintenance. Learning about the best general methods for caring and treating leather items will guide your decisions and prepare your steps ahead. I encourage you to keep building your care knowledge-it’s how we honor these goods and make them last.
Relevant Resources for Further Exploration
- How to remove glue from leather, the secret revealed
- r/howto on Reddit: How to clean this superglue stain from leather in car
- How to get glue off leather: It’s easy cleaned up in a few steps!
- How can I remove superglue from leather? I spilled a little bit of superglue on the leather band of my wristwatch and I’d like to remove …
Harriet is a avid collector of leather goods such as purses, bags, seat covers, etc and has an extensive background in leather care, recovery, stain removal and restoration. She has worked for a number of years perfecting her leather care techniques and knows the ins and outs of restoring all kinds and types of leather products. With her first hand knowledge in leather care, you can not go wrong listening to her advice.
Boot and Shoe Care