How to Safely Darken Your Leather and Suede Boots & Shoes
Published on: May 20, 2026 | Last Updated: May 20, 2026
Written By: Harriet Nicholson
Hello Tannery Talk. If your footwear has faded or you crave a richer color, I know that mix of hope and hesitation before starting a project like this.
We will cover professional dye application, using conditioners for gradual darkening, and evaluating common home remedies.
From restoring the deep chestnut on my saddle Mason to adjusting the tone on a jacket like June, I’ve handled these color changes firsthand.
Before you start: Setting the stage for success
Think of your leather or suede like a canvas. You wouldn’t paint on a dirty, wet canvas. The same rule applies here. Good prep work is the difference between a beautiful, even finish and a blotchy mess.
Cleaning smooth leather and suede are different tasks. For smooth leather, a damp cloth and a pH-balanced leather cleaner work well. For suede, you need a dedicated suede brush and eraser to lift dirt without pushing it deeper into the nap. Treat them differently from the very first step. Best methods vary by leather type—suede, nubuck, patent, and smooth leather—especially for purses. Starting with the correct type in mind guides both cleaning and conditioning from the first step.
Gather your tools before you begin. You will need:
- Soft, lint-free cloths (like old t-shirts)
- Brushes (a horsehair brush for smooth leather, a suede/nubuck brush for suede)
- Cotton swabs for precise work
- Masking tape to protect areas like soles and hardware
The most important step is this: clean the footwear thoroughly and then let it dry completely, away from direct heat. Any moisture or dirt left on the surface will trap itself under your darkening agent, creating permanent, uneven spots. I let Mason, my saddle, dry for a full 24 hours after a deep clean before I even think about conditioning.
Finally, always test your chosen product in a hidden spot. The inside of the tongue or the very top of the shaft are perfect. This tells you exactly how the color will change and how the leather will react. Never skip this.
How to darken smooth leather boots and shoes
You have three main paths to choose from. Your choice depends on how much you want to darken the leather and what result you’re after.
Conditioners and oils darken subtly while nourishing the hide, while dyes are for a more dramatic and permanent color change. Home treatments sit in a rustic, unpredictable middle ground.
The conditioner method: A gentle, nourishing darkening
This is my preferred method for pieces I want to maintain for years, like June, my leather jacket. Oils and conditioners (mink oil, neatsfoot oil, or wax-based conditioners) work by soaking into the leather fibers. As they moisturize, they naturally enrich and deepen the existing color. To do this properly, you’ll want to know how to apply mink oil to a leather jacket and how conditioning and waterproofing fit into the routine. The next guide will cover those steps.
The result is not a new color. It’s a richer, more vibrant version of the original, often with a lovely, soft patina. Think of it like hydrating your skin-it just looks healthier and more alive.
The process is simple but requires a light touch:
- Apply a very thin, even coat with a soft cloth. Less is more.
- Let it absorb fully. This can take several hours. The leather will drink it in.
- Buff gently with a clean, dry cloth to remove any excess and even out the finish.
A warning: if the leather is extremely dry, the first application can darken unevenly as thirsty spots absorb more. If this happens, don’t panic. A second, light coat after a day usually evens everything out beautifully.
The professional dye method: For a solid, permanent color change
Dye is for when you want a true color change, like going from tan to dark brown. Leather dye is a penetrating colorant. The chemistry of these dyes lets them bond with the leather fibers for a lasting finish. It soaks into the leather’s pores, unlike a paint which just sits on top. This makes the color change more durable and natural-looking.
You’ll find two basic types. Alcohol-based dyes dry fast and penetrate deep. Water-based dyes are easier to clean up and have less odor. For footwear, alcohol-based dyes often offer better water resistance.
You don’t need fancy tools. A simple dauber or sponge works for most of us. Professionals might use an airbrush for flawless coverage on smooth leather. It’s also essential to use the right products and methods for cleaning leather before applying any finish.
Patience and ventilation are your best friends here. Apply multiple whisper-thin layers, letting each dry completely before adding the next. Thick layers will crack and peel. Work in a well-ventilated space, as the fumes can be strong.
Home remedy approaches: What works and what to avoid
I get asked about coffee grounds, walnut shells, or vinegar all the time. These can impart a rustic, antiqued darkness, but they come with big caveats.
The results are almost always spotty and unpredictable. More importantly, substances like vinegar are acidic and can actually damage the leather fibers over time, making them brittle. You might darken the leather but shorten its life. Maintaining the leather’s pH balance is crucial for long-term durability. Acidic or alkaline cleaners can disrupt that balance and cause irreversible damage to the fibers.
Compare these to a simple application of neatsfoot oil, which will darken the leather reliably while preserving its strength and flexibility.
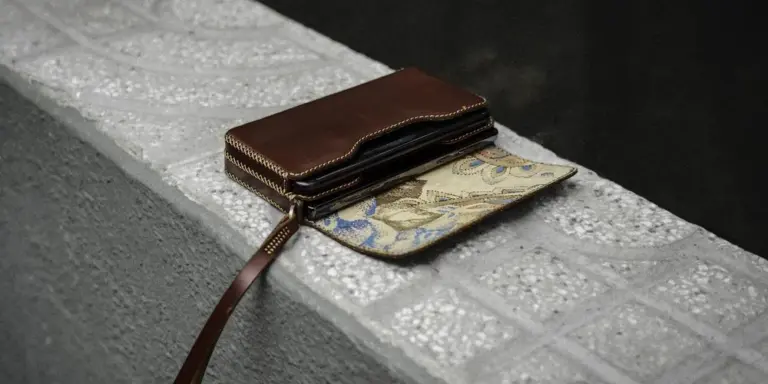
If you experiment, only do so on a low-stakes item. For your good boots or a beloved bag like Scout, my wallet, I always advocate for using proper leather care products. They are formulated to work with the leather, not against it.
How to darken suede boots and shoes
Suede is a different beast. Its fuzzy nap is delicate. You cannot use the same liquids you use on smooth leather, or you will flatten and ruin the texture.
You must use products made specifically for suede or nubuck, never standard leather conditioners or oils. Look for spray-on suede renewers or colorants. These are designed to darken while preserving the nap.
The process is careful and linear:
- Clean the suede impeccably with a brush and eraser. Let dry.
- Mask off any areas you don’t want to color, like the sole.
- In a well-ventilated area, hold the spray can 6-8 inches away.
- Apply the color in very light, even passes. Multiple light coats are essential.
- Let it dry fully between coats and after the final coat.
- Once completely dry, use a suede brush to gently restore the nap.
The goal is a gentle, even saturation of color that doesn’t mat down the soft surface. Rushing this process is the most common mistake. Take your time.
How to darken suede shoes and boots safely
Can you darken suede? Yes, but carefully. Suede is the fuzzy underside of the leather, and its delicate nap is much more fragile than smooth leather.
You cannot use the same oils, waxes, or heavy conditioners you would use on smooth leather, as they will mat the fibers and create permanent, dark stains. Think of suede like velvet, it needs a gentle touch.
Does suede darken over time? Absolutely. Natural oils from your hands, dirt, and exposure to sunlight will slowly deepen its color. This patina is part of its character, but it can become uneven.
Using suede dyes and refresher sprays
For intentional darkening or color revival, you need products made specifically for suede or nubuck. These are usually spray-on dyes or color refreshers.
The key is an even, light application. Hold the can about 10 inches away and use short, sweeping bursts. Spraying too close will saturate the suede, causing spots and a stiff, ruined texture. Always test on a hidden area first, like the inside of a tongue.
How to darken black suede that has faded to gray? The same rule applies. A dedicated black suede dye spray is the most effective way to restore a deep, uniform color. Apply it in thin, even layers, allowing it to dry completely between coats.
Reviving faded suede with careful brushing
Sometimes, you don’t need dye. A good suede brush with brass or synthetic bristles is your first tool.
Gentle, consistent brushing can lift the nap and redistribute the existing color pigments from within the fibers. This can even out slight fading and make the overall color appear richer and darker.
This method is for maintenance and minor touch-ups, not for a complete color transformation from tan to chocolate brown. For that, you need dye.
Step-by-step: Walking through a leather darkening project
Let’s walk through a common scenario: using a conditioner to darken and revive a pair of dry, light-colored leather boots. This is about nourishment, not dye. I’ll guide you through it like you’re at the bench with me, unlike dyeing leather shoes and boots which requires a different process.
- Clean first. Always start with a clean surface. Use a gentle, pH-balanced leather cleaner with a soft cloth. Remove all dirt and old polish. Let the boots dry completely.
- Choose your product. For darkening via conditioning, a natural oil-based conditioner (like neatsfoot or mink oil) or a wax-based cream will work. Oils penetrate deeper and darken more; waxes sit on top and darken less. For this walkthrough, we’ll use an oil-based conditioner.
- Apply a thin, even coat. Use your fingers or a dedicated application cloth. Your body heat helps the product melt and absorb. Work it into every fold and crease, but avoid gloopy buildup. For tight stitching, I sometimes use a clean, soft-bristle toothbrush or even a toothpick to gently work conditioner into the thread, just like I do on Mason’s saddle.
- Let it absorb. This is the most important pause. Let the boots sit for at least an hour, preferably overnight. The leather will drink in the conditioner and the true, darker color will emerge as it dries.
- Buff and assess. The next day, buff off any slight residue with a dry, clean cloth. Feel the leather. Is it still dry or stiff? Look at the color. Is it even? If you want it darker or more nourished, you can apply a second, very thin coat. Remember, you can always add more, but you can’t take it away.
The darkening from conditioning is permanent because it’s part of the leather’s structure now. The boots will be softer, more protected, and richer in color. This is how a piece like my old jacket, June, gets its deep, lived-in glow over years of careful care.
Step-by-step: Walking through a suede darkening project
Let’s talk about a pair of faded, dusty suede boots. The nap is flat, and the original rich color has turned pale and blotchy from sun and wear. This is a perfect job for a spray dye, which can restore depth and evenness without oversaturating the delicate fibers.
The key to success with suede is patience and a gentle touch; rushing will only lead to a stiff, spotty finish.
- Clean Thoroughly: Use a soft suede brush and a dedicated suede cleaner. Gently work the cleaner into the nap in circular motions, then brush with the grain to lift dirt and oils. Let the shoes dry completely for 24 hours. Any leftover moisture will block the dye.
- Protect Everything Else: Wrap the shoe soles, any leather trim, and the welt (the stitched edge) with painter’s masking tape. This keeps dye off areas you don’t want colored. I’ve seen more than one project spoiled by a spray mist turning a light sole an unintended shade.
- Test and Prepare: Shake the suede spray dye can for a full minute. Spray a light coat on a hidden area, like the inside of the tongue. This confirms the final color and your technique.
- Apply the First Coat: Hold the can 6 to 8 inches from the shoe. Use steady, sweeping motions across the surface. Start with an incredibly light mist coat, just enough to barely darken the surface. Do not try to achieve full coverage yet. Let this first coat dry for at least two hours.
- Build Color Slowly: Apply a second light coat, again using even sweeps. Two or three of these light layers will create a more even, lasting color than one heavy, wet coat that soaks and stiffens the suede.
- The Final Dry and Brush: After the final coat, let the shoes cure undisturbed for a full 24 hours. Then, take a clean, dry suede brush and gently brush the nap back up. This restores the soft handfeel and blends any microscopic unevenness in the dye.
Fixing common darkening problems
Even with careful work, things can sometimes go a little sideways. Here’s how to troubleshoot the most frequent issues.
Streaky or uneven color on smooth leather
This often happens with liquid dyes or conditioners applied by hand. You see darker lines where strokes overlapped. For minor streaking, let the piece dry fully, then lightly buff the entire surface with a very fine grit sandpaper (like 800-grit or higher) or a superfine abrasive pad. This smooths the top layer. Follow up immediately with a light, even application of a pH-balanced leather conditioner to replenish moisture lost from sanding.
Blotchy or oversaturated suede
If suede feels hard, sticky, or shows dark, wet-looking spots, the dye was applied too heavily. Once it’s fully dry, vigorous brushing with a suede eraser and then a stiff bristle brush can sometimes lift excess pigment and revive the nap. If the stains persist, the fibers may be clogged. At this point, taking the shoes to a professional cleaner is the safest bet to avoid permanent damage, especially if youdon’t know how to remove stains from delicate suede surfaces yourself.
The color is too dark
This is the toughest problem to fix. Dye adds pigment; it doesn’t remove it. This is why testing your product on a hidden spot is non-negotiable-it’s your only real safety net. On smooth leather, a very light sanding might remove a tiny amount of surface pigment to slightly lighten the shade, but it risks an uneven finish. Often, the only path forward is to apply an even darker dye to unify the color. On light-colored leather, dye transfer stains can be especially noticeable and stubborn. Dealing with dye transfer requires a careful plan that addresses the transferred color before trying to even out the finish.
Leather feels stiff after oiling
Oils and heavy conditioners can temporarily stiffen leather as they penetrate and cure. Don’t panic. For the best oil conditioning to keep leather soft and prevent cracking, choose a light oil and apply in thin layers. This approach helps maintain pliability over time. After the leather has cured for 48-72 hours, gently flex the material and buff it vigorously with a soft, dry cloth. The heat and motion from buffing help redistribute waxes and oils, which usually restores pliability. For future applications, use thinner layers of product. My old saddle, Mason, taught me that a little oil, worked in slowly, is always better than a lot all at once.
Caring for your footwear after you darken it
You’ve put in the work. The color is deeper, richer, just what you wanted. Now, the most common mistake is to rush out the door in them. Patience here makes all the difference.
Let it cure, let it rest
Think of the darkening agents-dye, conditioner, oil-as needing to settle into their new home. They need time to fully bond with the leather fibers. Wearing the shoes too soon can cause the product to transfer onto your socks or rub off unevenly.
Give your footwear a solid 48 to 72 hours of rest in a warm, dry, well-ventilated spot away from direct heat. This cure time lets the materials fully absorb and stabilize. You’ll know they’re ready when they no longer feel tacky to a light touch and have no chemical scent.
Building a lasting maintenance routine
After the cure, your care shifts from transformation to preservation. Your goal is to protect that beautiful new depth of color. The routine differs for smooth leather and suede.
For classic leather boots and shoes, a simple three-step process every few months works wonders:
- Clean with a damp cloth or a mild, neutral leather cleaner.
- Apply a thin coat of conditioner that matches your leather type (like a light cream for dress shoes, a heavier oil for work boots).
- Use a polish or cream that matches your new, darker color. It adds a subtle layer of pigment and wax to protect against scuffs and moisture.
Suede requires a gentler, more preventive approach. Its nap is fragile.
- Use a specialized suede brush regularly to lift the nap and remove dust.
- After darkening, a quality waterproofing spray designed for suede is your best friend. It guards against water spots and stains that can force you to re-darken areas. Test it on a small hidden area first.
- Always tackle spills or stains immediately with a clean, dry suede eraser or brush.
Gentle care prevents big projects
I think of my old wallet, Scout. I’ve never needed to re-dye it. A quick wipe and a tiny dab of conditioner every six months is all it gets. That consistent, gentle care has allowed its color to age gracefully and uniformly.
Regular, light maintenance completely avoids the stress and mess of another full darkening project. It keeps the leather nourished, so it doesn’t dry out, crack, or fade unevenly, which are the main reasons people feel they need to start over. A well-cared-for piece simply evolves; it doesn’t break down.
Your goal is a personal patina
This ongoing care isn’t just about fixing problems. It’s about cultivation. Every gentle brush, every light conditioning session, adds to the story. Like Scout’s dark brown veg-tan leather, which has developed honey-toned highlights along every fold and edge from years of use and simple care.
The darkening was your first chapter. The consistent, thoughtful care you provide now writes the rest of the story, building a patina that is uniquely yours. That character can’t be bought or rushed.
Common Questions
Can stiff, over-dyed suede be saved?
Once suede is stiff from over-saturation, it’s difficult to fully restore. Vigorous brushing with a suede eraser and brush after complete drying may help, but prevention through light, even coats is crucial.
How do I maintain the new color on my suede shoes?
Apply a suede protector spray after the dye fully cures to shield against moisture and stains. Regularly brush with a suede brush to lift the nap and distribute color evenly.
Are home remedies ever acceptable for darkening suede?
No, avoid home remedies like vinegar or coffee, as they can damage suede’s delicate fibers and cause uneven spots. Use only products designed specifically for suede.
What’s the most common error when darkening suede for the first time?
Applying dye too heavily for quick coverage, which saturates and mats the fibers. Always use multiple light coats to preserve the texture and ensure even color.
Choosing Your Path to a Richer Color
The single most reliable method is patience. Always start with a deep conditioning treatment; it often achieves the subtle, even darkening you want without the risks of dye. If you choose to dye, your success depends entirely on a perfectly clean, bone-dry surface and a meticulous test on a hidden spot first.
Every time you care for your leather, you extend its life and honor the animal and craft behind it. Building your skill with each project, from a simple oiling to a careful dye job, is the most sustainable practice of all. It also helps you enhance the natural patina that develops over time.
Expert Resources and Citations
- How To Darken Leather
- r/Boots on Reddit: Question on darkening suede
- How to Darken Suede Boots: Super Easy Process That Takes Little Effort – Bootpedia
- How To Darken Leather – The Leather Colour Doctor
- How to Darken Leather Boots at Home Easily
Harriet is a avid collector of leather goods such as purses, bags, seat covers, etc and has an extensive background in leather care, recovery, stain removal and restoration. She has worked for a number of years perfecting her leather care techniques and knows the ins and outs of restoring all kinds and types of leather products. With her first hand knowledge in leather care, you can not go wrong listening to her advice.
Restoring Color and Re-Dyeing