How Do You Sew and Craft with Sheepskin Hides? A Hands-On Guide
Published on: May 2, 2026 | Last Updated: May 2, 2026
Written By: Harriet Nicholson
Hello Tannery Talk. Sheepskin might seem like a tricky material to handle, but with the right approach, it’s wonderfully forgiving and rewarding to work with.
This article will walk you through the process, covering selecting the proper tools, mastering key sewing techniques, and completing your first simple projects.
My advice comes from years at the workbench, repairing wear on pieces like my leather jacket June and crafting durable items from scratch like my wallet Scout.
Understanding Sheepskin: Your Material Matters
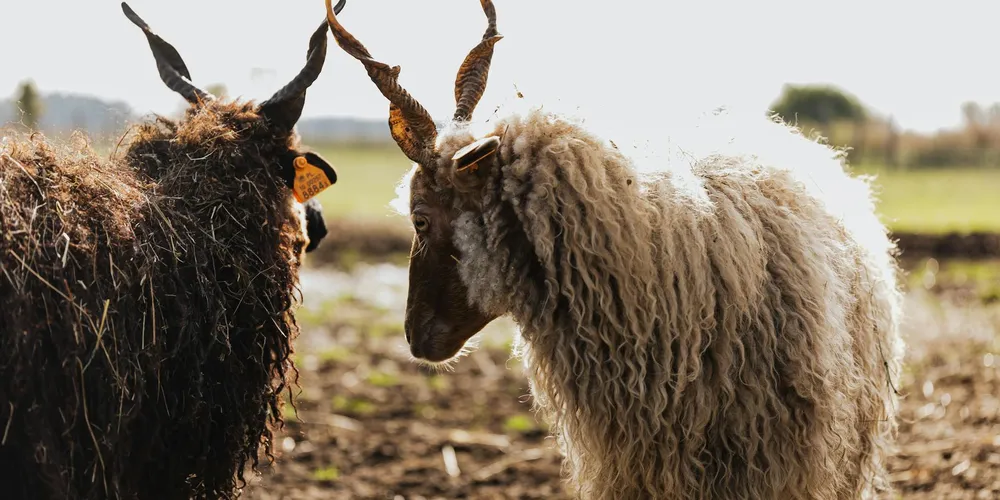
Sheepskin is exactly what it sounds like: the full skin of a sheep, tanned with its warm, dense wool still attached to the leather side. I often think of it as a natural two-layer fabric. The tanning process locks this bond in place, preserving the hide. When you read about ‘how is sheepskin made,’ the key takeaway is that quality tanning stabilizes the skin and prepares the wool, preventing shedding and rot.
Sheepskin gets compared to lambskin often. Think of lambskin as the younger, more delicate version. It is generally thinner, with a silkier, finer wool. Sheepskin from a mature animal has a thicker, more substantial leather backing and a denser, springier fleece. For a pair of durable winter mittens or a sturdy rug, I’d choose sheepskin. For a super-soft vest lining or delicate accessories, lambskin is a dream.
Run your hand over a premium grade. The wool should feel full and resilient, like a cloud, not flat or matted. The leather side should be firm and consistent, not brittle or papery. You might find shearlings, which are shorn to a uniform, velvety pile, or sheepskins with a long, shaggy wool. The handfeel tells you everything about the care that went into the hide.
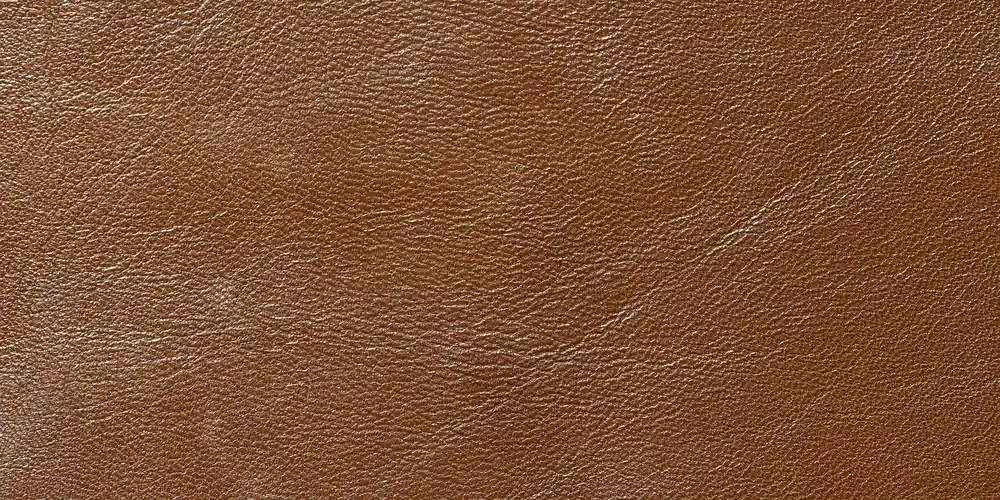
Choosing a hide with a tight, healthy grain and strong wool dictates how your finished project will look, feel, and last for years. I always look for clear signs of responsible sourcing, like reputable tanneries that prioritize animal welfare and environmental standards. A good hide is an investment in your craft.
Gathering Your Sheepskin Sewing Toolkit
Working with sheepskin is different from thin garment leather. Knowing the difference between sheepskin and shearling leather helps in choosing the right technique. You need tools that manage both the bulk of the wool and the toughness of the skin. This distinction matters for texture and how the material responds to cutting and finishing. A dull blade will crush and tear the fibers, leaving a ragged edge.
Cutting & Preparation Tools
- Sharp Fabric Shears: Dedicate a pair solely for leather and fleece. Blunt scissors will make a mess.
- Rotary Cutter & Self-Healing Mat: For long, straight cuts through the leather backing, this gives you clean control. The mat protects your table.
- Pattern Weights: Use these instead of pins. Pins leave permanent holes in the leather and snag the wool.
- Sharp Utility Knife: For intricate cuts or trimming seams from the back, a fresh blade is essential.
Needles & Thread
Your standard sewing needle will struggle and likely snap. You need a needle designed to punch through leather without tearing.
- Leather Needles (Glovers): These have a sharp, triangular point that slices through the hide cleanly. Choose a size appropriate for your thread and the leather’s thickness.
- Heavy-Duty Machine Needles: If using a sewing machine, you must use leather needles (often labeled as 100/16 or 110/18). A universal needle will break.
Thread choice is a balance of strength and look. For most projects, I lean toward strength.
- Heavy Waxed Polyester Thread: This is my go-to for durability. The wax coating helps the thread glide through the leather and locks stitches tight.
- Linen Thread: It offers a beautiful, traditional look and great strength, but it can be less consistent than modern synthetics.
- Thin, Unwaxed Thread: It can cut through the leather under stress over time. For sheepskin, always opt for a heavier, bonded, or waxed thread.
Using the wrong thread is a common mistake that leads to seam failure just when the piece is getting broken in.
Specialty Items for Handwork
- Awl: This tool is your best friend for pre-punching stitching holes, especially where layers are thick. It makes hand-sewing smooth and precise.
- Stitching Pony or Clamp: This holds your work firmly, freeing both hands to manage the needle and thread. It makes a huge difference in stitch consistency and reduces hand fatigue.
- Flat Clamps or Spring Clamps: For gluing seams or holding pieces in place before sewing, these provide even pressure without damaging the wool.
Preparing Your Sheepskin Hide for the First Cut
Working with sheepskin is a joy, but that fluffy wool needs respect before you make a single cut. A clean, flat hide is your foundation for a successful project.
Start by giving the hide a gentle cleaning. Lay it wool-side down on a clean, flat table. Use a soft-bristle brush or the upholstery attachment on your vacuum to lightly remove any dust or debris from the wool. For the leather side, a barely damp cloth is all you need; soaking can stiffen the skin and damage the fibers. Let the hide air dry completely if you use any moisture.
Flattening comes next. With the leather side up, smooth out any curls or wrinkles with your hands. You can place light books or pattern weights around the edges to encourage it to lie flat. Avoid using heavy objects in the center, as they can create permanent creases.
Marking your pattern is a delicate step. Always draw your cutting lines on the smooth leather back, never on the wool. Use tailor’s chalk or a water-soluble fabric marker. Apply very light pressure when tracing so you don’t crush the wool fibers on the other side, which can leave a visible dent. Secure your paper pattern with weights instead of pins to keep everything in place.
Now for the cut. Your goal is a clean line that follows the hide’s natural grain for maximum strength. I always reach for a sharp rotary cutter with a fresh blade or very sharp fabric shears. Dull tools will tear and pull at the leather. Guide your tool steadily, letting the sharpness do the work, and avoid the common mistake of stretching the hide as you cut, which leads to misshapen pieces.
Sheepskin hides are living canvases, so they often have irregular edges and natural stretches. If you hit a stretchy spot, pause and let the material relax. Cut slightly outside your line in these areas if needed, and trim to perfection once the piece is stable. Embrace the hide’s unique shape-it adds character to your final craft.
Sewing Sheepskin: By Hand and By Machine
The sewing method you choose sets the pace and personality of your project. Each has its perfect moment.
Choose hand sewing when you need absolute control for detailed work, small repairs, or when you want the strong, beautiful look of hand-stitched seams. It is meditative and precise. Opt for machine sewing when tackling large projects like a vest or blanket, where speed and consistent, sturdy seams are the priority.
For hand sewing, the saddle stitch is your best friend. It uses two needles and creates a locked, durable seam that is easy to keep even. The key to a professional finish is maintaining the same gentle tension on every pull of the thread, which prevents loose or puckered seams.
Machine sewing demands the right setup. You will need a heavy-duty needle (often labeled for leather or denim), and you must adjust your machine’s presser foot pressure so it guides the hide without mashing down the wool. Feeding the material slowly and evenly under the foot prevents jams and ensures your stitches are straight and strong.
Hand Sewing Sheepskin Hides
Let’s walk through a saddle stitch. First, punch your stitching holes. Using a sharp awl or diamond chisel, pierce through both pieces of leather from the back, keeping your holes evenly spaced. Brush the wool pile away from the stitch line with your fingers as you work to keep it clear.
Thread two needles with a length of waxed thread. Start from the backside, and with each stitch, pass one needle through the next hole from the front, and the other from the back, always pulling the threads in opposite directions. This crisscross action is what locks the stitch and makes it so durable, much like the stitching on my old wallet, Scout. Pull each stitch to a firm, consistent snugness.
Keeping your stitches straight is easier with both hands free. A stitching pony or a simple clamp to hold your work makes a world of difference. It lets you focus on the rhythm of the needle and the feel of the thread pulling through.
Machine Sewing Sheepskin Hides
Your machine needs to be ready for a thicker material. Install a brand new heavy-duty needle (size 14 or 16 is a good start). Reduce the presser foot pressure if your machine allows it; this keeps the fluffy wool from being compressed too much.
Always, always test on a scrap piece first. Sew a few lines on an off-cut to dial in the perfect stitch length and thread tension, which prevents skipped stitches or broken threads later. A slightly longer stitch (3-4 mm) often works best for thicker hides.
To stop the wool from getting tangled in the feed dogs, sew with the wool side facing up. The leather backing will grip the feed dogs better. For extra security, you can place a strip of thin tissue paper or tear-away stabilizer under the seam area; just sew right through it and peel it away when done.
From Project to Heirloom: Finishing and Caring for Sheepskin
A great finish makes all the difference. For sheepskin, the goal is a clean, durable edge that protects the hide and looks intentional. The method you choose depends on your project and skill level.
Neatening Your Edges
The raw, cut edge of a sheepskin hide has a fluffy leather side and wool fibers. Leaving it unfinished can lead to fraying and a messy look. Here are the three most common ways to finish it.
Folding the leather (a turned edge) creates a clean, professional finish common on coats and cushion covers. You cut your piece with a seam allowance, fold the leather side under itself, and glue or baste it down before stitching. This encloses the raw edge completely. It works best on straight or gently curved edges.
Binding the edge with bias tape or a leather strip is very forgiving for beginners. You wrap a strip of fabric or thin leather around the raw edge and stitch through all layers. This method adds a decorative color pop and reinforces the edge, making it ideal for rugs and blankets where the back might be visible.
Using a specialty edge paint gives a smooth, colored seal. After trimming the wool fibers close to the leather, you apply multiple thin coats of paint, sanding lightly between layers. This technique is standard on high-end bags and accessories. It requires practice but offers a hard-wearing, polished result. To finish with a truly professional look, seal the leather edges. That edge treatment complements the painted surface and adds durability.
| Method | Best For | Skill Level |
| Folding (Turned Edge) | Garments, cushions, items needing a hidden edge. | Intermediate |
| Binding | Rugs, blankets, throws, straightforward projects. | Beginner |
| Edge Paint | Bags, accessories, modern furniture. | Advanced |
Projects to Grow Your Skills
Sheepskin’s combination of a soft leather backing and insulating wool opens up unique project possibilities. Start simple to understand how the material behaves, especially when used in equestrian saddles and automotive seat covers.
A sheepskin rug or seat cover is the perfect first project. Cut the hide to your desired shape-a simple rectangle or a fun animal silhouette. Finish the edges with binding, and you have a cozy, instant upgrade. This teaches you how to handle the hide’s bulk and cut through both leather and wool cleanly.
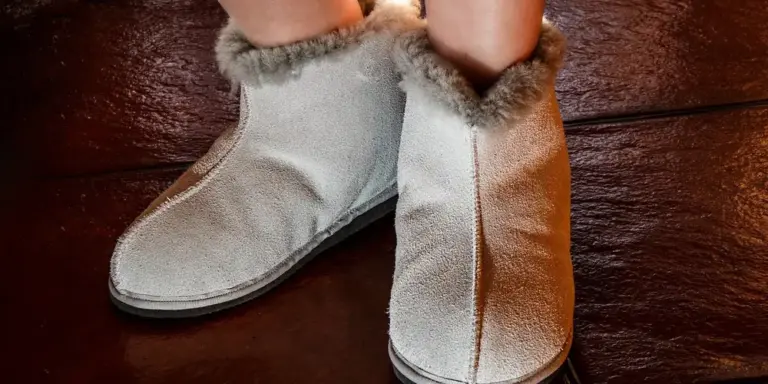
Moving to slippers or boot liners introduces basic shaping and sewing through multiple layers. You often sew the leather sides together, hiding the seams inside, so the fluffy wool faces outward. It’s a forgiving project because minor imperfections get buried in the plush wool.
Crafting a vest or coat is an advanced endeavor. It involves complex pattern pieces, significant leather shaping, and managing heavy seams. The construction is similar to a fabric garment but requires stronger thread, a leather needle, and patience. The reward is a breathtaking, functional piece of wearable art.
Caring for Your Creation
Sheepskin needs a gentle touch. Harsh cleaning can mat the wool and dry out the leather. Think of care as preventive maintenance, not a rescue operation.
For spills or spots, act quickly with a simple spot clean. Blot-don’t rub-the wool with a clean, damp cloth. For the leather side, use a cloth barely dampened with a mild, pH-balanced soap solution. Rinse the cloth with clean water and blot the area again to remove any soap residue. Be sure to properly treat leather stains to avoid damage.
Never apply direct heat to dry sheepskin, as it can bake and crack the leather. After any cleaning, shake out the item and lay it flat or hang it in a well-ventilated room away from radiators or sunlight. The air should do all the work.
Condition the leather side once a year, or if it starts to feel stiff. Use a light, non-greasy leather conditioner. Apply a small amount to a cloth and work it into the leather backing only, avoiding the wool. Let it absorb fully. This keeps the hide supple and prevents it from becoming brittle with age.
The Gift of Long-Term Maintenance
Your relationship with a sheepskin piece changes after it’s made. Gentle, regular care preserves its character for decades.
Shake out or gently brush the wool with a soft-bristle brush every few weeks to remove dust and maintain its fluffy loft. For a rug, a periodic gentle vacuum without the beater bar helps. Rotate cushions or rugs in sunny rooms to ensure even wear and fading.
That regular brushing and occasional conditioning are small acts that prevent big problems like dried-out leather or permanently flattened wool. My own well-worn pieces, like Mason the saddle or June the jacket, thrive on this predictable rhythm of care. It’s not about perfection, but consistent, mindful attention. Store sheepskin in a cool, dry place, never in plastic, which can trap moisture and cause mildew. With this care, your crafted sheepskin will only grow softer and more personal with time. To keep that softness long-term, learn how to properly clean, condition, and store your sheepskin or lambskin jacket. When you do, the leather will stay supple and comfortable for years to come.
Quick Answers
How do you care for and maintain sheepskin projects?
Spot clean only with a damp cloth and mild soap, and never apply direct heat to dry it. Condition the leather backing annually with a non-greasy product to prevent brittleness. Consider the best products and methods for cleaning leather to maintain its look and longevity. Use gentle, non-greasy cleaners and follow care guidelines for ongoing protection.
What types of thread and needles work best for sheepskin?
Use heavy waxed polyester or bonded thread for strength, and always pair it with sharp glover’s or leather needles. These are designed to slice through the hide cleanly without tearing.
Can you machine sew sheepskin, and what’s the key to avoiding jams?
Yes, but always sew with the wool side facing up so the leather grips the feed dogs. Using a strip of tear-away stabilizer under the seam area will keep wool fibers from tangling.
What’s a common, easily avoided mistake that ruins a seam?
Pulling your stitches too tight, which cuts through the leather over time. Maintain a firm, consistent tension that allows the seam to flex with the hide.
When hand-sewing, how do you protect the wool along the stitch line?
As you punch holes with your awl, use your fingers to brush the wool pile away from the seam allowance. This keeps fibers from being caught in the stitches, ensuring a clean line.
Finishing Your Sheepskin Journey
Your best work with sheepskin comes from matching the right needle to its supple hide and sewing with deliberate, even pressure. I’ve found that this careful approach builds durability into every seam, letting projects like my wallet Scout age with character instead of falling apart.
Always choose hides from transparent suppliers who practice ethical sourcing and gentle tanning methods. Caring for your creations with proper cleaning and conditioning turns them into trusted items you’ll use and refine your skills on for years.
References & External Links
- How to Make a Sheepskin Coat – Mother Earth News
- Sewing Natural Fur by Hand | In Pursuit of Medieval Excellence
- Tips on sewing with fur every beginner should know | So Sew Easy
- 3 Ways to Sew Fur Pelts Together – wikiHow
- sewing sheepskin sewing discussion topic @ PatternReview.com
Harriet is a avid collector of leather goods such as purses, bags, seat covers, etc and has an extensive background in leather care, recovery, stain removal and restoration. She has worked for a number of years perfecting her leather care techniques and knows the ins and outs of restoring all kinds and types of leather products. With her first hand knowledge in leather care, you can not go wrong listening to her advice.
Jacket and Apparel Care