How Do You Waterproof Suede?
Published on: March 5, 2026 | Last Updated: March 5, 2026
Written By: Harriet Nicholson
Hello Tannery Talk. You love your suede boots, but the forecast calls for rain. That familiar worry sets in-will a single splash ruin them? I understand that feeling completely.
Protecting suede is simpler than you think when you know the right steps. We will cover how suede reacts to water, choosing the right protector, the correct application method, and how to clean stains if they happen.
I’ve cared for materials like suede for years, reviving everything from delicate jackets to hard-worn work boots.
What You’re Actually Protecting: The Nature of Suede
Think of a piece of leather. One side is smooth and tough, like the outside of my saddle, Mason. The other side, the underside, is soft and fuzzy. That’s suede.
The soft surface, called the nap, feels like velvet. It’s like a very short, dense carpet made of tiny leather fibers. This nap is what gives suede its beautiful, matte look and soft handfeel.
The very thing that makes suede beautiful is what makes it vulnerable: that nap acts like a sponge, eagerly soaking up water, oil, and dirt. A drop of rain doesn’t bead up and roll off. It gets sucked in. A little salt stain from the sidewalk gets trapped deep in the fibers. Suede is thirsty leather.
Some new suede items get a light protective treatment at the factory. I still treat my suede jacket, June, as if it has none. Assuming your item needs help is the safest way to care for it and avoid surprises in a downpour. No amount of treatment can make them waterproof.
The Golden Rule: Always Clean First
This step is not optional. Applying a protector over dirt is like painting over a dusty wall. You just seal the grime in place forever.
You only need two simple tools for basic cleaning: a suede brush (a clean, soft-bristled toothbrush works in a pinch) and a suede eraser. The brush has brass or nylon bristles designed to lift the nap without damaging it.
Here is how to prep your suede, step by step.
- Take your suede brush. Brush the entire item firmly in one direction, following the natural grain of the nap. You’ll hear a soft, whispering sound as you lift the fibers. This brings up dried mud and dust.
- For scuffs or darker spots, use the suede eraser. Rub it gently over the mark like you’re erasing pencil from paper. The eraser crumbles away, taking surface grime with it.
- Brush the area again with your suede brush to whisk away the eraser crumbs and any loosened debris.
After cleaning, let the item sit for at least an hour in a clean, dry spot. This ensures any hidden moisture from the air evaporates and all the dust you’ve stirred up settles. You want a completely dry, clean canvas before you add any protector. Rushing this step is the most common mistake I see.
Choosing Your Shield: Sprays, Sprays, and More Sprays
A good waterproof suede spray is one you will use. It’s the simple first step for how to make suede shoes water resistant. But not all sprays are the same. Picking the wrong one can change the color and handfeel of your suede permanently.
Think of these sprays as a light, invisible raincoat. You want it to repel water without smothering the soft, breathable nap of the suede.
The Two Main Types of Protector
You will find two main chemistries on the shelf: water-based and silicone-based sprays.
Water-based sprays are my go-to recommendation for almost every suede item, especially jackets and light-colored pieces. They dry clear, have little to no chemical odor, and are less likely to darken the material. The protection is excellent for daily wear and unexpected showers.
Silicone-based sprays can offer a very strong water barrier. They are a common choice for heavy-duty work boots. But there is a trade-off. They often darken suede more noticeably and can leave a slightly slicker feel. The chemical smell is also stronger.
| Type | Best For | Watch Out For |
| Water-Based | Jackets, light colors, fashion boots, daily wear. | Reapply more often with heavy use. |
| Silicone-Based | Work boots, hiking shoes, items needing maximum rain defense. | Can darken suede; stronger odor. |
When you are looking at a label, check for the words “suede and nubuck protector.” A formula that also repels oil and stains is a great bonus. Avoid any product that says “conditions” or “nourishes” suede. That language is for smooth leathers. It’s especially important to use such a protector before any stains or spots appear.
The Golden Rule: No Oils, No Waxes
This is the most common mistake I see. You must never use products made for smooth leather on your suede.
Oils like mink oil or neat’s-foot oil, and waxes like those in some boot conditioners, will soak into the suede’s nap and clump it together into a hard, stained mess. It is nearly impossible to fix. Imagine pouring honey on a velvet cushion. That sticky, matted result is what happens to suede. Keep those excellent conditioners for pieces like my old saddle, Mason. They have no place on suede, and trying to remove such stains from suede is often futile.
How to Apply Your Spray Shield
Getting the right spray is only half the battle. Applying it correctly is what makes it work.
- Clean First. Always start with completely clean, dry suede. Use a specialized suede brush or a clean, dry microfiber cloth to lift dirt and restore the nap. Any dirt sealed under the protector becomes a permanent stain.
- Test in Secret. Shake the can well. Spray a very small amount on a hidden area, like the inside of a cuff or tongue. Check for color change after 30 minutes of drying.
- Spray Evenly. Hold the can about 6 inches away. Apply a light, even coat over the entire surface. Do not soak the material. A fine mist is what you want.
- Let it Dry. Allow the item to dry fully, away from direct heat, for at least 2-4 hours. The suede might look a shade darker when wet. This usually fades as it dries.
- Apply a Second Coat. For the best protection, especially on shoes, a second light coat after the first is dry is a smart move. It builds a more reliable shield.
If your suede does darken more than you like after treatment, do not panic. Often, gently brushing the nap once it’s bone dry will lighten it back up close to its original hue.
The Main Event: How to Apply Suede Protector
The process is the same for boots, shoes, or a jacket. It is simple but requires patience. Rushing leads to patches and poor protection.
Step 1: The Spot Test
Always do this first. Formulas can react differently with dyes and finishes. This small step prevents a big disappointment and builds trust in your process.
- Find a hidden spot. Inside the boot’s tongue, a jacket’s inner seam, or under a shoe’s collar.
- Spray a tiny amount. A quick press of the nozzle is enough.
- Wait for it to dry completely. This takes 30 minutes to an hour.
- Check the test area. Look for any darkening or change to the suede’s soft, napped texture. If it looks and feels fine, you are ready to proceed.
Step 2: The Application
Think of this like painting with a mist, not a hose. You want to coat every fiber of the nap without soaking and matting it down.
- Shake the can vigorously for a full minute. This mixes the active ingredients.
- Hold the can 6 to 8 inches away from the leather. This is about the length of your hand and forearm.
- Use short, sweeping passes. Start spraying before you reach the leather and continue past the edge.
- Keep the can moving. Never point it at one spot. A light, even mist is your goal. If you see the surface look wet or darken instantly, you are too close.
- Cover everything. Go over the entire surface, paying special attention to seams and stitching. Water loves to seep in through thread holes, just like it does on my wallet, Scout.
Step 3: The Dry and Repeat
This is where the protector does its work. Letting it dry fully is non-negotiable for a strong, invisible shield.
- Place the item in a warm, dry room with good air flow. Keep it away from radiators, fireplaces, or direct sun. Artificial heat can damage the leather.
- Wait. Let the first coat dry completely. This usually takes a few hours. Touch the surface. It should feel dry, not cool or damp.
- Feel for thirst. Gently run your fingers over the suede. If it still feels dry and absorbent, like it did before you started, apply a second light coat using the same misting technique.
- Give it time to cure. Most sprays form their strongest bond after about 24 hours. Try not to wear the item or expose it to moisture during this time. Plan this treatment for a day when you do not need the boots or jacket.
Life After Waterproofing: How to Care for Treated Suede
Here’s the truth you need to know. A waterproofing treatment is a refreshable shield, not a permanent force field. Think of it like a hydrating lotion for your skin. It works wonders, but over time and with exposure, it wears away. That’s perfectly normal. Your care routine now shifts from a one-time application to simple, consistent maintenance.
Keeping the Shield Strong
So, how do you keep suede boots waterproof? The answer is in two simple habits: brushing and reapplication. The nap of suede—that soft, fuzzy surface—can get matted down by dirt and wear. A flattened nap can’t properly shed water, even with protector on it.
My routine for Scout, my wallet, and June, my jacket, is the same for suede boots.
- Give them a gentle brush with a suede brush or a clean, dry toothbrush after every few wears. This lifts the nap and keeps it looking fresh.
- Every few months-or sooner if you’re facing heavy rain or snow-reapply a light coat of suede protector spray. Don’t wait for a failure. If you notice water stops beading up and starts soaking in, it’s time.
Consistency is more important than any single product; a quick brush and a periodic spray are the secrets to long-lasting protection.
After the Rain: Your Post-Exposure Ritual
Your boots got caught in a downpour. Don’t panic. How you care for waterproof suede boots after exposure decides their long-term health. Dry cleaning and restoration are crucial for water-damaged footwear.
- Let Them Dry Naturally. This is the most critical step. Never use direct heat from a hairdryer, radiator, or fire. Heat will bake the leather, making it brittle and prone to cracking. Stuff the boots with crumpled paper to help them hold their shape and absorb internal moisture. Place them in a room with good air circulation.
- Brush the Nap. Once they are completely dry to the touch (this can take a full day), brush the entire surface vigorously with your suede brush. This will resurrect the nap that got flattened by the water.
- Check the Bead. Sprinkle a few drops of water on an inconspicuous spot. If the water still beads up, your protector is still working. If it soaks in, it’s time for a fresh application once the boots are dry.
From Boots to Sofas: The Logic Scales Up
The same principles apply to larger items, like a waterproof suede sofa. The scale is bigger, but the rules are identical. After treatment, vacuum it regularly with a soft brush attachment to lift the nap and prevent soil from grinding in. If a spill happens, blot-don’t rub-immediately with a clean, absorbent cloth and let it air dry. Check the water-beading test on a hidden corner every six months and reapply protector as needed. Whether it’s a boot or a sofa, your suede needs you to be its consistent, gentle guardian.
When Things Get Wet: Your Stain and Water Rescue Plan
Even with the best protector, life happens. A sudden downpour catches you on a walk. You brush against a damp railing. Don’t panic. With a calm plan, you can manage most moisture mishaps.
The first rule is to stay calm; rushing often leads to rubbing, which can grind water and dirt deeper into the suede’s delicate nap.
For Light Moisture or Raindrops:
This is what your protector is for. You see a few dark spots where water has beaded up on your boot. Here is your move.
- Immediately grab a clean, absorbent cloth or paper towel.
- Gently press it against the wet spot to soak up the moisture. Do not rub or wipe.
- Let the item dry naturally, away from radiators, hairdryers, or direct sun. Heat can bake stains in and make the leather brittle.
Once the suede is completely dry to the touch, it will likely look flat and matted. This is normal.
Take a suede brush or even a clean, dry toothbrush and brush the area vigorously in one direction to lift the nap back up. You should see the color and texture restore. This means your protector worked, creating a barrier that let you blot the water away safely.
For Stains and Soaked Suede:
This is for tougher situations, like a salt stain from slush or a full-on soaking. The process is more involved, but patience is your best tool.
For fresh stains, a dedicated suede eraser is your first line of defense. Gently rub the eraser over the mark, then brush away the residue. For older or tricky stains like water rings, a slightly damp cloth with a drop of white vinegar can help. Always test any cleaner on a hidden seam first, especially when trying to remove water stains from suede.
If the item is completely soaked, like a boot filled with water, drying it correctly is everything.
- Blot away as much surface water as you can with towels.
- Stuff the boots or the sleeves of a jacket with crumpled newspaper or plain paper. This absorbs internal moisture and holds the item’s shape as it dries, preventing warping and shrinkage.
- Leave it in a well-ventilated room. This can take one to three full days. Change the stuffed paper every 12 hours if it becomes soaked.
Once fully dry, assess the leather. It may feel stiff, and stains might be more visible.
After a serious soaking, the protective barrier is often compromised, so you will likely need to gently clean the suede and apply a fresh coat of protector. Think of it like reapplying sunscreen after a swim. It’s not a failure; it’s part of caring for a material that asks for a little more attention in return for its unique look and feel.
Straight Answers to Common Suede Dilemmas
Let’s get to your questions. I’ve heard these from folks at markets and in my own workshop countless times.
“Should I spray new suede before wearing it?”
Yes. Do this first thing. Think of it like a raincoat you put on before a walk, not after you’re already soaked. New suede has a clean, open nap that readily absorbs protector. This creates a strong shield from day one against rain, salt, and everyday spills.
Applying protector to a brand-new item is the single most effective way to prevent stains before they happen.
“How do I waterproof old or dry suede?”
You can, but you need a little more patience. Old suede, like a favorite pair of boots, has collected oils and dirt. A protector can’t bond well to a dirty surface. To keep them protected, consider a waterproofing spray or suede conditioner for leather shoes, boots, and bags.
- Clean it thoroughly with a dedicated suede cleaner or a soft brush and white vinegar solution on a cloth. Let it dry completely.
- The leather might be thirsty. A light application of a suede-specific conditioner can help, but test it on a seam first.
- Now, the critical step: spot test your protector. Spray a tiny, hidden area and let it dry. Old suede can sometimes darken or change texture, so you need to know what to expect.
- If the test spot looks good, proceed with the full application.
Always clean and spot-test old suede first; the material can react differently than new suede.
“Can I use this on suede suits or chukka boots?”
The process is identical, but your approach changes with the item’s delicacy. My leather jacket, June, gets the same spray as my suede chukkas.
- For boots or sturdy jackets: Follow the standard clean, dry, and spray method. Pay extra attention to seams and welts where water sneaks in.
- For a suede suit or delicate garment: You must be meticulous. Perform the spot test on an inside seam or waistband. When applying the protector, use lighter, more even passes from a slightly greater distance to avoid any potential spotting.
Protecting delicate suede like a suit requires a gentler hand and an even more cautious spot test.
“What’s the biggest mistake people make?”
Rushing. People see a rain cloud and spray a dirty boot on their way out the door. The protector seals the dirt in forever. The second big error is using the wrong product.
Never use oils, waxes, or conditioners made for smooth leather on suede. They will clog the nap, create dark, greasy patches, and ruin the soft handfeel. I’ve seen it turn a lovely suede bag sticky and flat. It’s a heartbreaker.
Using an oil or wax meant for smooth leather is a sure way to permanently damage the texture and appearance of suede. A wax-based vs oil-based leather protectors comparative analysis explains why the formulation matters for suede. Understanding these differences helps you pick a product that preserves texture without risking damage.
Common Questions
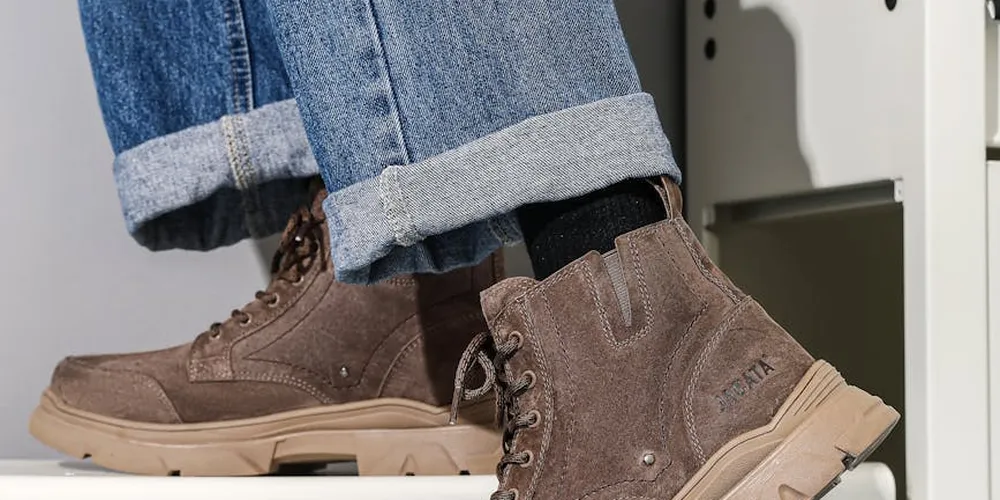
What’s the best way to waterproof suede chukka boots for men?
Treat them like any quality suede: clean them thoroughly with a brush and eraser first. Then, apply two light coats of a water-based protector spray, focusing on the seams and welt where water penetration starts.
Can I really make my suede sofa waterproof?
Yes, the same principles apply. After a careful spot test, use a water-based spray in a well-ventilated room, applying an even mist over the entire surface. Maintain it by vacuuming with a soft brush attachment and reapplying protector every six to twelve months.
Will a silicone-based spray ruin my suede shoes?
It won’t ruin them if you accept the trade-offs: expect more noticeable darkening and a potential change in handfeel. I reserve silicone sprays for rugged work boots where maximum water repellency is the only priority.
How often should I re-treat my waterproof suede boots?
Reapply protector every few months with regular wear, or as soon as you notice water no longer beading on the surface. A quick brush-down after exposure to dirt or rain will keep the nap lifted and the protection effective longer.
Caring for Your Suede Over the Long Term
The most reliable way to keep suede safe is to pair a quality protectant spray with gentle, consistent cleaning. Your first and best defense is always a fresh coat of protector, applied before suede ever sees rain or a stain. For best results, learn how to properly apply protective spray to suede shoes and boots. We’ll cover it in the next step.
Taking good care of your suede is a direct way to honor the material and practice sustainability. When you maintain your gear properly, you extend its life for years, which is the most respectful choice you can make.
Expert Resources and Citations
- r/goodyearwelt on Reddit: Suede shoes: to spray or not to spray (with waterproof protector)
- Nubuck & Suede Proof – Nikwax NA
- Amazon.com: Suede Waterproofing Spray
Harriet is a avid collector of leather goods such as purses, bags, seat covers, etc and has an extensive background in leather care, recovery, stain removal and restoration. She has worked for a number of years perfecting her leather care techniques and knows the ins and outs of restoring all kinds and types of leather products. With her first hand knowledge in leather care, you can not go wrong listening to her advice.
Suede and Nubuck Care