Is Leather Waterproof? A Practical Guide to Water Resistance and Outdoor Use
Published on: February 13, 2026 | Last Updated: February 13, 2026
Written By: Harriet Nicholson
Hello Tannery Talk. That sudden rain shower on your leather boots or the worry about your jacket in a downpour is a common fear, and I’m here to help.
We will cover why leather is not truly waterproof, how its natural water resistance varies, and the honest truth about using it in rain and wet conditions.
My hands-on years conditioning pieces like Mason the saddle and June the jacket have shown me exactly how leather reacts to water.
What Does “Waterproof” Really Mean for Leather?
Let’s clear this up first. “Waterproof” and “water-resistant” are not the same thing.
Think of a rubber raincoat. It’s waterproof. Water beads up and rolls right off. Nothing gets through. A waxed cotton jacket is water-resistant. It can handle a downpour for a while, but if you stand in the rain for hours, moisture will eventually seep in.
Leather is like that waxed jacket, not the rubber coat. As a natural, porous material made from skin, it can never be 100% waterproof. Its very structure is a dense network of protein fibers, like a tough sponge. This means it can be made highly water-resistant, but it will always interact with moisture on some level.
This fiber network is the leather’s foundation. When water hits it, those fibers can swell. The natural oils from the animal and the tannins from the tanning process fill some of the gaps between fibers, which is what gives leather its initial ability to shrug off a light splash.
How Leather Naturally Handles Water
You’ve seen it happen. A few drops of rain hit your bag, and the leather darkens in those spots. It feels cool and damp to the touch. That’s the moment of absorption. The water is being drawn into those tiny spaces between the fibers.
The natural oils and tannins I mentioned act as the first line of defense. They repel water briefly, giving you time to wipe it away. Oiled leathers, like many work boots or my old saddle Mason, have more of this built-in resistance from the start.
So, how water-resistant is it? It’s a spectrum. A thick, oil-treated full-grain leather boot is far more resistant than a delicate, unfinished suede shoe. The answer depends completely on the leather’s type, thickness, and finish.
When leather gets truly soaked, the problems begin. The fibers swell and then, as they dry, they can tighten and bind together. This leads to a stiff, board-like handfeel. If the leather dries too fast, it can crack. If it stays damp in a dark place, you risk mold or mildew stains that are very difficult to remove.
Why Some Water is Okay, But a Soaking is Not
Light, occasional exposure is part of a leather good’s life. A walk in a drizzle while wearing June, my jacket, is fine. A spilled drink quickly wiped off Scout the wallet is a minor event. These are manageable.
A soaking is different. Falling into a puddle or leaving a bag in a torrential rainstorm pushes water deep into the core. The risk isn’t just surface stains, it’s damage to the leather’s structure itself. That’s where the science of leather porosity explains why some stains sink deeper.
Here are the signs your leather has taken on too much water:
- Lasting Dark Spots: The area stays significantly darker after fully drying, indicating water penetrated deeply.
- A Stiff, Rigid Handfeel: The leather loses its suppleness and feels hard.
- A Warped or Puckered Shape: The item dries out of its original form, which is common with belts or thin wallets.
If this happens, don’t panic. The fix starts with patience. Wipe off excess water, stuff the item with newspaper or towels to hold its shape, and let it dry slowly at room temperature, away from direct heat. Once bone dry, a thorough conditioning with a quality leather conditioner will help replace lost oils and restore flexibility.
Different Leathers, Different Levels of Water Resistance
Think of leather like skin. Your own skin has oils and a top layer that sheds water. Leather works the same way, but its “skin” changes based on how it’s made. Some types bead up rain. Others soak it in like a thirsty sponge.
I see this every day in my shop. Mason, my old English saddle, is built from thick full-grain leather. Its surface is tight and dense. Water droplets sit on top for a minute before slowly soaking in. My jacket, June, is made from a softer, oil-rich pull-up leather. A light drizzle just darkens its color temporarily, wiping away easily.
Full-Grain and Pull-Up: The Tight Grain vs. The Oily Hand
Full-grain leather keeps the hide’s original, unaltered surface. This top grain is incredibly tight and compact. It’s your first line of defense. Full-grain leather resists water initially because its dense fibers have less space for moisture to enter. But it is not a seal. Prolonged wetness will penetrate.
Pull-up leather is soaked with oils and waxes during tanning. Bend it, and the oils “pull up” to the surface, creating lighter streaks. These oils make it naturally more water-repellent. The waxes and oils in pull-up leather create a barrier that causes water to bead and roll off more effectively than on untreated full-grain. It’s like comparing a well-waxed canvas jacket to a plain cotton one.
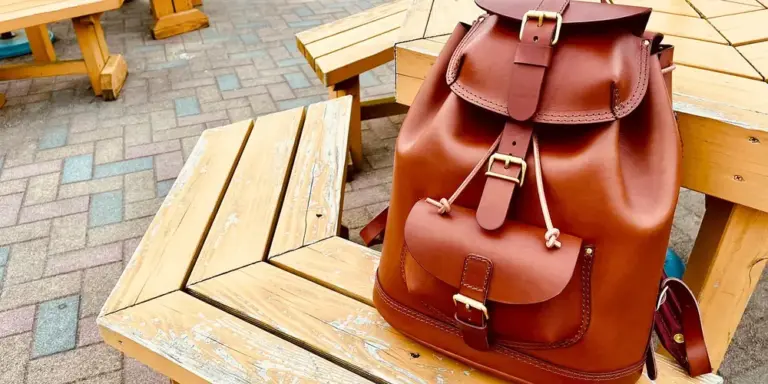
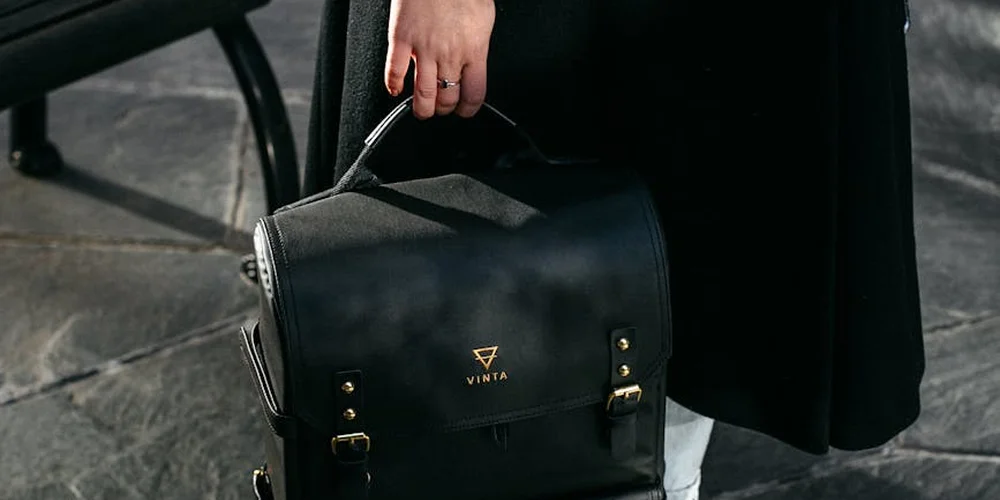
Your Leather Gear: Boots, Jackets, Gloves, and More
So, are your specific items waterproof? Let’s be clear. No everyday leather is truly waterproof. They are all water-resistant to varying degrees. That’s where the science of leather waterproofing comes in—how treatments bond to fibers and how long they last. Knowing this helps you gauge true protection and when to reapply.
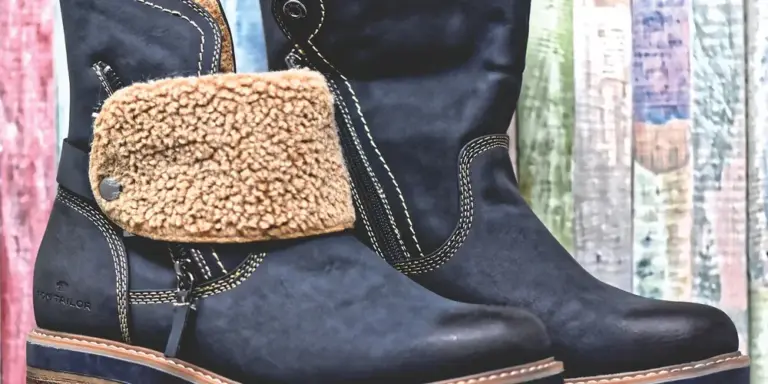
- Leather Boots & Cowboy Boots: Often made from full-grain or oil-tanned leathers. They can handle a walk in the rain but will wet through if submerged or in a downpour. The stitching is always a weak point for water entry.
- Leather Jackets & Coats: Like June, many are made from softer, treated leathers. They shrug off a light drizzle. A heavy storm will soak them, requiring careful drying away from direct heat.
- Leather Gloves (Cowhide): These provide a short burst of protection from dampness. However, constant contact with wet surfaces will saturate them quickly, stiffening the leather.
- Leather Shoes & Sneakers: Dress shoes with a smooth finish have minimal resistance. For any leather footwear, trapped moisture from rain is a fast track to damaged footbeds and lasting odor.
Smooth Leather vs. Nubuck and Suede: Stone Versus Sponge
This is a critical difference. Picture a smooth river stone. Water runs right off it. Now picture a kitchen sponge. It soaks up every drop.
A finished, smooth leather is like that stone. Its surface is sealed and compact. Nubuck and suede are buffed to create a nap, a layer of tiny fibers. This nap acts like a sponge, eagerly drawing in water and stains. Getting nubuck or suede wet often results in permanent dark spots and a stiff, matted texture. For these, prevention is everything. If they do get damp, dry them with a towel using a dabbing motion, never rub.
Special Cases: Sheepskin and Others
Sheepskin is a unique beast. It’s incredibly absorbent and insulating, often used for linings or slippers. The wool side loves moisture, which can lead to matting if not dried properly. If sheepskin gets wet, shake off excess water and let it air dry at room temperature, away from radiators or sun. Never apply heat, as it can cook the fibers and make the hide brittle.
For all leathers, the rule is simple. Water resistance is a temporary trait. Your job is to reinforce it. After any exposure to rain, let your gear dry naturally, then condition it with a pH-balanced leather conditioner to restore its natural oils. This simple habit keeps pieces like Mason and Scout ready for whatever comes next. It’s particularly important for jackets and shoes that face frequent exposure to harsh weather.
Is Your Leather Gear Ready for the Rain? A Practical Check
So, is leather suitable for outdoor use in the rain? My answer is a careful yes, but with major conditions. A well-maintained, sturdy piece of leather gear can handle a shower. Think of it like a waxed cotton jacket-it sheds water for a while, but a downpour will eventually soak through. Your success depends entirely on the leather’s type, its history, and how you’ve prepared it.
Not all leather is created equal for wet weather. My old English saddle, Mason, was built for it. His thick, oil-finished hide is meant to withstand horse sweat and meadow damp. My soft calfskin jacket, June, is a different story. She’s for style, not storms. Getting her soaked would be a setback.
Your Pre-Rain Assessment Checklist
Before you let your favorite bag or boots face the weather, run through this simple check. It takes just a minute but saves a lot of worry.
1. Check the Leather Type & Finish
Run your fingers over the surface. Does it feel slightly waxy or oily? Does it have a robust, tight grain you can see? These are good signs. Full-grain leathers with oil or wax finishes (like work boots or some saddles) resist water best. They have natural oils still in them.
If the surface is very smooth, painted, or has a plasticky feel, it’s likely a corrected grain or a heavily finished leather. Water can stain or crack these finishes. Suede and nubuck? They are thirsty. A drop of rain will leave a dark spot instantly. For suede, nubuck, or delicate finished leathers, the guidance is simple: avoid rain whenever possible.
2. Review Your Conditioning History
Leather is skin. Just like our skin, it dries out. Dry leather is brittle leather, and water will rush into those dry cracks, causing warping and damage. Think about the last time you conditioned it.
If you can’t remember, it’s been too long. A properly conditioned piece feels supple, not stiff. When you press it lightly, it should give a little and feel plump, not papery. A recent conditioning with a quality oil or wax-based conditioner is your best defense against water penetration.
3. Consider Its Age & Current State
Look closely. Are there deep scuffs that reveal a lighter color underneath? Are the stitches fraying? Is the leather already stiff in the folds? These are vulnerable points where water will enter first.
Old, dry, or damaged leather has lost its natural resilience. Exposing it to rain is asking for trouble. It’s like wearing a threadbare sweater in a snowstorm-it just won’t hold up. A new, stiff piece of veg-tan leather (like Scout was at first) also needs careful breaking in and conditioning before it’s weather-ready.
When to Risk It, and When to Stay Dry
Let’s make this clear with examples from the workshop.
Good to Go (for a light rain): Items like Mason the saddle, a well-oiled work boot, or a heavily waxed canvas-and-leather bag. These are designed for use. They have a built-up layer of protection from oils and waxes. If they get damp, you dry them slowly at room temperature and condition them afterward. The water beads up and rolls off for a period of time.
Keep It Sheltered: Items like June the jacket, a delicate handbag with a glossy finish, any suede item, or an antique, dried-out briefcase. The risk of permanent water spots, stains, or finish cracking is too high. For these, a sudden shower means seeking cover or using a dedicated waterproof cover.
A common mistake is using a waterproofing spray on leather that is already dry or damaged. The spray will seal the surface, trapping dryness underneath and potentially leading to cracks. Always condition first, then consider a protectant if needed. For most general use, a well-conditioned piece is adequately water-resistant. To prevent cracking and drying out, stick with regular conditioning rather than sprays. More tips on keeping leather supple appear in the next steps.
Your leather can be a companion for daily life, rain or shine. The key is knowing its limits and preparing it properly. A little attention goes a very long way.
How to Build a Shield: Prepping Leather for Wet Weather
Think of leather like your own skin. A healthy, conditioned hide handles a splash much better than a dry, thirsty one. Proper prep is everything. You cannot apply a protective product over dirt or dried-out leather and expect it to work.
Let’s start with Mason, my old saddle. Before a season of unpredictable trail rides, I always give him this three-step treatment.
- Clean Thoroughly. Use a gentle, pH-balanced leather cleaner and a soft brush or cloth. Wipe away all surface dirt, sweat, and old wax. This step opens up the leather’s pores.
- Condition Deeply. Apply a generous amount of a natural oil or conditioner. I work it in by hand, feeling for when the leather stops absorbing it. This replenishes the oils that give leather its natural flexibility and water resistance. Let it soak in overnight.
- Apply a Protector. Only on clean, conditioned leather do you add a protective wax or spray. This is the final shield.
Using a protectant is not a magic spell, it’s maintenance, much like putting on sunscreen before a long day outdoors. It adds a sacrificial layer. The water hits that layer first, giving you time to wipe it away before it soaks into the leather beneath. And just like sunscreen, it wears off. It breaks down with friction, time, and exposure.
This is why I recondition June, my leather jacket, every few months. The protector I applied last season has done its job, and now the leather needs fresh nourishment before a new shield goes on. Skipping conditioning and just adding more wax is a common mistake. It can lead to a stiff, clogged surface that might even crack.
Items like boots and shoes need extra attention. They face puddles, snow, and road salt directly. For my heavy-duty work boots, I follow the same clean-and-condition routine, but I always use a heavier wax-based protector on the lower quarters and seams. I pay special attention to the welt, where the sole meets the upper, as this is a prime spot for water seepage.
Choosing and Applying a Protector
Not all protectors are the same. Your choice depends on the leather and how you’ll use the item.
| Type | Best For | Things to Know |
|---|---|---|
| Silicone-Based Sprays | Jackets, bags, suede, nubuck. Items needing a lightweight barrier. | Easy to apply. Can sometimes change the handfeel, making leather less natural. Avoid on items you want to develop a patina. |
| Beeswax-Based Creams/Pastes | Boots, saddles, work gear. Full-grain leather facing heavy wear. | Provides a thick, durable barrier. Will darken leather noticeably and adds a matte finish. Needs buffing. |
| Water-Based Protector Sprays | Delicate or colored leathers, garments. A more breathable option. | Less likely to alter color or texture. Often requires more frequent reapplication than wax-based products. |
Application is simple, but precision matters. Here is my method.
- Test First. Always apply a small amount to a hidden area, like an inside seam. Check for any color change or texture issue after it dries.
- Apply Thin, Even Coats. For sprays, hold the can 6-8 inches away. For creams, use a soft cloth or your fingers. A common error is applying too much, which can leave a sticky residue or a cloudy white film (called “bloom”).
- Let it Dry Naturally. Never use a hair dryer or place leather near a heater to speed up drying. This can force moisture into the leather or crack the protective layer. Let it dry fully for 24 hours in a cool, airy spot.
- Buff Gently. Once completely dry, use a clean, dry cloth to buff the surface lightly. This brings up the shine on waxed pieces and ensures no tackiness remains.
A single, perfect coat is better than two rushed, gloopy ones. If you get caught in a downpour, don’t panic. When you get home, wipe the item down with a dry cloth and let it air dry, stuffed with newspaper if it’s a boot or shoe. Once fully dry, check the leather. If it feels stiff, a light conditioning will be necessary to restore the lost oils.
The Right Way to Dry Wet Leather
Getting caught in the rain with your leather bag or jacket is not a disaster. The real risk comes from how you dry it. Panic can lead to permanent damage. Here is the calm, methodical approach I use in my workshop.
The First 10 Minutes: Blot and Stuff
Act quickly, but gently. Your goal is to remove surface moisture without grinding it deeper into the grain.
- Blot, don’t rub. Use a clean, absorbent cloth or paper towel. Press it firmly against the wet leather to soak up the water. Rubbing can spread stains and damage the surface.
- Remove linings if possible. For items like boots or some bags, take out the inner lining or insole. This lets air circulate where you can’t reach.
- Use a paper core. For bags, boots, or gloves, stuff them firmly with plain, white paper or paper towels. This holds the item’s shape and absorbs moisture from the inside out. Avoid newspaper at all costs-the ink can transfer and stain the leather permanently.
The Long, Patient Dry: Air at Room Temperature
Now, let nature do the slow work. Place the item in a well-ventilated room, away from any heat source. A gentle airflow from a fan on a low setting across the room can help, but never point it directly at the leather. This process is not fast. A soaked jacket may need two to three full days to dry completely inside and out.
The single most important rule is to avoid any direct heat. I learned this the hard way with an old belt I tried to “help” along. Heat is the enemy of wet leather.
What Absolutely NOT to Do
- No hairdryers, radiators, or space heaters. Artificial heat cooks the leather. It forces the moisture out too fast, causing the fibers to contract, shrink, and become brittle and cracked. The finish can also blister.
- No direct sunlight. A sunny windowsill might seem perfect, but it acts like an oven. The heat has the same damaging effect, and UV rays can fade the color.
- Do not leave it crumpled or folded. This creates deep, permanent creases as the leather dries stiff.
How to Know It’s Done: The Feel Test
Your hands will tell you more than a clock. As my saddle, Mason, dries after a muddy ride, I check it daily. Properly drying leather should gradually regain its suppleness. When you gently flex it, it should move with a soft resistance, not a stiff, cardboard-like crunch.
If the leather feels stiff, dry, or papery once it’s no longer cool to the touch, it has lost its natural oils during the wetting and drying process. This is your signal that conditioning is needed—but only after the leather is completely dry through and through. Applying conditioner to damp leather traps moisture inside, which can lead to mold.
For a simple conditioning step after drying, use a small amount of a pH-balanced leather conditioner. Apply it with a soft cloth, let it soak in overnight, and buff off any residue. This replaces lost oils and restores the handfeel, helping to prevent the stiffness and cracks that come from dehydration.
Long-Term Care After Water Exposure

Once your leather piece is bone dry, the real work begins. Water doesn’t just get leather wet. It washes away the natural oils that keep the fibers flexible and strong. A thorough conditioning is non-negotiable. It’s like giving your leather a long drink of water after a hike. Make sure to use a conditioner specifically designed for leather rather than a waterproofing spray, as these serve different purposes.
This step restores the suppleness and protective oils that water exposure stripped away.
How to Condition After Drying
Use a generous amount of a pH-balanced leather conditioner or cream. I apply it by hand, as the warmth helps the product penetrate. Work it into every seam and fold.
- Apply conditioner to a clean, soft cloth.
- Rub it into the leather using small, circular motions.
- Let the leather absorb it for 15-20 minutes.
- Buff off any excess with a dry, clean cloth.
For a piece like my old saddle, Mason, I might do two light coats, letting it dry fully between each. You’ll know it’s worked when the leather feels cool and supple, not warm and papery.
Handling Water Spots and Stiffness
Sometimes, even after drying, you see faint rings or the leather feels a bit board-like. Don’t panic. These are often just mineral deposits or oils that have migrated. A gentle clean can fix it.
A light cleaning with a dedicated leather cleaner or saddle soap can often lift those water spots and prepare the surface for even conditioning.
- Dampen a cloth with clean water and wring it out completely.
- Apply a tiny amount of cleaner to the cloth, not directly to the leather.
- Gently wipe the affected area, then immediately wipe with a cloth dampened with water only to rinse.
- Let it dry completely again, then condition as described above.
My jacket, June, had this happen once. A light saddle soap clean followed by conditioning brought back its soft handfeel completely.
Prevention Through Consistent Care
The best defense against water damage is a good offense of regular maintenance. Think of it like this. A well-conditioned leather has its “tanks” full of protective oils. When water hits, it has less room to soak in and cause problems. This is just one aspect of proper leather care.
This is the simple routine that keeps my daily carry, Scout the wallet, ready for anything. A quick condition every three to four months takes just a few minutes.
Leather that is regularly nourished forms a more resilient barrier, making minor rain or spills much less of a threat.
With this knowledge, you can move forward with confidence. Leather isn’t a fragile museum piece. It is a durable, adaptable material. A little care goes a very long way. You can enjoy your leather boots on a damp trail or your bag in a sudden shower, knowing you have the simple steps to care for them afterward.
Quick Answers
Can I make my leather jacket waterproof with a spray?
No. A protector spray adds a temporary, water-resistant barrier; it does not create a permanent seal. For best results, always condition the leather first, then apply a thin, even coat of a suitable protector, reapplying as needed.
Is conditioning alone enough protection for light rain?
Yes, for most quality leathers. A well-conditioned piece has replenished natural oils that boost its inherent water resistance. Think of conditioning as feeding the leather from the inside, which is more important than any surface spray.
What’s the first thing I should do when I get caught in a downpour?
Blot off excess water immediately with a dry cloth, then let the item air-dry at room temperature, stuffed with paper to hold its shape. Never apply direct heat, as it will cook the fibers and cause irreversible stiffness and cracking.
How can I test my leather’s current water resistance at home?
Sprinkle a few drops of water on an inconspicuous area. If the water beads up and sits on the surface for a minute, your leather’s defenses are good. If it darkens and soaks in instantly, the leather is thirsty and needs conditioning before any wet weather use.
What is the single biggest mistake people make when drying leather?
Using direct heat from a hairdryer, radiator, or sunlight. This forces rapid moisture evaporation, which causes the leather fibers to contract violently, leading to permanent stiffness, shrinkage, and cracks (contrary to the natural extension of fibres during slow drying). Patience is non-negotiable.
Final Thoughts on Leather and Water
The single best piece of advice is this: treat leather like a trusted companion, not a sealed plastic shell. It breathes and changes, and with proper, gentle protection, it can handle life’s rainy days beautifully.
Looking after your gear is a quiet act of responsibility. Gentle cleaning and correct conditioning extend its life for years, which is the most sustainable practice of all.
Further Reading & Sources
- Is Leather Waterproof? Learn How to Waterproof Leather
- Is Leather Really Waterproof? Read Our Conclusive Guide Now – Von Baer
- Is Leather Waterproof? Learn Which Leather Can Get Wet – LeatherNeo
- Is Leather Waterproof?: The Definitive Guide
Harriet is a avid collector of leather goods such as purses, bags, seat covers, etc and has an extensive background in leather care, recovery, stain removal and restoration. She has worked for a number of years perfecting her leather care techniques and knows the ins and outs of restoring all kinds and types of leather products. With her first hand knowledge in leather care, you can not go wrong listening to her advice.
Waterproofing Leather (Sprays vs. Waxes)