Can You Use Acetone to Clean Leather? The Real Risks You Need to Know
Published on: November 3, 2026 | Last Updated: November 3, 2026
Written By: Harriet Nicholson
Hello Tannery Talk. That bottle of acetone might seem like a powerful cleaner for your leather, but using it is a quick way to turn a small problem into a big one.
We will cover why acetone strips leather’s essential oils, how it causes permanent dryness and color loss, and what safe alternatives to use instead.
I have learned this through years of hands-on repair, bringing everything from fragile vintage bags to my own worn saddle Mason back to life.
What Exactly is Acetone, and Why is it So Harsh?
Acetone is a powerful solvent. You probably know it as the main ingredient in strong nail polish remover. Think of it as a chemical bulldozer. Its job is to break things down and strip them away.
On leather, this chemical action is brutal. Leather is a natural material, kept soft and strong by its natural oils and protective topcoats. Acetone attacks both, dissolving the oils that moisturize and breaking down the finishes that protect. It doesn’t clean, it strips.
A good way to picture it is like pouring undiluted bleach on your favorite pair of dark jeans. The bleach wouldn’t clean the denim, it would instantly ruin the color and weaken the fabric fibers. Acetone does the same to leather.
This myth likely persists because acetone is useful for stripping paint or glue from hard surfaces. But leather is not a hard, inert surface. It’s a preserved skin. Using a tool for one job on a completely different material is a recipe for damage.
The Real Risks: What Acetone Does to Your Leather
The damage happens fast. Apply acetone, and you will see immediate changes. The leather’s color can fade or transfer onto your cloth. The surface dries out in minutes, leaving a stiff, brittle patch that feels totally different from the surrounding area.
That stiff feeling is a warning sign. It means the leather’s fibers have been robbed of their essential moisture. Once those natural oils are gone, they cannot be fully replaced, leading to irreversible long-term harm.
Over time, that dry, brittle spot is where deep cracks will form. The leather’s structure weakens, losing its strength and flexibility. It loses its supple handfeel, that pleasing softness when you touch it. Instead, the surface can become chalky and lifeless. To prevent this, regular conditioning keeps the leather hydrated and less prone to drying out and cracking. With the right care, you can stop your leather items from cracking and preserve their supple feel.
I think about my soft calfskin jacket, June. Her light creasing tells the story of years of careful wear. If I used acetone on a stain, I wouldn’t just clean a spot. I would create a permanent, dry scar. The area would lose its soft give, becoming stiff and prone to cracking at the seams. The repair would be far more difficult than the original “cleanup.”
For safe cleaning, skip the harsh solvents. Here is a reliable method:
- Test any cleaner on a hidden area first.
- Use a soft brush or cloth to remove dry dirt.
- Apply a small amount of a pH-balanced leather cleaner with a damp cloth.
- Gently wipe the area, never soaking the leather.
- Let it air dry completely away from heat.
- Condition the leather to restore moisture once it’s dry.
A common mistake is reaching for the strongest chemical to tackle a tough stain. The simple fix is patience and the right, gentle product. Stronger is not better in leather care.
| Agent | Primary Action | Result on Leather |
| Acetone | Dissolves and strips | Dries oils, removes finish, causes brittleness and cracks |
| pH-Balanced Cleaner | Lifts and suspends dirt | Cleans surface without harming oils or finish |
| Leather Conditioner | Replenishes and bonds | Restores moisture, maintains flexibility and strength |
Is Any Leather Safe from Acetone? The Rare Exceptions
For the leather you own and love, the answer is no. Using acetone on your boots, bag, or jacket is a guarantee of damage, not care.
Some heavily processed, industrial-grade leathers found in machinery or laboratory settings might briefly contact solvents without immediate failure. This is not a green light. Think of it like using steel wool on a painted wall. The paint might not strip off in one swipe, but the protective coating is scratched and compromised for good. The damage is done.
Acetone is a tool for professional refinishers in very controlled situations, not a cleaner for your cherished items. My saddle, Mason, or my jacket, June, would never see a drop of it. For your personal leather goods, the answer remains a firm and final no.
Safe and Effective Alternatives to Acetone for Cleaning Leather
Cleaning leather is about preservation, not aggression. You have gentle, proven options that clean while nourishing the material. Products and methods for cleaning leather should be chosen carefully to avoid damage.
- Saddle Soap: A classic for a reason. It cleans and adds a light layer of conditioning wax in one step. I use it on sturdy pieces like boots and belts.
- pH-Balanced Leather Cleaners: These are specifically formulated to lift dirt without stripping natural oils. They are my go-to for bags and furniture.
- Diluted Mild Dish Soap: For light, fresh stains, a drop of mild soap in a bowl of water works. Wring out a soft cloth until it’s just damp, never soaking.
Compare this to acetone. Where these products nourish, acetone devours. Where these protect, acetone exposes. The choice is clear.
The universal first step with any new product, even a mild soap, is to test it on a hidden area. This simple habit saves heartache.
Choosing the Right Cleaner for Your Leather Type
Matching your cleaner to your leather’s personality gives the best results. Here’s a simple guide:
| Leather Type | Recommended Cleaner | Care Tip |
|---|---|---|
| Full-Grain & Veg-Tan (like my wallet, Scout) | Saddle soap or pH-balanced cleaner. | These tough leathers can handle a gentle cleanse. Follow with a conditioner. |
| Suede & Nubuck | A dry, soft-bristled brush or a specialized suede eraser/cleaner. | Never use wet soapy cleaners initially. Brush gently to lift dirt and restore the nap. |
| Finished/Aniline Leathers | pH-balanced cleaner only. Be extra gentle. | These have less protection. Think of it like washing a delicate silk shirt, not scrubbing denim. |
Look for products with simple, nourishing ingredients like lanolin or natural oils. They clean while they care.
How to Test Any Cleaner Safely
This is non-negotiable. Skipping a patch test is like stepping into a bath without checking the temperature first.
Here is the quick, three-step method I use on every single piece:
- Find the Spot: Choose a hidden seam, inside flap, or bottom corner. The goal is invisibility.
- Apply and Wait: Use a cotton swab to apply a small dot of your cleaner. Let it dry completely. This usually takes 30 minutes to an hour.
- Check the Results: Look closely. Is there any color transfer on the swab? Does the leather feel rougher, stiffer, or look discolored? If you see any change, stop. That cleaner isn’t right for this leather.
A safe cleaner will vanish without a trace, leaving the leather’s color and texture untouched. Only then should you proceed to clean the entire item. This simple ritual is the cornerstone of confident leather care.
How to Clean Leather the Right Way: A Step-by-Step Guide
Think of cleaning leather like caring for your own skin. You would not scrub a dirty face with harsh chemicals without moisturizing after. The same rule applies here. For any piece, from a daily wallet like Scout to a prized jacket, follow this sequence: dust, clean, condition, and air dry. Cleaning without conditioning leaves leather vulnerable, stripping away the natural oils that keep it flexible and strong. This simple habit is what keeps my own pieces, like Scout, looking and feeling good for years.
Step 1: Gently Remove Loose Dirt and Dust
Always start dry. Take a soft brush, such as a horsehair brush, or a clean, dry microfiber cloth. Lightly sweep over the entire surface. Skipping this step is a common mistake that grinds abrasive particles into the leather’s grain during the wet clean, acting like fine sandpaper. On my wallet Scout, I pay special attention to the card slots and edges where dust collects. It takes less than a minute but prevents unseen wear.
Step 2: Apply Your Chosen Leather Cleaner
Pick a gentle, pH-balanced leather cleaner. Dampen a soft cloth with water and wring it out until it is just barely moist. Apply a small amount of cleaner, about the size of a pea for an item like a wallet. Use light, circular motions to lift the dirt. Immediately after, wipe the area with a separate cloth dampened with clean water to remove every trace of soapy residue. Leftover cleaner can attract more dirt and dry out the leather. I use this method on June my jacket, focusing on the cuffs and collar where oils from skin build up. This is a safe at-home method to clean a leather coat without damaging it. The next steps will guide you through doing a clean wash at home without damaging the coat.
Step 3: Condition to Restore Lost Oils
This step is not optional. Even the mildest cleaner removes some of leather’s essential moisture. Apply a thin, even layer of a quality conditioner (look for ones with natural bases like lanolin or beeswax) using a clean cloth. Let the conditioner soak in fully; this typically takes 15 to 30 minutes in a room with normal airflow. You will see the leather darken slightly as it absorbs the oils, and the handfeel will become richer. For vegetable-tanned leather like Scout’s, I condition every few months to maintain its integrity. Whether you’re caring for genuine leather or a faux leather jacket, the same basic steps still apply: clean, condition, remove stains, and restore the finish. Using the right products for each material helps keep the look and feel durable.
Step 4: Let it Dry Naturally, Away from Heat
Place the leather item in a shaded, well-ventilated spot at room temperature. Avoid any direct heat source like a hair dryer, heater, or sunny window sill. The leather is fully dry when it feels cool and dry to the touch, with no sticky or tacky sensation. Rushing this with heat can cause the fibers to contract and become brittle. For a piece like Mason the saddle, air drying might take a full day, but it ensures the leather retains its strength and suppleness. The same air-drying approach works for leather jackets and shoes. It helps prevent damage like cracking or stiffness while keeping the leather flexible.
What to Do If Acetone Already Touched Your Leather
Accidents happen. If acetone spills on your leather, your first moves are critical. Immediately blot the area gently with a clean, absorbent cloth. Do not rub or wipe, as this spreads the chemical. If you act fast, you can lightly dampen a cloth with plain water and gently dab the area to help dilute and remove any acetone residue. This quick response can limit the extent of the damage before you assess it properly.
Assessing the Damage: Is it Salvageable?
Once the area is blotted, inspect it carefully under a good light. Look for warning signs: a bleached or whitened color, a stiff or cardboard-like texture, or a grain that feels raised and rough. Minor damage often looks like a dry, dull patch, while severe damage shows as pronounced cracking, a sticky film, or complete loss of the topcoat and dye. Tilt the piece to catch the light and check for fine cracks you might not see head-on. On a smooth leather like June’s calfskin, acetone might just remove the finish, but on an oil-tanned piece, it could penetrate deeper.
Steps to Try at Home for Minor Damage
If the leather is not cracked or deeply discolored, you can try a careful recovery. First, clean the entire piece with a mild leather soap to ensure the surface is prepared. Then, apply a rich, oil-based conditioner generously to the affected area. You will need to repeat this conditioning process every day for several days, allowing the leather to air dry completely after each application. This slow, intensive feeding can help draw some moisture back into the fibers. Be patient and set realistic expectations. The leather may regain some softness, but the original color and surface sheen are often permanently altered. I have used this method on small spots on Mason with some success, but it is a repair, not a restoration.
Debunking Common Leather Cleaning Myths
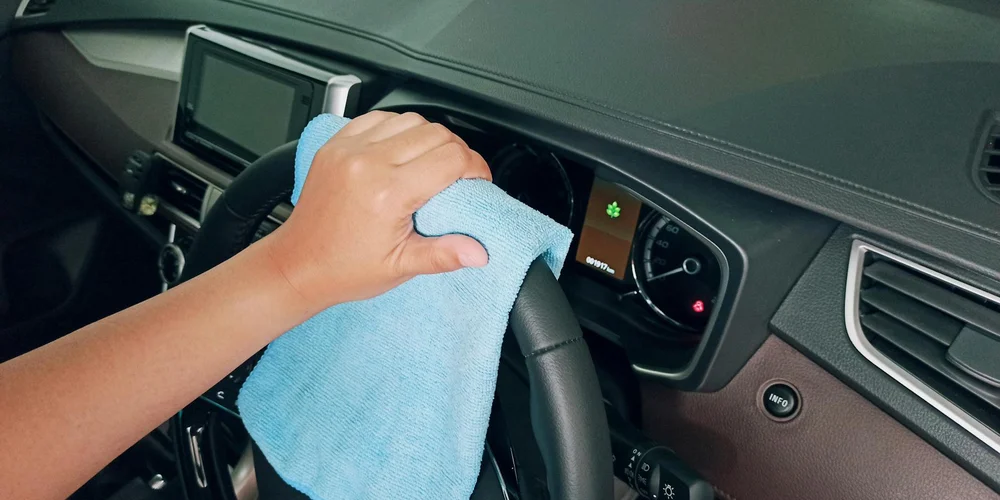
Acetone is not a lone wolf. It is part of a pack of common household items that seem handy for cleaning but spell disaster for leather. Recognizing the whole group helps you protect your gear.
Vinegar, Rubbing Alcohol, and Glass Cleaner
These are all harsh solvents or acids. They work by breaking things down.
White vinegar is acidic. Pouring it on leather is like giving it a chemical sunburn. It dries out the natural oils far faster than time ever could. I have seen belts treated with vinegar become stiff and brittle, losing all their flexibility.
Rubbing alcohol is a powerful drying agent. It strips away everything on contact. Think of your leather’s natural oils as its immune system. Alcohol wipes that defense out immediately, leaving the material parched and vulnerable to cracking.
Household spray cleaners are designed for hard, non-porous surfaces. Their chemistry is all wrong for leather. They often leave a filmy residue that blocks the leather’s pores, preventing it from breathing or accepting proper conditioner later.
Leather is a skin, not a countertop. It needs pH-balanced, dedicated products to stay healthy.
The Right Way to Clean Any Leather Item
Good leather care is not complicated. It is a gentle, two-step process that works on everything from Mason the saddle to Scout the wallet. These are the best general methods for caring and treating leather items. We’ll explore them in more detail in the next steps.
- Clean with a damp cloth. For most light dirt and dust, a soft microfiber cloth dampened with plain water is all you need. Wipe gently in one direction following the grain.
- Use a dedicated leather cleaner. For stuck-on grime, use a cleaner made for leather. Apply a small amount to a separate cloth, never directly onto the leather. Work in small circles, then wipe away any residue with a clean, damp cloth.
- Let it dry completely. This is the step everyone rushes. Walk away for a few hours. Let the leather air dry at room temperature away from direct heat.
- Condition. Once dry, apply a thin, even coat of leather conditioner. This replaces the natural oils that cleaning and time remove. Buff off any excess with a dry cloth.
This simple routine, done once or twice a year, is what builds a beautiful, resilient patina. It is what keeps June’s jacket soft and Mason’s saddle supple.
Why Risky Shortcuts Are So Tempting
The myth of using acetone or vinegar follows a pattern. We see a tough stain and reach for the strongest cleaner we know. We want results now. Leather, however, works on a different timeline. It rewards patience and gentle consistency.
These shortcuts promise a quick fix but always demand a long-term payment in the form of dried-out, damaged material. The repair for leather stripped of its oils is often more costly and complex than the original cleaning would have been.
Proper leather care is not more work; it is the right work. It is simpler and far more effective than recovering from a chemical mishap.
Your leather goods are built to last for decades with the right support. Understanding the science behind leather aging—why cracks form and how to prevent them—helps you choose care that keeps pieces looking new longer. Reaching for a gentle, specific product is the easiest way to honor that longevity and ensure your favorite pieces age with grace, not regret.
Common Questions
What exactly does acetone do to leather on contact?
It acts as a brutal solvent, instantly dissolving the protective topcoats and stripping the natural oils from within the leather’s fibers. This causes immediate drying, stiffening, and often permanent color loss or distortion.
If acetone dries leather out, can’t I just condition it after?
Conditioning replenishes moisture but cannot repair the structural damage to the fibers or replaced stripped finishes. Think of it like trying to heal a severe chemical burn versus moisturizing dry skin-the underlying damage is done.
Are there any ‘gentle’ solvents that are safe for leather?
No. Solvents like rubbing alcohol, vinegar, or ammonia are all harsh and drying. For preservation, you must use products specifically formulated for leather, which are pH-balanced to clean without attacking the material’s essential chemistry. Some myths about household cleaners like Windex can safely treat leather. The risks behind these myths are explained in detail in our guide.
What’s the very first thing I should do for a tough stain?
Stop, and gently blot-never rub-the area with a clean, dry cloth. Your immediate goal is to contain the spill, not attack it. Reaching for a harsh chemical in a panic guarantees a worse outcome than the original stain.
How do I know if a leather cleaner is truly safe?
The only way to know is to perform a patch test on a hidden area and let it dry fully. A safe cleaner will leave no trace-no color transfer, stiffening, or discoloration. This simple test is non-negotiable for any product you use.
Final Thoughts on Acetone and Leather
Avoid acetone for cleaning leather every single time. It aggressively removes the natural oils that keep leather flexible and strong, risking cracks and a stiff, dry feel. This is just one of the DIY leather cleaning dangers you should be aware of.
Responsible leather care respects the material and promotes its longevity. Learning to maintain your goods with gentle, appropriate methods is a skill that supports sustainability and honors the craft.
Research and Related Sources
- Can You Use Acetone On Leather? (No – Explained) – Karen’s Green Cleaning
- Acetone – the perfect leather cleaner?
- r/AskACobbler on Reddit: Just tried acetone to remove scuffs from a pair of docs – while it didn’t remove scuffs it seems to have made them significantly whiter? Is this bad for the shoe?
- 5 Things You Should NEVER Use on Leather – Honest Crafters Tips5 Things You Should NEVER Use on Leather – Honest Crafters Tips
Harriet is a avid collector of leather goods such as purses, bags, seat covers, etc and has an extensive background in leather care, recovery, stain removal and restoration. She has worked for a number of years perfecting her leather care techniques and knows the ins and outs of restoring all kinds and types of leather products. With her first hand knowledge in leather care, you can not go wrong listening to her advice.
How to Spot Test New Products