Genuine Leather vs. Bonded Leather: How Do You Repair Them?
Published on: October 28, 2026 | Last Updated: October 28, 2026
Written By: Harriet Nicholson
Hello Tannery Talk. That split seam or scuff on your leather item can feel daunting, especially when you are not sure what kind of ‘leather’ you are even working with.
This article will walk you through spotting the difference between genuine and bonded leather, practical repair steps for each, and the hard limits you might face.
I have spent years at the bench giving pieces like my worn saddle Mason and repaired jacket June a second life, so I know what works and what does not.
What Exactly Are You Working With? Genuine vs. Bonded Leather
Before you pick up a cleaner or a patch, you need to know your material. This isn’t just a label check. It’s about understanding the very nature of what you’re trying to fix.
Genuine leather, in its simplest form, is a whole tanned animal hide. It’s a natural material with pores, fibers, and character. It ages, develops a patina, and tells a story. Unlike synthetic alternatives, genuine leather has unique characteristics that come from its natural origin.
Bonded leather is a composite material. It’s made by taking shredded leather fibers and dust, mixing them with plastic binders and glue, and pressing them into sheets. A synthetic topcoat, usually polyurethane, is then applied to look and feel like leather.
Think of it like baking. Genuine leather is like a loaf of whole grain bread. Bonded leather is like those uniform, processed sandwich slices. One is a complete, natural product. The other is a reconstituted version. In a comprehensive comparison of genuine leather vs bonded leather vs top grain leather, we’ll see how they stack up.
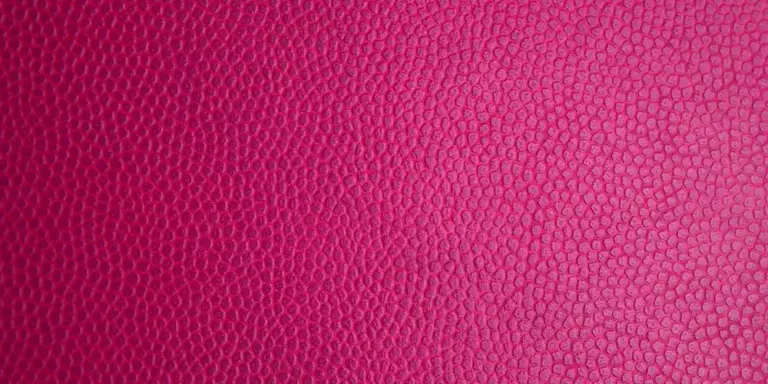
You can often tell the difference with your senses. Pick up a jacket like my June. Genuine leather feels supple, has a varied grain you can see, and carries a distinct, earthy scent. Bonded leather on a sofa or budget belt feels more uniform, often plasticky to the touch, and smells synthetic.
Genuine Leather: The Skin That Breathes
This material is alive in a sense. It reacts to its environment and your care. My old English saddle, Mason, is a perfect example. With regular conditioning, its deep chestnut color has warmed and darkened in the high-wear areas, creating a rich, unique patina. The scratches and marks aren’t flaws. They’re a record of every trail ride, adding to its character.
Genuine leather has a grain structure, just like wood, and this is where terms like “full-grain” and “top-grain” come from. Full-grain is the entire, un-sanded top layer. It’s the most durable and develops the best patina. Top-grain is sanded to remove imperfections, making it smoother but slightly less rugged. It’s the difference between a pair of raw denim jeans that fade uniquely and a pair that’s been pre-washed for a uniform look.
Bonded Leather: The Glued-Together Alternative
The construction process defines bonded leather’s limits. Manufacturers take the leftover dust and very short fibers from the genuine leather cutting process. They mix this with a polyurethane binder-a liquid plastic-and spread it onto a fabric or paper backing. Once it dries, a plastic coating is applied to the surface for color and texture.
The primary weakness is that this plastic top layer is only glued onto a fragile base. Over time, with flexing, sunlight, and general use, that bond fails. The top layer starts to peel, crack, and flake away, revealing the fuzzy, fabric-like layer underneath. This isn’t aging. It’s disintegration.
The Repair Reality Check: Durability and Limits
How these materials age dictates what you can do to fix them.
Genuine leather ages through use. It creases, softens, and develops a sheen. A small scratch on my wallet, Scout, can often be blended away with a bit of conditioner and gentle rubbing. Bonded leather doesn’t age. It wears out. It cracks abruptly and flakes off in pieces, like old paint on a wall.
Here’s a useful analogy. Repairing genuine leather is like fixing a broken-in work boot. You can re-sole it, polish it, and condition it for more years of service. Repairing bonded leather is like trying to fix a sheet of laminated paper that’s peeling apart. You’re working against its fundamental construction.
This is the core of the repair battle. Genuine leather has a solid, fibrous structure. This gives you a real foundation for repairs.
- For Scratches & Scuffs: Clean the area with a neutral leather cleaner. Apply a matching leather cream or conditioner with a soft cloth, rubbing it into the mark. For deeper cuts, a leather filler paste can be used, sanded smooth, and then colored with a leather dye.
- For Tears & Rips: You can saddle-stitch a tear for strength or apply a leather patch from behind using a flexible, water-based leather glue, then blend the edges.
Bonded leather lacks this integrity. The “leather” part is just a dust coating on plastic. Once the plastic topcoat peels or cracks, there is no structural leather left to repair. Your options are severely limited and often temporary.
- For very small, early cracks, a flexible vinyl or leather repair compound can sometimes fill the gap and be color-matched. This is a cosmetic fix.
- If the layer is peeling, you can try to re-glue it with a strong adhesive, but the surrounding area remains weak and will likely continue to peel.
- There is no effective way to “condition” bonded leather to prevent this. Conditioners are designed for natural fibers, not plastic coatings.
This brings us to cost. A genuine leather sofa or bag costs more upfront because it is a durable, repairable material built to last decades. A bonded leather item costs less because it is not. The initial savings often come at the expense of long-term repairability and a much shorter lifespan. You are investing in years of service versus years of eventual replacement.
Step-by-Step: Mending Your Genuine Leather Goods
This section is for the pieces you love, the ones with stories in their grain. With the right care, you can extend their life for years. We will focus on the most common issues: surface wear and physical tears.
Fixing Scratches and Restoring Moisture
Light scratches and dryness are signs your leather is thirsty. This is the most common repair and often the most satisfying. Think of it like skincare. My jacket June gets these light creases and scuffs. Here is how I handle them.
First, you clean. Use a soft brush or cloth with a pH-neutral leather cleaner. This removes dirt that could grind into the grain during buffing. Wipe with a damp cloth and let it dry completely.
Next, you feed the leather. Apply a quality leather conditioner or cream with your fingers or a soft cloth. Use circular motions and let it soak in. Your goal is a uniform, matte finish that feels supple, not slick or sticky to the touch. For a belt or shoes, pay extra attention to bend areas.
Finally, you buff. Once the conditioner is dry (usually 30-60 minutes), use a clean, dry cloth to buff the surface gently. This brings up a soft shine and ensures no residue is left behind. If the leather still feels dry after 24 hours, you can apply a second, lighter coat.
Patching Tears and Reattaching Seams
For small tears or loose seams, you can often make a strong, nearly invisible repair. The key is to reinforce from behind. When the stitching on my wallet Scout started to fray, I used this method.
For a clean tear or a loose seam flap, a flexible leather glue is your best start. Apply a thin layer to both surfaces, press firmly together, and wipe away any excess that squeezes out. Use a clothes peg or binder clip to hold it for an hour.
For strength, you need a patch. For a tear, place a piece of sturdy fabric or thin leather behind the hole. Glue this backing patch in place first, let it cure, then glue the tear closed over it. This distributes stress.
Hand-stitching is the gold standard for lasting repairs. If a seam has burst, you can often re-stitch along the original holes using a saddle stitch. This creates a redundant, strong lock that machines cannot replicate. A common mistake is using thread that is too thin; use a robust waxed thread meant for leatherwork.
Patchwork Possibilities: Can You Really Fix Bonded Leather?
We need to be honest here. Bonded leather is a layered material of shredded fibers and polyurethane. You cannot restore its structure, only disguise damage for a short while. Repairs are cosmetic, not curative.
Deep tears in bonded leather are often a death sentence because the material has no continuous grain or fiber structure to hold a stitch or patch securely. A patch glue may stick to the surface vinyl, but the weak bonded core underneath will likely fail again.
The products that work for genuine leather, like conditioners and heavy-duty adhesives, are often wrong for bonded leather. Conditioners cannot penetrate the plastic top-layer, and strong glues can dissolve the vinyl. You need products designed for vinyl or synthetic material repair.
Cosmetic Fixes for Peeling and Cracks
If the damage is surface-level peeling or a small crack, you can attempt a cover-up. Understand that the peeling will likely continue at the edges of your repair.
Clean the area thoroughly with rubbing alcohol to remove any oils. Let it dry.
For peeling edges, use a tiny drop of flexible cyanoacrylate (super glue) or a specific vinyl adhesive. Carefully lift the peeling film, apply glue underneath with a toothpick, and press down firmly. Wipe away excess immediately.
For cracks and gouges, use a liquid leather or vinyl repair compound. These are colored pastes. Fill the crack slightly higher than the surface, following the product’s instructions. Once dry, you can sand it lightly with fine grit sandpaper to smooth it. You may need to use a colored leather paint or dye to blend the repair. The result is a visual fix, but the feel and flexibility will not match the original.
Knowing When to Call in a Leathercraft Pro
Sometimes the best tool for the job is another person’s skill. Assessing damage honestly is the first step. I look at three things: size, location, and the material itself.
Assess the Damage: A Three-Point Check
First, check the size. A small scuff is one thing. A long, gaping tear is another. Second, note the location. Is it on a high-stress seam, like where a sofa cushion bends? Or is it on a flat, non-moving panel? Third, you must know your material. Is it genuine leather or bonded? This changes everything.
For genuine leather, the repair options are broad and often very successful, turning damage into a story rather than an ending. This naturally leads to questions about which methods are most effective for repairing and fixing general leather items. In practice, you’ll find some approaches that apply across wallets, belts, jackets, and bags.
Contrasting Repair Realities
Let’s take a torn sofa cushion. On a piece like my old English saddle, Mason, I could rewax the threads and re-stitch a torn seam. For a gouge in the leather, a pro can fill, sand, and blend the area with matching dye. The hide is a solid, forgiving material.
Bonded leather tells a different story. When the thin top coating splits, it often peels back like a sticker. The fibrous layer underneath has no structural integrity. You can’t stitch it. Glue might hold the peel-down temporarily, but it won’t address the weakness of the material itself. The split usually comes back, often worse.
A splitting bonded leather item has reached a fundamental limit of its construction, where cosmetic fixes rarely provide a lasting solution.
The Cost-Benefit of Repair vs. Replacement
Think about value. Is this your favorite jacket, like my June, broken in perfectly over six years? Does your wallet, like Scout, hold sentimental weight? Repairing a quality genuine leather item preserves its history and character. It’s an investment in more decades of use.
For a bonded leather office chair or a low-cost item, a professional repair might cost more than the item is worth. In those cases, replacement is the practical choice. It’s also a chance to choose a better material next time.
Trusting the Experts
For valuable, genuine leather furniture, bags, or heirlooms, a professional leathercraft restorer is your best ally. They have the tools, the right adhesives, and the knowledge of grain and tension that I can’t give you in an article. They can perform invisible reweaving, structural reinforcement, and perfect color matching. If you’re curious about DIY options, a vintage leather restoration guide can introduce basic antique upholstery repair techniques. It can also help you know when professional help is needed.
Seeking expert help for a cherished genuine leather piece is the surest way to extend its life for another generation, honoring the animal and the original craft.
Smart Choices: Picking Leather That Grows Old With You
The easiest repair is the one you never have to make. Choosing the right leather from the start saves heartache later. Here’s how to spot the difference when you’re shopping. Considering natural leather vs faux leather, which is easier to repair and clean? This quick comparison will guide your choices.
How to Identify Genuine Leather
Use your senses. First, look closely. Genuine leather has a natural grain pattern. It will be unique, with small pores, wrinkles, and variations. No two sections look exactly alike. Bonded leather or fake leather often has a too-perfect, repeating pattern stamped on.
Next, feel it. Genuine leather feels warm and supple. It has a slight give. Bonded or synthetic materials often feel cool, plasticky, or uniformly stiff. Finally, check the label and edges. Look for terms like “Full-Grain,” “Top-Grain,” or “Genuine Leather.” Check the unfinished edge. Real leather will look fibrous, like compressed felt. A bonded edge often shows a clear, paper-like layer.
Trust the imperfections; a natural, inconsistent grain and a warm handfeel are the truest signs of real leather.
Let Price Be Your Guide
Leather is a premium material. If a sofa, jacket, or bag seems surprisingly cheap for its size, it often signals bonded or faux materials. Quality leather crafting has a cost. You are paying for durability.
Think of it like this: a full-grain leather belt might cost more upfront but will last 20 years. A bonded leather belt might crack in two.
Tips for Specific Purchases
For sofas and chairs, ask the retailer for a sample. Examine the edge and back of the sample. Run your fingernail lightly across it. On real leather, you might see a slight, temporary mark that fades (like the “pull-up” effect). On coated materials, nothing will happen or it might scratch.
For accessories like belts and wallets, look for items that showcase the flesh side (the back). A craftsman proud of their material will often leave it visible. Thicker leather indicates better longevity.
Choosing with Care
Selecting a well-made item from genuine leather is a responsible choice. It means choosing an object built to last for decades, not one destined for landfill in a few years. This mindful approach respects the resource.
By investing in quality, durable leather goods, you actively participate in a cycle of care and longevity that stands against wasteful consumption. Each scratch and patina, like on Mason or June, becomes a chapter in your story, not a reason for disposal.
Common Questions
Does bonded leather have any real longevity, or is failure guaranteed?
Failure is a matter of when, not if. The plastic topcoat will eventually crack and peel from flexing and sunlight, as the bond between the coating and the shredded fiber base fails.
Can I use the same conditioner on both my genuine leather sofa and a bonded leather chair?
No. Conditioners nourish the natural fibers in genuine leather, but they cannot penetrate bonded leather’s plastic coating and may even damage it. For bonded, use only a damp cloth for cleaning.
I’m shopping for a sofa. Is genuine leather always the better choice over bonded?
For long-term durability and repairability, yes. Bonded leather offers a lower initial cost but a much shorter lifespan; view it as a temporary furnishing, not an heirloom.
Is there any truly effective, permanent repair for peeling bonded leather?
No. Cosmetic fixes with vinyl compounds or glue can mask damage, but you are repairing a failing plastic layer, not the material’s structure. The peeling will almost always continue.
What should I look for specifically in a belt or bible cover to ensure it’s genuine leather?
Examine the unfinished edges and the backside. Genuine leather will show a fibrous, suede-like edge, while bonded will reveal a clean, paper or fabric backing layer. Also, trust the smell and supple feel. If you’re still unsure, check out guides that help identify different types of leather.
Choosing the Right Path for Your Leather
Your approach to care and repair must always start with knowing your material. Treat genuine leather as a living skin you can nourish and mend, but approach bonded leather as a composite material where stabilization is often the most realistic goal. This distinction saves you time, money, and frustration. A complete guide on the difference between bonded and real leather covers durability, care, and value.
Investing your care in quality genuine leather goods is a sustainable practice, extending their life for years. Every time you clean, condition, or repair a real leather piece, you’re building a valuable skill and honoring the material’s origin.
Relevant Resources for Further Exploration
- Amazon.com: Bonded Leather Repair Kit
- Bonded Leather Repair | Peeling & Cracking Restoration | We Can Fix That!
- How to Fix Peeling Leather? All About Bonded & Faux Leather
- How To Fix Bonded Leather Peeling – Von Baer
Harriet is a avid collector of leather goods such as purses, bags, seat covers, etc and has an extensive background in leather care, recovery, stain removal and restoration. She has worked for a number of years perfecting her leather care techniques and knows the ins and outs of restoring all kinds and types of leather products. With her first hand knowledge in leather care, you can not go wrong listening to her advice.
Bonded and Faux Leather Care