How to Fix Leather Car Seats and Dashboards: A Practical Repair Guide
Published on: October 27, 2026 | Last Updated: October 27, 2026
Written By: Harriet Nicholson
Hello Tannery Talk. That crack on your driver’s seat or the faded dashboard might have you concerned, but many leather issues in cars are perfectly fixable with some know-how.
We will cover spotting the real cause of damage, picking repair kits that bond correctly, and blending repairs to match your car’s interior.
I’ve restored everything from sun-baked leather to deep scuffs on pieces like my trusty saddle Mason, giving me a clear view of what makes a repair hold.
What Makes Car Leather Different from Your Jacket or Bag?
Your favorite leather jacket, like my friend June, is made for beauty and comfort. Car leather is built for battle. It faces challenges a bag or jacket never will.
Automotive leather is almost always given a protective topcoat. Think of it like a clear, plastic-like shield sprayed over the hide. This is for durability against constant scuffing and to meet strict fire-retardant safety standards. It’s tough by necessity.
The main enemies are intense, daily UV rays, extreme heat cycles, and repeated friction from entering and exiting the vehicle. Where June develops a soft crease, your car seat faces abrasive wear that slowly grinds down that protective coating.
You’ll often hear terms like “corrected grain” or “semi-aniline.” In simple terms, corrected grain means the leather’s surface has been buffed and embossed for a uniform look, then heavily coated. Semi-aniline has a lighter coating that lets more of the hide’s natural character show through, but it’s still protected. Both are common in cars because that coating is the first line of defense.
Sun, Heat, and Wear: The Car’s Harsh Environment
Your dashboard takes the full force of the sun. Day after day, UV rays break down the leather’s oils and the plasticizers in its topcoat. Combined with heat that can turn your car into an oven, this causes the material to dry out, shrink, and finally crack. It feels stiff and papery, losing all suppleness.
Seats wear in predictable patterns. The outer bolster of the driver’s seat goes first. That’s the part you slide across every time you get in and out. Constant friction from clothing wears the color off and weakens the grain. The leather there becomes smooth, shiny, and thin.
Healthy leather should have a slight give, a quiet creak, and a rich feel. Damaged car leather feels dry and rigid, with a network of fine cracks that look like a dry riverbed on a map. The scent changes from a rich hide to a faint, almost plastic smell as the coating degrades.
How to Tell What Kind of Damage You’re Dealing With
Before you fix anything, you need to know what you’re fixing. Here’s a simple guide to the most common types of car leather damage.
| What You See | What It Is | Common Location |
| A web of fine, shallow lines | Surface Cracking (Topcoat failure) | Dashboard, seat centers |
| A deep, open gap showing lighter material underneath | A Deep Tear/Split (Leather is torn) | Seat bolsters, stitching seams |
| Color is lighter or blotchy | Color Fade/Wear (Pigment loss) | Headrests, armrests, driver’s seat |
| Thin, shiny streaks or scuffs | Surface Scratches (Coating is marred) | Anywhere, from keys, belts, or pets |
Now, do the “touch and flex” test. With clean hands, gently press the leather around the damaged area. Then, very carefully, flex it. This can help identify any padding or underlying damage that needs attention.
- If the cracks open wide and you can see a fibrous layer underneath, the damage is deep.
- If the lines barely move and feel like they’re just on the surface, the damage is likely superficial.
This test is your best tool to decide if a repair is a weekend DIY project or needs a professional’s touch. Deep tears into the leather itself often need backing material and patching, which is expert work. Surface issues can frequently be addressed at home.
Is It a Surface Crack or a Deep Split?
Imagine the difference between the cracked glaze on an old porcelain mug and a piece of paper that’s been ripped in two. One is a failure of the surface layer; the other is a structural break.
A surface crack in car leather is like that porcelain glaze. The protective topcoat has become brittle and fractured, but the leather hide underneath is still mostly intact. The cracks are shallow, don’t gape open easily, and the area still has some flexibility.
A deep split is that torn paper. The leather fibers themselves are severed. It will open when flexed, revealing a lighter, suede-like interior. This is a critical failure.
To assess this yourself, you only need three things: bright, direct light (a flashlight helps), a clean white cloth to wipe the area clean, and your fingers for the flex test. Cleaning the spot first with a neutral, pH-balanced leather cleaner is crucial; dirt can hide the true depth of a crack. If you’re unsure, assume it’s worse than it looks. Starting with a gentle clean and condition can often improve the appearance of minor surface damage without needing a full repair kit.
Fixing It Yourself: A Practical Guide for Common Problems
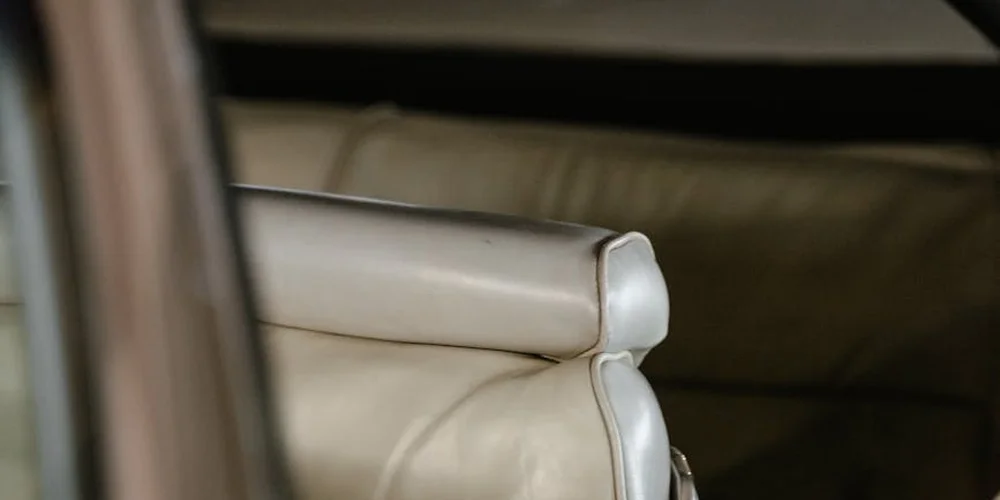
Car leather is tough, but it faces unique challenges like extreme sun, body oils, and constant friction. The key is to work slowly, with the right materials. Think of it like caring for an heirloom, not a quick wipe-down.
Before you start any repair, your two non-negotiable rules are ventilation and testing. Work in a garage with the door open or a very well-ventilated space. Always patch test your cleaner, dye, or filler on a hidden spot first, like under the seat or behind a headrest. Wait for it to dry completely to see the true color and effect.
What a Good Car Leather Repair Kit Contains
Many people search for a single kit to solve their problems. A worthwhile kit should have items for multiple steps, not just one job. Here is what to look for:
- A strong, neutral leather cleaner.
- A degreaser for heavy soil from skin contact.
- A flexible leather filler compound for cracks.
- A set of color pigments or a dye and a clear sealant (often called a “finish coat”).
- Applicators: sponges, small brushes, and fine-grit sanding pads.
Using a kit is about following its specific steps, but the general process below will help you understand what each step should achieve.
Restoring Color and Life to Faded Leather
Sun damage fades color and dries out the leather’s natural oils. This process is similar to refreshing an old, worn wallet like my Scout; you’re not making it brand new, you’re reviving its depth and health.
- Deep Clean: Use a pH-balanced leather cleaner and a soft brush to lift ground-in dirt and oils from the grain. Let it dry fully. Skipping this step will seal dirt under new color.
- Condition: Apply a light, absorbent leather conditioner. This replaces lost oils and creates a better surface for color. Wait several hours.
- Apply Color: For slight fading, a conditioner with added pigment might suffice. For severe fading, use a dedicated leather dye. Apply with a sponge in thin, even layers, letting each layer dry. Building color slowly prevents a sticky, painted look.
- Seal and Protect: Once the color is perfect and dry, apply a flexible leather sealant. This protects your work from UV rays and wear. Using a UV-protectant sealant is the critical step to stop the fading from happening again.
Repairing Cracks and Small Tears
Cracks happen when dry leather is repeatedly bent. A small tear is a physical split. You can fix both, but the goal is flexibility, not just filling a hole.
- Clean and Prep: Clean the area thoroughly. For a tear, carefully trim any loose fibers with sharp scissors. The goal is a clean edge.
- Apply Adhesive (for tears): For a clean tear, use a flexible leather adhesive on the backing of the leather to bond the sides together. Place a weight on it until dry. This provides the strength.
- Fill and Build: Using a flexible leather filler compound, fill the crack or tear. Overfill it slightly. Let it cure completely until hard.
- Sand Level: Gently sand the hardened filler until it is perfectly smooth and level with the surrounding leather. Use fine-grit sandpaper (often 400-grit or higher).
- Color Match: This is the trickiest part. You must mix color pigments to match your interior exactly. Apply the matched color over the repaired area and feather it out. Finish with the sealant.
Know your limits: if a tear is longer than a few inches, reaches the seam, or the leather is heavily degraded, the repair will likely fail under stress. That is the time to call for backup.
When to Call a Professional and What It Will Cost
There is no shame in calling a specialist. In fact, for some jobs, it is the only responsible choice. Professionals have tools and materials we simply cannot replicate at home.
Call a professional for these scenarios:
- Large scale damage: Tears longer than 2-3 inches, multiple large cracks, or damage across a full seat panel.
- Complex components: Any repair on seats with integrated heating, cooling, or airbag systems. You do not want to compromise safety features.
- Total color refurbishment: If you need to perfectly re-dye an entire seat or dashboard to match.
- Lack of confidence: If the steps above sound overwhelming, a pro can save you money by preventing a costly mistake.
Understanding Repair Estimates: DIY vs. Pro
Cost is a major factor. Here is a simple comparison to frame your decision.
| Consideration | DIY Repair Kit | Professional Service |
|---|---|---|
| Typical Cost Range | $30 – $100 for materials | $150 – $600+ per panel, depending on damage |
| Color Matching | You mix it; result can be close. | Computer-matched and blended for an invisible repair. |
| Tools & Materials | General-purpose filler, basic colors. | Industrial-grade compounds, flexible dyes, and high-output UV lamps for curing. |
| End Result | Functional repair that may be visible upon close inspection. | Often a warrantied, near-invisible restoration. |
| Time Investment | Your labor, spread over days for curing steps. | Their labor, usually completed in hours or a day. |
The major cost factors for a professional are the size of the damaged area, the type of leather (aniline is more complex), and the labor for color matching. A single crack might be at the lower end, while a full seat re-dye will be at the higher end.
Finding a Reputable Professional
Searching for “car leather repair near me” or “auto upholstery repair in [your city, like Atlanta or Houston]” is a good start. But you must vet them. Additionally, make sure you repair and maintain leather car seat covers properly to prevent cracking and wear.
- Look for shops that specialize in automotive interiors, not just general furniture repair.
- Ask to see a portfolio of their previous automotive work.
- Choose a shop that offers a clear, written estimate and asks about your car’s make, model, and interior color code.
- A good technician will clearly explain their process and set realistic expectations about the repair’s longevity and appearance.
It is worth calling a few shops. The right one will make you feel confident that your car’s interior is in expert hands.
Keeping Your Car Leather Looking Fixed for Years
Once a repair is complete, the real work begins. Your focus shifts from fixing a problem to preventing the next one. Think of it like this: a repaired spot, when cared for correctly, becomes the strongest part of the leather. It’s no longer a weak point.
The secret to a lasting repair isn’t magic, it’s consistent, gentle maintenance that protects the leather from its toughest enemies: sunlight, heat, and daily grime. Humidity and temperature swings can accelerate wear, so prevention and repair strategies should account for your climate. Adjusting humidity levels and avoiding extreme temperatures helps preserve leather’s look and feel.
A Simple, Lifelong Care Routine
You don’t need a complicated regimen. You need a reliable one, performed every few months. This routine has three simple parts: clean, condition, protect.
- Gentle Cleaning (Every 1-2 Months)
Start by removing dust and grit with a soft, dry brush or microfiber cloth. For light soil, use a damp cloth. For a proper clean, use a pH-neutral leather cleaner designed for automotive use. Spray it onto your cloth, not directly onto the seat or dash. Wipe in gentle, overlapping circles. Let the surface dry completely before moving on. This step prevents abrasive dirt from grinding into the grain and wearing down the finish.
- Conditioning with UV Protection (Every 3-4 Months)
Conditioning is non-negotiable. It replaces the natural oils that heat and sun steal away. For car interiors, always choose a conditioner that specifies UV protection or UV blockers. This ingredient is what fights fading and drying. Apply a small amount to a clean cloth and work it into the leather with soft, circular motions. Pay extra attention to repaired areas and high-wear spots like seat bolsters and the steering wheel rim. A little goes a long way.
- Sun Defense (Every Single Day)
This is your most powerful tool. Use a windshield sunshade whenever you park. It dramatically reduces the greenhouse effect that bakes and cracks leather. If possible, park in the shade or a garage. This daily habit does more to preserve your interior than any product applied quarterly.
Relating to Your Other Leather
This is no different from caring for your favorite leather jacket. I condition my jacket, June, every few months to keep the calfskin soft and the repaired stitching flexible. Your car seats are just like June-they face daily wear, changes in temperature, and need hydration to stay supple. You wouldn’t let June bake in direct sun for hours; give your car seats the same consideration. The principle is identical: consistent, preventative care builds longevity.
A common mistake is over-conditioning, which can leave a greasy film that attracts more dirt. If the leather feels slick or looks shiny after conditioning, you used too much. Next time, use half the amount. The leather should feel nourished, not wet.
With this straightforward care, the repaired area on your seat or dashboard will age gracefully alongside the original leather. It will develop a unified patina, a story of careful repair followed by thoughtful stewardship. A well-maintained repair doesn’t just last; it becomes a testament to the leather’s resilience and your good care.
Quick Answers
How do I know if my DIY repair will actually last?
A successful repair stays flexible and doesn’t crack again when the seat is used. The color should blend under different lighting, and the surface should not feel tacky or rough to the touch.
What’s the one daily habit I should start to protect my car leather?
Use a windshield sunshade every single time you park. This is the most effective action to fight the heat and UV rays that cause the majority of leather cracking and fading.
My dashboard feels sticky, not cracked. What’s going on?
That’s degraded plasticizer leaching from the vinyl or leather’s topcoat, often from harsh cleaners. Clean it gently with a mild, pH-balanced automotive interior cleaner and avoid silicone-based products that can cause this.
Can a professional really make a large tear disappear?
A skilled technician can make it visually disappear by patching from behind, re-texturing the grain, and expertly color matching. However, the goal is a seamless restoration, not making the leather structurally brand new at that spot.
Is it worth fixing minor color wear on a high-use area like a bolster?
Yes, but only if you seal it properly afterward. Applying a color restorer without a durable, flexible top coat will just lead to the same wear happening again, only faster.
Final Thoughts on Caring for Automotive Leather
The single most important rule for your car’s interior is consistency. A quick, gentle clean and a light conditioning every few months protects the leather far better than one intensive treatment every few years.
Caring for leather properly respects the material and extends the life of your car’s interior, which is one of the most sustainable choices you can make. Each time you condition Mason the saddle or buff a scuff from June the jacket, you build the practical skill and confidence needed to keep every leather item you own looking its best. Understanding the best general methods for caring and treating leather items helps you choose the right products and routines for different pieces. This practical approach keeps your car interior and other leather favorites looking their best over time.
Expert Resources and Citations
- How to Fix A Hole in a Leather Car Seat | UK Tutorials
- Leather Car Seat Repair In Los Angeles, CA 90232 – Best Way
- Amazon.com: Leather Repair Kit
Harriet is a avid collector of leather goods such as purses, bags, seat covers, etc and has an extensive background in leather care, recovery, stain removal and restoration. She has worked for a number of years perfecting her leather care techniques and knows the ins and outs of restoring all kinds and types of leather products. With her first hand knowledge in leather care, you can not go wrong listening to her advice.
Car Interior and Auto Leather Care