How to Remove Ink, Wine, and Oil Stains from Leather
Published on: September 29, 2026 | Last Updated: September 29, 2026
Written By: Harriet Nicholson
Hello Tannery Talk. A fresh stain on leather can feel like a disaster, but take a deep breath and know that most marks can be fixed with the right approach.
This guide walks you through safe, effective methods for tackling common culprits. We will cover ink, wine, and oil stains.
I’ve restored countless pieces like Mason, my trusty saddle, and June, a beloved jacket, so I know what works.
First, Do This Before Any Stain Treatment
Your first move is the most important. It protects your leather from a fix that’s worse than the stain.
Always test your cleaner on a hidden spot first, like an inside seam or the back of a strap. This tells you if the product will damage the finish or color. Wait for it to dry completely so you see the true result. Skipping this step is like pouring a mystery liquid on a painting to clean it. You wouldn’t do that.
When you touch the stain, remember this rule: blot, never rub. Think of it like dabbing a cut on your skin. You press gently to soak up the liquid without grinding it deeper into the fibers. Rubbing spreads the stain and can damage the leather’s surface grain.
Gather your universal toolkit before you start. You will need:
- Clean, white microfiber cloths (color-free to avoid dye transfer).
- Cotton swabs for precise application.
- Distilled water (it has no minerals that can leave spots).
Acting fast gives you the best chance. But haste should not mean panic. Take the thirty seconds to do your hidden test. It saves heartache later.
How to Remove Ink Stains from Leather
We have all been there. A pen slips into a jacket pocket, or a marker rolls around in a bag. Ink happens. My wallet, Scout, has a small blue line on one edge from a grocery list mishap. It tells a story, but not all ink stains are welcome.
Ballpoint pen ink is oil-based. Gel ink is water-based. This matters. An alcohol solvent works well on standard ballpoint ink. Gel ink might lift with just a damp cloth and a little soap. Start with the gentlest method and move up.
What You Need for Ink Removal
You likely have what you need at home.
- Isopropyl alcohol (rubbing alcohol, 70% or higher): This is your go-to for most pen inks. It breaks down the oil without being overly harsh.
- Cotton balls or swabs for application.
- A commercial leather ink remover is a stronger option for stubborn stains, but always test it first.
A warning about colored inks from markers or pens: the dye can stain the leather itself. You might remove the waxy or gel substance, but a faint color shadow could remain.
The Step-by-Step Ink Cleanup
Follow these steps slowly. Patience is your best tool here.
Step 1: Blot and Lift
If the ink is still wet, take a dry corner of your microfiber cloth. Gently press it onto the stain. Lift straight up. You are pulling ink out of the surface, not across it. Do this until no more ink transfers to the cloth. This simple blotting can sometimes lift a fresh stain completely.
Step 2: Apply Your Chosen Solvent
Dampen a cotton swab with your isopropyl alcohol. Do not soak it. Lightly dab the stain, starting at the very outer edge and working inward. This contains the stain and stops it from spreading to clean leather. For ink stains on leather surfaces or items, see our guide on removing ink stains from leather. It offers leather-specific tips and safe techniques.
Use a fresh part of the swab for each dab. You will see ink transfer onto the cotton. Let the area dry for a minute, then check. Repeat with light dabs. Multiple gentle applications are far better than one heavy, soaking one that can spread ink deeper or damage the finish.
Step 3: Rinse and Dry
Once the ink is gone, you need to remove any alcohol residue. Dampen a clean part of your microfiber cloth with distilled water. Wipe the cleaned area gently. This rinses it.
Let the leather air-dry naturally, away from radiators, sun, or hair dryers. Heat can dry out the leather and set any remaining traces. Once fully dry, the spot might feel a bit stiff. Apply a small amount of leather conditioner to that area to restore flexibility. This process works for ink on a leather purse, briefcase, or journal cover.
How to Clean Wine Stains from Leather

Wine spills happen. They are especially common on sofas and armchairs where we relax. Red wine, with its deep pigments, is the more stubborn opponent. White wine is simpler to address but still needs quick action.
Gathering Your Wine Stain Supplies
You do not need fancy chemicals. Start with these basics:
- A mild, pH-balanced leather cleaner is ideal.
- For a home mix, use a drop of mild dish soap in a cup of distilled water.
- For a set-in red wine stain, white vinegar diluted with water (1:1) can help. Always test any cleaner on a hidden spot first, like the back of a cushion, to check for color fastness.
You will also need several clean, white, absorbent cloths. An old cotton t-shirt works perfectly.
The Wine Stain Removal Process
Speed prevents a spill from becoming a stain. Follow these steps calmly.
Step 1: Soak Up the Spill
Do not rub. Rubbing grinds the wine into the leather’s pores. Grab a cloth and blot firmly, pressing straight down. Soak up as much liquid as you can. Change to a dry section of the cloth as it becomes saturated.
Step 2: Gently Clean the Area
Dampen a clean cloth with your chosen cleaner. Wring it out so it is barely damp, not wet. Working on a large, fixed piece like a sofa, start from the outer edge of the stain and gently work in small circles toward the center. Flip to a clean part of your cloth often to avoid wiping the stain back onto the leather. This patience is key for effective stain removal on a leather sofa, especially when dealing with water stains and spots.
Step 3: Rinse and Restore Moisture
Cleaning leaves behind residue. Dampen a new cloth with plain water, wring it well, and wipe the cleaned area to rinse. Dry thoroughly with another clean cloth.
Leather loses moisture during cleaning. Conditioning the area afterwards is not optional; it replaces essential oils and prevents the leather from drying out and cracking. This routine helps prevent your leather items from cracking and drying out over time. Keeping treatments consistent supports long-lasting flexibility and appearance. Use a quality leather conditioner on the spot once it is completely dry, following the product’s instructions.
How to Tackle Oil and Grease Stains on Leather
Oil stains are tricky. Think of chili oil from a dropped takeout container on your sofa-oil repels the water in most cleaners. You must absorb the oil first, then clean what is left.
What Works on Oil and Grease
Your goal is to pull the oil out. For this, you need absorbent powders:
- Cornstarch
- Talc-free baby powder
- Baking soda
After absorbing the bulk, a degreasing leather cleaner can tackle the residual film. Avoid using strong “oil-eating” dish soaps directly on leather; they are designed for plates and can strip your leather’s natural, beneficial oils.
Steps to Lift Oil and Grease
This method is a classic leather stain removal home remedy because it is gentle and effective.
Step 1: Absorb the Excess
Gently blot any wet oil with a cloth to remove the surface layer. Do not spread it. Then, generously cover the entire stain with your absorbent powder. I use cornstarch on my workbench. Pile it on thick, like a heavy dusting of snow. Let it sit for at least 6 hours, or overnight. The powder will slowly draw the oil up and out of the leather. These steps also apply to removing grease stains from suede leather boots and shoes. For suede, be gentle and avoid rubbing too hard to protect the nap.
Step 2: Vacuum and Assess
Carefully vacuum up all the powder. Look at the stain. It should be noticeably lighter. If a dark, oily spot remains, apply a fresh layer of powder and repeat the waiting process. Patience here saves the leather.
Step 3: Clean the Residue
Now you can clean. Apply a small amount of leather cleaner with degreasing properties to a soft cloth. Gently work it over the area to remove the last traces of oil. Finish with a rinse using a water-dampened cloth, dry thoroughly, and condition. This final conditioning step restores suppleness after the oil removal ordeal. These steps also apply to other leather items—footwear, bags, and jackets. The same degreasing routine can remove oil stains from leather.
Special Care for Different Leathers and Items
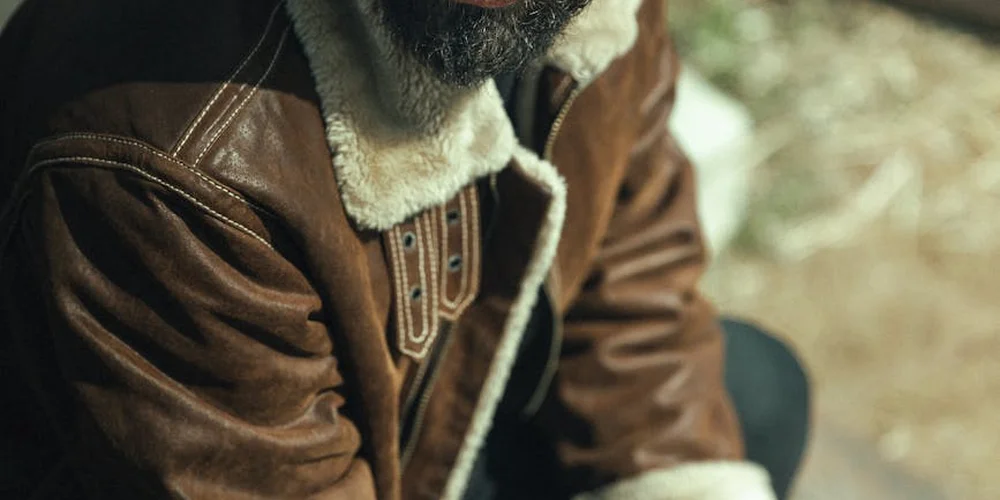
Not all leather is created equal. Think of it like fabric: cleaning a delicate silk shirt needs a different approach than washing a sturdy cotton t-shirt. The same principle applies to your leather goods. The right stain removal method depends entirely on the type of leather and the item you’re treating, such as a leather jacket or a more delicate accessory.
Applying the wrong product or technique can permanently damage the finish or texture. Your first step should always be to identify your leather type, often found on a tag or in the manufacturer’s care guide.
Handling Stains on Aniline Leather
Aniline leather is the most natural and porous type. It’s dyed with soluble dyes but has no protective pigment or plastic topcoat. This gives it a beautiful, rich handfeel, but it also means it absorbs spills almost instantly.
For aniline leather stain removal, you must proceed with extreme caution and gentler solutions than you’d use on other leathers. Understanding how aniline compares with pigmented leather in hiding stains and repair ease can guide your approach.
Your immediate action is critical. Blot, never rub, with a clean, dry, absorbent cloth. For a fresh liquid stain, you can try a slightly damp cloth with distilled water, but test this on a hidden seam first. If the water darkens the leather noticeably, stop.
Common mistakes include using too much moisture or harsh cleaners, which can spread the stain or create a watermarked ring. For anything beyond a simple water-based spill, I recommend consulting a professional cleaner who specializes in aniline leather much sooner. The risk of making it worse is high.
Adjusting Methods for Cars, Bags, and Boots
Each leather item has its own quirks. You need to adjust your technique to fit the shape and setting of the piece.
For leather stains removal in a car, your main concern is the surrounding materials. Always check your vehicle’s owner manual for specific leather care instructions first. Avoid harsh chemicals or abrasive scrubbing that could damage the stitching, plastic trim, or dashboard surfaces adjacent to the leather. Use a soft brush and a leather cleaner formulated for automotive interiors, working in small sections.
For bags and boots, you’re working around hardware and structure. On a bag, be careful around zippers, metal clasps, and lining fabric. On boots, pay extra attention to seams and the sole attachment point. For a query like ‘stain removal leather sofa chilli oil boots’, the approach splits: a sofa allows for a broader treatment area, but a boot requires careful spot work to avoid saturating the stitching.
Follow these general steps for these items:
- Remove loose dirt with a soft, dry brush.
- Apply a small amount of pH-balanced leather cleaner to a microfiber cloth, not directly onto the stain.
- Gently work in a circular motion, starting from the outside of the stain moving inward.
- Wipe away cleaner residue with a second clean, damp cloth.
- Let the area air dry completely away from direct heat before conditioning.
When to Stop and Call a Professional

Knowing when to hand over a project is a sign of a careful owner. There is no shame in seeking expert help. In fact, for valuable items, it’s the most responsible choice.
You should contact a professional leather repair specialist if you see any of these red flags:
- The stain is very large, has set for more than 24 hours, or you don’t know its origin.
- The item is highly valuable, an antique, or has significant sentimental value. My Mason, for instance, would go straight to a saddle specialist for a major stain.
- The leather is aniline, suede, or nubuck, and the stain hasn’t budged with gentle, dry methods.
- Your cleaning attempt caused new damage, like severe discoloration, stiffness, or a bleached spot.
- The stain is on a complex item like a car seat or a sofa where DIY repair could lead to an obvious, mismatched patch.
A professional has access to stronger degreasers, dyes, and techniques that can save a piece you might otherwise ruin. They can often tell from experience what a stain is and how to safely lift it. Calling them is often the best way to truly preserve your leather for the long term.
Common Questions
How often should I condition my leather to help prevent stains?
Condition your leather every 6 to 12 months with a product made for its specific type. A well-nourished, conditioned surface is more resistant to absorbing spills and easier to clean when accidents happen. For boots, condition more often—every 3–6 months with regular wear. Apply the conditioner with a clean cloth in a thin, even layer, using circular motions, which is part of the best leather boot conditioning method, and let it absorb before buffing.
What’s the first thing I should do if I don’t know what the stain is?
Start with a dry, absorbent cloth to gently blot any residue. Then, use a tiny amount of distilled water on a cloth to test-clean; if that fails, use a pH-balanced leather cleaner, always testing in a hidden spot first. Understanding the best products and methods for cleaning leather helps you choose the right approach for your item. In the next steps, we’ll compare top products and proven methods for cleaning leather.
Can I remove a stain that’s been there for weeks or months?
Old, set-in stains are very difficult to remove completely without risking damage. For these, especially on valuable items, seeking professional help is your best chance for preservation.
My leather sofa gets daily use. Any special maintenance tips?
Keep it clean by dusting weekly with a dry microfiber cloth and address spills immediately. A light, annual conditioning will maintain its protective barrier against the oils and dirt from regular contact.
What’s the safest way to clean my leather bag without harming the hardware?
Apply all cleaners and conditioners with a cloth, not directly onto the bag, to avoid pooling around zippers and clasps. Work in small sections and dry thoroughly to prevent moisture from reaching the lining or metal.
Final Thoughts on Leather Stain Removal
The single best piece of advice I can give you is to act fast and use the mildest cleaner possible. Blotting a spill immediately with a dry cloth does more than any fancy product applied a week later.
Taking care of leather is an act of respect for the material and the animal. Gentle, consistent care builds your skill and keeps pieces like Mason, June, and Scout looking their best for years.
Expert Resources and Citations
- How To Remove Stains from Leather at Home – Goodwill Akron
- r/howto on Reddit: How to remove stain from leather purse? It was in my closest for a month unused, and while using it last time I didn’t spill anything on it to cause the stain
- Remove stains from leather » 6 types of stains at a glance
- Leather Degreaser for Body Oils, Head, ArmRest Stain Removal – Leather World Technologies
- How to Get Oil Stains Out of Leather: 5 Household Remedies
Harriet is a avid collector of leather goods such as purses, bags, seat covers, etc and has an extensive background in leather care, recovery, stain removal and restoration. She has worked for a number of years perfecting her leather care techniques and knows the ins and outs of restoring all kinds and types of leather products. With her first hand knowledge in leather care, you can not go wrong listening to her advice.
Removing Ink and Marker