How Do You Remove Grease Stains from Suede Boots and Shoes?
Published on: February 5, 2026 | Last Updated: February 5, 2026
Written By: Harriet Nicholson
Hello Tannery Talk. That fresh grease mark on your suede can send a jolt of panic right through you, but take a deep breath. I promise it’s not the end of your favorite pair.
We will walk through a clear, step-by-step process, covering immediate blotting, using safe absorbents like cornstarch, reviving the suede’s nap, and choosing a reliable protector.
I’ve handled this very fix on countless pieces in my workshop, from delicate jackets to sturdy boots.
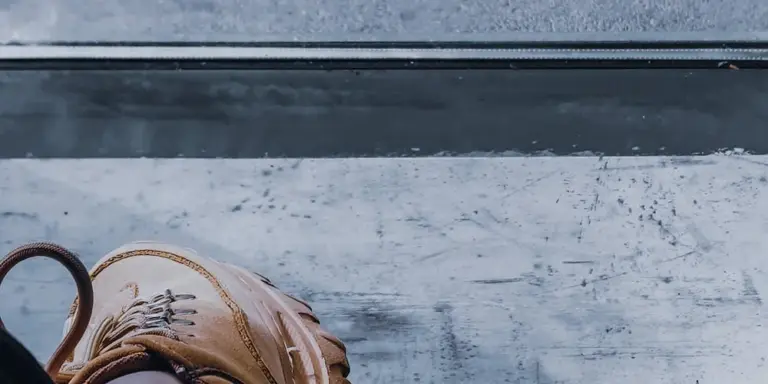
Why Grease Is a Suede Boot’s Biggest Rival
To care for suede, you need to know what it is. Suede is not a different animal. It’s the flesh side of a leather hide, sanded to create that soft, fuzzy surface we love. Think of that fuzz, called the nap, like millions of tiny fibers standing up.
This makes suede incredibly porous, so it soaks up oils and grease almost instantly. Your smooth leather jacket, June, has a tight top grain that can resist a light splash. Suede acts like a thirsty sponge.
A simple analogy helps. Spilling oil on a smooth, finished leather is like spilling ink on a plastic bag-you can wipe most of it off the surface. Spilling oil on suede is like spilling ink on a paper towel. It gets pulled in deep and spreads fast.
Your goal with a grease stain is simple but delicate: you must absorb and lift the oil without grinding it deeper or permanently crushing and matting the delicate nap.
Your First Move: The 60-Second Emergency Response
A fresh stain is your best chance for a full recovery. Time is critical. When you see that grease spot, your immediate reaction sets the stage for everything that follows.
First, resist every bad instinct. Do not rub the spot. Rubbing grinds the grease down into the base of the fibers. Do not reach for water or a wet cloth. Water can set the stain and often causes a dark, permanent ring. Most of all, do not panic. I’ve saved many a piece by staying calm and moving methodically.
Here is your exact action plan for the first minute:
- Grab a dry, clean, absorbent cloth. A plain cotton rag, a paper towel, or even a clean napkin will work.
- Gently place it over the stain and press down. Use the flat of your fingers or palm.
- Apply firm, steady pressure for 10-15 seconds. The goal is to blot, which means lifting the oil up and out onto the cloth.
- Lift the cloth straight up. Check to see if grease transferred to it.
- Move to a clean section of the cloth and repeat. Keep blotting until no more oil transfers to the clean cloth.
This simple blotting technique pulls up excess surface oil before it can fully penetrate, making the deeper cleaning steps far more effective. It’s the most important thing you can do in the moment. After this, you can assess the stain and move on to targeted cleaning.
The Tools You Need for the Job
You do not need a cabinet full of chemicals. With a few simple items, you can handle most grease stains on suede. I keep these in a small kit near my workbench.
The Essential Tools
These are your first line of defense. They work by lifting and brushing away grease without pushing it deeper into the nap.
- Suede Brush: This is not a regular clothes brush. A proper suede brush has stiff brass or synthetic bristles on one side, and a softer eraser side (often gum rubber) on the other. The stiff bristles are for reviving the nap after treatment. The eraser side is for gently abrading away dried-on, surface-level grime. Never use a wire brush, it will destroy the delicate surface.
- Suede Eraser: Think of this as a more powerful pencil eraser for your leather. It’s a block of soft, crumbly rubber or vinyl. You use it before the brush to tackle scuffs and lighter oil marks. Rub gently, let the crumbs fall away, then follow up with the brush.
- Clean, Dry Microfiber Cloths: You need these for every step. They are for blotting, never for rubbing. Have a few on hand so you can switch to a clean section as one gets soiled.
Household Absorbents (The First-Aid Kit)
For a fresh, wet grease stain, your goal is to pull the oil out before it sets. These common kitchen and household items are brilliant for that. For a fresh spill, reaching for an absorbent powder is almost always better than reaching for a cleaner.
- Cornstarch or Talc-Free Baby Powder: This is my go-to for fresh stains. It’s fine, highly absorbent, and neutral. Sprinkle a generous layer over the entire stain, thicker in the center. The powder will start to turn translucent as it soaks up the oil. Leave it for at least 8 hours, or overnight.
- Baking Soda: Works on the same principle. It can be slightly more abrasive, so I use it for darker suedes where any potential lightening is less noticeable. Same method: apply, wait, then brush away thoroughly.
- White Chalk: A classic trick. Rub a piece of plain white chalk over a dry, set-in stain. The chalk dust acts as a dry absorbent and can also help mask the darkened spot on lighter-colored suede temporarily. It’s not a permanent fix, but it’s useful in a pinch.
Specialized Suede Cleaners
Consider this a secondary tool, not your starting point. A good suede cleaner is a mild, dry-foam or spray-on solution designed to lift dirt from the nap without saturating it. I keep one for deep cleans on a whole item, not just a spot.
Always use absorbents first to pull out the grease, then a cleaner if needed to address any remaining dirt ring. Test any cleaner on a hidden spot, like inside the tongue of a boot. Spray it on a cloth first, never directly onto the suede in a heavy stream, as that can create water spots. For the best methods and products to clean suede shoes and boots, see our upcoming recommendations. This will guide you to trusted options before you buy.
Step-by-Step: How to Get Grease Out of Suede (The Dry Method)
Water is often the enemy of a grease stain. It can spread the oil and set the discoloration. The dry method works by pulling the oil out from the inside. It is the gentlest, most reliable way to start. Think of it like using baking soda on a carpet spill, but for your delicate suede.
I once saved a favorite pair of suede shoes this way after a spot of cooking oil found its way onto the toe. Patience is your best tool here.
What You Will Need
- A pure absorbent powder (cornstarch, fuller’s earth, or talc)
- A suede brush with brass and nylon bristles
- A suede eraser (a gum eraser works in a pinch)
- A clean, dry cloth
The Cleaning Process
-
Apply an absorbent powder generously. Cover the entire stain with a thick layer of cornstarch. You want to completely bury it. The powder acts like a sponge, slowly drawing the oil up and out of the leather’s nap. This is especially useful when dealing with oil stains on leather.
Let it sit for at least 8 hours, or overnight. For an old or heavy stain, 24 hours is better. This waiting period is not optional; it is the most critical part of the process. Place the boot in a warm, dry spot to help the powder work.
-
Brush the powder away thoroughly. After the waiting period, use your suede brush. Brush in one direction, following the natural grain of the suede, to flick all the powder off.
You will likely see the stain has lightened. The powder may look slightly discolored where it absorbed the oil. That is a good sign. Brush until no powder residue remains.
-
Use a suede eraser on any remaining discoloration. For faint, shadowy stains that the powder did not fully lift, use your suede eraser. Rub it gently back and forth over the area.
Do not press hard or scrub. You are lightly abrading the very tips of the suede nap to remove surface residue. Gentle strokes prevent you from wearing a bald spot into the delicate surface. After erasing, brush the area again to remove eraser crumbs.
-
Give the area a final brush to fluff and blend. Use your suede brush vigorously over the entire panel of leather, not just the stained spot. This lifts the nap, restores the texture, and helps the treated area blend seamlessly with the surrounding suede.
Hold the boot up to the light and look at it from different angles. The stain may be gone, or you may see a slight “memory” of it. This is normal for suede. The leather is clean, and the character remains.
If the Stain Persists
If a dark spot remains after the dry method, the grease has penetrated deeply. Do not panic. You can repeat the dry process one more time.
Applying water or liquid cleaners now is a last resort, as it can leave a permanent water ring. For a cherished boot like my jacket June, sometimes accepting a faint shadow is better than risking a more noticeable cleaning mark. The boot is still clean, protected, and full of life.
When the Dry Method Isn’t Enough: Tackling Stubborn Stains
Sometimes a stain is too deep, too old, or the grease has really set in. You’ve tried the brush and the eraser, but a faint shadow remains. This is a common place to get stuck. I’ve seen it on June’s jacket collar after a rainy commute. The key is patience and a very gentle touch with a bit more cleaning power.
For these persistent marks, you can move to a slightly damp clean. You have two main options: a dedicated suede cleaner or a homemade mild vinegar solution. A commercial suede cleaner is formulated to lift stains without harming the delicate nap. The vinegar solution (one part white vinegar to three parts water) works by gently breaking down the oily residue. I tend to reach for a dedicated cleaner first, but the vinegar mix is a reliable alternative you likely already have at home.
The Step-by-Step Damp Clean Procedure
This process is about control. You are not washing the suede. You are spot-treating with precision.
- Prepare your tool. Use a clean, white cloth. Dampen a small corner with your chosen cleaner. Wring it out completely. It should be barely damp to the touch, not wet.
- Test on a hidden area first, like inside the tongue of a boot. This checks for colorfastness.
- Dab gently. Place the damp corner on the stain and press straight down. Do not rub in circles. You are trying to draw the grease out, not grind it in.
- Let it work. Allow the area to air dry fully, away from direct heat. This can take a few hours.
- Re-brush. Once bone dry, use your suede brush to gently lift the nap again. You will often see the stain lighten significantly after this.
This method relies on the stain wicking up into the barely-damp cloth, so patience during the drying phase is non-negotiable.
The Critical Warning: What Not to Do
The biggest mistake here is using too much moisture. Soaking suede will cause permanent staining, distort the shape, and can make the material stiff. Think of suede like a powdered sugar donut. A light dusting comes off easily, but if you run it under water, it’s ruined.
Never use regular soap, dish liquid, or household cleaners. These can leave their own residues, strip natural oils, and discolor the leather. Water and soap are the enemies of a dry-clean-only material like suede. If you wouldn’t pour it on a prized wool sweater, don’t use it on your suede boots.
Special Stain Scenarios: Car Grease, Motor Oil, and Kitchen Spatters
Car grease on suede is a common worry. I get it. You brush against a fender or drop a tool, and suddenly there’s a dark, oily blotch on your boot. My friend’s suede chukkas met a garage floor last year, and we saved them. The key is to act fast and lean on a simple, dry method first.
For a fresh car grease stain on suede, your best first move is the dry absorbent method, which pulls the oil out without risking water damage. This answers the frequent question I hear about “suede grease stain removal car.” You will need a dry, clean cloth, cornstarch or talcum powder, and a suede brush.
- Gently blot the stain with the cloth to lift any excess, wet grease. Do not rub.
- Cover the stain completely with a thick layer of cornstarch or talcum powder. Press it in lightly.
- Let it sit. I leave it for at least 8 hours, or overnight. The powder will darken as it absorbs the oil.
- Brush the powder away with your suede brush, using light strokes in one direction to restore the nap.
Thicker greases, like heavy car grease or transmission fluid, don’t always come out in one go. If a shadow of the stain remains after the first round, simply repeat the process with fresh powder. Patience here pays off. Rushing or using liquid cleaners too soon can set the stain or matte the suede permanently.
For stubborn motor oil, a suede-specific degreaser is a cautious last step. Only use it after the dry method has pulled most of the oil out. Always test any cleaner on a hidden seam first. If the stain still won’t budge after these efforts, taking the boots to a professional cleaner is the safest choice to preserve the leather. Sometimes even the best DIY attempts fail, as discussed in this article on removing oil stains from suede.
Kitchen oils, like butter or cooking spray, are often lighter. The same dry absorbent method works well here. Just remember, with suede, dry techniques are your reliable friend. I treat June’s leather jacket with more oil-based conditioners, but suede asks for a different, more delicate conversation.
What Will Ruin Your Suede? Common Mistakes to Avoid
I’ve seen good intentions do real damage. Suede is not like the smooth leather on my old saddle, Mason. It’s a delicate nap, like the velvet on a deer’s antler. Treat it wrong, and you can change its texture and color forever.
Let’s clear up some common questions right away. Can you use saddle soap? No, never use saddle soap on suede. It’s made for stripping grime from robust, oily leathers and will leave a sticky, discolored residue on suede that is nearly impossible to fully remove. Will baby wipes work on leather? They usually cause a stain. Most contain alcohol or other cleansers that can set a grease mark deeper and leave a water ring.
The Absolute No-Go List
Steer clear of these. They are the fastest way to turn a small stain into a permanent flaw.
- Household Cleaners: Dish soap, window cleaner, or multipurpose sprays are far too harsh. They strip the suede’s natural oils and often contain brighteners or dyes that alter its color.
- Rubbing Alcohol or Solvents: These can break down the grease, but they will also break down the leather’s dyes and finish, creating a bleached spot.
- Excessive Water: Soaking suede causes the nap to clump and harden as it dries. It also leads to severe water spotting.
- Scrubbing: Don’t use a stiff brush or rub hard in a circular motion. You’ll mat the nap down unevenly, creating a bald spot that looks worn and shiny.
- Direct Heat: Never use a hairdryer, space heater, or place boots near a radiator. Heat bakes stains and oils into the leather fibers, making them permanent. It also dries out the leather catastrophically.
The One Rule You Must Follow
Before you touch the stain, you have to do this one thing. Always, always test your cleaning method in a hidden area first, like inside the tongue or behind the heel counter. Wait for it to dry completely. This tells you if the product will darken the suede or affect the texture. It’s the five minutes that saves your shoes. Even when you’re removing tough stains like marker ink, testing first is crucial.
Keeping Your Suede Boots Grease-Free for Good
Fixing a grease spot feels good, but stopping the stain before it happens feels even better. The best way to care for suede is to think ahead. A little regular attention keeps the nap lively and forms a barrier against everyday messes.
Your First Line of Defense: A Protector Spray
Think of a suede protector spray like a lightweight, invisible raincoat for your boots. It won’t make them completely waterproof for a deep puddle, but it will cause water and oil to bead up on the surface so you have time to blot it away. It’s a crucial step in any effort to waterproof suede.
The single most important step is to apply it to brand new, perfectly clean boots. Any dirt or skin oils already on the leather will get sealed in forever. Follow the can’s instructions, apply in a well ventilated area, and let the boots dry fully. Reapply this spray every few months, or after a thorough cleaning, to keep the protection active.
A common mistake is spraying a protector on boots that are already slightly worn. If you do this, you might notice dark spots where the spray interacts with unseen dirt. Always start with a clean slate.
The Power of a Simple Brush
Your suede brush is your best friend. I keep one by the door for my own boots. Brushing isn’t just for fixing stains, it’s for preventing them.
Dirt and dust particles are abrasive. Over time, they grind into the suede’s fibers and create a flat, dull surface that actually attracts and holds oil. A quick, gentle brushing after each wear lifts the nap back up and knocks that grit loose.
Regular brushing redistributes the natural oils from your skin and prevents dirt from building up into a hardened, stain-prone layer. Use a proper suede or nubuck brush with brass or synthetic bristles. Brush in one direction to raise the nap, and go over the entire boot. It takes less than a minute, but it makes all the difference for long term health.
Let Your Boots Breathe
Leather is skin. Just like your feet, it needs to dry out and air out. When you wear boots all day, moisture from your feet builds up inside.
If you put them on again the next morning, that moisture has nowhere to go. A constantly damp environment weakens the fibers and can lead to stiffness or cracking over time. It also makes the leather more susceptible to permanent staining.
I give my boots, like my old reliable pair I call Scout, a full 24 hours of rest between wears. Use cedar shoe trees to help them keep their shape and absorb moisture, or simply stuff them with clean, dry paper. Thinking about how to store leather goods properly to prevent damage and extend their lifespan can help you plan better care. Store them in a cool, dry place away from direct heat. This simple habit greatly extends the life of any leather footwear.
You Can Save Your Favorite Boots

Take a deep breath. A grease spot on suede can feel like a disaster, but I promise it’s usually not. With a calm approach and the right steps, you can lift that stain without damaging the delicate nap. I’ve brought back suede bags, boots, and jackets that looked ruined. The key is patience. Rushing this process is the only sure way to make a temporary mark permanent.
Your first and most important rule is to always start dry, work gently, and give the material time to respond between steps.
The Dry-Cleaning First Steps
Never put water or liquid cleaner on a fresh grease stain. You’ll just spread the oil and drive it deeper. Your first tools are all dry.
- Blot, Don’t Rub: Immediately use a clean, dry cloth or paper towel to gently blot away any excess grease from the surface. Press straight down and lift.
- Use a Suede Eraser: A plain suede eraser (usually a rubbery or gum-like block) is your best friend. Rub it lightly back and forth over the stain. You’ll see the eraser collect grime and the nap of the suede begin to lift.
- Brush It Out: Follow with a suede brush (brass or nylon bristles). Brush in one direction to re-raise the nap and remove eraser debris. Check the stain. You may need to repeat the eraser and brush steps a few times.
This dry method often handles light grease splatters completely. For a stubborn spot, you move forward slowly.
When to Introduce a Cleaner
If a shadow of the stain remains after dry cleaning, you can use a specialist suede cleaner. These are usually foam-based. Different types of stains require different cleaning methods, so make sure to choose the right one.
- Test the cleaner on a small, hidden area first, like inside the tongue of a boot.
- Apply a tiny amount of foam to a clean cloth, not directly to the suede.
- Dab (don’t scrub) the stained area gently with the cloth.
- Let the area dry completely away from direct heat.
- Once bone dry, brush the nap vigorously again with your suede brush.
This slow, dry-to-damp process respects the suede’s structure and prevents the stain from setting into a dark, wet ring.
What Not to Do: Common Mistakes
Fixing one problem by creating another is easy with suede. Avoid these common errors.
- Never use household stain removers, vinegar, or baking soda pastes. They can strip color, alter the pH, or leave a crusty residue.
- Don’t soak the leather. Suede isn’t like smooth leather. Saturating it can mat the nap down irreversibly.
- Avoid excessive heat from hairdryers or radiators. High heat can cook the oil into the fibers and stiffen the leather.
Think of suede like velvet. You wouldn’t scrub a greasy velvet chair with a wet rag. You’d carefully lift the oil from the fibers. The same principle applies here.
The Reward of Care
A small, well-treated scar on suede adds to its story. My leather jacket, June, has a few light marks like this. They’re memories of use, not failures of care. When you patiently work a stain out, you preserve the soft hand and rich color of the material. The boot remains your comfortable, dependable companion, its character deepened by the care you’ve shown. That patina of use and maintenance is what makes a leather good truly yours.
Common Questions
Can I use baking soda instead of cornstarch on a fresh grease stain?
Yes, baking soda is an effective dry absorbent. I prefer cornstarch for light suedes, as baking soda can sometimes leave a slight residue that requires more vigorous brushing to remove.
How do I know if a stain is too far gone for home treatment?
If multiple rounds of the dry absorbent method leave a dark, unchanged stain, the oil has fully saturated the leather. At this point, applying liquids risks setting a water ring, and a professional cleaner is your safest option. For common leather stains such as ink, wine, or oil, there are targeted removal approaches you may want to review in the next steps.
Is it absolutely necessary to use a suede protector spray after cleaning?
It is the single best practice for prevention. A quality spray causes liquids to bead up, giving you critical time to blot a spill before it becomes a permanent stain.
What’s the most important step when using a specialist suede cleaner on a stubborn spot?
Always test it on a hidden area first, like inside the boot’s tongue, and apply it to a cloth, not directly onto the suede. This prevents color transfer and avoids over-saturating the delicate nap.
For car grease, should I use a degreaser immediately?
No, never start with a liquid degreaser. Always begin with the dry absorbent powder method; a degreaser is only a last resort after the oil has been mostly pulled out, and even then, test it meticulously.
Keeping Your Suede Looking Its Best
The best way to handle a grease stain is to tackle it right away with a gentle touch. Patience and the right tools, like a suede brush and a dedicated eraser, will preserve that soft nap far better than any harsh chemical.
Proper care extends the life of your leather goods, which is a core part of responsible ownership. Learning these skills honors the material and the craft, reflecting a commitment to quality and mindful consumption.
Deep Dive: Further Reading
- How to Get Grease Out of Suede: Quick & Easy Methods
- r/Rollerskating on Reddit: Help! Best way to remove grease/oil from suede??
- How to Clean Suede Shoes Without Wrecking Their Velvety Texture
- How To Clean Suede Properly, Without Damaging It – Von Baer
Harriet is a avid collector of leather goods such as purses, bags, seat covers, etc and has an extensive background in leather care, recovery, stain removal and restoration. She has worked for a number of years perfecting her leather care techniques and knows the ins and outs of restoring all kinds and types of leather products. With her first hand knowledge in leather care, you can not go wrong listening to her advice.
Suede and Nubuck Care