How Do You Repair Scuffs and Marks on Leather Shoes and Boots?
Published on: July 12, 2026 | Last Updated: July 12, 2026
Written By: Harriet Nicholson
Hello Tannery Talk. That sudden scrape on your boot or the dull mark on your shoe doesn’t have to be permanent.
This guide will walk you through the simple process, covering identifying the type of scuff, gathering the right tools, cleaning the area, conditioning the leather, and blending the repair seamlessly.
I’ve brought everything from my saddle Mason to my jacket June back from worse, and I’ll show you how to do the same.
What Kind of Scuff or Mark Are You Dealing With?
Before you reach for a product, take a close look. Run your fingertip over the mark. Your touch will tell you more than your eyes.
Scuffs, Scratches, and Stains
A scuff is like a graze on your skin. It roughens the leather’s top layer, often leaving a pale, dusty mark where the finish is worn away. It feels slightly rough to the touch.
A scratch is more like a thin cut. It’s a defined line, and you might feel a slight groove. Sometimes you’ll see a different color at the bottom of that groove, which means it’s gone past the surface dye.
A mark is usually a stain or discoloration. Think coffee splashes, water spots, or dirt ground in. The surface might feel different, but the main issue is the color change.
Figuring out if the damage is just on the surface or if it’s gone deeper is the most important step you will take. Everything that comes next depends on this.
The Simple Assessment
- Clean the area gently with a dry, soft cloth.
- Look at it in good light. Is it just a surface discoloration, or is the leather fiber itself torn or cut?
- Feel it again. Does your nail catch in a groove, or does the texture just feel matte and rough?
A surface-level scuff on a polished shoe is a quick fix. A deep scratch on a pull-up leather boot like my old work pair, Mason, is a different story. For that scratch, you’re not just hiding a mark, you’re rebuilding the leather’s surface. Do methods to repair scratches and remove scuff marks on leather shoes and boots actually erase them, or do they only hide them? This post will unpack what works and why.
Gathering Your Leather Repair Toolkit
You don’t need a professional workshop. A thoughtful, simple kit is all about control and care.
Items You Probably Own
- Several soft, lint-free cloths (old cotton t-shirts are perfect).
- A horsehair or soft-bristle brush for dust and dirt.
- Cotton swabs for precise application.
- A small bowl of lukewarm water.
The Essential Products
For probably 80% of scuffs and light marks, these three products are all you need.
- A Gentle Leather Cleaner: Look for a pH-balanced option. This lifts away grime without stripping the leather’s natural oils. For a simple scuff, sometimes a good cleaning is the whole repair.
- A Quality Leather Conditioner: This is the heart of leather care. After cleaning, leather is thirsty. Conditioner replaces lost oils, keeps the material supple, and can often help minor scuffs blend away.
- A Matching Cream or Wax Polish: This is your finishing artist. A cream polish adds a hint of color back to scuffed areas. A wax polish adds a protective, shiny layer on top. For dress shoes, I use wax. For my casual boots, I prefer cream.
Your single most important tool is a hidden spot for testing. Always apply your cleaner, conditioner, or polish to the inside of a tongue, a belt loop, or an ankle seam first. Wait for it to dry. This tells you if the color changes or if the leather reacts badly.
For Deeper Damage
If your assessment shows a real gouge or a deep scratch that reveals a light-colored core, your kit expands. You’re moving from cleaning and blending to filling and recoloring. This is when you might consider a leather filler (to level the groove) and a leather dye (to match the color). We can tackle that process another time. For now, mastering the clean-condition-polish method will solve most of your problems.
The Step-by-Step Guide to Fix Scuffed Leather Shoes
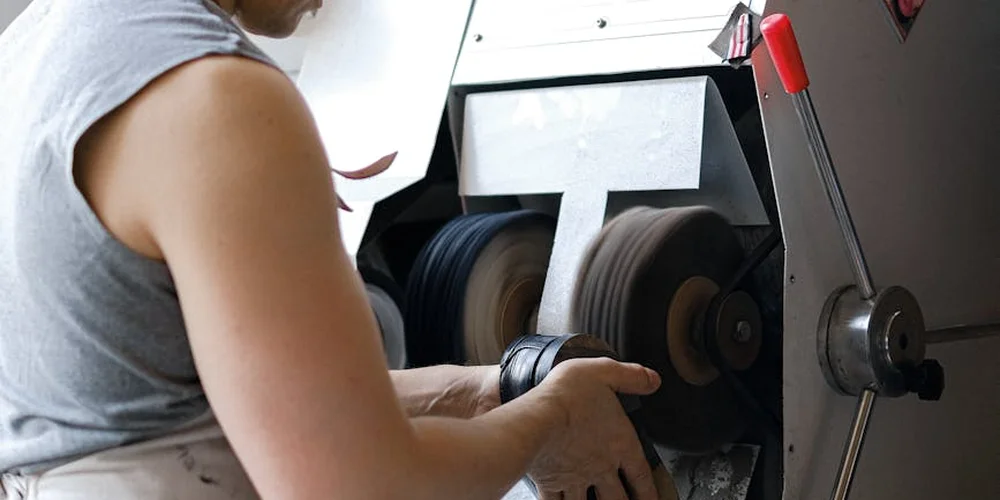
Step 1: Clean the Leather Thoroughly
You cannot fix a scuff on a dirty surface. Old polish, dirt, and oils will prevent any conditioner or color from bonding properly.
Take a soft cloth, dampen it with water, and wring it out well. Gently wipe the entire scuffed area and the leather around it. For stubborn grime, a drop of a pH-neutral leather cleaner on the cloth works wonders. Your goal is to see the true color of the leather again.
A perfectly clean, dry surface is the only reliable foundation for a lasting repair.
Let the area dry completely. Rushing this step is a common mistake. Wait fifteen minutes, or until the leather feels cool and dry to the touch.
Step 2: Condition to Restore Suppleness
A scuff often means the leather fibers have been crushed and dried out. A good conditioner puts moisture back in. This can plump up the fibers, making shallow marks much less obvious.
Apply a small amount of leather conditioner to a clean cloth. Rub it into the scuffed spot using small, circular motions. Conditioning rehydrates the leather, which can significantly reduce the visual depth of a minor abrasion before you even add color. It’s especially important for problematic stains or wear spots on leather boots.
Let the conditioner soak in for at least ten minutes. Then, use a dry part of your cloth to gently buff away any residue left on the surface. The leather should feel supple, not greasy.
Step 3: Camouflage the Scuff with Polish or Cream
Now we match the color. A pigmented leather cream or wax polish is your best tool here. Choose a color that matches your shoes as closely as possible.
- Dip a polishing applicator or soft cloth into the cream.
- Work the product into the scuff in tight, small circles, blending out into the surrounding leather.
- Let it dry for five to ten minutes. It will look hazy.
- Take a clean, soft brush or cloth and buff the area. This blends the new pigment with the old.
Repeat this process if the scuff still shows. Two thin layers are always better than one thick, globby one. This technique of layering and buffing colored cream is the direct answer for how to fix a scuff on leather shoes. Patience here makes the repair invisible. From scuffs to cracks and even small sole separation, this same approach can help with leather and patent leather shoes or boots.
Step 4: Buff for a Smooth, Integrated Finish
The final buff is what makes the repair part of the shoe. Use a dedicated soft buffing cloth, like a microfiber or an old t-shirt. Apply some passion and elbow grease, buffing the entire panel of leather until it has a consistent, gentle shine. This is part of the leather care and polishing techniques that help maintain and restore the appearance of leather footwear.
Run your finger over the repaired spot. It should feel as smooth as the leather around it. If you feel a waxy edge, buff more. A proper buff creates a uniform finish, ensuring the repaired scuff feels as good as it looks.
The result isn’t a sterile, new look. It’s a harmonious, cared-for appearance, much like the deep, rich patina on my old saddle, Mason. The mark becomes part of the story, not a flaw.
Special Cases: Light Leather, Deep Scratches, and Other Items
For Light-Colored Leather
Tan, white, or pastel leather shows every mark. The standard process still works, but your product choice is critical. Using a dark or neutral conditioner can permanently stain light leather, especially when dealing with dye transfer stains on light-colored leather.
Always seek out conditioners and creams labeled for light leathers. They are formulated to moisturize without darkening. Test any product on a hidden spot first, like the inside of a strap. On light leather, preventing color change is just as important as repairing the scuff.
For Deep Gashes and Scratches
Sometimes a scuff is more of a scratch or gash, where material is actually missing. Surface polish won’t fill that gap. This is when you need to know how to fix leather boots scuffed deeply.
You will need a leather filler paste. After cleaning and conditioning, use a spatula to press the filler into the gash, overfilling it slightly. Let it cure rock hard.
Next, use very fine grit sandpaper (like 600 grit) to carefully sand the filler down until it is perfectly flush with the leather surface. This takes a gentle touch. Finally, you must re-dye the spot to match, using the layering technique from Step 3. It’s a more advanced fix, but it can save a deeply damaged boot.
For Leather Furniture and Bags
The core principles never change. Clean, condition, color, buff. Whether it’s a scuff on your sofa or a mark on your purse, the steps are the same.
For a large furniture piece, you may need to condition a broader area to ensure an even look. Be generous with the conditioner on dry, worn spots. For a delicate purse or bag, use even lighter pressure and less product. The leather is often thinner.
I’ve used this exact method on my soft calfskin jacket, June, after a scrape, and on my veg-tan wallet, Scout, when it gets marked. The same respectful process of cleaning, nourishing, and coloring works for any quality leather item you own. The material responds to care, no matter its form. That same approach also works for leather and faux leather jackets—clean, condition, remove stains, and restore the finish. It’s a simple routine you can apply to any jacket you own.
Keeping Your Leather Looking Good for Years
Once you’ve fixed a scuff, you want to keep that good condition going. Think of it like tending a garden. A little regular care prevents big problems later.
Your Best Defense is a Good Offense
Conditioning is not a rescue mission. It is regular maintenance. A conditioned leather boot is softer, more flexible, and far more resistant to scrapes. Think of it like moisturizing your own skin to avoid dry, cracked heels. Leather that is well-fed from within is tougher on the outside.
Here is a simple rhythm you can follow for boots and shoes you wear often.
- Clean them with a damp cloth or a gentle, pH-balanced leather cleaner. Let them dry.
- Apply a small amount of conditioner (like a neutral oil or cream) to a soft cloth.
- Rub it into the leather in small circles. You are not painting a wall. You are massaging it in. Cover the entire surface evenly.
- Let it absorb for at least an hour, or better yet, overnight. The leather will drink it up.
- Buff off any excess with a clean, dry cloth to a soft shine.
I do this for my own boots every three to four months, and for a piece like my saddle Mason, maybe twice a year unless it’s been in heavy rain. If the leather ever feels stiff or looks thirsty, it is time for a conditioning session.
Add an Invisible Shield
For shoes and boots that face daily battles against rain, salt, or mud, a protective spray is a wise choice. It is like putting a clear raincoat over your leather. It will not make it waterproof, but it will cause water to bead up and roll off, giving you precious time to wipe it dry.
Spray in a well ventilated area. Hold the can about six inches away and apply a light, even mist over the entire surface. Let it dry completely. One coat is usually enough. Reapply this protection every few months, especially before winter or a rainy season.
This extra step adds a layer of security that can stop a potential stain or water spot before it even starts.
Smart Storage is Simple Care
How you put your boots away matters just as much as how you clean them. A good pair of shoe trees is your best friend. They are not just for fancy dress shoes. They work in your leather work boots too.
- They absorb moisture from your sweat after a long day.
- They hold the shoe’s shape, preventing deep, permanent creases.
- They stop the leather from collapsing and getting crushed in a closet.
If you do not have shoe trees, at least stuff the boots with clean, crumpled paper. Store them in a cool, dry place away from direct heat or sun. Keeping them on a simple rack, rather than piled on the floor, prevents accidental scuffs from other shoes.
Every Mark Tells Your Story
With this consistent care, your perspective on marks will change. A perfect, shiny boot is a new boot. A boot with a few gentle scuffs and a deep, rich patina is a boot with character. It is my wallet Scout, darkened from my hands. It is June’s jacket, with creases at the elbows from years of wear.
Leather is a living material, and these small signs of use become part of its story, not a flaw to be feared. Your care ensures that story is one of longevity and beauty, not neglect and decay.
Common Questions
Can I use household items like vinegar or mayonnaise to fix a scuff?
Do not. These are acidic or oily concoctions that can degrade leather finishes and cause lasting stains. Stick to pH-balanced cleaners and proper conditioners designed for leather preservation.
How do I repair a deep scratch on my leather sofa?
The clean-condition-color method works, but for a deep scratch, you’ll need a leather filler paste to rebuild the surface. Always test any filler or dye on an inconspicuous area, like the back or underside of a cushion, first.
My leather purse has a scuff. Is the process the same as for shoes?
The core principles are identical: clean, condition, and blend with a colored cream. Use a lighter hand, as bag leather is often more delicate. Focus on nourishing the leather to prevent the scuff from drying and cracking further.
Will conditioning alone fix a scuff?
For a minor surface abrasion, yes-conditioning rehydrates crushed fibers, often making the scuff blend in. For a true mark where the color is removed, you will need a pigmented cream or polish after conditioning to restore the color.
How do I care for suede or nubuck if it gets scuffed?
Forget creams and conditioners. Use a specialized suede eraser and brush for surface marks. For deeper stains, you need a suede-specific cleaner; always test it first. The goal is to raise the nap, not add moisture or pigment like smooth leather.
Parting Advice on Leather Repair
The most important rule is to match your repair method to the mark’s depth and the leather’s character. A simple cream often fixes a surface scuff, while a gouge needs filler and pigment to become part of your boot’s story.
Choosing plant-based conditioners and reputable repair kits supports a more sustainable practice. Each careful repair you complete builds your skill and honors the material, adding years of good service to a well-made item.
Expert Resources and Citations
- r/AskACobbler on Reddit: how to fix badly scuff leather?
- How Do You Repair Scuffed Leather Shoes or Boots? – Evans
- How to repair scratches on leather shoes?
- How to Remove Scuff Marks from Shoes | HowStuffWorks
Harriet is a avid collector of leather goods such as purses, bags, seat covers, etc and has an extensive background in leather care, recovery, stain removal and restoration. She has worked for a number of years perfecting her leather care techniques and knows the ins and outs of restoring all kinds and types of leather products. With her first hand knowledge in leather care, you can not go wrong listening to her advice.
Fixing Surface Scratches and Scuffs