How Do You Remove Mud Stains from Suede Boots and Shoes Without Damaging the Material?
Published on: February 26, 2026 | Last Updated: February 26, 2026
Written By: Harriet Nicholson
Hello Tannery Talk. That sinking feeling when mud meets suede is real, but I can tell you from my bench that most stains come out with patience and the right touch.
We will cover the critical drying step, choosing the proper brush, using a gentle suede cleaner, and reviving that soft, velvety handfeel.
Having cared for everything from delicate suede shoes to rugged boots, I rely on this careful process.
The Golden Rule: Your First Step Before Cleaning Mud from Suede
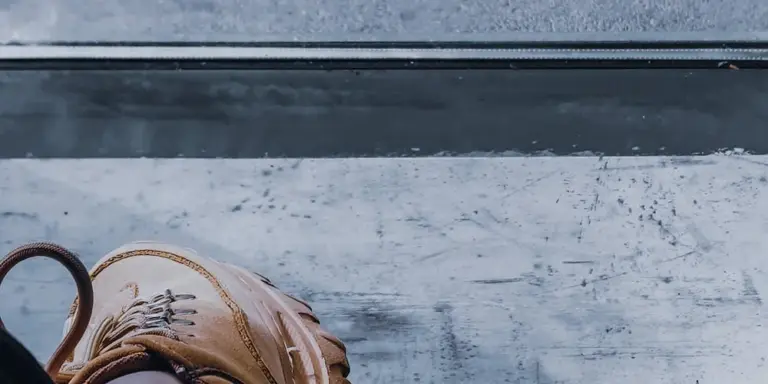
Your instinct might be to grab a wet cloth and start scrubbing. I understand that panic. Resist it. The single most important thing you can do for muddy suede is absolutely nothing. You must let the mud dry completely.
Think of wet mud like wet sand on a paper towel. If you wipe it while wet, you just grind the grit deeper into the fibers and spread the stain. Letting it dry turns that sticky mess into a crust of loose dirt. This rule applies whether the mud is fresh from your walk or you just noticed an old, dried stain on your boots. Patience here prevents permanent damage.
Once the mud is fully dry and crumbly, you can start the real cleaning. You will need a soft-bristle suede brush or even a clean, dry microfiber cloth. For very delicate suede or nubuck, your fingertips work well.
- Hold the shoe firmly and brush in one direction, following the natural nap of the suede.
- Use light, short strokes. You are coaxing the dirt out, not scouring it.
- If you encounter a stubborn bit of dried mud, gently pick at it with your fingernail or the edge of the brush bristles.
Never, ever rub wet, muddy suede or apply any liquid cleaner directly to the stain. This forces dirt and minerals from the mud deep into the material, creating a dark, set stain that is nearly impossible to lift without professional help. Water is a tool for later, not for now.
How to Clean Fresh Mud Off Suede Shoes and Boots
You came in from the rain and your boots are caked. Here is your calm, step-by-step plan. I followed this exact process on a pair of suede hiking boots just last season, and they look ready for another trail.
- Remove Excess. Gently knock the boots together or use your fingers to flick off big clumps of mud. Do not use a tool that could scrape the surface.
- Air Dry. Stuff the boots with clean, dry paper to help them hold their shape. Place them in a well-ventilated room, away from direct heat like radiators or hair dryers. Let them sit overnight, or until every speck of mud is bone-dry and light in color.
- The Dry Brush. Once fully dry, take your soft suede brush. Brush the entire affected area thoroughly. You will see most of the mud disappear as dust. This often gets you 90% of the way there.
Many people ask, “Can you use water to clean mud off suede?” The answer is careful and specific. You do not use water on the mud itself. Water is only for a follow-up spot clean on any remaining dingy shadow after all the dry dirt is gone.
If a faint stain persists after dry brushing:
- Dampen a clean white cloth with cool, clean water. Wring it out until it is just barely damp.
- Gently dab (do not rub) the stained area. The goal is to lift the final residue, not wet the suede.
- Let the area air dry completely again.
- Once dry, give it a final brush with your suede brush to reactivate the velvety nap.
The mistake is using water first. Water on wet mud makes a paste that stains. Water as a final, delicate touch on a pre-cleaned area can lift that last bit of grime. If the shadow remains after this, a specialized suede eraser or a tiny amount of white vinegar on a cloth can help, but always test any cleaner in a hidden spot first.
How to Clean Dried Mud Off Suede Without Damage
Dried mud is mostly just dirt held together by water that’s long gone. Your goal is to break that bond and lift the dirt away without scrubbing the delicate suede fibers. Here is the safe way to do it.
- Let the boots dry completely. Do not try to brush or pick at mud while it’s damp. This can grind the particles deeper into the nap.
- Once the mud is bone-dry, take a suede brush or a clean, dry pencil eraser. Start by gently tapping or scraping at the crusty edges of the stain to break it up. You’re not brushing yet, just crumbling it.
- Now, use your suede brush. Hold the boot firmly and always brush in one direction, following the grain of the nap. You can feel the nap by running your fingers over the clean suede; one direction will feel smooth, the opposite will feel rough. Brush with the smooth direction.
- Brush gently at first, using short, light strokes to lift the loose dirt. As more comes off, you can use slightly firmer strokes. The crust should powder and lift away.
- For stubborn bits, a dry eraser can work like a gentle sandpaper. Rub it lightly over the spot, then brush the residue away.
This method relies on patience and a light touch, letting the dry materials do the work instead of moisture or force. For fresh mud, the process is different. If your boots are wet, let the mud dry fully first. Trying to rinse wet mud can create a bigger, muddier water stain. The drying-and-brushing method is almost always the best first step.
When to Use a Specialty Suede Cleaner
Brushing removes surface dirt, but sometimes the stain has set deeper. You might need a cleaner if, after thorough brushing, a discolored shadow or a greasy spot remains on the suede.
A specialty cleaner is for breaking down oils or lifting embedded grime that a brush can’t reach. These come in two main types: water-based foam cleaners and solvent-based liquid cleaners. A foam is often gentler for overall cleaning, while a solvent can be better for specific oil-based stains.
Before using any cleaner, you must test it. Apply a small dab to a hidden area, like inside the tongue or behind the heel tab. Let it dry completely. Check for any color change or stiffening of the suede. If the test spot looks good, you can proceed.
Apply the cleaner sparingly to the stained area, following the product’s instructions. Usually, you’ll use a soft cloth or the included applicator, working in small circles. Let it dry, then brush the nap back up. It may take a few cycles of clean-dry-brush to see full results. Be especially careful when removing delicate pen ink stains.
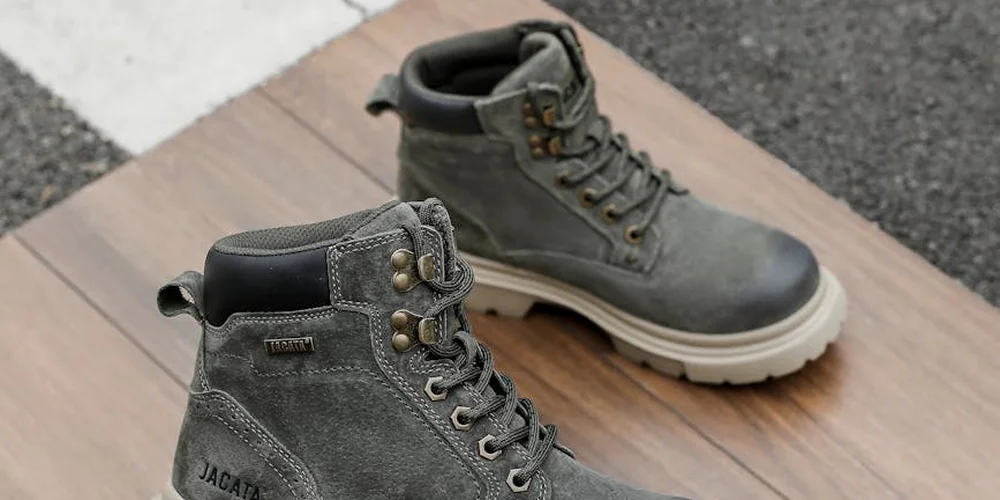
The Right Tools: Your Kit for Suede Mud Removal
The wrong tool can turn a small stain into a permanent scar. Your suede needs a gentle touch. This is the kit I keep on hand for my own suede shoes and for repairing pieces like June, where harsh treatment would ruin the delicate surface. It’s especially crucial when fixing scratches on suede shoes.
Your Essential, Safe Toolkit
Gather these four items before you start. They work together to lift dirt and restore texture without force.
- A Soft Bristle Suede Brush: This is your most important tool. It has fine, dense brass or synthetic bristles designed to lift the nap, the fuzzy surface of the suede. Think of it like a gentle comb for very short, delicate hair.
- A Nylon Bristle Brush (Dauber Brush): This brush has stiffer, but still flexible, nylon bristles. You use it dry for one job only: to carefully flick away dried, crusty mud. It is not for scrubbing.
- A Suede Eraser: This is a rubbery, gritty block. It works like a pencil eraser for suede, lifting away scuff marks and stubborn dried dirt that the brush can’t reach. It abrades the stain away without damaging the leather underneath.
- Clean, Dry Microfiber Cloths: You need these for blotting and buffing. Their soft, lint-free texture won’t scratch or leave fibers behind on the suede.
Why Stiff or Metal Brushes Cause Harm
I see this mistake often. A stiff brush or, worse, a wire brush seems like it would scrub the dirt away faster. It will also scrub the suede itself into a flat, shiny, and damaged patch.
Suede is the inner layer of the hide, sanded to create its soft nap. Stiff bristles act like sandpaper, mashing and cutting those tiny fibers. Metal brushes are far too aggressive and will permanently scar the leather. Force is the enemy of suede; your goal is to coax the dirt out, not attack it.
The Step-By-Step Process: From Dried Mud to Revived Nap
Patience is your secret weapon. Never try to clean wet, muddy suede. You will grind the dirt deeper into the pores.
- Let It Dry Completely. Leave the boots in a warm, dry place away from direct heat for 24 hours. The mud will turn to a dry, crusty powder.
- Knock Off the Crust. Take your dry nylon bristle brush. Gently flick it across the dried mud to dislodge the big chunks. Hold the boot upside down so the dust falls away.
- Erase Stubborn Marks. For any remaining dark spots or ingrained dirt, use the suede eraser. Rub it back and forth gently over the stain, then brush the residue away with your soft suede brush.
- Revive the Nap (This Finishes the Job). This final brush is what makes suede look like new again. Take your soft bristle suede brush. Brush the entire area in one direction with firm, smooth strokes. You will see the color even out and the fuzzy texture spring back to life. For tough spots, you can gently brush in a circular motion, then finish by brushing in one direction to align the fibers.
If a shadow of the stain remains, don’t panic. Some pigments can settle deep in the leather. Often, after a second gentle treatment with the eraser and brush a few days later, it will continue to fade as the leather relaxes.
Using a Suede Eraser to Tackle Stubborn Marks
After the mud has dried and you’ve brushed off the crust, you might still see a faint shadow or a bit of ingrained grime. This is where a suede eraser becomes your best friend. Think of it not as a pencil eraser, but as a gentle, abrasive block designed to lift away discoloration without harming the delicate nap of the suede.
I keep one in my kit for moments like these. It’s the tool I used to clean a pair of hiking boots that looked like they’d been through a clay pit, restoring the rich color without leaving a shiny, worn spot.
Step by Step: The Right Way to Erase
- Work on a small, stubborn area at a time. Focus on the discolored spot, not the entire boot.
- Hold the eraser firmly and use a very light touch. Imagine you’re trying to lift the stain out, not scrub it in.
- Rub in a gentle, circular motion. You should see a light dust of eraser crumbs and stain particles forming.
- After 10-15 seconds of light rubbing, stop. Over-rubbing is the fastest way to create a bald, shiny patch on your suede.
- Now, take your soft-bristled suede brush. Brush the area vigorously and in one direction to remove all the eraser crumbs and lift the suede’s nap back up.
- Check your work. If the stain persists, you can repeat the process one more time, but always err on the side of caution. Sometimes a faint memory of the stain is better than a damaged surface.
The vigorous brushing after erasing is non-negotiable. It does two critical jobs: it cleans the eraser debris from the fibers, and it re-aligns and fluffs up the suede’s texture. You’ll hear a soft, whisking sound and see the color become more uniform.
If you rub with the eraser until the stain is totally gone, you’ve probably already rubbed too hard and flattened the fibers permanently. Patience and multiple light sessions are safer than one aggressive attempt. For a really set-in stain, combining this eraser method with a specialized suede cleaner foam is often the next, safest step.
Cleaning Solutions: From Your Kitchen to the Store
You don’t always need a specialty product. Some of the gentlest cleaners are already in your home. The goal is to lift the stain without scrubbing the life out of the delicate suede fibers.
Homemade Care: Gentle and Effective
For fresh mud or light soil, a simple, dry approach is best. Let the mud dry completely, then brush it away with a suede brush or a clean, dry toothbrush. Brush in one direction to lift the nap back up.
For a slightly deeper clean on a stubborn spot, a mild solution can help. I keep a mix in a small spray bottle for my suede pieces.
- Mix one part distilled white vinegar with two parts cool water.
- Lightly mist the stained area from about 6 inches away. Do not soak it.
- Gently dab with a clean, white microfiber cloth. Never rub in circles.
- Let the area air dry away from direct heat.
- Once dry, brush the nap gently to restore the texture.
This method uses the mild acidity of vinegar to break down grime without harsh chemicals, preserving the suede’s natural oils.
A common mistake is using too much liquid. Suede is not like smooth leather. Water can leave dark, permanent spots and stiffen the material. Always use a light touch and let nature do the drying.
Choosing a Commercial Cleaner
For heavier stains or overall grime, a dedicated suede cleaner is a smart investment. Not all leather cleaners are the same. Products made for smooth leather can ruin suede’s texture.
Look for cleaners labeled specifically for suede and nubuck. These are usually water-based, pH-balanced formulas. Many come with a companion protector spray, which is a great next step after cleaning.
- Application is key: Apply the cleaner to a brush or cloth first, not directly onto the suede. Work in small sections.
- Test first: Always do a spot test on an inconspicuous area, like the inside of the tongue or backstay.
- Patience pays: Allow the cleaner to dry fully, which can take several hours, before brushing or wearing.
A good suede cleaner lifts dirt from the fibers without altering the color or handfeel of your boots.
A Note on Faux Suede
Many of the same dry methods apply to synthetic or faux suede. You can brush away dry dirt and use a slightly damp cloth to dab spots. The material is often less delicate than real suede, but you should still exercise care, especially when cleaning ultra suede or fake suede materials.
The rule here is simpler: always check the care tag or manufacturer’s instructions first. Some synthetic materials have specific cleaning requirements, and it’s the safest way to know you won’t cause damage.
How to Protect Your Suede After the Mud is Gone
Once your suede is clean and dry, your job is not quite finished. The final, critical step is creating a shield for next time. A quality suede protector spray is your best ally here.
Think of this spray not as a permanent, waterproof sealant, but as a resilient barrier. It helps water and dirt bead up on the surface instead of being absorbed immediately. This gives you a crucial window to wipe away a fresh splash before it becomes a deep stain.
Applying Your Suede Protector
Always apply protector to perfectly clean, completely dry suede. Any trapped moisture or dirt will be sealed underneath.
- Do a spot test. Spray a very small, inconspicuous area (like the inside of the tongue) and let it dry. Check for any color change or texture alteration.
- Work in a well-ventilated space. Hold the can about 6 inches from the material.
- Apply a light, even first coat. Move the can steadily to avoid soaking any one spot.
- Let it dry completely, which usually takes an hour or two. Then, apply a second light coat for thorough coverage.
This two-coat process builds a consistent, protective layer without oversaturating the delicate suede nap. This waterproofing step helps protect suede and faux suede shoes or boots from rain stains. Let the boots cure for a full 24 hours before wearing them. You will likely notice the suede darkens slightly when wet with the spray, but it should return to its normal color once fully dry.
Making Future Cleanups Simple
With a fresh protective barrier, maintenance becomes much easier. Light soil and rain spots can often be brushed away immediately with a suede eraser or dry brush. What would have been a deep mud stain now sits more on the surface.
My own boots, ready for a walk, benefit from this. A quick brush after a damp day keeps them looking sharp. It transforms a potential deep cleaning session into a 30-second wipe-down. The protector wears off over time, especially in high-wear areas like the toes and heels, so reapplication every few months is wise for boots that see regular use.
Storing Your Prepared Suede
How you store your boots determines how ready they are for the next outing. Good habits here prevent new problems from forming.
- Use shoe trees. Cedar shoe trees are ideal. They absorb moisture, maintain the boot’s shape, and prevent deep creases that can crack over time.
- Store in a breathable bag. A cotton dust bag is perfect. Avoid sealed plastic, which traps humidity and can encourage mildew on any lingering moisture.
- Keep them in a cool, dry place away from direct heat sources like radiators. Extreme heat can dry out and stiffen the leather.
Proper storage is a silent form of care that preserves all the cleaning and protecting work you’ve just done. It keeps the leather supple and the shape intact, so your boots are always adventure-ready, not recovery-ready.
Common Questions
What’s the absolute first thing I should do with fresh mud on my suede boots?
Gently knock off big clumps without rubbing. Then, let the boots air dry completely away from heat before any cleaning attempt.
Can I use a regular eraser or brush on suede?
Never use a standard pencil eraser or stiff brush. Use only a designated suede eraser and a soft-bristle suede brush to avoid flattening the nap.
Is it ever safe to use water on a mud stain?
Only as a final step on a pre-brushed, dry stain. Dampen a cloth slightly, dab-never rub-the area, then let it air dry completely.
What’s in a basic suede cleaning kit I should have at home?
A soft suede brush, a dedicated suede eraser, clean microfiber cloths, and a quality suede protector spray. That’s your foundation for routine care.
How do I protect my suede after a successful cleaning?
Apply a quality suede protector spray to clean, dry boots. To do it properly, apply an even, light coat and follow the product directions. Let it cure for 24 hours to create a barrier against future stains and moisture.
Keeping Your Suede Looking Its Best
The most reliable method is always a gentle touch and a good brush. Let the mud dry completely, then carefully brush it away with a suede-specific tool before you consider any deeper cleaning.
Proper care is a form of respect for the material and the craft behind it. Taking the time to maintain your leather goods skillfully honors their origin and builds your confidence in keeping them for years.
Relevant Resources for Further Exploration
- Removing stains from your suede shoes – Start-Rite Shoes
- How to Clean Suede Shoes, No Matter the Stain
- r/CleaningTips on Reddit: A wise person suggested waiting to clean mud off suede until it dried, which was very smart. Next steps?
- How to Clean Suede Shoes Without Wrecking Their Velvety Texture
Harriet is a avid collector of leather goods such as purses, bags, seat covers, etc and has an extensive background in leather care, recovery, stain removal and restoration. She has worked for a number of years perfecting her leather care techniques and knows the ins and outs of restoring all kinds and types of leather products. With her first hand knowledge in leather care, you can not go wrong listening to her advice.
Suede and Nubuck Care