How Do You Remove Blood Stains from Suede and Leather Furniture?
Published on: March 15, 2026 | Last Updated: March 15, 2026
Written By: Harriet Nicholson
Hello Tannery Talk, that sudden blood stain on your suede boots or leather couch is alarming. I know the feeling, but don’t panic yet.
We will cover why blood stains are tricky, the immediate action to take, safe cleaning for suede, gentle treatment for leather, and how to restore the texture and color.
Having repaired and conditioned leather goods like my jacket June for years, I can guide you through this with practical, tested steps.
Why Blood Stains Demand Your Calm, Quick Attention
Panic is normal when you see blood on your favorite suede boot or leather chair. Take a breath. Your next move matters more than your first reaction.
Think of blood like egg white. It’s a protein. When it’s wet, you can wipe it away. As it dries, those proteins bind to the fibers of your item, turning from a spill into a set-in stain. Heat speeds this process up dramatically, cooking the protein into the material.
This is why your number one rule is to use only cold water and to act as fast as you safely can.
Suede and leather handle this challenge differently. Suede is all nap, like a very short, dense carpet. It’s thirsty and porous, so blood soaks in quickly. Finished leather, like the smooth hide on my jacket June, has a protective top coat. This gives you a little more time, as the blood often sits on the surface before seeping in.
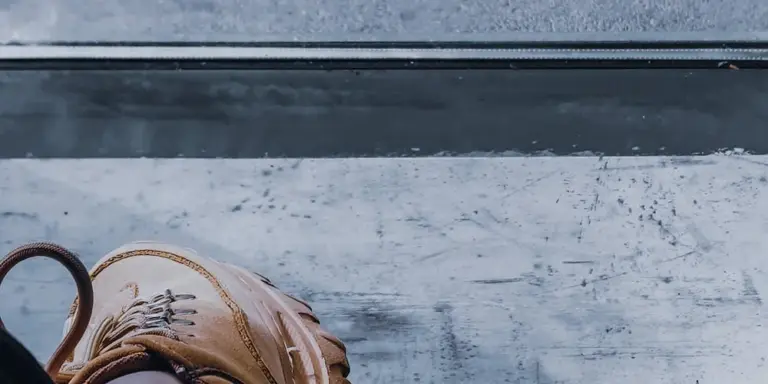
Your First Move for Fresh Blood on Suede
You just got a drop on your suede. This is your moment. Your goal is to lift the stain without driving it deeper or damaging the delicate nap.
- Grab a clean, white, absorbent cloth or paper towel. Immediately blot the spot. Press down firmly and lift straight up. Do not rub. Rubbing grinds the stain in and mats the suede’s fibers.
- Take a clean microfiber cloth and dampen it with cold water. Wring it out completely. You want it barely damp, not wet.
- Gently dab the stain, starting from the outer edge and working toward the center. This prevents the stain from spreading outward into a larger ring. Continue with a clean section of the cloth as it picks up the blood.
Never soak or saturate the suede; too much water can leave a hard water mark or distort the texture.
Let the area air dry naturally, away from radiators, direct sunlight, or hair dryers. Once completely dry, the nap might look flat or stiff. Use a suede brush (a nailbrush for cleaning can work in a pinch) to gently brush the area. Brush in one direction to restore the raised texture. The stain should be gone or significantly faded.
If a faint shadow remains, do not re-wet it immediately. For old or set-in stains, you need a different approach, which we’ll cover next.
Your First Move for Fresh Blood on Finished Leather
Fresh blood on leather demands a calm, quick response. I treat it like a small spill on a cherished table-swift action prevents a permanent mark.
Your priority is to lift the stain without letting it set or harming the leather’s protective topcoat. Gather a few clean, white cloths and a mild leather cleaner. Avoid heat and harsh scrubbing from the start. Use gentle techniques tailored for leather to ensure you don’t damage the material.
Step by Step: The Gentle Clean
Follow these steps in order. Work patiently.
- Blot up the liquid. Press a dry, absorbent cloth firmly onto the stain. Soak up as much blood as possible. Do not wipe or rub.
- Prepare a soapy solution. Dampen a second cloth with cold water. Wring it out so it’s just moist. Add a tiny drop of a pH-neutral, leather-safe soap.
- Dab the stain. Gently press the soapy cloth onto the affected area. Use a light, circular motion, starting from the outer edge and moving inward.
- Rinse away the soap. This step is easy to forget but vital. Dampen a third cloth with plain cold water and wipe over the cleaned spot. Removing all soap residue stops it from drying into a sticky film that attracts dirt.
- Dry the area. Pat the leather dry with a soft towel. Let it air dry naturally, away from radiators or sunlight, for several hours.
After drying, the leather might feel a little stiff or look lighter in that spot. That is normal. The cleaning process removes more than just the stain.
Restoring Life with Conditioner
Cleaning, especially with even a mild soap, can pull natural oils from the leather. Conditioning puts those oils back. This hinges on the science of how conditioning oils and waxes penetrate the hide to protect and nourish the leather. The right balance helps maintain flexibility, luster, and resistance to drying and cracking.
Think of this like giving a drink of water after a long day in the sun. I always condition my English saddle, Mason, after a deep clean. It keeps his leather from cracking and maintains that deep, chestnut patina he’s earned over eight years.
Use a clean, soft cloth to apply a thin layer of a quality leather conditioner. Let it soak in fully, then buff lightly with a dry cloth. The leather should feel supple again, not greasy.
How to Get Dried Blood Out of Suede and Leather
An old, set-in blood stain can feel like a permanent mark. I’ve seen it on the workshop table more than once, and that moment of worry is real. While a fresh spill is easier to manage, dried blood is tougher. The proteins bind with the fibers. With patience and the right approach, you can often lift the stain significantly and save the piece.
For Suede Items and Furniture
Suede is delicate. Its napped surface traps stains easily, and using the wrong cleaner can mat it down or leave a water ring. Your first tools should always be mechanical.
- Start Dry. Use a suede eraser (a rubbery, abrasive block) or a stiff-bristled suede brush. Gently rub or brush the stain in one direction to lift dried particles from the nap. Don’t scrub in circles.
- Brush It Out. After using the eraser, go over the area with a suede brush to restore the nap. You might already see a big improvement.
- The Diluted Vinegar Step (Proceed with Caution). If a shadow remains, you can try a mild acidic solution. Mix one part white vinegar with two parts cold water. The goal is to break down the proteins without soaking the suede.
- Test First. Dab this solution on a hidden seam or underside with a white cloth. Check for color transfer or darkening after it dries.
- If the test spot is okay, lightly dampen a clean microfiber cloth with the solution. Never pour it on.
- Dab (do not rub) at the stain from the outside in.
- Let it air dry completely, away from direct heat.
- Once dry, brush the nap gently again.
The key here is a light touch. Over-wetting suede is a common mistake that causes bigger problems than the original stain.
For Smooth Leather Furniture and Items
Smooth leather, like the calfskin on my jacket June, has a protective top coat. This makes it more forgiving for cleaning but requires follow-up care. You’ll need a dedicated leather cleaner and a conditioner.
- Apply a Leather Cleaner. Choose a pH-balanced cleaner meant for finished leathers. Apply a small amount to a soft, lint-free cloth.
- Let It Sit. Gently work the cleaner into the stain with circular motions, then let it sit for a few minutes. This dwell time lets the surfactants break down the stain.
- Wipe and Dry. Wipe the area clean with a damp section of your cloth, removing all cleaner residue. Buff dry with a separate, dry cloth.
- Condition Without Fail. Cleaning strips natural oils. Once the area is fully dry, apply a light coat of leather conditioner. This replaces lost moisture and protects the spot. Think of it like washing your hands and then using lotion.
Conditioning is the non-negotiable final step that keeps the leather from drying out and cracking where you cleaned it.
Managing Your Expectations
Blood, especially when it’s had time to set, can leave a faint tint behind. On suede, this might be a slight darkening of the nap. On smooth leather, it could be a subtle shadow in certain lights. This isn’t failure. Your goal is to remove the stain’s substance and biological material, not necessarily every trace of its memory. The result should be a clean, cared-for piece where the stain is no longer the first thing you see. On an old English saddle like Mason, these faint reminders often just blend into the character of a well-used and properly maintained companion.
How Do You Get Blood Out of a Suede Jacket or Shoes?
Many people ask me, “How do you remove blood stains from suede items?” The core principles are the same, but shaped items like a jacket or shoes need a more precise touch. You are dealing with seams, edges, and different wear patterns. The goal is to lift the stain without flattening the delicate nap or damaging the construction.
I think of my own suede jacket, June. A small scrape years ago left a mark on the sleeve. Working slowly and with the nap, not against it, brought her back. You can do the same.
Your Step-by-Step Guide for Any Suede Item
First, assess the stain. Is it fresh and damp or old and dried? Your approach changes slightly.
- For a fresh stain: Use a clean, white cloth dampened with cold water. Dab gently from the outside of the stain inward. Do not rub. Let the area air dry completely away from direct heat.
- For a dried stain: Use a dry, soft-bristled suede brush to gently loosen any surface residue. Then, apply a small amount of a pH-neutral suede cleaner to a microfiber cloth and dab at the stain. Let it dry fully.
After any cleaning, once the area is bone-dry, you must restore the nap by gently brushing it with a suede brush or using a suede eraser for stubborn spots. This final step is what makes the repair invisible.
Focus on a Suede Jacket: Seams and Stitching
Jackets are tricky. Blood loves to wick into the thread of seams and stitch lines. If you just clean the surface, a faint line can reappear later.
My method for jacket seams is extra patience. After the initial cold water dab, I take a cotton swab dipped in a little cold water or suede cleaner. I trace it carefully along the stitched line, rolling the swab to absorb the stain from the threads. I let it dry fully before I even think about brushing the main panel.
Always clean and dry the seam area separately from the larger leather panel to prevent moisture from spreading where you don’t want it. Rushing this step is the most common mistake I see.
Focus on Suede Shoes: Soles and Crevices
Shoes collect stains on the toe box, vamp, and around the sole edge. Your main concern here is protecting the adhesive that bonds the sole to the upper. Too much moisture can weaken it.
When cleaning near the sole, I use less liquid. A barely-damp cloth is better than a wet one. For the tight space where the suede meets the rubber sole, I use a soft toothbrush. I dip just the tips of the bristles in cold water, tap off the excess, and lightly flick at the stained edge. The small brush gives you control without soaking the glue. If you’re exploring the best methods and products for cleaning suede shoes and boots, this approach pairs well with gentle care.
For scuffs on the main body of the shoe, follow the standard dab-and-dry method. After drying, stuff the shoes with paper to help them hold their shape as they dry and before you brush the nap back up.
| Stain State | Primary Tool | Key Action | What to Avoid |
|---|---|---|---|
| Fresh & Damp | Cold water on a cloth | Dab, don’t rub. | Hot water (it sets protein stains). |
| Dried & Set | Suede brush & cleaner | Brush first, then dab with cleaner. | Scrubbing before loosening the stain. |
| On Jacket Seams | Cotton swab | Isolate and treat the thread. | Soaking the entire panel. |
| On Shoe Edges | Soft toothbrush | Use minimal moisture. | Flooding the sole joint. |
How to Get Blood Stains Out of Leather Furniture or a Sofa
When a spill happens on your sofa, the scale of the problem feels bigger. You can’t just dunk it in the sink. The key is to work slowly, section by section, and let the materials do their job.
The most important step is always the first one you take before cleaning.
Before you touch the stain, find a hidden spot-like behind a cushion, under an arm, or on the back-and test your cleaner there.
This tells you if the color will bleed or the finish will cloud. It’s the difference between a simple cleanup and creating a new, more permanent problem.
The Step by Step Cleanup
This process is for a standard protected leather. It’s the method I’d use on a piece like my old friend Mason, treating one panel at a time with patience.
- Blot and Vacuum
If the blood is still wet, use a clean, absorbent cloth to gently blot it up. Don’t rub. For a dry stain, use the soft brush attachment on your vacuum to remove any loose particles from the grain. This prevents grinding dirt into the leather during cleaning.
- Clean Gently
Dampen a second clean, white cloth with cool water. Wring it out so it’s just damp, not wet. Wipe the stained area. For a more stubborn mark, use a leather-specific, pH-neutral cleaner on the damp cloth. Work in small circles from the outside of the stain inward to prevent spreading it.
- Rinse the Area
This step is often skipped and leads to sticky residue. Take a third cloth, dampen it with clean, cool water, wring it well, and wipe over the area you just cleaned. You’re removing any leftover cleaning solution.
- Dry Thoroughly
Use a dry, absorbent towel to pat the area dry. Then, let it air dry completely, away from direct heat or sunlight. A fan can help. This can take several hours. Leather is like skin; forcing it dry with heat makes it brittle.
- Condition the Leather
Cleaning, especially with water, can strip natural oils. Once the piece is fully dry, apply a light, pH-balanced leather conditioner with a clean cloth. Buff it gently after it soaks in. To properly clean, condition, and waterproof oiled leather boots or shoes, follow a simple care routine. A consistent routine helps keep them flexible and protected for years. Conditioning restores moisture and flexibility, preventing the cleaned spot from drying out and cracking later.
A Special Note for Aniline Leathers
Aniline and semi-aniline leathers, like a beautiful unfinished suede or a super soft couch, are more absorbent. They have little to no protective topcoat. Water and cleaners can stain them permanently or leave a dark “water spot” ring. Understanding the difference between aniline and semi-aniline finishes and how to care for each can help you identify them and choose appropriate maintenance.
If your furniture is this type, the safest path is to blot up fresh blood with a dry cloth and call a professional leather cleaning service immediately. They have the right tools and experience for these delicate materials. They can also advise on the best methods, products, and sanitizing techniques for cleaning leather sofas and other furniture. This guidance helps you maintain leather upholstery safely and effectively.
Alternative Cleaning Agents and What to Avoid
You might not always have a specialty cleaner nearby when a spill happens. I keep a few household items in my kit for quick fixes on pieces like Mason or June. They can work, but you must know how to use them safely.
Always test any cleaner on a small, hidden area of your item first, like inside a seam or under a flap, to check for color transfer or damage.
Household Items You Can Try
These are gentle options for fresh stains. Work slowly and blot, never scrub.
- Diluted White Vinegar
Mix one part white vinegar with two parts cold water. Dab it onto the stain with a soft, white cloth. Let it sit for about five minutes to break down the blood, then blot with a clean cloth dampened with plain cold water. This works on both leather and suede, but on suede, it can slightly darken the nap, so use it sparingly. - Baking Soda Paste (For Leather Only)
Make a thick paste with baking soda and a little cold water. Using your finger or a soft cloth, gently apply a thin layer to the stain on smooth leather. Let it dry completely, which might take an hour. Then, brush it off with a soft bristle brush. Do not use this on suede. The paste is slightly abrasive and will matt down the delicate surface. - Mild Dish Soap
Use a clear, lotion free dish soap. Put a drop in a bowl of cold water and whip it with your fingers to make foam. Scoop up just the foam and dab it on the stain. After a minute, wipe the area with a cloth dipped in clean cold water to rinse. This is good for recent accidents on most surfaces.
Agents and Methods That Cause Harm
In my years of repair, I’ve seen more damage from the wrong cleaner than from the original stain. Avoid these at all costs.
Bleach, ammonia, and harsh solvents like acetone or nail polish remover will permanently damage dyes and make leather fibers dry and brittle. They strip away the natural oils that keep leather supple. Imagine pouring bleach on Mason’s deep color. It would create pale, weak spots that cannot be fixed.
Never use hot water or a hair dryer to treat a stain or speed up drying. Heat cooks the proteins in blood, setting the stain into the material. Heat also rapidly dries out the leather’s moisture, leading to cracks and stiffness. Always use cold water and let the item air dry at room temperature, away from sun or heaters.
When to Call a Professional
If the item is an antique, a cherished heirloom, or a very expensive designer piece, do not experiment. For very precious or antique items, contacting a professional leather cleaner is the best and safest first step. They have the right tools and experience to assess the damage without risking further harm. It is the most responsible choice for preserving your investment.
Special Considerations for Suede vs. Nubuck and Faux Materials
Your cleaning approach changes based on the material. This is the single most important factor for success.
Suede and Nubuck: Close Cousins, Different Strengths
Suede and nubuck are often confused. Both have a soft, brushed nap, but they come from different parts of the hide. Suede is made from the inner split of the skin, giving it a uniform, velvety texture. Nubuck is made from the top layer of grain, which is then lightly sanded. Think of it as a robust full-grain jacket, like my June, that’s been gently buffed for a softer feel.
The main difference is durability: nubuck is generally more resilient than suede because it starts with a tighter, stronger grain. However, its delicate nap means you must treat it with the same gentle care as suede. Aggressive scrubbing will mat the fibers permanently.
The initial cleaning steps for fresh blood we discussed apply to both. After the stain is lifted, restoring the nap is your final task. Here’s how:
- Let the area dry completely after your cleaning work.
- Use a dedicated suede brush or a clean, soft-bristled toothbrush. Gently brush the area in one direction to lift and align the nap.
- For stubborn matting, you can use a suede eraser. Rub it lightly over the spot, then brush away the residue.
- Hold the item over steam from a kettle (not too close) and gently brush the nap as it dries. This can help fibers spring back.
A Note on Faux Leather and Vinyl
Faux materials are a different story. They have no organic fibers to nourish and are essentially plastic coatings over fabric. Cleaning blood from them is often simpler.
You can use a mild soap or a general-purpose cleaner diluted in water. Wipe gently, then dry. The key is to avoid harsh solvents that might degrade the plastic coating.
Never use leather conditioners or oils on faux leather, as they won’t absorb and will just sit on the surface as a greasy, attract-dirt film. Your goal here is purely surface cleaning, not preservation.
Know Your Material First
I always check an inconspicuous spot first, like an inside seam. Test your cleaner and your brushing technique there. If the color bleeds or the nap flattens irreversibly, you know to stop.
This moment of patience saves heartache. Whether it’s the rugged nap of a suede boot or the polished surface of a vinyl chair, starting with the right method for the material protects your item from the very first step.
Practical Ways to Prevent and Protect
Cleaning a stain is reactive care. The best strategy is always proactive. Think of it like this: putting on a raincoat before you get wet is easier than drying out all your clothes afterward.
Using Protective Sprays on Finished Leather
For smooth, finished leather items like my wallet Scout, a protective spray is a helpful first line of defense. These sprays create a thin, invisible barrier on the surface. A good protective spray can repel water, oils, and light spills, giving you precious minutes to blot an accident before it soaks in. It reduces fading from sunlight, too.
But these sprays have clear limits. They are not magical force fields. A deep scratch or a heavy, soaking spill will still penetrate. I apply a spray to Scout once a year, after a full conditioning. The process is simple:
- Ensure the leather is completely clean and dry.
- Shake the spray can well.
- Hold it about 6 inches away and apply a light, even coat over the entire surface. Do not soak it.
- Let it dry fully, usually for a few hours, before using the item.
Why Sprays and Suede Usually Don’t Mix
I never use standard protective sprays on suede. The soft, raised nap of suede is what gives it its beautiful texture. Most protective sprays work by coating the surface, which will glue those tiny fibers down. Applying a typical spray will mat the nap, leaving dark, stiff patches that are very difficult to restore. For suede, the best protection is careful use and immediate, gentle cleaning if something happens.
Specialized suede protector sprays do exist. They are formulated to be lighter. If you choose to try one, you must test it on a hidden area, like the back of a cushion, first. The results can be unpredictable.
Simple Shields for Your Furniture
For leather and suede furniture, your daily habits are the most powerful protective spray. Life happens. A glass of red wine, a dog with muddy paws, a child’s art project, these are the real threats.
I keep a soft, washable throw blanket draped over the corner of my sofa where my dog likes to nap. It’s not about hiding the leather, it’s about giving yourself a buffer. You can enjoy the piece without constant anxiety. Using decorative throws or slipcovers on high-traffic areas is a simple, reversible way to prevent the most common stains and scuffs.
Establish a simple rule: no messy snacks or inky pens on the furniture. Keep a soft, dry microfiber cloth handy for quick dusting and blotting. These tiny actions add up to years of preserved beauty.
The True Foundation of Care
No spray or throw blanket replaces the basics. Consistent, gentle cleaning and conditioning is what truly keeps leather supple, strong, and resistant to damage. A dry, neglected piece is brittle and will absorb stains instantly. A well-maintained piece, like my jacket June, has a resilient surface that fights off daily wear.
Dust leather weekly with a dry cloth. Condition smooth leather every 6-12 months. Gently brush suede with a specialized brush after use to lift the nap and remove surface dust. This regular rhythm of care keeps the material healthy from the inside out. It is your strongest, most reliable form of protection.
Common Questions
Why is using cold water an absolute rule for blood?
Blood contains proteins that coagulate and bind to fibers when exposed to heat. Cold water prevents this setting action, giving you a chance to lift the stain without cooking it into the material.
How soon after cleaning should I condition the leather?
You must wait until the leather is completely bone-dry to the touch. Conditioning over dampness can trap moisture and lead to mildew or finish clouding. It’s also important to allow leather to dry slowly and naturally as quick drying can cause cracks.
Can I use the same cleaner on my suede jacket and nubuck boots?
Yes, the initial gentle dabbing with cold water is the same. However, nubuck, being more durable, may tolerate a dedicated nubuck cleaner where suede would risk matting-always test first.
What’s the one thing I should do before any cleaning attempt?
Conduct a spot test on a hidden area with your chosen method. This checks for colorfastness and material reaction, preventing a minor stain from becoming a major repair.
Caring for Your Leather After a Stain
The single most important rule is to act fast. A fresh stain treated with a gentle method like cornstarch or a diluted white vinegar solution gives you the best chance of a full recovery without damaging the delicate fibers.
Good leather care is a responsible practice that respects the material’s origin. By maintaining and repairing your items, you honor the craft and ensure they last for years, which is the most sustainable choice you can make.
Relevant Resources for Further Exploration
- Leather or Suede – How to Remove Blood Stains | HowStuffWorks
- How To Clean Blood Off Of Suede – Hunker
- How To Get Blood Out Of Leather – Domini Leather
- Suede Blood Stain Remover – Kit-S5.bs – Leather Doctor
- Cleaning Blood From Faux Suede | Majilite
Harriet is a avid collector of leather goods such as purses, bags, seat covers, etc and has an extensive background in leather care, recovery, stain removal and restoration. She has worked for a number of years perfecting her leather care techniques and knows the ins and outs of restoring all kinds and types of leather products. With her first hand knowledge in leather care, you can not go wrong listening to her advice.
Suede and Nubuck Care