How to Fix Cracks and Tears in Leather Furniture: Sofas, Couches, and Car Seats
Published on: March 6, 2026 | Last Updated: March 6, 2026
Written By: Harriet Nicholson
Hello Tannery Talk. That new crack in your leather couch or tear on your car seat can feel like a disaster, but take a deep breath. I’m here to tell you that with the right approach, you can often restore it beautifully.
We will cover how to tell a simple crack from a deep tear, cleaning the area without causing more damage, selecting the perfect filler or adhesive for the job, applying your repair for strength and flexibility, and blending the finish so it looks natural.
My advice comes from years at the workbench, fixing everything from deep saddle wounds on Mason to careful stitches on June’s jacket.
How to Tell If Your Leather Furniture Can Be Fixed at Home
First, take a quiet moment with your piece. Sit with it. Run your fingers over the damage, the way I check the grain on my old saddle, Mason. You are feeling for the story the leather is telling you.
Here is what you are looking for.
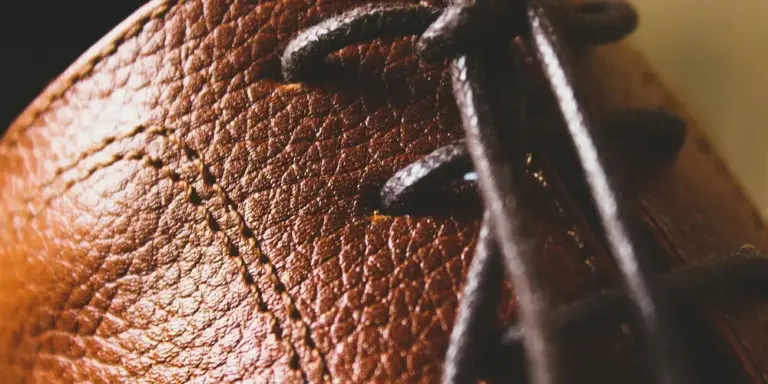
Surface Crack vs. Full Tear
A surface crack is a dry, light line. It looks like a fine web or a single shallow split in the top layer. You can often feel it more than see it. This is leather begging for moisture.
A full tear is different. It is a complete split through the leather’s thickness. The edges will be separate, and you might see the fibrous middle layer or the backing fabric. This is a structural wound.
Your fingers are your best tool here, gently probing to see if the damage is just skin-deep or goes all the way through.
The Simple Rule for Calling a Pro
You can handle many surface issues. But you should call a professional leather repair specialist if:
- You can see the fabric or mesh backing material.
- The tear is longer than one inch (about the width of your thumb).
- The leather is crumbling or feels like stiff cardboard around the damage.
Attempting a complex repair without the right tools and filler compounds often makes the final, professional fix harder and more expensive.
When DIY Repair is Not Likely to Work
Some materials simply will not respond well to home care. Bonded leather is a thin layer of leather pulp glued to a fabric backing. Once it cracks, it often peels away, and glues do not hold well. Pieces that have been bone-dry for years, losing all their natural oils, can be too brittle to salvage. In these cases, conditioning might help the surrounding area, but the crack itself will remain.
Why Leather Cracks and Tears Happen in the First Place
Leather is skin. It needs care. Think of the deep cracks on a neglected sofa like severe chapping on your hands in winter. The main culprit is always the same, leather drying out from a lack of oil. Even the best care routine can sometimes fail to prevent cracks.
Every time you sit on it, the fibers flex and stretch a tiny bit. Without natural oils or conditioner to keep them supple, they become brittle. They finally snap under the stress, creating a crack.
Neglect is the primary cause of catastrophic damage, not age. My jacket, June, has soft creases from six years of wear. They are a sign of life, not damage, because the leather is kept conditioned. Deep cracks are a sign of thirst.
Common Enemies of Your Furniture
- Sun and Heat: Direct sunlight through a window or the intense heat in a parked car acts like a dehydrator. It bakes the oils right out of the leather, accelerating the drying process massively.
- Stress Points: Seams, especially on sofa cushions or car seat bolsters, are high-stress areas. Repeated pressure on the same stitch line will eventually cause the leather to fatigue and split.
- Low-Quality Material: Leather from an older, well-cared-for full-grain sofa can last decades. A poorly tanned or overly corrected leather has less natural fiber strength to begin with. It is more prone to early cracking, much like cheap denim wears thin faster than heavy selvedge.
Understanding these causes is not about placing blame. It is about knowing how to prevent the next crack. Regular, gentle cleaning with a neutral pH cleaner and conditioning with a quality product for your leather type is the simplest defense you have.
Gathering Your Leather Repair Kit: What You’ll Need
Before you touch the leather, get your tools ready. A prepared workspace makes the whole process smoother and less stressful. You are not just fixing a problem, you are giving your furniture a new chapter.
Think of this like a first-aid kit for leather. For most repairs, you will want these items close by:
- Leather Cleaner: A pH-balanced, neutral cleaner. This removes old oils and dirt so your repair materials can bond properly.
- Leather Conditioner: A good conditioner restores suppleness after cleaning and before you apply any filler.
- A Repair Kit for Cracks: This contains a filler compound and often a colorant. It is your main tool for how to fix a cracked leather sofa.
- A Patch Kit for Tears: For holes or gashes, you need reinforcement. This includes backing material and adhesive.
- Colorant: A liquid dye or cream balm to blend the repair into the original color. Matching the shade is an art.
The scope of your project determines what ‘essential’ really means. A single, hairline crack on a couch arm requires a minimalist approach. You might only need cleaner, conditioner, and a color-stick balm to camouflage it. A torn car seat is a different story. For that, you need the full arsenal: cleaner, conditioner, a strong adhesive, a backing patch, a flexible filler, a graining tool to mimic the surface texture, and a matched colorant.
I always advocate for water-based adhesives in patch kits. The old-fashioned contact cements with strong solvents work, but they are harsh. They can stiffen the leather and that toxic smell lingers. A quality water-based glue gives you a strong, flexible bond without the fumes. It preserves the natural handfeel of the leather, which is the whole point.
Choosing the Right Kit for Your Job
Not all cracks and tears are the same. Picking the right filler and patch type is the difference between a repair that lasts and one that reopens in a month.
For cracks, you usually have two filler choices:
- Liquid Crack Fillers: These are thin and soak into the crack. They are best for superficial, web-like cracks that have not opened up deeply. Think of them like a liquid bandage. They dry fast and can be built up in layers.
- Paste or Putty Fillers: This is what you need for a deep, open crack or a small gouge. It is like spackle for your wall. You press it into the void, let it cure, and then sand it smooth. For a convincing how to fix a leather couch that is cracking in a high-stress area, a paste filler gives you the substance you need.
For tears, the choice is about the patch:
- Self-Adhesive Patches: These are convenient. You peel and stick a fabric or leather patch onto the back of the tear. They are great for quick, low-stress repairs, but the bond may not withstand heavy, repeated flexing like on a car seat.
- Glue-On Patches: This is the professional method. You apply adhesive to both the leather and a separate backing fabric, then press them together. It takes more time and care, but it creates a much stronger, more durable repair. This is what I use on weight-bearing areas.
Sometimes, the fix is simpler than you think. If your couch is only showing minor, dry surface cracking with no splits, you might not need filler at all. A thorough cleaning followed by a heavy application of a good conditioner and a colored leather balm can often re-hydrate the fibers and mask the appearance of fine cracks. It is more like giving the leather a long drink than performing surgery.
Step-by-Step: Fixing a Crack in Your Leather Couch or Car Seat
Take a deep breath. Seeing a crack can feel like a final verdict, but it’s often just a sign your leather is thirsty and needs help. With the right steps, you can mend it and restore both strength and appearance. The goal is a repair that you can’t feel when you run your hand over it.
1. Start with a Clean, Dry Surface
Think of this like cleaning a wound. Any dirt, oil, or old conditioner left in the crack will prevent the filler from bonding. Use a pH-balanced leather cleaner and a soft, lint-free cloth. Work in small circles, lift the grime, and wipe it away. Let the area dry completely. Rushing this step is the most common mistake. A perfect repair is impossible on a dirty surface, so take your time here.
2. Soften the Area with Conditioner
Dry leather is brittle leather. Applying a neutral leather conditioner around the crack makes the material more pliable and receptive, much like moisturizing dry skin before applying a bandage. Use your fingers to gently work a small amount into the leather about an inch around the crack. Wait 15-20 minutes for it to absorb. This simple prep reduces the chance of the crack spreading as you work.
3. Fill the Crack
Now for the main event. Use a flexible leather filler and a small plastic spatula or palette knife. Press the filler firmly into the crack, overfilling it slightly. Then, using the edge of your tool, carefully scrape across the surface to level the filler, removing any excess. You want it perfectly flush with the surrounding leather. A common hiccup is leaving a depression; if you do, just add a tiny bit more filler and level it again.
4. Let it Dry and Sand Smooth
Patience is your best tool here. Let the filler dry completely. This can take a few hours, sometimes overnight. Test it by gently touching it-it should feel hard and not tacky. Once dry, use very fine grit sandpaper (like 400 grit or higher). Lightly sand the filled area in one direction until it is perfectly smooth to the touch and completely level. The sanding step is what makes the repair invisible to your hand, so don’t skip it.
5. Apply Your Colorant
Your filler will likely be a neutral color. Now you need to match the surrounding leather. Use a leather dye or colorant that closely matches your piece. Apply it with a small, soft artist’s brush. Start in the center of the repair and feather your strokes outward to blend with the original color. You may need two thin coats, letting the first dry in between. My jacket June taught me that thin layers look more natural than one thick, globby coat.
6. Finish with a Protective Conditioner
After the colorant has fully dried (check the product instructions, usually 24 hours), seal your work. Apply a very light, even coat of leather conditioner over the entire repaired panel, not just the spot. This protects the new colorant and keeps the leather supple. Buff it gently with a clean cloth. Your repair is now protected and ready for use.
For Car Seats: Extra Care for a High-Use Area
Fixing leather in a car is a different challenge. Your repair must survive extreme temperature swings, constant friction, and sunlight, especially on car seats and dashboards.
How to fix a crack in a leather car seat starts with choosing a filler designed for flexibility. A standard rigid filler will crack again after a few summer heat waves and winter chills. Look for products labeled as flexible or elastic.
Always work in a shaded, cool area, like a garage. Direct sun will cause the filler and colorant to dry too fast, leading to poor adhesion and a brittle finish. If you must work outdoors, do it in the early morning or evening.
Finally, consider the finish. After your final conditioner, using a leather protectant with UV inhibitors can help shield the entire seat, reducing fading and future drying that leads to cracks.
Step-by-Step: Mending a Tear in Your Leather Sofa or Chair

Fixing a tear feels different than smoothing a crack. You are reconnecting the leather’s structure. Don’t worry. With patience, you can make a repair that lasts for years. To repair scratches, tears, and cracks on a damaged leather couch, the same careful approach applies.
1. Clean the Area Thoroughly
Start exactly as you would for a crack. Any dirt or oil on the surface will stop the glue from creating a strong bond.
- Use a clean, damp cloth with a tiny drop of pH-balanced leather cleaner.
- Gently wipe the tear and a good inch around it.
- Let it dry completely. I usually wait 30 minutes to be safe. A damp surface will reject the glue.
This step is non-negotiable; a clean, dry surface is the foundation of any good repair.
2. Repairing a Clean Tear
This is for a straight, neat split where the edges still line up perfectly. Think of a clean slice, not a missing chunk.
- With a toothpick or small brush, apply a very thin line of leather adhesive to both raw edges of the tear.
- Wait about 60 seconds for the glue to become tacky. This is key-it creates a stronger grab.
- Carefully press the edges together. Use firm, even pressure from your fingers for at least two full minutes.
- Wipe away any glue that squeezes out immediately with a damp cloth.
Let it cure. Don’t touch it or put any weight on it for a full 24 hours. Patience here means the bond will be nearly as strong as the original leather.
3. Repairing a Gaping Tear or Hole
When pieces are missing or the tear won’t close, you need internal support. This is where my old saddle, Mason, taught me a lesson. A patch provides strength from behind.
- Find or Make a Patch: Cut a piece of thin, flexible leather slightly larger than the hole. You can source this from a repair kit, an old bag, or an unseen spot like the underside of a cushion.
- Prep the Patch: Lightly sand the back (suede side) of your patch to roughen it. This gives the glue more to hold onto.
Think of this patch as internal stitches; it holds everything together from the inside, hidden from view.
4. Glue the Patch in Place
- Apply a thin, even layer of adhesive to the roughened side of your leather patch.
- Gently lift the torn edges of your furniture. You might need a thin, blunt tool to create a small opening.
- Slide the glued patch underneath, centered under the hole. Press it down firmly from the top.
- Use a smooth, hard object like the back of a spoon to burnish the patch flat from the outside, working out any air bubbles.
Let the patch glue cure completely. I give it the full 24 hours again. You want this foundation to be rock solid before you move to the next step.
5. Fill, Sand, and Color
Now you address the visible gap from the top. The patch is your structure; the filler is your new surface.
- Using a flexible spatula, press a leather filler compound into the hole. Overfill it slightly, as filler shrinks a bit as it dries.
- Let the filler dry hard. This can take a few hours; follow your product’s instructions.
- Once bone-dry, sand it flush with the surrounding leather using very fine-grit sandpaper (400 grit or higher). Sand in gentle, circular motions.
- Clean away all dust with a dry cloth.
- Apply a leather dye or refinishing color to match the piece. Use a small brush or sponge, building the color up in thin layers, letting each dry.
- Finish with a matching leather conditioner to seal and blend the repair.
A common mistake is rushing the drying times between filling, sanding, and coloring. Each layer must be completely set, or you’ll create a gummy, uneven mess.
Special Tips for Car Seats and High-Use Furniture
Leather in a car or on your favorite sofa lives a tough life. It faces constant friction, changing body heat, and most damaging of all, direct sunlight. Fixing cracks here is different from repairing a bag in your closet. Knowing how to protect your leather car seats is essential to keep them looking good for longer.
How to fix a cracked leather seat starts with choosing products built for the environment. You need a flexible repair compound and a topcoat rated for UV resistance. Think of the UV protection like sunscreen for your leather; it’s what slows fading and prevents the new repair from becoming brittle and cracking again under the sun. Regular maintenance also matters—proper repair and conditioning help prevent cracking and wear on leather car seat covers. This keeps future repairs simpler and the seats looking like new.
Choosing the Right Products
For car seats and sofas by a window, your repair kit must handle heat and light. Look for these features on the label:
- Flexible Repair Paste: It should bend with the leather, not dry hard and flake off.
- UV-Blocking Topcoat or Conditioner: This is non-negotiable for any surface exposed to sunlight. It reduces fading and protects the leather’s fibers.
- Color-Matched System: Many kits include a dye or pigment. Test it in a hidden spot first. The color must match in both shade and sheen (matte or glossy).
Reinforce Before You Repair
High-use areas fail in predictable spots. Look at the outer edge of your driver’s seat, the center cushion of a sofa, or any armrest. These spots take the most stress.
I reinforce these common stress points with a little extra conditioner every other time I clean the piece. It’s a simple habit that keeps the leather supple and far less likely to tear. Here’s my quick routine for stress points:
- Clean the area with a neutral, pH-balanced cleaner.
- Apply a thin layer of conditioner. For edges, I use my fingertip to work it deeply into the fold.
- Buff off any excess after 15 minutes. That’s it.
The Critical Cure Time
This is where patience truly pays off. A car interior can become an oven on a sunny day. Heat causes materials to expand and softens adhesives.
Let repairs cure fully before using the seat again, even if the surface feels dry to the touch. I recommend giving it a full 48 hours, longer if possible. If you must use the car, place a clean towel or blanket over the repaired section to protect it from direct pressure and body oils while it fully sets.
Lessons from a Trusted Companion
I think of my wallet, Scout, when I work on car seats. It’s a small, high-use item I handle daily. I don’t wait for it to look dry before I care for it.
Frequent but light conditioning prevents the leather from ever reaching a dry, cracked state where tears begin. For car seats, this means a thorough conditioning every 3 to 6 months, depending on your climate. For sofas, once or twice a year is often enough. This regular care is the best fix you can apply, long before any cracks appear.
When Your DIY Fix Isn’t Enough: Finding a Professional
Sometimes, the damage is more than a patch kit can handle. I learned this with a client’s vintage sofa that had a tear right on a main seam. My temporary fix held, but it looked clumsy and I knew it wouldn’t last. Knowing when to call a professional saves your furniture from worse damage and saves you from wasted effort and materials. It’s not a failure; it’s the right tool for the right job.
Signs You Need a Professional Repair
How do you know it’s time? Look for these clear signals. If you see them, put down the glue and pick up the phone.
- Large or Multiple Areas of Damage: A single small scratch is one thing. A network of cracks across an entire cushion seat, or a tear longer than your hand, is different. The surface area is too big for an invisible fix.
- Structural Issues: This is about the foundation, not the surface. If the leather is torn and you can see the foam padding underneath, or if a seam has split open from stress, the repair needs to address both the skin and the stuffing.
- Your DIY Attempt Failed: Maybe the filler shrank and cracked, or the color is a glaring mismatch. Adding more DIY products on top of a failed repair often makes a professional’s job much harder and more expensive.
What Professional Leather Furniture Repair Involves
Think of a professional repair like surgery for your sofa. It’s precise, methodical, and uses techniques that go far deeper than surface care. For a major tear on a cushion, the process might look like this:
- Cleaning and Assessment: They thoroughly clean the area to see the true extent of the damage, much like I would with Mason’s saddle before any work.
- Stabilizing the Structure: They may need to re-adhere the leather to its backing or reinforce the foam substrate before touching the tear itself.
- Filling and Rebuilding: Using flexible, durable compounds, they fill cracks and rebuild missing leather. This isn’t like spackling a wall; the filler must move and flex with the leather.
- Advanced Color Matching and Finishing: This is an art form. A good technician will mix pigments to create a perfect match for your leather’s unique patina-whether it’s a warm chestnut like Mason or a cool black. They then seal it with a topcoat that matches the original sheen.
- Reupholstering Sections: For damage on a bolster arm or a back panel, the most permanent fix is often replacing that entire leather panel. A pro can source a compatible hide and recreate the stitching pattern.
How to Search for “Leather Furniture Repair Near Me”
Finding the right person is the most important step. A generic handyman might make the problem worse.
Start with a detailed online search. Look for specialists, not generalists. Read their reviews carefully. Pay special attention to reviews that mention specific items like “car seat” or “sectional sofa” and include photos. I always tell people to directly ask the repair service for a portfolio of before-and-after photos. A trustworthy professional will be proud to show their work.
Specialization matters. A shop in a humid climate might see more mold-damaged leather, while a service in a bustling city like leather furniture repair Chicago or leather furniture repair Los Angeles might have more experience with high-end aniline dyed leathers from designer furniture stores. Don’t be afraid to ask, “What type of leather do you work with most?”
Getting Quotes and Ensuring Quality
Once you have a few potential services, get a detailed written quote from each. The cheapest option is rarely the best for a lasting repair.
When you speak to them, ask a few key questions. A professional’s willingness to explain their process and materials is a great indicator of their craftsmanship and honesty. Ask what filler and pigment systems they use. Ask how they ensure the repair remains flexible. A good technician will use products designed specifically for leather repair, not generic hardware store items.
They should also ask you questions: about the leather’s age, if it’s been treated with any conditioners recently, and the cause of the damage. This shows they care about compatibility and a lasting result. Take your time, compare the quotes and the conversations, and choose the service that gives you confidence, not just the lowest price.
Keeping Your Leather Soft and Strong to Prevent Future Damage
A repair is only as good as the care that follows. Think of your leather sofa like my old saddle, Mason. It needs regular, simple care to stay flexible and resist new cracks. This routine isn’t about fancy products. It’s about consistency.
A Simple, Powerful Care Routine
Leather dries out from use, air, and time. A basic schedule replaces that lost moisture.
Clean it monthly. Use a soft, damp cloth (microfiber is perfect) and a tiny drop of a neutral, pH-balanced leather cleaner. Wipe in gentle circles to lift dust and oils. Let it air dry completely. This quick step prevents grit from grinding into the grain and causing wear.
Condition it every 3 to 6 months. This is the most important step. If you want to condition leather boots properly, it’s helpful to know how often to do it and the best application method. That topic will be covered in the next step. A good leather conditioner feeds the fibers. Apply a thin, even layer with a clean cloth, let it soak in for 15-20 minutes, then buff off any excess with a dry cloth. If the leather feels thirsty and absorbs it quickly, a second light application is fine. Over-conditioning can clog the pores, so less is more.
Trust Your Nose When Choosing Products
The scent of a product tells you a lot about what’s in it. Open a bottle of conditioner. Take a whiff.
A quality conditioner should have a mild, natural scent, like beeswax, lanolin, or the earthiness of oils. A strong chemical or perfumed smell often signals harsh solvents or additives that can dry leather out over time. Your leather shouldn’t smell like a cleaning aisle. It should smell like, well, good leather.
Guard Against Sun and Heat
Sunlight and heat are leather’s biggest enemies. They bake out the natural oils, making the leather brittle and pale. This is the main cause of those ugly, deep cracks, especially when exacerbated by humidity and UV light.
Position furniture away from direct sunlight. Use curtains or blinds during peak sun hours. Keep it several feet away from radiators, fireplaces, or heating vents. That gentle warmth feels nice to you, but it’s slowly cooking the leather over years.
For car seats, this fight is daily. A good windshield sunshade is a non-negotiable investment. Use it every time you park, even on cloudy days. The greenhouse effect in a car creates intense heat that speeds up cracking dramatically.
Smart Habits for Car Seats
Car leather endures unique stress. A few simple habits make a huge difference.
- Always check your back pockets before sitting. Keys, pens, or a pocketknife can puncture or scratch the leather in an instant.
- Avoid wearing clothing with sharp rivets, rough textures, or embellishments that can scuff the surface.
- Clean spills quickly with a damp cloth. Don’t let liquids, especially sticky ones, soak in and dry.
Protection from the sun and mindful sitting are the two easiest ways to extend the life of your car’s interior. It’s how I keep the driver’s seat in my own car looking like new, despite daily use.
Common Pitfalls to Avoid When Repairing Leather Yourself

Fixing leather can feel empowering. You save a beloved piece and learn a new skill. But a few common mistakes can turn a simple fix into a permanent eyesore. Here’s what to watch for, learned from patching up everything from Mason’s scrapes to June’s fine seams. Knowing the right techniques is essential for a lasting repair.
Using Too Much Filler or Glue
It’s tempting to slather on leather filler like cake icing. More must be better, right? Not here. Excess product creates a stiff, plastic-like patch that feels wrong and cracks under stress. The goal is flexibility.
Think of filler like spackle for a wall; you apply thin layers, sanding smooth between each one to blend with the surrounding leather’s texture.
- Apply filler sparingly, just above the surface of the crack.
- Use a flexible spatula or palette knife to spread it thinly and evenly.
- Let it dry completely, then sand it down flush with the leather using fine-grit sandpaper.
- For tears, use a flexible leather glue only on the torn edges, not the surrounding area. Press the edges together firmly and wipe away any squeeze-out immediately.
Skipping the Cleaning Step
You have your tools ready. You want to jump straight to the repair. Stop. Any dirt, oil, or old conditioner on the surface will sabotage the bond. The filler or colorant will just sit on top, then peel off.
Cleaning is non-negotiable; it prepares the leather to accept the repair materials and form a lasting bond.
- Use a soft brush or cloth to remove loose dust.
- Dampen a clean cloth with a pH-neutral leather cleaner.
- Gently wipe the entire repair area and let it dry fully for at least 30 minutes. The leather should feel clean and slightly cool to the touch.
Guessing on Color Matching
That colorant bottle looks like a perfect match in the store. Under your living room lights, it might look neon orange. Color changes as it dries and interacts with your leather’s unique patina.
Always, always test your colorant or dye on a hidden spot first, like the back of a cushion or underneath the furniture.
- Apply a small dot of colorant and let it dry completely.
- Check it in different lights-daylight, lamplight, evening light.
- If it’s too dark, you can often lighten it by mixing in a neutral or lighter shade. If it’s too light, add darker pigment drop by drop.
Rushing the Drying Times
Impatience is the enemy of a good leather repair. Moving to the next step before the previous one is bone-dry causes smudging, poor adhesion, and a bumpy finish. This is especially critical for a smooth, durable fix on how to fix a tear in leather furniture.
Patience is your most important tool; respecting drying times guarantees a repair that moves and ages with the rest of the piece.
I learned this the hard way on an early project with a briefcase. I was excited to see the result and didn’t let the glue set. The edges peeled up in a week. Now, I set a timer and walk away. For Mason’s saddle, I wait overnight for filler to cure. For Scout’s wallet, I give colorant a full hour. It’s better to go slow once than to redo the entire job.
Quick Answers
Can a store-bought repair kit fix my leather couch?
A quality kit can work for small, straightforward cracks or tears. For large areas, color-matching aniline leather, or damage on high-stress seams, a professional’s custom materials and skill are a better, longer-lasting investment.
How do I choose a good local leather repair service?
Look for specialists with photos of repaired furniture, not generalists. Ask what filler and pigment systems they use; a true professional uses flexible, leather-specific compounds, not generic hardware store products.
Why did my DIY repair crack again after a few months?
Using a rigid filler on a flexible surface like a seat cushion is the usual culprit. The patch cannot flex with the leather, so it fails. Always use a flexible filler compound designed for furniture or automotive upholstery.
Is repairing the leather on my car’s dashboard different from a seat?
Absolutely. Dash leather faces extreme UV exposure and heat. After any repair, a UV-blocking topcoat is critical to prevent rapid fading and re-cracking. Use conditioners with UV inhibitors routinely.
How often should I condition my leather furniture to prevent cracks?
For typical home use, a thorough cleaning and conditioning every 6 to 12 months is sufficient. In arid climates or for pieces in direct sunlight, increase this to every 3-4 months. Let the leather’s suppleness, not a calendar, be your guide.
Caring for Your Repaired Leather Furniture
Start every repair by thoroughly cleaning the area; this gives fillers and adhesives a solid base to hold. Patience in color-matching and blending the repair will make your work disappear into the original grain.
Mending cracks extends the life of your furniture, a responsible choice that values the material and reduces waste. Each repair you complete deepens your practical skill, helping you care for everything from car seats to cherished pieces like Mason or June.
Citations and Authoritative Sources
- Looking for best way to repair real leather couch. …
- Technique Leather – Leather Repair [30+ Years in Business]
- Leather, Couch & Sofa Repair | Fibrenew Palatine
- Leather Furniture Repair in Chicago & Suburbs | Maximus
- Furniture Leather Repair Chicago | Leather Doctor Pro
Harriet is a avid collector of leather goods such as purses, bags, seat covers, etc and has an extensive background in leather care, recovery, stain removal and restoration. She has worked for a number of years perfecting her leather care techniques and knows the ins and outs of restoring all kinds and types of leather products. With her first hand knowledge in leather care, you can not go wrong listening to her advice.
Filling Deep Cracks