How Do You Dye, Repair, and Restore Color to Black Suede Shoes and Nubuck Boots?
Published on: January 17, 2026 | Last Updated: January 17, 2026
Written By: Harriet Nicholson
Hello Tannery Talk. That moment you notice the rich black on your suede shoes has dulled or a scuff mars the nap is frustrating, but I can show you how to fix it.
This article will guide you through the entire restoration, covering assessing your footwear, properly cleaning the surface, selecting and applying dye, repairing common damage, and locking in the renewed color.
As a leather care specialist, I have hands-on experience reviving worn pieces, from scuffed nubuck boots to faded suede, just like your own.
Understanding Suede and Nubuck: What You’re Actually Working With
Run your fingers over a suede jacket or nubuck boot. The feel is everything. Suede is made from the inner layer of the hide. It has a soft, brushed nap that feels like a favorite, well-worn sweater.
Nubuck is different. It starts as a premium top-grain leather, like the hide on my old saddle Mason, and is then lightly sanded on the surface. This gives it a velvety, dense feel, more like a fine piece of corduroy than a fluffy sweater.
You can dye both suede and nubuck to bring back a rich black color or even change their shade completely. The process works because you are coloring the fibers of the nap itself. But you must be gentle. Their open, porous surfaces absorb everything quickly, including mistakes.
This is not like working on smooth, finished leather. The creams and waxes you might use on a leather belt like Scout will clog and matte the nap on suede. The products and techniques are not interchangeable.
First, Diagnose Your Footwear: Is It a Dye, Repair, or Restore Job?
Pick up your shoes. Look at them under good light. What you see determines your next move. Ask yourself these questions.
- Is the color loss even across the whole shoe, a general fading from sun or wear?
- Are there isolated scuffs or bald spots where the nap is worn away?
- Is the original color mostly there, but just looks tired and dull?
Here is a simple way to decide what to do.
- Full Re-Dye: Choose this for overall, severe color loss, when you want to change the color (like brown to black), or for major stains that won’t clean out.
- Spot Repair: Choose this for small, specific scuffs, scratches, or worn edges.
- Color Restoration: Choose this for mild, even fading where the leather just needs a color refresh, not a complete overhaul.
Changing a light color to a deep black is very possible, but it often requires multiple coats of dye for full, even coverage. Refreshing faded black is usually more straightforward.
Set your expectations before you start: results on heavily worn, oily, or previously treated with silicone sprays can be less uniform. The leather may not absorb the new color evenly. It is still worth doing, but the result may be a character-filled, lived-in look rather than a factory-fresh finish.
When a Full Dye is the Right Answer
A full dye job is a commitment. It is the right choice when the existing color is too far gone to salvage with a simple touch-up. Think of it like repainting a whole wall instead of just patching a nail hole.
- Your black boots have faded to a dusty, ashy grey all over.
- You have a pair of tan suede shoes you truly want to be black.
- A large, dark stain (like an oil spot) covers a significant area and cleaning did not remove it.
When Spot Repair or Color Restoration Will Do
Most of the time, your shoes just need a little help, not a total transformation. My jacket June gets these fixes often. A spot repair targets a tiny flaw. Color restoration is like applying a tinted moisturizer to perk up the overall look.
- A small scuff on the toe where the black nap is gone, showing a lighter underlayer.
- The edges of the soles or the collar of a boot are worn and lightened.
- The entire shoe is still black, but looks washed out and dull, lacking depth and richness.
Gathering Your Arsenal: The Right Tools for Black Suede and Nubuck
Restoring color is not a race. It’s a careful process. Having the right tools from the start is the difference between a confident refresh and a patchy mess. Think of it like this: you wouldn’t refinish a wooden table without first sanding it clean.
The Essential Clean-Up Crew
Every successful color restoration starts with a perfectly clean, dry surface. Dye or spray will not adhere to dirt or oils.
- A Dedicated Suede/Nubuck Cleaner: Use a cleaner made specifically for these napped leathers. General leather cleaners or saddle soap can mat the fibers permanently.
- Two Brushes: A stiff-bristled suede brush (often brass or nylon) and a softer bristle brush. The stiff brush lifts the nap and scuffs out dried dirt. The soft brush smooths everything back down after cleaning and dyeing.
- Clean, Lint-Free Cloths: White cotton cloths are ideal. You need them for blotting, applying cleaner, and checking your work without leaving fibers behind.
A clean base is non-negotiable; any skip here will show through your new color as a dark, muddy spot. I learned this the hard way on a pair of nubuck boots I rushed through.
Liquid Dye vs. Spray Colorant: Choosing Your Weapon
This is your biggest choice. Both can work, but they behave very differently.
Imagine liquid dye is like using a small paintbrush for a detailed mural. Spray colorant is more like using a can of spray paint for broad, even coverage.
| Type | Best For | Considerations |
|---|---|---|
| Liquid Dye | Targeted repairs, deep color saturation, precise control. | Requires a dauber or cloth for application. Can be tricky to get perfectly even on large areas. Often provides a richer, deeper black. |
| Spray Colorant | Overall color renewal, large areas like boot shafts, achieving a uniform finish. | Easier to apply evenly. Requires very light, multiple coats. You must work in a well-ventilated space and protect surrounding areas from overspray. |
For a full restoration, I often use both. I’ll touch up worn heel counters or toe caps with liquid dye for depth, then use a spray to blend everything together seamlessly.
Selecting Your “Black Suede Dye” Product
When shopping, you’ll see products labeled for “suede & nubuck.” This is good. These formulations are designed to color the leather without clogging the delicate nap. If a product only says “leather dye,” it’s likely for smooth leathers and will ruin your suede’s texture.
Always, always do a spot test in an inconspicuous area, like inside the tongue or behind the heel. This checks for final color and ensures the product doesn’t stiffen the leather. Let it dry completely before you judge.
Search terms like “black suede dye for shoes” or “for Ugg boots” are usually looking for the same thing: a colorant safe for napped leathers and, in the case of lined boots, one that won’t bleed through. The process is identical. However, it is important to know where to buy the right suede dye and paint to ensure the best results.
The Final Shield: Protective Sprays
Your work isn’t finished when the color is dry. Freshly dyed suede is thirsty and vulnerable.
A quality water-and-stain repellent spray made for suede/nubuck is your final, critical step. It locks in the color and provides a barrier against daily life. Apply it in a well-ventilated area using slow, sweeping motions, keeping the can about 6 inches from the leather. Let the first coat dry fully, then apply a second.
This spray isn’t a one-time fix. Reapply it every few months, or whenever water stops beading on the surface, to keep your restored black looking rich and protected.
The Non-Negotiable First Step: A Deep and Gentle Clean
You cannot skip this. Dye will not stick to dirt. It will highlight every stain and bit of grime you missed, making the final result look blotchy and amateur. Think of it like painting a wall. You would never paint over dust and grease. The same rule applies here, just on a much more delicate surface.
Using a cleaner made for general leather or, worse, a household spray is a sure way to damage the delicate fibers of suede and nubuck. These materials have a raised, fuzzy surface called a nap. Harsh chemicals can flatten that nap permanently or leave a sticky residue that attracts more dirt. Always use a cleaner specifically formulated for suede and nubuck.
Here is your step-by-step guide for a foundational clean:
- Prepare your shoes. Remove the laces. If you have shoe trees, insert them to help the boot keep its shape. If not, crumple some clean, dry paper inside to absorb moisture.
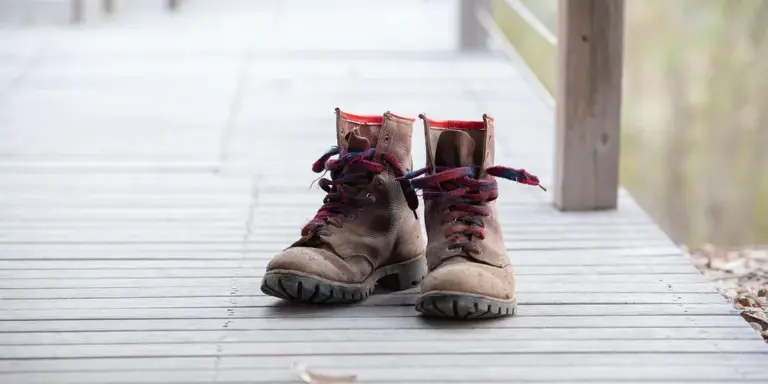
- Dry brush thoroughly. Take a dedicated suede/nubuck brush (one with soft brass or nylon bristles) and brush the entire surface. Go in one direction to lift the nap and knock off surface dust. This alone can make a huge difference on a pair of lightly worn shoes like my wallet, Scout.
- Apply the specialized cleaner. Follow the instructions on your suede/nubuck cleaner. Typically, you’ll apply it to a clean cloth or the included applicator, then work it into the material using small, circular motions. Do not soak the leather. Work on one small section at a time.
- Lift the nap again, while slightly damp. This is the secret step many forget. After cleaning a section, immediately use your dry brush to gently brush the fibers back up. This prevents them from drying matted and clogged with cleaner. An even, lifted nap is what allows dye to absorb consistently later.
- Let them dry completely, away from direct heat. Patience is your most important tool. Set the shoes in a room with good air circulation and let them dry for a full 24 hours. Do not put them near a radiator, fireplace, or in direct sunlight. Rushing this with heat will bake in stains and can make the leather stiff and brittle.
How to Clean Stubborn Stains or Grime
Standard cleaning might not fix everything. For these tougher issues, you need a targeted approach. The key is to act gently and never scrub aggressively, which can wear down the nap and create a bald spot.
For oil or grease stains: Immediately sprinkle a small amount of cornstarch or talcum powder on the spot. Let it sit for several hours, or overnight, to absorb the oil. Then, gently brush it away with your suede brush. For older, set-in stains, especially on leather boots or shoes, a suede-specific stain eraser (a rubbery block) can sometimes lift the residue. Gently rub it over the spot as if you were erasing a pencil mark.
For salt stains (common in winter): Mix a solution of one part white vinegar to three parts water. Dampen a clean cloth with the solution and gently dab (do not rub) the white salt residue. Follow immediately by dabbing with a cloth dampened with plain water to rinse. Let dry completely, then brush. These steps also help remove white salt stains rings that can form on leather boots after winter. If rings linger, repeat the process or follow with a leather conditioner to restore suppleness.
For dried mud: Let the mud dry completely. Once it’s dry and crumbly, use your suede brush to carefully brush the majority of it off. For any leftover film, use the suede eraser block mentioned above. Never apply water or cleaner to wet mud, as it will make a bigger stain.
How to Dye Black Suede or Nubuck: A Careful, Layer-by-Layer Process
Think of dyeing suede or nubuck like painting a delicate watercolor. You work with the material, not against it. Rushing leads to dark splotches and a stiff, unnatural finish. Patience is your most important tool.
Your workspace matters. I always work in a garage or a room with the windows wide open. Dye fumes are strong. Cover your table with several layers of newspaper or a disposable plastic cloth. Nitrile gloves are a must, unless you want black-stained hands for a week.
Step 1: The Crucial Preparation
Never, ever dye over dirt or old conditioner. It will trap grime and create a patchy, weak bond.
- Clean the entire shoe with a dedicated suede/nubuck cleaner and a soft bristle brush. Follow the product’s instructions.
- Let the shoes dry completely, away from direct heat. This can take a full 24 hours. The material must feel cool and dry to the touch.
- Use painter’s tape to mask off any areas you don’t want dyed, like soles, logos, or fabric linings. Press the tape down firmly.
Always perform a color test on a hidden spot, like the inside of the tongue or behind a strap, before you commit to the whole shoe. This tells you how the color will look and how the material reacts to the dye.
Step 2: The Application Mindset
Whether you use liquid or spray, the golden rule is the same: thin, even layers. Your first coat will look terrible and uneven. That’s normal and correct. You are building depth, not dumping color.
Let each layer dry to the touch before applying the next. This usually takes 15-30 minutes. I use this time to clean my tools. Building up three or four light layers gives you a richer, more even black than one heavy, dripping coat ever could.
Applying Liquid Dye for Controlled Color
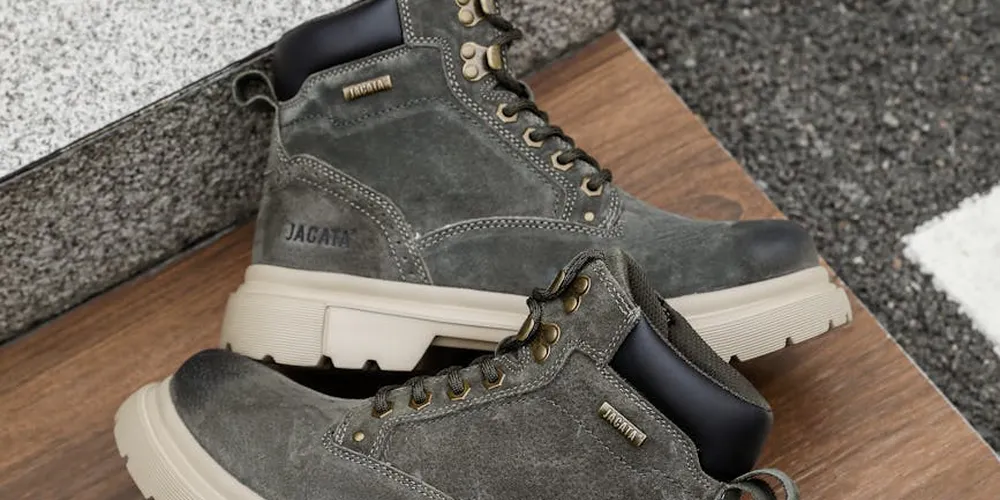
Liquid dye from a bottle gives you the most control, perfect for spot repairs or smaller areas. I used this method on the scuffed toe of a nubuck boot last season. You will need a soft sponge applicator or a lint-free cloth.
- Shake the dye bottle vigorously for two minutes.
- Pour a small amount into a disposable dish or onto your applicator. Less is more.
- Identify the direction of the nap (the fuzzy surface). Gently brush your finger over the suede; the smooth direction is “with the grain.”
- Apply the dye using light, linear strokes, always following the grain of the nap. Do not scrub or use circular motions, as this will disturb the nap and create dark, matted spots.
- Allow the layer to dry completely. Examine the color under good light. Repeat with another thin layer only where needed.
Using Spray Dye for Broad Coverage
Aerosol spray dye is excellent for overall, even coverage on a whole shoe or boot. The key is distance and motion.
- Shake the can for a full three minutes. You should hear the mixing ball rattling freely.
- Hold the can 8 to 10 inches away from the shoe. Any closer and you risk saturating and matting the suede.
- Start spraying off to the side of the shoe, then use a steady, sweeping motion across it. Never hold the spray in one spot.
- Apply a fine, misty coat. It should look like morning dew, not a rainstorm. Let this tacky mist settle.
- After the first coat is dry, apply the next from a slightly different angle to ensure you cover every part of the textured surface.
A common mistake is spraying too heavy a final coat. If the suede looks wet and shiny, you’ve applied too much. Wipe gently with a dry cloth immediately to soak up the excess, but often the damage (a stiff, plastic-like feel) is already done. Stick to light mists.
Fixing Scuffs and Repairing the Nap: Before You Add Color
Think of your suede or nubuck like a fuzzy carpet. You can’t paint over a hole in the carpet and expect it to look right or last. The same is true here. Adding dye is the final step, not the first aid. Your goal is to get the surface as smooth and even as possible so the color applies uniformly and bonds correctly.
Color will only look even and last if you apply it to a smooth, repaired surface.
How to Handle Rough Scuffs and Bald Spots
A bad scuff flattens the nap, making a dark, shiny, or rough patch. Your job is to lift those fibers back up. You have two main tools for this.
First, try a suede eraser. It looks like a rubbery pencil eraser. Rub it gently back and forth over the scuffed area. You’ll see a pinkish dust lift away-that’s the damaged fibers. This works well for surface-level marks.
For more stubborn spots where the fibers are badly matted or slightly worn down, you need to be bolder. Take a piece of very fine-grit sandpaper, like 400 grit or higher. I keep a small piece in my kit for this exact job.
- Place the shoe on a stable surface.
- Using only the weight of your finger, gently sand the scuffed spot in one direction.
- Stop frequently to check your progress. You’re not trying to sand a hole; you’re just roughing up the surface to encourage new nap to form.
It will feel a bit scary, like you’re making it worse. You’re not. You’re creating a uniform texture for the dye to grip. My jacket, June, had a scuffed elbow that needed this treatment. The spot felt slightly rougher than the surrounding leather after sanding, which was perfect for the next step.
Bringing the Nap Back to Life
After sanding or erasing, the area will look dusty and pale. That’s okay. Now you need to realign and fluff the tiny leather fibers. This is where the magic happens.
Use a dedicated suede brushing tool, a clean toothbrush, or even your thumb. The key is motion.
- For general fluffing, brush in gentle, circular motions.
- To blend a repaired spot into the surrounding area, brush from the undamaged leather into the repaired spot, following the original grain of the nap.
Brushing is what makes a repair invisible, reactivating the natural texture of the material.
You might need to repeat the erasing/sanding and brushing process a few times. Patience is your best tool here. Stop when the damaged spot no longer looks shiny or bald and its texture matches the leather around it. If the damage is from hair dye, color transfer can complicate the repair—address the stain first before continuing. Once the stain is managed, you can proceed with the steps above to restore the finish.
Addressing Deep Cuts and Gashes
What if the damage is more than a scuff? A deep cut or tear presents a different challenge. Colorant will just pool in that crevice, highlighting the flaw.
For shallow cuts, a leather filler paste can be used to level the surface. You apply it, let it dry completely (often 24 hours), and then sand it flush with the surrounding area. It creates a hard, smooth patch.
Filler changes the material’s handfeel and flexibility at that spot, which is a trade-off for saving the shoe.
For major damage-large tears, holes, or separation from the sole-this is your sign to seek a professional cobbler. They have the tools and materials, like patches and specialized adhesives, to perform structural repairs that I can’t replicate at home. Trying to fix a big hole yourself often leads to a stiff, uncomfortable result that fails later. Knowing when to call for help is part of good care.
Restoring Black Color Without a Full Dye Job
Let us say your favorite black suede boots are not torn or scuffed. They are just tired, with a washed-out toe or ashy grey heel. They have lost their depth. A full dye job is a major commitment. For simple fading, a color restorer is your best friend.
Think of color-restoring sprays and creams as a powerful refresh, not a complete rebuild. They are pigments suspended in a carrier that soaks into the existing fibers. These products are designed to revive the existing color, not completely cover it with a new layer. They work with what is already there.
How is this different from dye? Dye is more intense. It chemically bonds to the leather and aims to completely change or overwhelm the base color. A restorer is like a concentrated touch-up. It is often less permanent than dye, which makes it perfect for maintenance. You can apply it just to the spots that need it, especially when trying to restore and refinish the color on a faded or worn leather sofa.
Here is how to tackle those faded areas, step by step.
- Clean the area thoroughly with a suede/nubuck eraser and brush. Any dirt will get trapped under the new color.
- Mask off surrounding areas with painter’s tape to protect any non-suede parts like the sole or lining.
- Shake the color restorer can vigorously for a full minute. This mixes the pigment perfectly.
- In a well-ventilated space, hold the can 6-8 inches from the shoe. Apply a light, even mist to the faded spot. Do not soak it. One light coat is better than one heavy, drippy one.
- Let it dry completely. This usually takes an hour. Do not touch it or wear the shoes.
- Assess the color. If the spot still looks lighter than the rest, you can apply a second light coat after the first is totally dry.
Your goal is to build the color back up slowly. Rushing this step leads to a dark, shiny, painted-looking patch that stands out for all the wrong reasons. Patience here saves the whole project.
Reviving Faded Spots and Evening Out Color
You have refreshed the badly faded toe cap. Now it is a perfect black circle on a charcoal grey shoe. That is not the look we want. The next skill is blending, or feathering, the new color into the old.
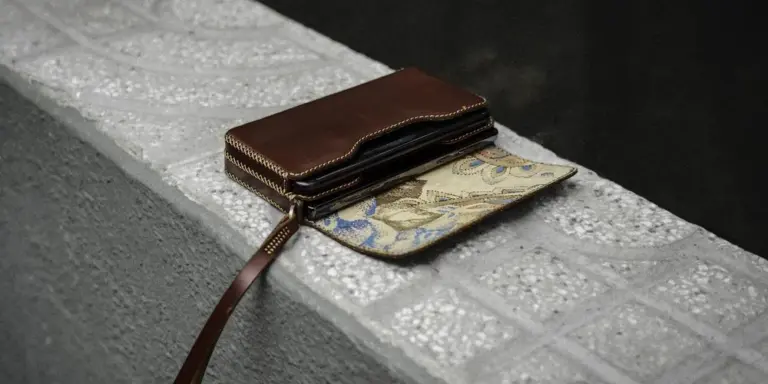
This technique is about gentle transitions. For my own pieces, like Scout’s wallet where the edges wear, I never just color the worn spot. I always work the color outwards.
Start with your soft suede brush. Once the touched-up area is bone dry, brush it lightly. This helps reactivate the nap and begins to blend the fibers at the edge of the application.
For the next coat, do not just spray the dark spot again. Hold the can further back, about 10-12 inches, and use a very light, sweeping motion that starts over the restored area and continues out onto the surrounding original leather. You are creating a mist that lightly tints the perimeter, softening that hard line.
You can also use this sweeping method from the start on larger faded zones. Do not point and spray. Always keep the can moving in broad, gentle arcs. This builds color evenly across a wider area, preventing obvious rings or spots.
The final step is universal. After your last coat is dry, brush the entire shoe gently but thoroughly. This lifts the nap uniformly across both the restored and original areas. It makes the texture and sheen consistent, which is just as important as the color for a seamless repair. The shoes will look cared for, not patched.
Aftercare: Locking In the Color and Protecting Your Work

The dye is dry. The color looks rich and even. It’s tempting to call the job finished and put your shoes right back into rotation. I understand that feeling-I’ve felt it myself after spending hours on a project. But for suede and nubuck, stopping here is the most common mistake.
The real secret to long-lasting color isn’t just the dye you put on, but the protection you put over it. Think of it like this: dye gives the color a home, but aftercare builds a fence around that home to keep it safe from the elements.
The First Defense: A Protective Spray
You would never condition a suede jacket with a heavy cream. The same rule applies here. Traditional leather conditioners and oils will mat the delicate nap of suede and nubuck, ruining their texture.
Your primary tool is a water-and-stain repellent spray formulated specifically for suede and nubuck.
- Ensure your freshly dyed shoes are completely dry, ideally for a full 24 hours in a warm, dry spot.
- Take them and the spray to a well-ventilated area, like a garage or outside.
- Hold the can about 6 to 8 inches from the surface. Apply a light, even first coat. You want a mist, not a soak.
- Let this coat dry for the time recommended on the product label, usually 10-15 minutes.
- Apply a second light coat. Two thin layers are always better than one heavy, dripping layer that can cause spotting.
- Let the shoes dry thoroughly again, for at least another few hours, before you even think about wearing them.
This spray creates an invisible shield. It won’t make your shoes fully waterproof, but it will cause water to bead up and roll off, giving you precious time to blot a spill before it becomes a stain.
Daily Habits for Lasting Beauty
Protection isn’t a one-time event. It’s a habit. My leather jacket, June, gets a quick brush-down every few wears to keep her looking sharp. Your suede boots need the same simple love.
A suede brush is your best friend for maintaining the color and texture you worked so hard to restore. The soft brass or nylon bristles lift the nap, redistribute natural oils from your skin, and brush away surface dust that can grind in and dull the color.
Give your shoes a quick brush every couple of wears, always brushing in one direction to keep the nap uniform.
Storage matters, too. Never stuff suede or nubuck footwear in a crowded, airless closet. Use shoe trees to help them keep their shape, and store them in a breathable cotton bag if possible. This prevents dust buildup and allows any residual moisture to escape.
Your Longevity Questions, Answered
I often hear two big worries after a color restoration: “Will it crack?” and “Will the dye rub off on my socks?”
Let’s connect those directly to your aftercare routine. Cracking happens when the material itself dries out and loses flexibility. While you don’t condition suede like smooth leather, the protective spray you use contains agents that help maintain material health and repel things that cause dryness, like salt. Regular brushing also keeps the fibers supple.
Dye transfer-color rubbing off-is almost always a sign of improper drying after the dye job or skipping the protective spray. The spray acts as a final sealant and top coat. If you applied thin layers of dye, let it cure fully, and sealed it with two coats of protector, you should have no issues with transfer.
The goal is for your boots to age gracefully, like my old saddle Mason, acquiring character from use, not damage from neglect. Consistent, gentle care makes that possible.
Common Questions
1. Is Angelus Suede Dye the best black suede dye?
Angelus is a reputable brand with formulations designed for napped leathers, making it a reliable choice for a rich, lasting black. The “best” dye, however, is the one you apply correctly with thorough preparation and thin, even layers. When comparing it to others, it’s helpful to see how Angelus stands against other top brands.
2. Can I use the same black suede dye on my Ugg boots and Birkenstocks?
Yes, the process and product type (a dye for suede/nubuck) are identical, as both are napped leathers. Always do a spot test on an inner seam first, especially on light-colored suede, to ensure the final shade is correct and doesn’t bleed through any lining.
3. Should I search for “black suede dye near me” or just order online?
Specialist products are rarely in big-box stores; you’ll have better luck with dedicated shoe repair shops or online retailers. Focus less on immediate local availability and more on sourcing the correct suede/nubuck dye and the companion cleaner and protector.
4. What’s the real difference between a black suede dye and a color-restoring spray?
Dye is for a complete color change or severe fading, as it chemically bonds to the fibers. A color-restoring spray is a pigmented refresher for mild, even fading where you just need to revive the existing black, not overhaul it.
5. After dyeing, how do I stop the color from rubbing off?
Let the dyed shoes cure for a full 24 hours, then apply two light coats of a water-and-stain repellent spray made for suede/nubuck. This seals the surface and prevents transfer, which is a sign the dye wasn’t properly set or protected. Proper techniques are especially important when you dye and recolor suede shoes and boots.
Caring for Your Restored Suede and Nubuck
The single most important step is always a deep, careful clean before you do anything else. A perfect restoration starts on a perfectly clean surface.
I believe caring for leather well is a way to honor the animal and the craft, keeping pieces like my jacket June in service for years. Building this skill means you buy less and waste less, which is a quiet, powerful form of respect.
Relevant Resources for Further Exploration
- How to Dye Suede and Nubuck Shoes
- Suede Nubuck Dye
- Suede Nubuck Dye – Tarrago
- What to Avoid When Dyeing Suede or Nubuck (Don’t Ruin it) – My Shoe Supplies
Harriet is a avid collector of leather goods such as purses, bags, seat covers, etc and has an extensive background in leather care, recovery, stain removal and restoration. She has worked for a number of years perfecting her leather care techniques and knows the ins and outs of restoring all kinds and types of leather products. With her first hand knowledge in leather care, you can not go wrong listening to her advice.
Restoring Color and Re-Dyeing