What Leather Properties Define a Professional Burnish?
Published on: July 10, 2026 | Last Updated: July 10, 2026
Written By: Harriet Nicholson
Hello Tannery Talk. That frustration when a burnished edge turns waxy or uneven instead of glass-smooth? I know it well, and it almost always traces back to the leather itself.
This article will explain how to work with your material, not against it. We will cover the key physical traits of leather like grain tightness and tannage, how these properties directly guide your choice of tools and pressure, and the adjusted techniques for veg-tan, chrome-tan, and oily pull-up hides.
My advice comes from the bench, learned by conditioning the deep patina on Mason and repairing the soft creases on June.
Leather’s Personality: How Its Inner Nature Responds to Burnishing
Think of leather as skin, not plastic. It’s a living, breathing material even after tanning. Its surface is a dense network of interlocking fibers, like the grain in a piece of wood. This porous structure is what allows it to absorb conditioners and, when we burnish, to transform under heat and pressure. The chemistry of tanning shapes this structure and affects how it ages and responds to care. Different tanning methods can influence durability and how well conditioners and finishes perform over time.
To predict how a piece will burnish, you need to know its personality. I judge this by three key traits.
Temper: The Leather’s Mood
Temper is the leather’s inherent softness or stiffness. It’s the handfeel. My old saddle, Mason, has a firm temper. It feels substantial. My jacket, June, has a soft, supple temper. A firm temper generally burnishes to a higher, harder shine because its tight fibers compact more uniformly. A soft temper can be trickier; you need a lighter touch to avoid over-compressing and damaging the pliable fibers.
Density: How Tightly Packed the Fibers Are
Density is about structure. Tight, dense fibers (common in high-quality veg-tan) create a smooth, solid surface for burnishing. Spongy, loose fibers absorb too much and lack a solid base for a shine. Run your thumb over the edge. A dense leather feels like a solid block. A less dense one might have a slight give. Density is why burnishing the compact edge of Scout, my wallet, works so well.
Fiber Pull-Up: The Leather’s Memory
This is leather’s most magical trait. Oily leathers, like pull-up or waxed varieties, have pigments and oils suspended in those fiber networks. When you bend or compress it, the fibers stretch and lighten the color. When you stop, the oils flow back and the color returns. Burnishing uses controlled pressure and heat to create a permanent, polished compression of those fibers. It’s like setting a crease in denim with a hot iron, but on a microscopic level.
Here’s the practical takeaway from these properties. Because leather is a natural protein fiber, it reacts to extreme heat. Just like skin, it can burn. A common question is whether leather melts or burns. At very high, sustained temperatures from a tool, the fibers can scorch, dehydrate, and become brittle-this is burning. It won’t melt like plastic, but it can be permanently damaged. The risk of burning is highest on dry, thin, or poorly conditioned areas, where there’s no moisture or oil to buffer the heat.
The Burnishing Trinity: Heat, Friction, and Moisture
Professional burnishing isn’t just rubbing hard. It’s a careful dance between three elements. When balanced, they seal the leather’s edge or surface, polishing the fibers into a glassy, durable finish.
The Role of Moisture: The Prep Step
Moisture is your control agent. A little water or a dedicated gum tragacanth solution does two critical things. First, it slightly softens and swells the leather fibers, making them more receptive. Second, it makes the fibers heat-sensitive, allowing the polish to happen at a lower temperature. Most importantly, this moisture creates a protective barrier that prevents the direct, scorching heat that burns leather. The goal is damp, not sopping wet.
- Lightly dampen a cloth or applicator.
- Run it along the edge you’re working on. You should see a darkening of the leather.
- Wait about 30 seconds for the moisture to soak in just below the surface.
The Role of Friction: The Polishing Force
This is where you apply pressure. Using a wood slicker, canvas cloth, or glass slicker, you rub the dampened leather vigorously. This friction does the heavy lifting. It physically compacts those softened fibers together, squeezing out air pockets. As you rub, this friction generates the precise, controlled heat needed for the finish. This is the action that creates the initial shine. You’ll feel the tool start to glide more smoothly as the polish develops.
The Role of Heat: The Setting Agent
The heat generated by friction is the final catalyst. It activates any natural oils and waxes within the leather, bringing them to the surface. For an even tougher finish, craftsmen often add a beeswax-based product at this stage. The heat melts the wax, letting it seep into the compacted fibers. This gentle heat sets the finish, fusing the fibers and wax into a solid, polished seal.
The warning is clear: too much heat, too fast, ruins everything. If you skip moisture and just grind a dry edge with a powered tool, you generate destructive heat. You’ll smell a faint burning scent, see discoloration, and feel a brittle, rough texture. The fix is to stop immediately, let the leather cool, and gently sand the damaged area before starting again correctly with moisture.
Listen to the leather. A quiet, smooth hiss from the damp edge is good. A sharp sizzle or smoke is bad. A successful burnish combines dampened fibers, consistent friction, and rising heat until the surface cools into a hard, glossy shell. It’s the difference between a rough, fraying edge and the smooth, sealed rim on a well-loved bag.
Your Toolkit: Matching Tools and Compounds to Leather Type
Think of your burnishing tools as an extension of your hands. Each one creates a different feel and finish.
- Wooden Slicker: This is my go-to for most jobs. The wood grips the leather just right, building heat through friction. It gives you a smooth, semi-gloss finish that feels warm and worked by hand.
- Canvas Denim: A scrap of old jeans is a secret weapon. It’s gentle, perfect for a final high-speed buff. It polishes the edge to a subtle, deep shine without risk of burning.
- Glass Slicker: Glass creates an incredibly hard, mirror-like surface. The finish is cold and slick to the touch, almost like polished stone. It works best on very dense leathers.
- Bone Folder: This tool offers precise control. The smooth, rounded edge is excellent for working on small, tight curves or applying focused pressure without scratching.
Choosing your tool starts with the leather’s character. A dense, firm leather like my wallet Scout’s veg-tan body needs more aggressive friction from wood or glass to compact its fibers. A soft, supple leather like the calfskin on my jacket June needs a gentler touch with canvas or a bone folder to polish without distorting the delicate edge. Across the ages, leatherworking tools evolved—from bone folders and wood to steel. Understanding that evolution helps reveal the best practices guiding today’s tool choices.
Choosing Your Compound
The medium you use acts as a lubricant and a binder, sealing the leather fibers together as you work.
- Gum Tragacanth: This is a classic vegetable gel. It soaks into the edge, lightly gluing the fibers as you burnish. It dries clear and hard, ideal for a natural, mid-gloss finish on veg-tan leather.
- Beeswax: Beeswax adds water resistance and a rich, warm glow. It’s softer than gum trag. I use it for a final protective coat or on leathers that need more flexibility.
- Paraffin Wax: This is a harder wax. It creates a very high-gloss, almost plastic-like seal. A little goes a very long way to avoid a thick, waxy buildup.
- Dedicated Edge Paints: These are opaque paints made for edges. They are the best solution for chrome-tanned leathers or when you want a perfect, uniform color match that regular burnishing cannot achieve.
Your choice of compound directly controls the final look, feel, and durability of the edge. Gum trag gives a natural, slightly matte seal. Beeswax gives a soft, water-repellent luster. Paraffin gives a hard, glossy shell. Edge paint covers completely for a flawless, colored finish.
A quick but vital note: a wood burning tool is for decoration, not burnishing. The concentrated heat will instantly scorch and weaken the leather edge. Please keep it for pyrography projects only.
The Craftsman’s Method: A Step-by-Step Burnishing Guide
Follow these steps in order. Patience here makes all the difference between a good edge and a great one.
Step 1: Prepare the Edge
You cannot burnish a rough edge smooth. Preparation is 80% of the work.
First, skive the edge if it’s too thick, tapering it so it will fold over neatly. Next, sand it. Start with a coarser grit (like 400) to level any lumps, then move to a finer grit (like 800 or 1000). Sand until the edge feels perfectly smooth to your fingertip. Finally, bevel the top corner with an edge beveler tool. This creates a rounded profile that accepts the burnish more easily than a sharp 90-degree angle. A uniform, smooth, and bevelled edge is the only proper foundation for a professional burnish.
Step 2: Apply Your Medium
Now, introduce your lubricant. For a traditional veg-tan burnish, I often start with just a drop of water on a cloth.
If using gum tragacanth, apply a tiny amount with your finger or a cloth. You want the edge damp, not dripping wet. For wax, rub the block lightly against the edge once or twice. The golden rule here is “less is more.” Too much gum trag creates a gummy, sticky mess. Too much wax leaves a globby residue you cannot burnish in.
Step 3: Generate the Burnish
This is where the magic happens. Take your chosen tool, like a wooden slicker. Press it firmly against the leather edge and pull it along the length in a consistent motion. Build speed. The friction generates heat, which softens the natural oils and fibers, fusing them together.
Listen closely. You’ll hear the sound change from a rough scratching to a light, smooth hiss. That’s the sound of a good burnish. Keep going until the edge feels warm, looks darker, and has a consistent shine.
- Vegetable-Tanned vs. Chrome-Tanned: Veg-tan, like on Mason’s saddle, responds beautifully to water and friction, compacting into a hard, polished edge. Chrome-tan often resists this; its fibers are processed differently. For chrome-tan, you usually need to apply edge paint, let it dry, and then lightly burnish that painted surface.
- Smooth Grain vs. Rough-Out/Suede: You burnish the smooth grain side directly. For rough-out or suede (the fuzzy side), you don’t traditionally burnish. You would instead apply a gum or wax and use a slicker to lay the fibers down flat, creating a sealed, but not glossy, edge.
Step 4: Seal and Finalize
For added protection and luster, apply a final coat. I rub a beeswax block lightly over the now-warm, burnished edge.
Immediately take a piece of canvas denim and buff the edge at high speed with firm pressure. This melts the wax into the leather and creates a deep, water-resistant luster. This final high-speed buff is what transforms a polished edge into a dazzling, professional finish. This taps into the science of leather waterproofing and how long it lasts. Knowing this longevity helps plan future steps. Let it cool, and your work is done.
Troubleshooting Your Burnish: Reading the Leather’s Signals
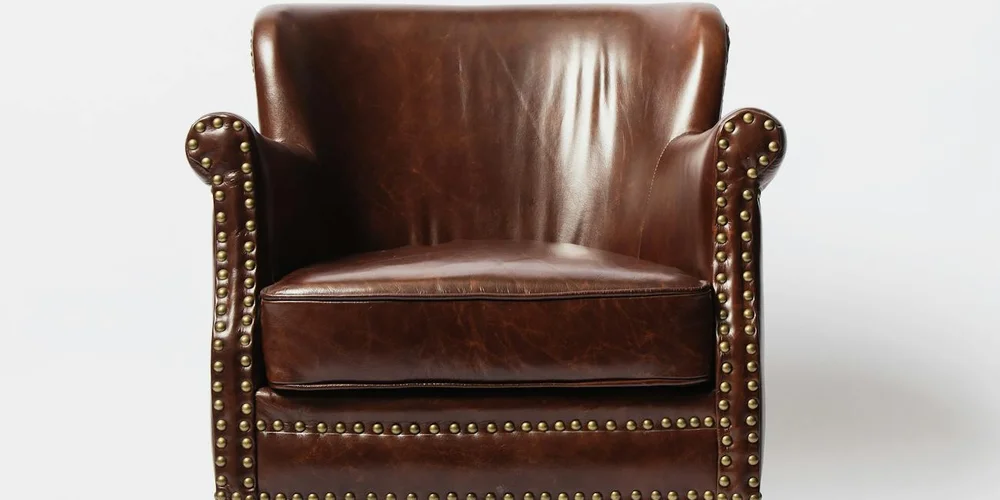
Even with the right techniques, your leather might talk back to you during burnishing. Listen to what it’s saying. These common issues have straightforward fixes.
Problem: Edge is rough or fuzzy.
This means the leather fibers haven’t sealed. It’s often the first sign you’re moving too fast.
Solution: Not enough moisture or heat. You need to return to sanding and restart the process.
Stop burnishing immediately. Go back two steps with a higher grit sandpaper, around 400 grit. Sand until the fuzz is gone and the edge is perfectly smooth to your fingertip. Then, re-apply your water or gum tragacanth and begin burnishing again with steady, patient pressure.
Problem: Edge looks cloudy or sticky.
A cloudy film or a tacky feel means there’s too much burnishing agent left on the surface.
Solution: Too much gum tragacanth. Buff it aggressively with a clean, dry cloth.
Take a lint-free cloth, like canvas or denim, and rub the edge firmly. The friction and absorbency of the dry cloth will remove the excess gum and restore clarity. If it remains sticky, a very lightly dampened cloth can help, but dry buffing is almost always the answer.
Problem: Leather darkens too much or scorches.
You see a deep, uneven brown or even a slight blackening. This is a warning sign.
Solution: Too much heat or friction. You are essentially burning the leather, so ease up.
You’re pressing too hard or moving the tool too fast. For hand burnishing, slow your strokes and lighten your touch. With a powered tool, use the lowest speed setting. Let the edge cool completely. You may need to lightly sand the scorched area to remove the damaged surface before trying again with a much gentler approach.
Problem: Edge is uneven or wavy.
The edge dips and rises instead of forming a consistent, rounded profile.
Solution: Inconsistent pressure or an unevenly cut edge. The foundation isn’t level, so re-sand.
This usually starts at the cutting or sanding stage. Clamp your piece securely. Use a sanding block to ensure you’re applying even force across the entire edge. Sand slowly, checking for flatness every few strokes. A wavy edge won’t burnish evenly, so take the time to correct it now.
Problem: Finish feels weak or rubs off.
The edge seems polished but a quick rub with your thumb leaves residue or dulls the shine.
Solution: The fibers are not fully compacted. You need to repeat the burnishing cycle.
The surface is sealed, but the underlying fibers are still loose. Apply a tiny bit more moisture and burnish again, focusing on building heat through sustained friction. Think of it like polishing a stone, you need multiple passes to truly compact and harden the material from the inside out.
Special Considerations for Different Leather Goods
Burnishing a wallet edge is different from working on a boot sole. The technique adapts to the item’s life and structure.
Burnishing Thick, Rolled Bag Edges
Think of a briefcase or a handbag with a rounded, padded edge. These are multi-layered and thick.
You must sand each layer evenly to create a smooth curve before any burnishing begins. I use a wooden dowel wrapped in sandpaper to follow the contour. Apply your burnishing agent generously because the thicker leather absorbs more. Use a hard, curved burnisher or even the back of a spoon to work the rounded profile, applying firm pressure to fuse all the layers into one solid edge.
Burnishing Shoe Edges (Welts and Soles)
These edges face constant abrasion from pavement and moisture. Durability is everything.
For shoe edges, the final step is almost always a heavy application of edge wax, not just gum tragacanth.
After sanding and a basic water burnish to seal the fibers, I melt a colored edge wax onto the leather with a heated edge iron. The heat drives the wax deep into the fibers, creating a hard, waterproof, and flexible seal that can withstand daily wear. It’s a more intensive process but crucial for longevity. This taps into the science behind leather conditioning oils and waxes, which penetrate the hide to form a protective, water-repellent layer. Understanding this chemistry helps explain why proper conditioning matters for durability.
Burnishing Furniture Edges
With an antique chair or a worn sofa, you’re often not creating a new raw edge.
You are usually polishing and reviving an existing finish. Here, burnishing means gently cleaning the edge with a neutral cleaner, then using a soft cloth and a tiny amount of conditioner or wax to restore a gentle luster through hand buffing. The goal is maintenance and blending, not creating a stark, new sealed edge.
A Quick Note on Unrelated Properties
Some search terms pop up that have nothing to do with burnishing. Let’s clear those up so you can focus on what matters.
- Leather does not reliably block RFID signals. A wallet’s protection comes from a separate metal layer, not the leather itself.
- Leather is not a good conductor of electricity. Its insulating properties are not a factor in any burnishing technique.
Your focus should remain on the leather’s physical structure, its fiber density, and how it responds to heat and friction. That’s the core of a professional finish.
Beyond the Edge: What Burnishing Teaches You About Leather
Burnishing is more than a final step. It is a conversation with the material. The pressure you apply, the speed you move, and the leather’s response teach you everything about its core properties.
Listening to Temper, Density, and Finish
Run a slicker or wooden burnisher along a raw edge. You are not just polishing. You are testing the leather’s temper-its stiffness and flexibility. A firm, dry temper like the leather on Mason’s saddle resists compression and needs more deliberate pressure. A soft temper, like June’s jacket, yields quickly. Push too hard and you will round the edge instead of sealing it.
Density determines how much friction and heat the leather can take. Dense, tight fibers in a high-quality veg-tan wallet like Scout’s will accept more vigorous rubbing and generate a clean, glassy shine. Less dense leather feels spongy and can fray or become discolored if you work it the same way.
The surface finish is your starting point; a smooth, tight grain polishes to a high shine, while a pronounced pull-up or waxed finish will darken and develop a rich, warm glow with friction.
The First Rule: Practice on Scraps
Do not start on your prized bag or boots. Find a scrap piece that resembles your project leather. A firm, dry scrap like Mason’s saddle leather is perfect for learning edge control. A softer, garment-weight scrap teaches you about gentle, consistent pressure.
Here is a simple practice routine:
- Cut a clean, straight edge on your scrap.
- Dampen a cloth with clean water and lightly run it along the edge. This swells the fibers slightly.
- Using a wooden burnisher or a slicker, rub the edge firmly and evenly. Start slow.
- Feel the heat build. Watch for the edge to darken and compress.
- Stop. Let it cool. Run your finger over it. Is it smooth and sealed, or fuzzy and rough?
A common mistake is using too much water, which soaks the leather and weakens the fibers before they can be sealed. Another is rushing. The shine comes from cumulative friction, not one fast, hard pass. Proper conditioning and balanced moisture prevent cracking and drying out. Regular upkeep keeps fibers supple and the finish resilient.
How Different Leathers Respond
| Leather Type | Burnishing Feel | Key Consideration |
|---|---|---|
| Firm Veg-Tan (like a belt) | Solid resistance, needs steady pressure. | Can achieve a very hard, glossy edge. Works well with beeswax or gum tragacanth. |
| Soft Chrome-Tan (like a jacket) | Yields easily, feels almost spongy. | Seals best with light pressure and a dedicated edge paint or latex-based solution. Often will not take a traditional high-gloss burnish. |
| Pull-Up / Oil-Tanned | Waxy, friction darkens the color quickly. | The goal is a sealed, rounded edge, not a high shine. The waxy content often self-burnishes with use. |
Respecting the Material is the True Skill
A professional finish is not forced onto the leather. It is coaxed from it. When you respect the leather’s inherent temper and density, your technique adapts. You learn when to apply more moisture, when to lighten your touch, and when the edge has reached its limit. Sealing the edge gives a clean, professional look.
The lasting finish comes from working with the leather’s properties, not against them. Your patience and observation are the most important tools on your bench. Start with those scraps. Listen to what the leather tells you. Let it guide your hands, and the results will speak for themselves.
Common Questions
How do the chemical differences between veg-tan and chrome-tan leather affect burnishing?
Veg-tan fibers are cross-linked with natural tannins, allowing them to compact and fuse under heat and friction. Chrome-tan fibers are lubricated with oils and metallic salts, which often resist compression, making a traditional water-and-friction burnish ineffective.
How does a pre-existing factory finish or topcoat change my burnishing approach?
A sealed acrylic or polymer topcoat acts as a barrier to moisture and heat. You must lightly sand through it to expose the raw leather fibers before any traditional edge burnishing can begin.
Can I burnish leather that’s been heavily oiled or treated with waterproofing?
Excess oils prevent proper fiber compression and create a greasy barrier. For a successful seal, let the leather dry thoroughly or use a deglazer first, then proceed with a dry burnishing agent like pure gum tragacanth. This is in contrast to oil used for conditioning leather, which keeps it soft and supple.
Is there a ‘grain direction’ to consider when burnishing an edge?
Yes, always burnish in one consistent direction, following the length of the edge. Rubbing back and forth can lift and fray the fibers, ruining the smooth seal you’re trying to create.
Why do some leather edges feel ‘dead’ and refuse to take a shine?
This often indicates fiber damage from prior excessive heat or chemical degradation. The fix is to sand back to healthy leather and restart, using adequate moisture to buffer the heat this time. Repairing now helps prevent future peeling and cracking, preserving durability. It supports long-term material integrity and resilience.
Bringing It All Together for a Perfect Burnish
Your most reliable tool isn’t your slicker or wax, it’s your understanding of the leather in your hands. Burnishing isn’t a one-step trick; it’s a conversation where you respond to the leather’s density, finish, and temper to guide it toward a smooth, sealed edge. Take a moment to test on a scrap or hidden area first-it saves time and teaches you what your specific piece needs.
Honoring the material means sourcing leather from responsible tanneries and maintaining the goods we already own with skill. Every time you repair, condition, or finish a leather item with care, you extend its life and deepen your own craft.
Deep Dive: Further Reading
- Why Burnish Leather & How Do You Do It? – Buckleguy.com
- A Basic Guide to Burnishing – Gold Bark Leather
- ILC – Burnishing Leather – Types, Gums, Waxes, Oils, and Methods
- Bob Park Method of Burnishing & Edge Finishing – Rocky Mountain Leather Supply
- How to Burnish Leather, Ultimate Leather Finishing Guide – Von Baer
Harriet is a avid collector of leather goods such as purses, bags, seat covers, etc and has an extensive background in leather care, recovery, stain removal and restoration. She has worked for a number of years perfecting her leather care techniques and knows the ins and outs of restoring all kinds and types of leather products. With her first hand knowledge in leather care, you can not go wrong listening to her advice.
Applying Oils, Creams, and Waxes